
Setting the time on your GE stove might seem like a small task, but it’s more important than many people realize. An accurate clock keeps your cooking on schedule, ensures timed features work correctly, and helps you avoid confusion when preparing meals. If you’ve just installed your stove, experienced a power outage, or noticed the time is off, it’s essential to know how to set it quickly and confidently. Fortunately, most GE stoves make this a simple process. However, different models have their own methods, and a few small details can trip up even experienced users. In this guide, you’ll learn how to change the time on various GE stove models, troubleshoot common problems, and discover useful tips that will save you time in the kitchen.
Why Setting The Correct Time Matters
Many people overlook the importance of having the correct time on their stove. It’s not just about knowing what hour it is while you cook. Here’s why it matters:
- Timed Bake and Delay Start: These features rely on the clock. If the time is wrong, your food might start or stop cooking at the wrong moment.
- Consistency: Following recipes accurately often means timing each step. An accurate oven clock supports this.
- Household Harmony: In busy homes, several people might use the stove. A wrong clock can create confusion about meal times.
- Appliance Updates: Some modern GE stoves with Wi-Fi features need the correct time for software updates and remote control via apps.
If you want your kitchen to run smoothly, don’t ignore the stove’s clock.
Understanding Your Ge Stove Model
Before you try to change the time, you need to know your stove model. GE has produced many types over the years, and each might have a slightly different method for time setting.
Types Of Ge Stoves
- Analog Models: Older units with dials or mechanical clocks.
- Digital Keypad Models: Most common, featuring a touchpad or physical buttons.
- Touchscreen Models: Newer stoves with digital screens, sometimes with smart features.
- Wi-Fi Connected Models: The latest generation, often set through a mobile app.
You’ll usually find the model number inside the oven door, on the frame, or at the back of the range. Knowing your model helps you use the correct method and avoid frustration.
Step-by-step: How To Change The Time On Ge Stove
Changing the time on your GE stove is simple when you follow the right steps for your model. Let’s look at the methods for each major type.
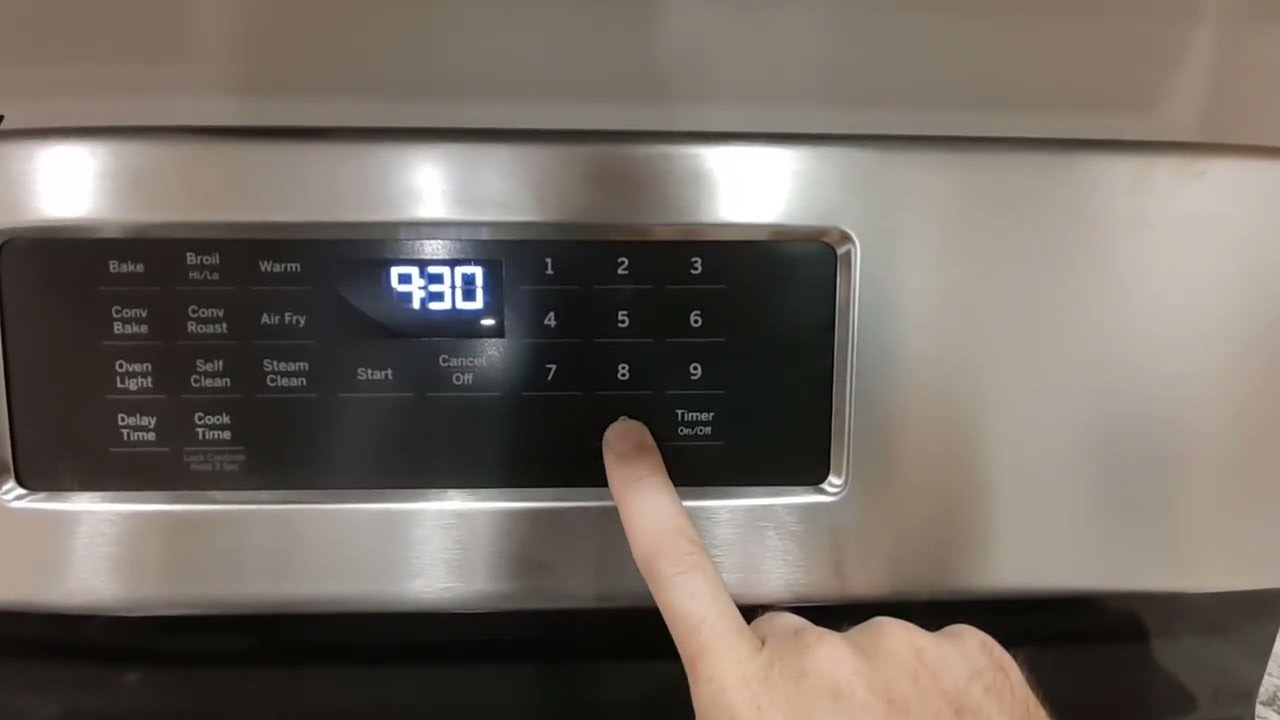
For Digital Keypad Models (most Common)
- Locate the Clock or Set Clock Button: Look for a button labeled Clock, Set Clock, or a small clock icon.
- Press Clock or Set Clock: Hold the button for 3-5 seconds until the display blinks or shows “SET.”
- Enter the Correct Time: Use the number pad to enter the current time. For example, to set 2:30, press 2, 3, and 0.
- Choose AM or PM (if needed): Some models require you to select AM or PM. Check if there is an indicator or a button for this.
- Press Start or Clock Again: To confirm, press Start, Clock, or just wait a few seconds until the display stops blinking.
For Touchscreen Models
- Wake the Screen: Tap the screen to wake it up.
- Find Settings or Options: Look for a gear icon or a menu that says Settings.
- Select Clock or Time: Inside the menu, tap Clock or Set Time.
- Enter the Time: Adjust the hours and minutes using the on-screen controls.
- Save or Confirm: Tap Save, OK, or Confirm.
For Analog Or Mechanical Models
Some older stoves use a dial or small knob near the clock. To set:
- Push and Turn the Knob: Push in the clock knob and turn it to set the time.
- Release the Knob: Once the time is set, let go. The clock will start running from there.
For Wi-fi Connected Or Smart Models
Many new GE smart stoves allow you to set the time through a mobile app.
- Open the GE Appliances App: Make sure your stove is connected to Wi-Fi.
- Select Your Appliance: Choose your stove from the list.
- Go to Settings: Tap the gear icon or menu.
- Set the Clock: Enter the correct time and save.
If your stove supports automatic time updates, it may sync with your phone or the internet, so you don’t have to set it manually.
Example: Changing Time On A Ge Jgbs66dekww Gas Range
Let’s look at a real example. The GE JGBS66DEKWW is a popular gas range with a digital display. Here’s how to set the time:
- Press and hold the Clock button for three seconds.
- The display will flash.
- Enter the time using the number pads.
- Press Start to confirm.
Miss a step? The display will usually return to the current (wrong) time. Repeat the process.
Troubleshooting Common Problems
Even with clear instructions, you might run into trouble. Here are the most common problems and how to solve them.
The Clock Won’t Change
- Check for Lock Mode: If the oven controls are locked, you can’t set the time. Look for a key symbol or try holding the Lock Controls button for three seconds.
- Power Cycle: Sometimes, unplugging the stove for a minute and plugging it back in resets the controls.
- Wrong Button Sequence: Check your user manual. Some models require pressing two buttons at once (for example, Bake and Set Clock).
The Display Is Blank
- Power Outage: If you recently lost power, your stove may need to be reset. Wait for a few minutes after power returns.
- Loose Connection: Check the breaker or power supply. If the display is still blank, you may need service.
Time Resets After Power Loss
- No Battery Backup: Most stoves do not have backup batteries. You need to set the time after each outage.
- Frequent Outages: Consider using a smart stove that auto-syncs time via Wi-Fi.
Can’t Find A Clock Button
- Hidden Functions: Sometimes, the clock button is combined with another button, or you must access it through the settings menu. Refer to your manual or look for a small clock icon.
Time Jumps Forward Or Back
- Daylight Saving Time: Some smart stoves adjust time automatically. If not, you’ll need to set it manually twice a year.
Comparing Different Ge Stove Clock Interfaces
Understanding the interface helps you change the time faster. Here’s a comparison of the main types:
| Model Type | Clock Setting Method | Difficulty | Common Issues |
|---|---|---|---|
| Digital Keypad | Press Clock, enter time, confirm | Easy | Missing clock button, lock mode |
| Touchscreen | Menu > Settings > Clock | Moderate | Hard to find menu, software glitches |
| Analog/Mechanical | Turn dial/knob | Very easy | Stiff knob, inaccurate time |
| Wi-Fi Connected | App-based or auto-sync | Easy (if connected) | Wi-Fi connection problems |
Detailed Walkthroughs For Popular Ge Stove Models
Let’s go deeper with step-by-step guides for some of the most popular GE stove models.
Ge Profile Series (digital Keypad)
- Locate the Set Clock button.
- Press and hold Set Clock until the display blinks.
- Enter the time using the keypad.
- Press Start to confirm.
- If the display returns to normal, you’re done.
Ge Café Series (touchscreen)
- Tap the display to wake it.
- Press the Menu button.
- Select Settings, then Clock.
- Adjust the time using the + or – buttons or by tapping the numbers.
- Press Save.
Ge Adora (digital Keypad)
- Find the Clock button.
- Press Clock once.
- Use the keypad to enter the time.
- Press Start.
Ge Jgbs Series (mechanical)
- Push in the clock knob.
- Turn to the correct time.
- Release the knob.
Ge Smart Ranges (wi-fi)
- Open the SmartHQ app.
- Select your stove.
- Go to Settings > Clock.
- Enter the time or enable auto-sync.
- Save and check the oven display.
Helpful Tips For Accurate Time Setting
Getting the time right is not just about following steps. Here are a few practical tips:
- Set to the Nearest Minute: Avoid setting times like 2:31 or 3:28—round to the nearest five minutes for easy reference.
- Use a Phone or Atomic Clock: Always set your stove to match a reliable time source.
- Double-Check AM/PM: Especially important for ranges with Delay Start or Timed Bake features.
- Adjust for Daylight Saving: Twice a year, remember to update your stove’s clock.
- Label Sticky Notes: If your household members are unsure, leave a note on the stove with simple steps.
What To Do If You Lose Your Manual
Many people lose their appliance manuals. Thankfully, GE offers digital copies online.
- Go to the GE Appliances website.
- Enter your model number.
- Download the PDF manual, which includes specific clock-setting instructions.
If you’re still stuck, many user-uploaded videos show how to set the time for your model. Just search for your GE stove model number and “set clock” on YouTube.
Table: Clock Features By Ge Stove Generation
To help you see the differences between older and newer GE stoves, here’s a side-by-side look at clock features:
| Generation | Clock Type | Time Sync | Battery Backup | Supports Timed Bake |
|---|---|---|---|---|
| 1980s-1990s | Analog Dial | No | No | Some models |
| 2000s | Digital Keypad | No | No | Yes |
| 2010s | Touchscreen | Some models | No | Yes |
| 2020s | Wi-Fi Smart | Auto-sync | No | Yes |
Credit: rightfix.ca
When Should You Reset The Stove Clock?
Knowing when to check or reset your GE stove clock is useful. Here are the main situations:
- After Power Outages: Any loss of electricity resets most stove clocks.
- After Daylight Saving Time Changes: Spring and fall require manual updates unless your model auto-syncs.
- After Installation or Moving: Transporting or installing a stove often resets the clock.
- If You Notice Cooking Times Are Wrong: If you rely on the oven timer, but food is over- or undercooked, check the clock.
- After a Factory Reset or Software Update: Some smart models reset the time after updates.
Don’t wait until you run into trouble—check your stove’s time regularly, especially before big meals or holidays.
Common Mistakes When Setting The Time
Even simple tasks can go wrong. Here are mistakes to avoid:
- Not Confirming the Time: Some models need you to press Start or Clock again to save. If you skip this, the time won’t change.
- Ignoring AM/PM: Especially for timed bakes, missing AM/PM can cause meals to start at midnight instead of noon.
- Using the Wrong Buttons: Pushing the wrong combination may activate features like Sabbath Mode or lock the controls.
- Not Checking for Lock Mode: If your controls are locked, you’ll think the clock is broken.
- Trying to Set During Cooking: Most stoves require you to stop all cooking functions before you can set the time.
Advanced Features: Daylight Saving And Automatic Time Sync
Modern stoves make timekeeping easier. If you have a Wi-Fi connected GE stove, look for these features:
- Daylight Saving Auto-Adjust: Some models update the time automatically. Check your settings menu or app for this option.
- Internet Time Sync: When connected, the stove can update itself based on your location.
- Manual Override: You can still set the time manually if the auto-sync is wrong.
If your stove doesn’t support these, just remember to set the clock twice a year.
Why Your Stove’s Clock May Drift
You may notice your GE stove clock running a few minutes fast or slow after months of use. This is called clock drift and happens because:
- Cheap clocks in appliances are less accurate than those in phones or computers.
- Power surges and interruptions can affect timekeeping.
- Some stoves slowly gain or lose time due to temperature changes.
Pro Tip: Check and reset your clock every few months, especially if you rely on timed features.

Credit: www.youtube.com
How Setting The Stove Clock Affects Cooking
It’s easy to forget that the clock does more than tell time:
- Timed Bake/Delay Start: If your clock is wrong, your food may not cook at the right time.
- Self-Cleaning Cycles: These often use the clock to start or end cleaning.
- Timer Synchronization: The kitchen timer relies on the correct clock for accuracy.
For best results, always set the clock before you use these features.
Safety Note: Resetting The Clock After Power Surges
If you’ve experienced a power surge, always check your clock before cooking. A wrong clock can cause:
- Burned or undercooked food (timed bake starts too early/late)
- Missed meals or kitchen confusion
If you notice flickering lights or a reset display, set the clock right away.
User Stories: Real Experiences
Sandy from Ohio: “After a lightning storm, my GE stove kept blinking 12:00. I thought it was broken, but I just needed to hold the Clock button and reset the time. Now, I always check the clock after storms.”
Carlos from Texas: “My smart range updates the time automatically, but once my Wi-Fi went out and the clock was wrong. I learned to use the app to fix it. It’s much easier than the old models!”
These stories show that knowing how to set the clock saves time and prevents stress.
How To Keep Your Ge Stove Clock Accurate
Here are two non-obvious tips:
- Plug Your Stove into a Surge Protector: While not always possible, using a surge protector for electric ranges can reduce clock drift and prevent resets after small surges.
- Create a Reminder: Set a phone reminder every three months to check your stove’s clock. This habit keeps your kitchen running smoothly, especially during busy seasons.

Credit: www.abt.com
Where To Find More Help
If you’re still having trouble, visit the official GE support page at GE Appliances for manuals, troubleshooting, and customer support. You can also call their support line or use their live chat for quick answers.
Frequently Asked Questions
How Do I Set The Clock On My Ge Stove If There Is No Clock Button?
On some models, the clock function is combined with another button, such as Settings or Bake. Hold both for a few seconds or check your manual for the correct combination.
Why Does My Ge Stove Clock Keep Resetting To 12:00?
This usually means your stove lost power or experienced a power surge. Set the clock again and check your home’s electrical supply for issues.
Can I Set The Time On My Ge Stove Using My Phone?
If you have a Wi-Fi connected GE stove, you can set the time through the GE Appliances app. Make sure your stove is connected to your Wi-Fi network.
Does My Ge Stove Clock Have A Battery Backup?
Most GE stoves do not have a battery backup. The clock will reset after a power outage, and you’ll need to set it again.
What Should I Do If My Stove Clock Is Always A Few Minutes Fast Or Slow?
This is called clock drift. Check and reset your clock every few months, or consider upgrading to a smart model that syncs time automatically.
With these steps, tips, and insights, you’ll never have to worry about an incorrect clock on your GE stove again. Accurate time means better meals, less stress, and a kitchen that works for you.