
Swimming pools can be a peaceful escape or a lively gathering place. But sometimes, a small problem can turn into a big headache. One of these issues is water in pool light housing. Many pool owners notice their pool lights flicker, stop working, or look cloudy. Often, the reason is water sneaking inside the light housing. This isn’t just a simple annoyance—it can be dangerous and costly if ignored.
Understanding why water gets into pool light housing, how to fix it, and how to prevent it will help you keep your pool safe and looking great. Whether you’re a new pool owner or have years of experience, knowing about this issue will save you time and money.
This article will cover every detail you need, from the basics to advanced tips, so you can handle water in pool light housing confidently.
What Is Pool Light Housing?
Pool light housing is the protective case that holds the pool light under water. It keeps the electrical parts dry and safe while shining light into your pool. Most pool light housings are made from tough plastic or stainless steel and have a strong seal, usually with a gasket, to keep water out. The housing is installed inside the pool wall, with wires running through a special tube called a conduit.
Why is this housing important? It’s not just to hold the light. It protects against electric shock, keeps the light working, and stops water from damaging the bulb or electrical parts. If water gets inside, it can cause problems—from dim lights to dangerous electrical risks.
Common Signs Of Water In Pool Light Housing
How do you know if there’s water inside your pool light housing? Here are the most common signs:
- Flickering lights: The light turns on and off or works unevenly.
- Cloudy or foggy lens: The glass looks misty, not clear.
- Visible water droplets: You can see moisture behind the lens.
- Burned-out bulbs: Bulbs need replacing more often than normal.
- Tripped circuit breaker: The pool’s electrical system shuts off suddenly.
- Corrosion or rust: Metal parts inside the light show rust or greenish spots.
Many owners miss these early signs, thinking a bulb is just old or the breaker needs resetting. But repeated issues often mean water is inside the housing.
Why Does Water Get Into Pool Light Housing?
Understanding how water gets inside is key to fixing and preventing the problem. Here are the main reasons:
1. Worn-out Gasket
The gasket is a rubber or silicone ring that seals the light’s lens to the housing. Over time, it can crack, shrink, or get brittle. When this happens, water seeps through the gap, reaching the electrical parts.
2. Loose Or Damaged Lens
If the lens is not screwed tightly or has cracks, water can enter the housing. Pool lights experience pressure changes and vibration, which can loosen the lens over time.
3. Faulty Conduit Seal
The conduit is a pipe that carries wires from the light to the power source. If the seal around this conduit fails, water can travel along the wires into the housing—even if the front gasket is fine.
4. Poor Installation
Sometimes, lights are not installed correctly. Missing screws, uneven gaskets, or poor sealing can leave gaps for water to enter. This is common in DIY installations or rushed professional jobs.
5. Chemical Damage
Pool chemicals, especially chlorine, can break down rubber or plastic parts over time. This weakens seals and makes leaks more likely.
6. Physical Damage
Accidents, pool cleaning equipment, or even rough play can crack or chip the housing or lens. Even a small crack can let water in.
Two insights many beginners miss: First, temperature changes make materials expand and contract, which can loosen seals even if they look fine. Second, water can travel through tiny gaps, so a leak may not be visible from outside.
Risks Of Water In Pool Light Housing
Some pool owners think a bit of water is no big deal. That’s a mistake. Here’s why you should care:
- Electrical shock risk: Water and electricity are a dangerous mix. Even a small leak can create a shock hazard for swimmers.
- Light failure: Water ruins bulbs and electrical connections, leaving you with a dark or half-lit pool.
- Increased maintenance costs: Frequent bulb changes and repairs add up.
- Corrosion and permanent damage: Rust can destroy metal parts, making the entire light fixture useless.
- Breaker trips and power loss: Water can short-circuit the system, causing repeated breaker trips.
- Code violations: Many areas require pool lights to be watertight by law. A leaky light could cause inspection problems.
The biggest risk is safety. If you suspect water in your light housing, act quickly.
How To Check For Water In Pool Light Housing
If you see any warning signs, it’s important to confirm if water is really inside. Here’s how to check:
- Turn Off Power: Always switch off the pool light at the breaker before starting.
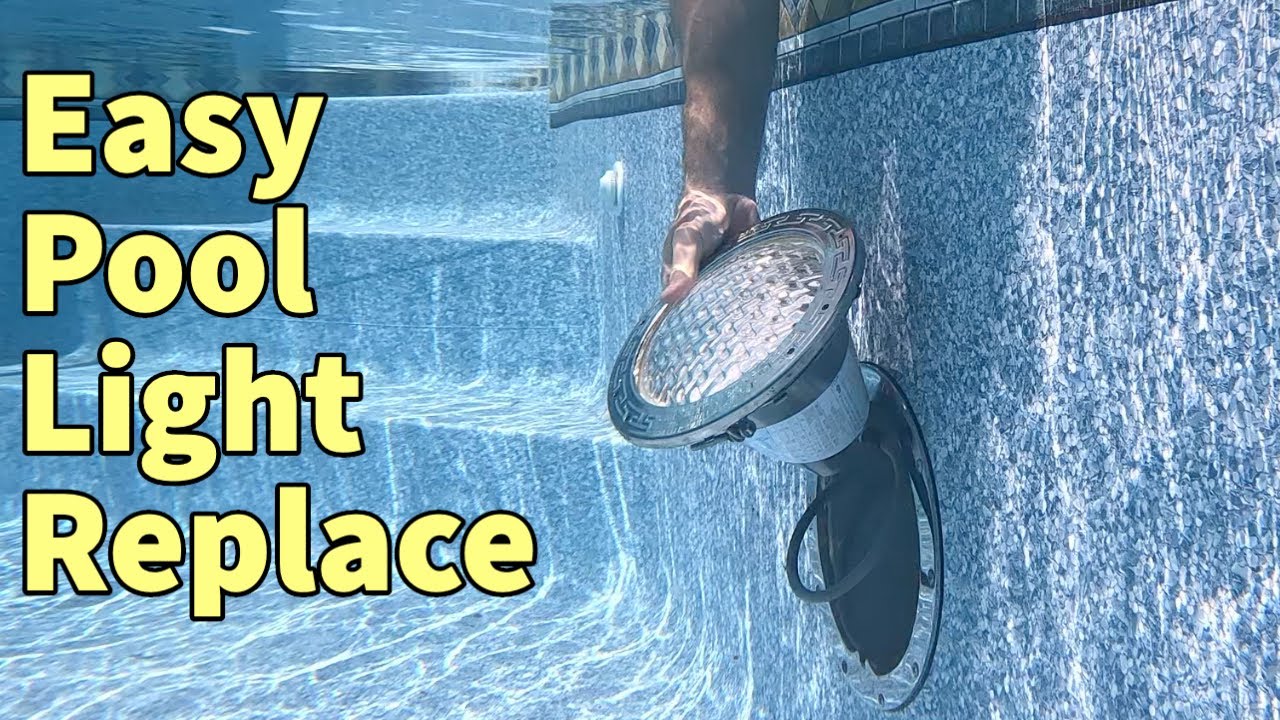
- Remove the Light Fixture: Most pool lights are held in place with a single screw, often at the top. Use a screwdriver to remove it.
- Gently Pull Out the Light: There should be enough wire (called a “service loop”) to lift the light onto the pool deck.
- Inspect the Lens: Look for droplets, fog, or water inside the lens.
- Open the Housing: If you’re comfortable, remove the screws to open the housing. Check for water pooling inside.
- Check the Gasket and Wires: Look for cracks, wear, or corrosion.
Never check the light while the power is on. If you’re unsure, call a pool professional.
How To Fix Water In Pool Light Housing
Fixing the problem depends on the cause. Here are the main steps to solve it:
1. Remove Water
If there’s water inside, dry everything fully before reassembling. You can use:
- A towel or sponge for small amounts
- A hair dryer (on low heat, away from water)
- Letting the parts air dry for several hours
2. Replace The Gasket
A new gasket is the most common fix. Make sure to:
- Buy a gasket that matches your light model
- Remove the old gasket and clean the surfaces
- Place the new gasket carefully and check for a snug fit
3. Check And Seal The Conduit
If water is entering through the conduit:
- Dry the conduit area
- Use silicone sealant or a special conduit potting compound to seal the gap
- Let the sealant dry before reassembling
4. Inspect And Replace The Lens
If the lens is cracked or loose, replace it. Tighten all screws evenly to avoid gaps.
5. Test The Fixture
Before putting the light back, test it out of water. Power it on briefly to check for leaks and proper function. If the light works, reinstall it in the pool.
6. Reinstall Carefully
Place the fixture back in the housing, tighten the screw, and check the seal one more time.
Many beginners forget to dry the wires and connectors fully. Even a little moisture can cause future problems. Also, always use pool-grade silicone or lubricant on gaskets for a better seal.
Preventing Water In Pool Light Housing
Prevention is better than repair. Follow these tips to keep water out:
- Check Gaskets Yearly: Inspect and replace them before they get brittle.
- Use Only Pool-Approved Parts: Don’t use regular rubber or silicone—get parts made for pool lights.
- Seal the Conduit Properly: Use the right sealant to stop leaks at the wire entry point.
- Avoid Over-Tightening Screws: Too much force can crack the lens or housing.
- Protect Against Impact: Be careful with cleaning tools and avoid hitting the light.
- Balance Pool Chemicals: High chlorine can eat away at seals. Test water regularly.
- Schedule Professional Checks: Have a pro look at the lights during yearly pool service.
A tip many miss: After big temperature swings or a pool draining, recheck all seals. Expansion and contraction can weaken even new gaskets.
How Long Do Pool Light Gaskets And Seals Last?
Most pool light gaskets last 3 to 5 years. However, heavy pool use, high chlorine, or lots of temperature changes can shorten this time. Seals around the conduit may last longer but should be checked at least every five years.
If you see any signs of cracks or leaks, don’t wait—replace the gasket right away.
Credit: www.youtube.com
Choosing The Right Replacement Parts
Not all pool lights are the same. When buying parts, consider:
- Brand and Model: Always match the gasket and lens to your light’s make and model.
- Material: Look for UV-resistant, chemical-resistant rubber or silicone.
- Fit: Even a small size difference can cause leaks.
- Warranty: Some brands offer longer warranties on seals and lenses.
If you’re unsure, bring the old part to a pool supply store or check the manual.
When To Call A Professional
Some repairs are easy for handy pool owners. But call a licensed pool technician if:
- You’re not comfortable working with electricity
- The leak keeps coming back
- There’s visible damage to wiring or the housing
- The fixture is old and may need full replacement
A professional can pressure test the conduit, check the entire electrical system, and replace parts safely.
Comparing Pool Light Housing Materials
The material of your light housing affects how long it lasts and how likely it is to leak. Here’s a quick comparison:
| Material | Strength | Corrosion Resistance | Cost | Typical Lifespan |
|---|---|---|---|---|
| Stainless Steel | High | Good | Medium | 10-15 years |
| Plastic (ABS) | Medium | Excellent | Low | 7-10 years |
| Brass | High | Medium | High | 10-20 years |
Stainless steel is tough but can rust if scratched. Plastic does not rust but can become brittle. Brass is strong but expensive and needs careful installation.
How Pool Light Problems Differ Between Led And Halogen Lights
The type of bulb affects how the light reacts to water leaks. Here’s a comparison:
| Light Type | Water Damage Risk | Replacement Cost | Common Issues |
|---|---|---|---|
| LED | High (electronics can short easily) | High | Corroded contacts, full fixture failure |
| Halogen | Medium (bulb burns out) | Low | Shorted bulb, rusted base |
LED lights last longer but are more sensitive to moisture. Halogen bulbs are cheaper to replace but still need a dry housing.
Typical Costs For Repair And Prevention
Understanding costs helps you plan. Here’s what to expect:
- Gasket replacement: $20–$60 for parts, $100–$200 with labor
- Lens replacement: $30–$80 for parts
- Conduit sealing: $15–$40 for sealant, $100+ if professional
- Full fixture replacement: $300–$900 depending on brand and type
Prevention (like yearly checks and sealant) usually costs less than repairs from a major leak.
Example: Fixing A Pool Light Leak Step-by-step
Let’s walk through a real-world example:
- Owner notices the pool light flickering and sees fog on the lens.
- Turns off power at the breaker.
- Removes the screw, pulls the fixture onto the deck.
- Finds water droplets inside.
- Opens the housing, dries all parts with a towel and air.
- Removes old, cracked gasket.
- Installs new gasket (matching the brand/model).
- Applies a thin layer of pool-grade lubricant.
- Reassembles the housing, tightens screws gently.
- Tests the light out of water before reinstalling.
- Returns the light to the pool, checks for leaks over the next week.
This process usually takes about an hour for someone with basic tools.
What Most Pool Owners Get Wrong
Many owners make these mistakes:
- Ignoring small leaks, thinking they’ll go away. They usually get worse.
- Using home-grade silicone instead of pool-approved sealant. Not all sealants resist pool chemicals.
- Skipping yearly checks. Gaskets wear out faster than expected.
- Forgetting to turn off power before opening the fixture. This is a serious safety risk.
- Not matching parts to their light model, leading to poor fits and repeat leaks.
A well-maintained pool light system rarely has leaks.
Upgrading Pool Lights: Is It Worth It?
If your pool light housing has repeated leaks, it might be time to upgrade. Modern LED lights use better seals and are more efficient. They often come with longer warranties and easier maintenance. While the upfront cost is higher, you’ll save on repairs and electricity.
Check if your pool is compatible with new fixtures, or if you’ll need extra work on wiring or the housing.
Credit: www.youtube.com
Pool Light Housing Maintenance Schedule
A regular maintenance plan keeps leaks away. Here’s a good schedule:
- Monthly: Check for flickering, foggy lens, or dim lights.
- Yearly: Remove the fixture, inspect gaskets and lens, clean and lubricate.
- Every 3-5 years: Replace gaskets and check conduit seals.
- After big storms, draining, or repairs: Inspect for cracks or leaks.
Keep a log of maintenance and repairs. If a part fails early, check if it’s under warranty.
Pool Light Safety Regulations
In many countries, pool lights must meet electrical codes for wet locations. The National Electrical Code (NEC) in the U.S. requires pool lights to be watertight and grounded. Some areas demand inspection after installation or repair. Using non-approved parts or skipping repairs can lead to fines or insurance issues.
If you’re not sure about your pool’s compliance, ask a professional.
Myths About Water In Pool Light Housing
There are several myths that cause confusion:
- “A little water is okay.” False. Even small leaks can cause big problems.
- “All pool lights leak eventually.” Not true. With proper maintenance, leaks are rare.
- “Water only enters from the front.” Actually, many leaks start at the conduit.
- “Any silicone works as a sealant.” Only use sealants made for pool use.
Don’t believe everything you hear—trust official guidelines.
Real-world Example: Costly Consequences
One pool owner ignored a flickering light for months. When the light stopped working, a technician found water inside, a rusted housing, and damaged wires. The repair required a full fixture replacement and rewiring, costing over $1,000. If the leak was fixed early, the cost would have been under $100.
Where To Learn More
For more technical details and up-to-date safety rules, the National Electrical Code is a trusted resource. You can read about pool lighting standards on the Wikipedia: Swimming Pool Sanitation page.
Frequently Asked Questions
What Should I Do If My Pool Light Is Full Of Water?
Turn off power to the pool light at the breaker right away. Remove the fixture, dry it completely, and check the gasket and lens for damage. Replace any worn parts and reseal the housing before using the light again.
Is It Safe To Swim With Water In The Pool Light Housing?
No, it can be very dangerous. Water inside the light housing can cause electrical shock. Do not use the pool or the light until the problem is fixed by a professional.
How Often Should I Replace Pool Light Gaskets?
Replace the gasket every 3 to 5 years, or sooner if you notice cracks, leaks, or foggy lenses. High pool usage or strong chemicals can shorten the gasket’s life.
Can I Use Any Silicone To Seal The Conduit Or Lens?
Only use silicone or sealant made for pool use. Regular home silicone breaks down in chlorine and may not keep water out.
What Is The Best Way To Prevent Water In Pool Light Housing?
Check and replace gaskets regularly, seal the conduit properly, avoid over-tightening, balance pool chemicals, and schedule yearly professional inspections.
Keeping water out of your pool light housing may seem like a small task, but it’s one of the most important for pool safety and enjoyment. With regular checks, the right repairs, and a little care, your pool lights will stay bright and safe for years to come.

Credit: www.amazon.com