
Removing the door of an infrared electric oven might look simple, but it’s a task that needs attention to detail, patience, and safety. Whether you’re cleaning the oven, replacing a damaged door, or troubleshooting a heating issue, understanding the right way to remove the door is essential. Many people feel nervous about handling their oven, but with the right guidance, you can do it confidently at home—no need to call a technician every time.
Infrared electric ovens are popular in both home and professional kitchens. They use infrared heating elements to cook food more evenly and efficiently. The oven door plays a crucial role in keeping the heat inside and ensuring the cooking process is safe and effective. If the door is not working well, heat can escape, energy is wasted, and food may not cook properly. Sometimes, the door glass cracks, or the hinges loosen, making it necessary to remove the door for repair or replacement.
In this guide, you’ll learn everything about how to remove an infrared electric oven door. We’ll cover safety, step-by-step instructions, tools you need, common mistakes, advanced tips, and even how to reattach the door. This advice is based on real-world experience, not just manuals, so you’ll get practical solutions for common problems.
Understanding Your Infrared Electric Oven Door
Before you start, it helps to understand how your infrared electric oven door is designed. Most oven doors have two or three layers of glass, a handle, and hinges on both sides. The hinges are usually spring-loaded or have a locking mechanism to hold the door in place. Modern ovens may also have child safety locks or electronic sensors.
Common Door Types
- Drop-down doors – These open downward, like most ovens.
- Side-opening doors – These swing open to the left or right.
- French doors – Two doors open outward from the center.
Most infrared electric ovens use a drop-down door with spring-loaded hinges. Knowing your oven’s door type is crucial before starting.
Why Remove The Oven Door?
- Deep cleaning – Removing the door gives better access to the oven interior.
- Replacing glass or seals – If the glass cracks or the seal wears out, you may need to remove the door.
- Repairing hinges or locks – Loose hinges cause the door not to close properly.
- Moving or storage – Removing the door makes the oven lighter and easier to move.
Safety Precautions Before You Begin
Working with ovens means dealing with heavy parts and sometimes sharp edges. Safety is always the first step. Here’s how to prepare:
- Unplug the oven – Always disconnect the oven from the electrical outlet to avoid electric shock.
- Let it cool – Wait until the oven is completely cool. Removing a hot door can cause burns.
- Use gloves – Wear sturdy gloves to protect your hands from sharp metal or glass edges.
- Clear the area – Make sure there’s enough space around the oven to move safely.
- Secure the door – If possible, lock or support the door before starting to prevent it from falling suddenly.
Pro Tip: Many people forget to remove trays or racks inside the oven. Take them out first to prevent them from sliding out or getting damaged during the process.

Credit: www.pcrichard.com
Tools And Materials You Need
For most infrared electric ovens, you won’t need many tools, but having the right ones makes the job much easier:
- Screwdriver set (usually Philips or flat-head)
- Protective gloves
- Towel or soft mat (to lay the door on)
- Flashlight (for seeing hinge details)
- Small container (for screws and small parts)
- Manual (if available, for your oven model)
Some doors may have security screws or unusual fasteners. It’s wise to check your oven’s manual or look up your model online before starting.
Step-by-step Guide: How To Remove An Infrared Electric Oven Door
Now let’s get into the core process. These steps are based on the most common oven designs, but always check your model for unique features.
1. Unplug And Prepare The Oven
First, unplug the oven and make sure it’s cool. Open the door fully so it’s flat against the floor. Remove all trays, racks, and anything else inside. Lay a towel or mat on the floor to protect the door and your floor.
2. Locate And Unlock The Hinges
Most oven doors have hinge locks or latches at the base where the door connects to the oven. These are small metal pieces you flip up or down to release the door.
- Open the door completely.
- Look for a small lever or latch on each hinge.
- Using your fingers or a flat-head screwdriver, flip the latch toward the oven body.
If you don’t see a latch, your oven may use a different system. Some models have screws or pins instead.
3. Partially Close The Door
After unlocking the hinges, partially close the door—about a quarter of the way. This position releases tension from the springs and makes the door lighter. You should feel less resistance when moving the door.
4. Lift And Remove The Door
Grasp the sides of the door firmly, near the hinges. Slowly lift the door straight up and away from the oven. Most doors will slide out of the hinge slots. If there’s resistance, double-check that the latches are open.
Warning: Oven doors can be heavy. If you’re not strong enough, get help to avoid dropping or damaging the door.
5. Set The Door Aside Safely
Place the door on a towel or soft mat, glass side up. This prevents scratches or cracks. Now you can clean, repair, or replace parts as needed.
Common Variations
Some infrared electric ovens, especially high-end or European models, have different hinge mechanisms:
- Pin locks – Some doors have pins you pull out to release the hinge.
- Screwed hinges – You may need to remove screws holding the hinge to the oven body.
- Electronic connectors – Rare, but some smart ovens have wires for sensors in the door. Disconnect these carefully.
If you face these, check your oven’s manual or look for a model-specific guide online.
How Oven Door Hinges Work
Oven door hinges are more complex than they appear. Understanding their design helps you avoid mistakes.
| Hinge Type | Common Use | Removal Difficulty |
|---|---|---|
| Spring-loaded | Most home ovens | Easy |
| Pin lock | Premium/European ovens | Moderate |
| Screwed | Commercial ovens | Hard |
| Electronic | Smart ovens | Challenging |
Most users will deal with spring-loaded hinges. These are designed for easy removal and reinstallation.
Tips For Safe And Easy Removal
- Read the manual – Each oven model may have small differences.
- Ask for help – Oven doors are heavy and awkward. Two people can make the job safer.
- Don’t force it – If the door doesn’t come out easily, recheck the latches.
- Keep parts together – Use a container for screws or pins.
Beginner’s Insight: Many people try to remove the door with it fully open. This makes the springs tense and the door heavier. Always move the door to the quarter-open position before lifting.
Reinstalling The Oven Door
After cleaning or repair, putting the door back is just as important. Here’s how to do it safely:
1. Align The Hinges
Hold the door at the same angle you removed it—usually a quarter open. Line up the hinge arms with the slots on the oven body.
2. Slide The Hinges In
Push the hinges fully into the slots. You may need to wiggle the door slightly to get both sides in evenly.
3. Open The Door Fully
Once the hinges are in, open the door all the way. This lets the hinges lock into place.
4. Lock The Hinges
Flip the hinge locks or levers back to their original position. This secures the door.
5. Test The Door
Open and close the door a few times. It should move smoothly and seal tightly. If it feels loose or crooked, remove and reinstall it.
Pro Tip: If your oven door has wires for sensors or lights, reconnect them before locking the hinges.
Cleaning And Maintenance While The Door Is Off
With the door removed, you have a rare chance to clean and maintain both the door and the oven cavity.
Cleaning The Door
- Use warm soapy water and a soft sponge for glass and metal.
- Avoid harsh chemicals, which can damage the glass coating.
- Dry thoroughly to prevent streaks.
Cleaning The Oven
- Remove crumbs and debris with a vacuum or brush.
- Wipe down interior surfaces with a damp cloth.
- Use a safe oven cleaner for tough stains.
Checking Seals And Hinges
- Inspect the door seal for cracks or wear.
- Check hinges for loose screws or rust.
- Lubricate metal parts with a food-safe spray if needed.
Regular maintenance can extend the life of your oven and improve cooking results.
Troubleshooting Common Problems
Sometimes, you may face issues during or after removing the oven door. Here’s how to handle the most common ones.
Door Won’t Release
- Double-check hinge locks or pins are fully open.
- Gently wiggle the door while lifting.
- Some hinges need to be at a precise angle (quarter open).
Door Is Stuck Or Jammed
- Check for screws or hidden fasteners.
- Look for debris or rust around the hinge area.
- If it’s still stuck, consult your oven’s manual or contact support.
Hinge Or Lock Is Damaged
- Do not force the door. Order replacement parts.
- Many brands sell replacement hinges online.
Door Glass Is Cracked Or Loose
- Do not use the oven with damaged glass.
- Order a replacement glass panel and follow manufacturer instructions.
Door Won’t Reinstall Properly
- Make sure hinges are fully inserted.
- Check for bent or misaligned parts.
- Remove and try again, following each step carefully.
Advanced Insight: Some oven hinges have a small hole for inserting a nail or pin to lock the spring during removal. This makes the process easier and safer. Not all models have this feature, so check your hinges closely.
Comparing Infrared Electric Oven Doors To Other Ovens
How does removing an infrared electric oven door compare to other types? Here’s a quick look:
| Oven Type | Door Removal Method | Difficulty | Notes |
|---|---|---|---|
| Infrared Electric | Hinge locks/latches | Easy to Moderate | Most common in homes |
| Gas Oven | Similar hinge system | Easy | Some have safety valves |
| Convection Oven | May have more insulation | Moderate | Heavier doors |
| Commercial Oven | Screws/pins | Hard | Usually two-person job |
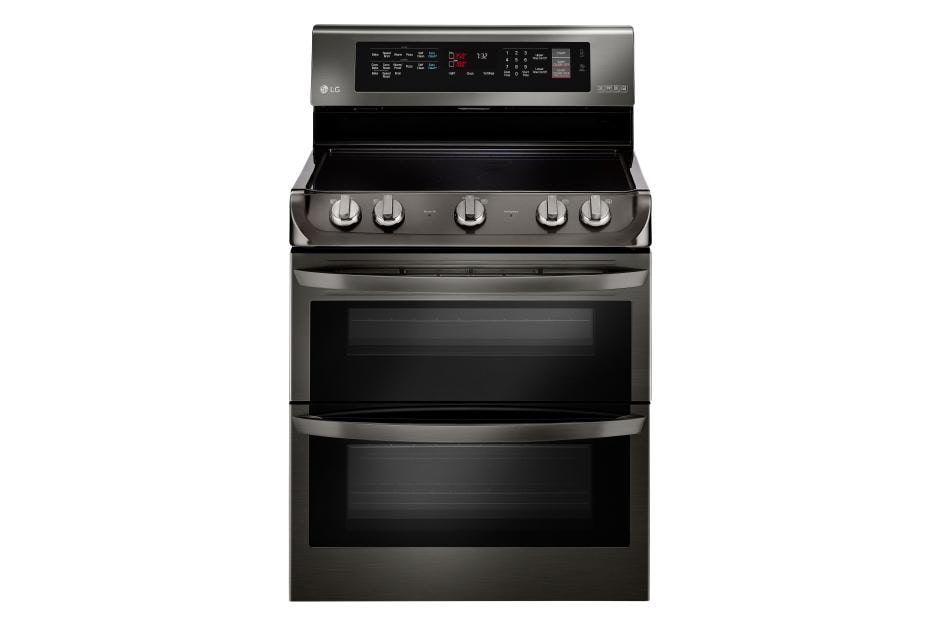
Infrared electric ovens are generally easier to work with than heavy commercial models.
Credit: www.lg.com
Mistakes To Avoid When Removing An Oven Door
Mistakes can lead to injuries, broken parts, or even a non-functional oven. Here are the biggest errors to watch out for:
- Not unplugging the oven – Always cut power before starting.
- Removing the door while fully open – This puts pressure on the hinges and can cause injury.
- Forgetting to support the door – Dropping the door can break the glass or bend the hinges.
- Losing screws or pins – Keep all small parts in a container.
- Forcing stuck parts – This can damage the hinge or oven body.
- Not checking for wires – Smart ovens may have electrical connectors in the door.
- Ignoring the manual – Small differences in design can lead to big problems.
- Skipping gloves – Sharp edges can cut your hands.
- Not testing after reinstalling – Always make sure the door seals and moves smoothly.
- Skipping cleaning – Take advantage of the open oven to clean thoroughly.
Special Considerations For Different Brands
Some popular oven brands have unique features or removal methods. Let’s look at a few:
Samsung
Samsung ovens often use a removable hinge pin. After unlocking the latches, you may need to pull out the pin to release the door. Check for wires if the door has electronic controls.
Lg
LG ovens use a lever lock system. Flip the levers up, move the door to the quarter-open position, and lift.
Bosch
Bosch ovens may have additional screws or security tabs. Use the manual for guidance.
Whirlpool
Whirlpool uses a standard spring-loaded hinge with latches. Removal is straightforward.
Ge
GE ovens usually have a visible locking tab at each hinge. The process is similar to the standard method.
Pro Tip: Always check your oven’s model number. You can often find step-by-step guides or videos for your exact model on the manufacturer’s website or on WikiHow.
Credit: www.aosom.com
Door Removal For Cleaning Versus Repair
Why you remove the oven door changes your approach:
- For cleaning: Remove the door, clean all surfaces, seals, and glass. Inspect for damage.
- For repair: Identify the faulty part (glass, hinge, seal) and have replacement parts ready.
- For moving: Protect the door with padding and handle gently.
If you’re not sure, always start with cleaning. Many oven door issues are simply caused by debris or grease in the hinges.
When To Call A Professional
Some situations are best left to a qualified technician:
- Electronic or smart oven doors – If there are wires, sensors, or you’re unsure, call for help.
- Bent or damaged hinges – Replacing hinges can require special tools.
- Broken glass replacement – The glass can be sharp and tricky to install.
If you’re comfortable with basic DIY tasks, most oven door removals are safe to do yourself.
Environmental And Energy Impact
A properly installed and sealed oven door keeps heat inside, saving energy. If your door is loose or the seal is worn, your oven uses more electricity to maintain temperature. Over a year, a poorly sealed oven can increase your energy bill by 5-10%.
Also, a tight seal reduces cooking times and improves food quality.
Practical Insight: Many people don’t realize that small gaps in the oven door seal can cause a big drop in cooking efficiency. Always check the seal when the door is removed.
Advanced Troubleshooting: Hinges And Seals
If you notice your oven door doesn’t close tightly or sags, the problem may be with the hinges or the gasket (seal).
| Problem | Possible Cause | Solution |
|---|---|---|
| Door doesn’t close tightly | Worn seal, bent hinge | Replace seal or hinge |
| Door sags | Loose or worn hinge | Tighten or replace hinge |
| Heat loss | Poor seal contact | Clean or replace seal |
| Rattling noise | Loose screws or pins | Tighten hardware |
Many of these repairs can be handled when the door is off. If you’re not sure, consult a technician.
The Value Of Regular Oven Door Maintenance
Preventive care is better than repairs. Every 6 months, check your oven door for:
- Loose hinges
- Cracked glass
- Worn or dirty seals
- Smooth opening and closing
A little attention now prevents bigger problems later.
Frequently Asked Questions
How Often Should I Remove My Oven Door For Cleaning?
For most homes, removing the oven door once or twice a year for deep cleaning is enough. If you cook often or notice lots of grease buildup, you may want to do it more often.
Can I Remove My Oven Door If It Has Electronic Controls?
Yes, but be careful. Some modern ovens have wires or sensors in the door. Always unplug the oven, and if you see wires, consult your manual or call a professional.
What If My Oven Door Feels Stuck Or Too Heavy To Lift?
Don’t force it. Make sure the hinge locks are fully open and the door is in the correct position (usually a quarter open). If it’s still stuck, check for hidden screws or pins. Ask for help if the door is too heavy.
Is It Safe To Use The Oven Without The Door?
No. Never use an oven without the door in place. It’s dangerous, wastes energy, and can damage the oven.
Where Can I Find Replacement Parts For My Oven Door?
You can order replacement parts from the manufacturer’s website, local appliance stores, or trusted online shops. Always use your oven’s model number to ensure you get the right part.
Removing an infrared electric oven door isn’t as hard as it sounds, but it does need care, the right steps, and a little patience. By following the advice above, you can safely remove, clean, or repair your oven door, making your kitchen safer and your cooking more efficient. Whether you’re a beginner or have some DIY experience, these steps will help you handle the task with confidence.