
Getting ready to paint your kitchen cabinets is exciting. A fresh coat of paint can change the whole look and feel of your kitchen. But before you open the paint can, there’s one step you should never skip: cleaning your cabinets. This is not just about making things look neat. Proper cleaning helps the paint stick better, last longer, and look smooth. If you paint over greasy or dirty cabinets, even the best paint won’t give you a good finish.
Many people think they can just dust or wipe down their cabinets quickly. But kitchen cabinets collect grease, food splatters, fingerprints, and even invisible residues from years of cooking. If you miss these, your paint might peel, bubble, or chip soon after finishing.
The cleaning step may sound simple, but there’s a right way and a wrong way. Doing it the right way saves you time, money, and frustration later.
This guide will walk you through everything you need to know about how to clean kitchen cabinets before painting. You’ll learn what supplies to use, step-by-step cleaning methods, tips for tough stains, and how to deal with different cabinet materials. Whether your cabinets are wood, laminate, or painted, you’ll find clear instructions here. Let’s get started and prepare your cabinets for a flawless paint job.
Why Cleaning Cabinets Before Painting Matters
Painting over dirty surfaces causes problems. Even tiny bits of grease or dust can keep paint from sticking properly. When that happens, the paint may start to peel or crack within months. In humid kitchens, trapped grime under paint can even lead to mold or mildew.
Cleaning also helps you spot hidden issues like water damage, loose hinges, or cracks. These should be fixed before painting. If you skip cleaning, you might be sealing in smells or stains that will show through the new paint.
Many professional painters say 80% of a good paint job is preparation. In fact, research by paint manufacturers shows that surfaces cleaned and prepped correctly can double the lifespan of your paint.
Understanding Your Cabinet Surface
Before you start cleaning, it’s smart to check what material your cabinets are made of. This affects the cleaning products and methods you should use.
| Cabinet Material | Common Issues | Best Cleaning Method |
|---|---|---|
| Solid Wood | Grease, stains, swelling | Mild soap, degreaser, avoid soaking |
| Laminate | Surface grime, peeling edges | Non-abrasive cleaner, soft cloth |
| Painted MDF | Scratches, old paint chips | Gentle soap, avoid harsh chemicals |
| Veneer | Loose edges, bubbling | Gentle cleaner, no excess water |
Always test your cleaner on a small area first. Some strong degreasers or chemicals can damage certain finishes.
Credit: www.dododsondesigns.com
Gathering The Right Supplies
Having the right tools makes cleaning easier and more effective. Here’s what you’ll need:
- Rubber gloves – Protects your hands from cleaners and grime.
- Buckets – For mixing cleaning solutions and rinsing.
- Soft sponges or microfiber cloths – Won’t scratch cabinet surfaces.
- Scrub brushes (small and medium) – For grooves and corners.
- Degreaser or heavy-duty cleaner – Cuts through kitchen grease.
- Mild dish soap – For general cleaning.
- Spray bottle – To apply cleaning solution evenly.
- Old toothbrush – Great for hardware and tight areas.
- Clean towels – For drying after cleaning.
- Painter’s tape – Optional, for labeling cabinet parts.
For very dirty cabinets, you might also want:
- White vinegar or baking soda for natural cleaning
- TSP (Trisodium Phosphate), a strong cleaner used by professionals (always read instructions and use gloves)
- Screwdriver for removing hardware
- Drop cloth or plastic sheet to protect floors
Removing Cabinet Hardware And Doors
Cleaning is much easier if you take off cabinet doors, drawers, and hardware like handles and knobs. This helps you reach all surfaces and avoids trapping grime around hardware. Here’s how to do it efficiently:
- Label each door and drawer as you remove them. Use painter’s tape and a marker so you know where each piece goes.
- Use a screwdriver to remove all handles, knobs, and hinges.
- Store screws and hardware in a container or plastic bag, and label them.
- Lay doors and drawers flat on a covered surface for easy cleaning.
Some people skip removing doors to save time, but this can lead to missed spots and a less professional finish. If you’re painting the inside of the cabinets too, removing everything is a must.
Dry Dusting And Vacuuming
Before using any liquid, remove loose dust and debris from your cabinets. This prevents dirt from turning into mud when mixed with cleaner.
- Use a vacuum with a brush attachment to clean inside corners and edges.
- Wipe flat surfaces with a dry microfiber cloth.
- Don’t forget the tops of cabinets—these often have a thick layer of dust.
If your cabinets are very greasy, dry dusting can help remove the first layer, making deep cleaning more effective.
Degreasing: The Most Important Step
Kitchen cabinets often have a layer of grease that isn’t always visible. This comes from cooking oils, steam, and food splatters. Paint will not stick well to greasy surfaces.
Choosing A Degreaser
You have several options:
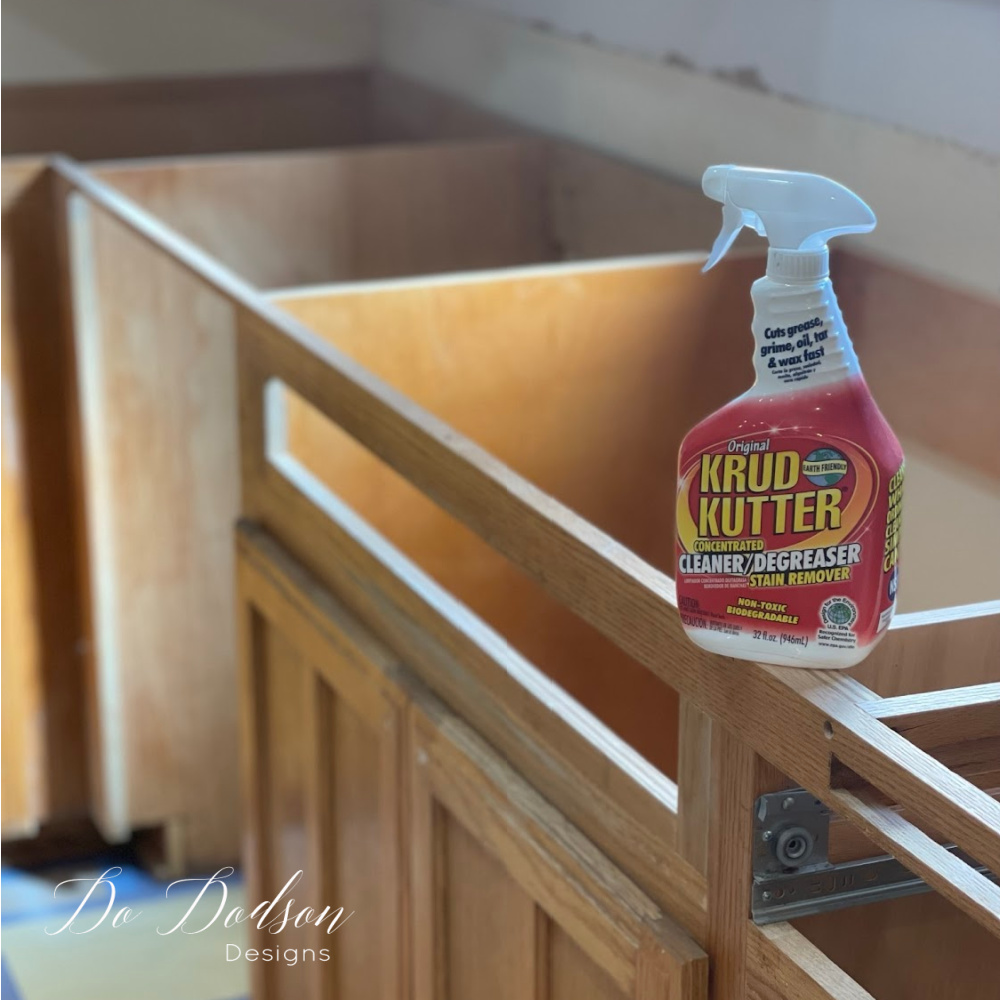
- Commercial degreasers: Products like Krud Kutter or Zep are strong and easy to use.
- TSP (Trisodium Phosphate): Very effective for tough grease, but use with gloves and rinse well.
- DIY solution: Mix 1 part white vinegar with 2 parts warm water, plus a few drops of dish soap.
Never mix ammonia-based cleaners with bleach. This creates toxic fumes.
How To Degrease Cabinets
- Mix your degreaser according to package directions.
- Dip a sponge or cloth into the solution, wring it out well.
- Scrub the cabinet surface, focusing on handles, corners, and areas near the stove.
- For heavy build-up, let the cleaner sit for 3–5 minutes before wiping.
- Use a soft brush or toothbrush for grooves and moldings.
- Rinse the sponge in clean water and wipe away any residue.
- Dry with a towel.
Repeat if you still feel a slippery or sticky surface. Cabinets above the stove often need extra attention.
Cleaning Inside And Outside Surfaces
Don’t skip the interior! Even if you only plan to paint the outside, cleaning inside prevents dust and smells.
- Use a mild soap and water solution for the inside of cabinets.
- Wipe shelves, sides, and the back wall.
- Remove shelf liners before cleaning and replace them after painting, if needed.
For glass doors or inserts, use a glass cleaner and soft cloth. Avoid spraying directly onto wood—spray on the cloth instead.
Handling Tough Stains And Sticky Residue
Some cabinets have stubborn spots that normal cleaning doesn’t remove. Here’s how to deal with them:
For Sticky Grease
- Try a paste of baking soda and water. Rub gently with a cloth.
- For very tough spots, use a dab of mineral spirits on a rag (test in a hidden area first).
For Food Or Drink Stains
- Use a mix of hydrogen peroxide and water (1: 1) for light stains. Rinse well.
For Old Tape Or Sticker Residue
- Apply a little cooking oil to soften the adhesive, then scrape gently with a plastic scraper.
- Wipe clean with soap and water.
For Mold Or Mildew
- Mix 1 part bleach with 10 parts water. Apply with a cloth, let sit 5 minutes, then rinse and dry.
Be sure to wear gloves and ventilate the area when using strong cleaners.
Rinsing And Drying
After using any cleaning solution, rinse the cabinets with a clean, damp cloth. Leftover soap or chemicals can react with paint or stop it from sticking.
- Use a separate bucket of clean water for rinsing.
- Change the water often to avoid spreading dirt.
- Wipe all surfaces dry with a clean towel. Moisture left behind can cause problems with wood or paint adhesion.
Non-obvious insight: Many people forget to let cabinets dry completely. Moist wood or finish will cause paint to bubble or peel. Wait at least 2–4 hours after cleaning (or overnight if possible) before you start sanding or painting.
Repairing Minor Damage Discovered During Cleaning
As you clean, you might find small cracks, dents, or loose veneer. Fixing these before painting is important for a smooth finish.
- Fill small holes or dents with wood filler. Let it dry, then sand smooth.
- Glue loose veneer edges with wood glue and clamp until set.
- Tighten loose hinges or screws.
- Sand rough or raised areas gently with fine-grit sandpaper.
If there’s water damage or rot, fix it before painting. Painting over damaged wood will only make it worse.
Final Surface Prep: Sanding After Cleaning
Once your cabinets are clean and dry, light sanding prepares the surface for paint. Sanding removes any shiny finish and helps paint grip better.
- Use 220-grit sandpaper for most cabinets.
- Sand in the direction of the wood grain.
- Wipe away dust with a damp cloth or tack cloth after sanding.
If your cabinets have a glossy or slick surface, sanding is even more important. Skip this, and your paint may peel.
How Long Should You Wait After Cleaning?
Patience pays off. After cleaning and rinsing, let the cabinets air dry fully. The best practice is to wait overnight, especially in humid areas.
- For wood cabinets, allow at least 8 hours to dry.
- For laminate or veneer, 2–4 hours may be enough, but check for any damp spots.
- Use fans or open windows to speed up drying if needed.
Painting even slightly damp cabinets can lead to bubbling and poor adhesion.
Common Mistakes To Avoid
It’s easy to rush through cleaning, but these common mistakes can ruin your paint job:
- Skipping degreasing: Even if cabinets look clean, invisible grease will cause paint to fail.
- Not removing hardware: Paint around hinges and handles is never as smooth or durable.
- Using harsh chemicals: Strong cleaners like oven cleaner can damage wood or laminate.
- Not rinsing thoroughly: Leftover soap or degreaser will interfere with paint adhesion.
- Painting damp cabinets: Always let surfaces dry fully before moving to the next step.
Non-obvious insight: Don’t use steel wool or rough scouring pads. These can leave scratches that show through paint.
Cleaning Different Cabinet Types
Not all cabinets are the same. Here’s how to adjust your cleaning for different materials.
Wood Cabinets
- Use mild soap and warm water.
- Avoid soaking wood—too much water can cause swelling.
- Dry immediately with a towel.
Laminate Cabinets
- Use a non-abrasive cleaner.
- Don’t sand too aggressively; laminate is thin and can be damaged.
- Avoid harsh chemicals.
Painted Cabinets
- Use a gentle cleaner to avoid stripping old paint.
- Sand lightly only if the old paint is in good condition.
Veneer Cabinets
- Use a slightly damp cloth with mild soap.
- Don’t let water seep under the veneer.
- Dry well after cleaning.
Credit: www.dododsondesigns.com
When To Use Stronger Cleaners Like Tsp
For very greasy or dirty cabinets, TSP (trisodium phosphate) can be a good choice. It’s strong and effective, but must be used carefully:
- Wear gloves and eye protection.
- Mix according to the package instructions.
- Apply with a sponge, scrub, and rinse thoroughly.
- Never let TSP dry on the surface.
TSP is not suitable for all cabinet types, especially some laminates or painted surfaces. Always test in an inconspicuous spot first.
Using Natural Cleaning Solutions
Some people prefer natural cleaners to avoid harsh chemicals. These can work well for light to moderate dirt.
- Vinegar and water: Good for cutting light grease. Mix 1 part vinegar to 2 parts water.
- Baking soda paste: Removes sticky spots without scratching.
- Castile soap: A gentle, plant-based soap.
Natural cleaners may not remove heavy grease as quickly as commercial products, but they are safer for sensitive materials and skin.
Credit: www.dododsondesigns.com
Cleaning Cabinet Hardware
Don’t forget the handles, knobs, and hinges. These get sticky and dirty too. Clean them before reattaching to painted cabinets.
- Soak hardware in warm, soapy water for 15–20 minutes.
- Scrub with a toothbrush to remove grime.
- Rinse and dry thoroughly.
If hardware is very tarnished, use a metal polish (test first). Let everything dry fully before reinstalling after painting.
Preparing For Painting After Cleaning
Once your cabinets are clean, dry, and repaired, you’re almost ready for paint. Before you start, make sure:
- All surfaces are dust-free and smooth.
- Holes or cracks are filled and sanded.
- You have all your painting supplies ready.
Tip: Wipe cabinets with a tack cloth just before painting to catch any last bits of dust.
Quick Reference: Cleaning Steps For Kitchen Cabinets Before Painting
Here’s a summary to keep you on track:
| Step | What to Do |
|---|---|
| 1. Remove hardware/doors | Label and set aside handles, hinges, and doors |
| 2. Dry dust/vacuum | Remove loose dirt and dust |
| 3. Degrease | Scrub with degreaser or vinegar solution |
| 4. Rinse | Wipe with clean water |
| 5. Dry thoroughly | Allow to air dry completely |
| 6. Repair & sand | Fix damage, sand lightly, wipe dust |
| 7. Final dusting | Use tack cloth just before painting |
How Clean Is “clean Enough” For Painting?
A good rule: If you can run your hand over the cabinet and it feels smooth, not sticky or greasy, you’re ready. The surface should also look dull (not shiny) after sanding. If you see or feel dirt, repeat the cleaning step.
Another test: Tape a small piece of painter’s tape to the surface, then pull it off. If it sticks well and comes off clean, your surface is ready for paint.
Health And Safety Tips
Cleaning cabinets means working with chemicals and sometimes strong cleaners. Here’s how to stay safe:
- Always work in a well-ventilated area. Open windows or use a fan.
- Wear gloves to protect your skin.
- Don’t mix cleaning chemicals.
- Keep cleaning solutions away from children and pets.
- Store rags with chemicals in a sealed bag—some can catch fire if left in a pile.
Environmentally Friendly Cleaning And Disposal
If you want a greener approach:
- Use plant-based or biodegradable cleaners.
- Dispose of dirty water and chemical rags according to local rules.
- Reuse cloths or sponges instead of paper towels.
- Avoid pouring strong cleaners down the drain.
Some cities have special disposal for TSP or other chemicals. Check your local guidelines.
What To Do If Cabinets Are Still Sticky After Cleaning
If cabinets stay sticky after cleaning, it usually means there’s still grease or old cleaning residue. Try these steps:
- Re-clean with a stronger degreaser.
- Rinse with warm water and vinegar.
- Let dry and test with your hand. If it’s still sticky, repeat.
Pro tip: Sometimes, sticky residue is from old furniture polish or wax. In this case, a product like mineral spirits (used carefully) can help remove it. Always test in a hidden spot.
Timing Your Cleaning With Your Painting Schedule
Plan your cleaning so you can paint soon after. If you wait too long, dust and grease can settle again.
- Clean the day before you plan to paint.
- Cover cleaned cabinets with a cloth or plastic sheet if you need to wait longer.
- Do a quick wipe with a tack cloth just before painting.
Special Situations: Rental Kitchens Or Older Cabinets
If you’re in a rental or working with very old cabinets:
- Use the gentlest cleaner first to avoid damage.
- Don’t use TSP or strong chemicals without checking the cabinet material.
- If cabinets are painted with lead-based paint (common before 1978 in the US), do not sand or use strong chemicals. Consult a professional.
For more information on lead paint safety, visit the EPA website.
Frequently Asked Questions
How Long Should I Wait After Cleaning Before Painting My Cabinets?
Wait until your cabinets are completely dry. This is usually at least 2–4 hours for laminate, and 8 hours or overnight for wood. Painting on damp cabinets can cause paint to peel or bubble.
Can I Just Use Soap And Water To Clean My Cabinets Before Painting?
For light dirt, soap and water may be enough. But most kitchen cabinets have grease that needs a stronger degreaser or a mix of vinegar and water. Always rinse after any cleaner.
What Should I Do If My Cabinets Are Still Greasy After Cleaning?
Repeat cleaning with a stronger degreaser or TSP. Focus on areas above the stove. Rinse well and make sure all residue is gone before painting.
Do I Need To Remove The Cabinet Doors To Clean Them Properly?
Removing doors and hardware is best. It lets you clean and paint all surfaces evenly. If you can’t remove them, clean carefully around hinges and handles.
Is It Safe To Use Tsp On All Cabinet Types?
TSP is very effective but can damage some surfaces, especially painted or laminate cabinets. Always test on a small area first, and rinse thoroughly. Use gloves and follow safety instructions.
A successful paint job starts with the right preparation. Taking time to clean your kitchen cabinets well will help you get a professional-looking result that lasts for years. With these tips and methods, you’re now ready for the next step: painting your freshly cleaned cabinets and enjoying a kitchen that looks brand new.