
Keeping your baby’s feeding items clean is a daily task every parent knows well. But when it comes to cleaning your Avent bottle warmer, things can get confusing. Is a simple wipe enough? How do you remove stubborn limescale? What about hidden areas you can’t see? If you’re worried about doing it right, you’re not alone. Many parents struggle to keep their Avent bottle warmer clean, safe, and working efficiently.
This guide will take you through every detail of cleaning an Avent bottle warmer. You’ll learn not just the basics, but also the techniques and insights that can make a real difference. From regular cleaning to deep descaling, you’ll get step-by-step instructions, tips to avoid common mistakes, and even expert advice for tricky situations. If you want your Avent bottle warmer to last longer and stay safe for your baby, read on for everything you need to know.
Why Cleaning The Avent Bottle Warmer Matters
Avent bottle warmers are designed to heat milk and food quickly and evenly. But like any kitchen appliance, they can collect milk residue, water deposits, and even bacteria if not cleaned properly. Over time, this can lead to:
- Reduced heating efficiency (warmer takes longer or doesn’t heat properly)
- Unpleasant smells from old milk or mold
- Limescale build-up that damages the heating element
- Health risks for your baby due to bacteria or mold
Regular cleaning isn’t just about looks—it’s about performance and safety. If the warmer isn’t clean, it might not heat bottles correctly, which can be dangerous for your child. Keeping it in top shape is one of the simplest ways to protect your baby and your investment.
Understanding The Parts Of Your Avent Bottle Warmer
Before you start cleaning, it helps to know the main parts. Most Avent bottle warmers include:
- Warming chamber: Where you place the bottle or food jar.
- Water reservoir: Holds the water used for heating.
- Control panel: Buttons or dials for settings.
- Heating plate: The base where water is heated.
- Lid or cover (some models): Keeps heat in and protects the chamber.
Different Avent models may look different, but the cleaning steps are similar. Always check your user manual for diagrams and extra details.
Common Areas That Collect Dirt
- The heating plate often collects limescale or burnt-on residue.
- The water reservoir can develop slime or mold if water sits too long.
- The warming chamber sometimes gets milk drips or spills.
Recognizing these trouble spots helps you focus your cleaning efforts for best results.
How Often Should You Clean Your Avent Bottle Warmer?
Cleaning frequency depends on how often you use the warmer and your local water quality. For most families:
- After every use: Wipe the warming chamber and empty any leftover water.
- Once a week: Clean the full unit with soap and water.
- Once a month: Descale the heating element to remove limescale.
If you use the bottle warmer several times daily, increase cleaning to every other day or more. Hard water areas (with lots of minerals) may need more frequent descaling.
Supplies You’ll Need
Cleaning your Avent bottle warmer doesn’t require special tools. Most items you’ll find in your kitchen:
- Mild dish soap (unscented is best)
- Soft sponge or cloth
- Small soft brush (like a toothbrush)
- White vinegar or citric acid for descaling
- Measuring cup
- Clean water
- Soft towel for drying
Avoid abrasive cleaners, scouring pads, or harsh chemicals, as these can scratch or damage the appliance.
Step-by-step: Daily Cleaning After Each Use
Regular cleaning is the simplest way to keep your Avent bottle warmer safe and efficient. Here’s what to do after each use:
1. Unplug The Warmer
Always unplug before cleaning. Water and electricity don’t mix.
2. Empty The Water
Pour out any water left in the chamber. Don’t let water sit inside, as this can lead to mold or bacteria.
3. Wipe The Chamber
Use a soft, damp cloth or sponge with a little mild soap. Wipe the inside of the warming chamber and the heating plate. Remove any milk drips or residue.
4. Clean The Exterior
Wipe the outside with a damp cloth. Pay attention to buttons or dials where milk or food can splash.
5. Dry Thoroughly
Use a towel to dry all parts. Leave the lid off for a while so air can reach inside and dry any hidden spots.
Important Tips
- Never submerge the main unit in water. Only clean the parts that can be safely wiped.
- If your warmer has a removable lid or basket, wash these separately in warm soapy water, rinse, and dry.
Deep Cleaning: Weekly Wash Routine
A deeper clean once a week helps remove any build-up that daily wipes might miss.
1. Unplug And Disassemble
Make sure the warmer is unplugged and cooled down. Take out any removable parts (lids, baskets, bottle holders).
2. Wash Removable Parts
Clean these with warm soapy water, rinse well, and let them air dry.
3. Clean The Heating Chamber
Use a soft brush (an old toothbrush works well) to gently scrub the heating plate and inside surfaces. Get into corners where residue can hide.
4. Wipe The Control Panel
Use a slightly damp cloth for the buttons or dial area. Don’t let water drip inside.
5. Reassemble And Dry
Once everything is dry, put the warmer back together.
Non-obvious Insight
If you notice sticky spots or dried milk that won’t come off, soak a cloth in warm soapy water and let it sit on the area for 5-10 minutes. This softens residue, making it much easier to wipe away without scrubbing hard.
Descaling The Avent Bottle Warmer: Monthly Maintenance
Even if you clean daily, minerals in tap water can build up as limescale on the heating element. This affects heating efficiency and can lead to odd smells or damage. Descaling removes these deposits.
What Is Descaling?
Descaling means removing mineral deposits using acid (like vinegar or citric acid). It’s essential in hard water areas but helpful everywhere.
How To Descale Avent Bottle Warmer
1. Mix The Descaling Solution
For most Avent warmers, use the following:
- 50 ml white vinegar + 100 ml water
Or
- 1 tablespoon citric acid + 100 ml water
- Pour Solution Into Chamber
Add the mixture to the water chamber (not above the max fill line).
3. Run A Heating Cycle
Plug in and turn on the warmer (without any bottles inside). Let it run for about 10-15 minutes or until the solution heats up.
4. Let It Sit
Turn off and unplug. Let the solution sit for 30 minutes to dissolve limescale.
5. Empty And Rinse
Pour out the liquid. Rinse the chamber several times with fresh water to remove any vinegar or acid smell.
6. Wipe And Dry
Use a damp cloth to wipe inside. Dry thoroughly before using again.
Pro Tip
If you notice white flakes or chalky spots after descaling, rinse with boiled (then cooled) water for one final clean. This removes any last residue.
Comparison: Vinegar Vs. Citric Acid For Descaling
Both vinegar and citric acid are safe for descaling, but each has pros and cons.
| Descaler | Effectiveness | Smell | Residue | Availability |
|---|---|---|---|---|
| White Vinegar | Very good | Strong, may linger | Easy to rinse | Common |
| Citric Acid | Excellent | Almost none | Easy to rinse | May need to buy |
If you dislike the smell of vinegar, citric acid is a better choice. Both are safe for use and easy to rinse out.
What If You See Mold Or Bad Odors?
Sometimes, you may notice a musty smell or even see black or pink spots inside the warmer. This means mold has started to grow, usually due to water left standing or missed cleaning.
- Clean immediately with hot soapy water.
- Descale using vinegar for extra disinfecting power.
- Let the warmer air dry completely before reassembling.
- If the smell remains, repeat the descaling process or contact Philips support.
Expert advice: If mold keeps returning, check your cleaning habits—never leave water sitting overnight and always let the unit dry fully.
Special Cases: Cleaning Burnt-on Milk And Stubborn Residue
Sometimes, milk can spill and burn onto the heating plate, leaving brown or black marks. Here’s how to handle it:
1. Soak The Area
Pour a little hot water with dish soap into the chamber and let it sit for 15–20 minutes.
2. Use A Soft Brush
Gently scrub the spot with a soft brush. Don’t use steel wool or anything abrasive.
3. Repeat As Needed
For tough stains, repeat the soak-scrub cycle. Avoid scraping, as this can damage the plate.
4. Descale After Cleaning
Finish with a descaling cycle to remove any last residue.
How To Clean The Avent Bottle Warmer If It Hasn’t Been Cleaned For Months
If you’ve just realized your Avent bottle warmer hasn’t been cleaned in a long time, don’t panic. Here’s a recovery plan:
1. Empty And Disassemble
Remove any leftover water and removable parts.
2. Soak Removable Parts
Wash with hot soapy water, rinse, and let air dry.
3. Deep Clean The Chamber
Use a strong vinegar solution (equal parts vinegar and water). Let it soak in the chamber for 1–2 hours.
4. Scrub Stubborn Areas
Use a toothbrush to remove any scale or residue.
5. Descale Thoroughly
Run a full descaling cycle as above.
6. Rinse Well
Rinse several times with clean water to remove any vinegar smell.
7. Let Everything Dry
Air drying helps prevent future mold or odor problems.
Non-obvious tip: If the smell of vinegar is strong, fill the chamber with lemon juice and water and let it sit for 30 minutes. Lemon neutralizes vinegar smell and adds a fresh scent.
Avent Bottle Warmer Maintenance: How To Prevent Problems
Regular cleaning is only part of the solution. Here are steps to keep your Avent bottle warmer working like new:
- Only use filtered or distilled water in the chamber to reduce mineral build-up.
- Never overfill past the max line—this can cause leaks and slow drying.
- Always empty the water chamber after each use.
- Store the warmer with the lid off to let air circulate and dry inside.
- Clean up spills right away, before they dry and harden.
These habits reduce the need for deep cleaning and extend the life of your device.

Credit: www.bibliotecaoscura.com
Common Cleaning Mistakes And How To Avoid Them
Many parents make simple mistakes that can damage their bottle warmer or make cleaning less effective. Watch out for these:
1. Using Abrasive Tools
Scouring pads or metal brushes scratch the heating plate and chamber, making them harder to clean in the future.
2. Skipping Rinses After Descaling
Vinegar or citric acid left inside can cause bad smells and affect your baby’s bottles.
3. Letting Water Sit Overnight
This encourages bacteria and mold growth.
4. Ignoring Small Spills
Even a few drops of milk can burn onto the heating plate and become very hard to remove.
5. Not Drying Completely
Reassembling while damp can trap moisture and cause odors or mold.
6. Using Bleach Or Strong Chemicals
These can damage the warmer and leave unsafe residues.
Confident guidance: Stick to mild soap, vinegar, or citric acid, and always rinse well for safe, effective cleaning.
Troubleshooting: If Your Avent Bottle Warmer Isn’t Heating Properly
A common complaint after a while is that the warmer takes longer to heat or doesn’t get bottles warm enough. This is often due to limescale or residue on the heating plate.
- Try descaling first.
- Make sure you’re not overfilling with water.
- Check for any blockages or debris.
- If problems continue, contact Philips support for advice.
If you see error lights or the unit won’t turn on, unplug and inspect for water damage or heavy build-up.
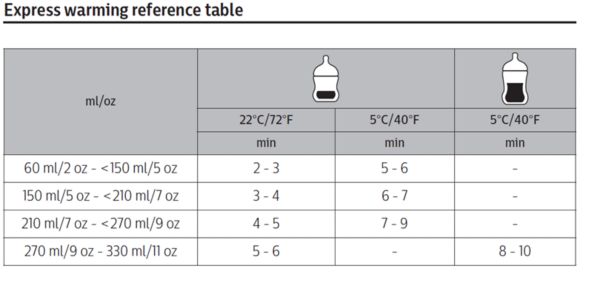
Credit: www.philips.sa
Avent Models And Cleaning Differences
Avent makes several bottle warmer models. Most cleaning steps are similar, but check your manual for any special instructions. Here’s a quick comparison:
| Model | Removable Parts | Descaling Needed | Special Instructions |
|---|---|---|---|
| Fast Bottle Warmer | Yes (basket, lid) | Monthly | Standard cleaning applies |
| Premium Bottle Warmer | Yes (basket, lid) | Monthly | Extra rinse cycles recommended |
| Classic Bottle Warmer | No | Monthly | Careful with control dial |
Always review your specific model’s manual for details about which parts can be washed and how to access them.
Storing Your Avent Bottle Warmer
If you won’t use the warmer for a week or more, store it clean and dry. Here’s how:
- Clean and descale before storing.
- Dry thoroughly and leave the lid off.
- Store in a dry, dust-free place.
- Before using again, rinse with clean water.
This prevents unpleasant surprises like mold, dust, or odors when you need it next.
When To Replace Your Avent Bottle Warmer
With proper cleaning, an Avent bottle warmer can last for years. But if you notice:
- Cracks or leaks in the chamber
- Heating plate is badly corroded or pitted
- Persistent bad smells despite cleaning
- The unit doesn’t heat at all
…it may be time to replace it. Safety always comes first for anything related to your baby’s feeding.
Eco-friendly And Baby-safe Cleaning Options
Many parents want to avoid harsh chemicals. Vinegar and citric acid are safe, natural options for descaling. Unscented, mild dish soap is gentle and effective for daily cleaning. Avoid products with strong scents, dyes, or antibacterial chemicals—these can leave residues that are hard to rinse.
Practical tip: If your baby is sensitive to smells, always rinse with an extra cycle of boiled (then cooled) water after cleaning or descaling.
Expert Advice: Cleaning For Families With Allergies Or Sensitive Babies
If your baby has allergies or sensitive skin, clean your bottle warmer even more often and always rinse well. Use only unscented dish soap and avoid any sprays or wipes with perfumes. Letting the warmer air dry fully is especially important, as moisture can collect allergens.
For more on cleaning and baby safety, see the official Philips Avent website.
Frequently Asked Questions
How Do I Remove Limescale Without Vinegar?
You can use citric acid instead of vinegar. Mix 1 tablespoon of citric acid powder with 100 ml of water, pour into the chamber, run a heating cycle, and let it sit before rinsing well. Citric acid has almost no smell and is easy to rinse out.
Can I Put My Avent Bottle Warmer In The Dishwasher?
No, never put the main unit in the dishwasher. Only removable parts (like baskets or lids) can go in the dishwasher if the manual says it’s safe. Always hand-wash the main unit with a damp cloth.
Why Does My Bottle Warmer Smell Bad Even After Cleaning?
Persistent odors can be due to old milk residue, limescale, or mold. Try a double descaling cycle (with vinegar or citric acid), then rinse well. If the smell remains, check for hidden spills or consider contacting Philips support.
Is It Safe To Use Bleach Or Antibacterial Wipes?
No, bleach and strong antibacterial chemicals are not recommended. They can damage the warmer and leave harmful residues. Stick to mild dish soap, vinegar, or citric acid for all cleaning.
How Can I Keep My Avent Bottle Warmer Clean Longer?
Use filtered or distilled water, empty the chamber after each use, clean spills immediately, and dry the unit completely after cleaning. Descale monthly to prevent mineral build-up and keep the warmer working well.
Caring for your Avent bottle warmer doesn’t have to be complicated. With the right routine and a few expert tips, you can keep it clean, safe, and reliable for every feeding—giving you peace of mind and your baby the best start possible.

Credit: www.youtube.com