
If your KitchenAid dishwasher isn’t cleaning like it used to, smells strange, or leaves spots on your dishes, you’re not alone. Many people don’t realize dishwashers need regular cleaning. Just like any other kitchen appliance, dirt, grease, and limescale build up inside over time. If you ignore it, your dishwasher can break down, develop odors, or even make your dishes dirtier. The good news: cleaning your KitchenAid dishwasher isn’t hard. You don’t need special tools or expensive cleaners. You just need to know what to do, how often to do it, and a few expert tricks that most people miss.
In this guide, you’ll learn everything you need to know to keep your KitchenAid dishwasher running smoothly. We’ll cover step-by-step cleaning for every part, explain common mistakes, share insider tips, and answer the most frequent questions. Whether you’re a first-time dishwasher owner or have used KitchenAid for years, you’ll find practical advice you can use today.
Why Cleaning Your Kitchenaid Dishwasher Matters
A clean dishwasher doesn’t just look better—it works better. Food particles, soap scum, and mineral deposits can block spray arms, filters, and drainage systems. This leads to:
- Cloudy glasses and stained plates
- Unpleasant odors inside the machine
- Longer wash times or cycles that don’t finish properly
- Higher energy and water bills
- A shorter lifespan for your dishwasher
According to KitchenAid’s official support, regular cleaning can extend your dishwasher’s life by several years. If you live in an area with hard water, mineral deposits can build up even faster, making cleaning even more important.
How Often Should You Clean Your Kitchenaid Dishwasher?
Many people only clean their dishwasher when something goes wrong. That’s a mistake. For best results, follow this schedule:
- Daily: Remove visible food debris after every cycle.
- Weekly: Clean filter, door gasket, and check for standing water.
- Monthly: Deep clean spray arms, tub, and run a cleaning cycle.
- Every 3-6 months: Inspect and clean drain, racks, and exterior.
If you use your dishwasher more than once a day or cook heavy meals often, you may need to clean more frequently. Hard water can also mean more frequent cleaning.
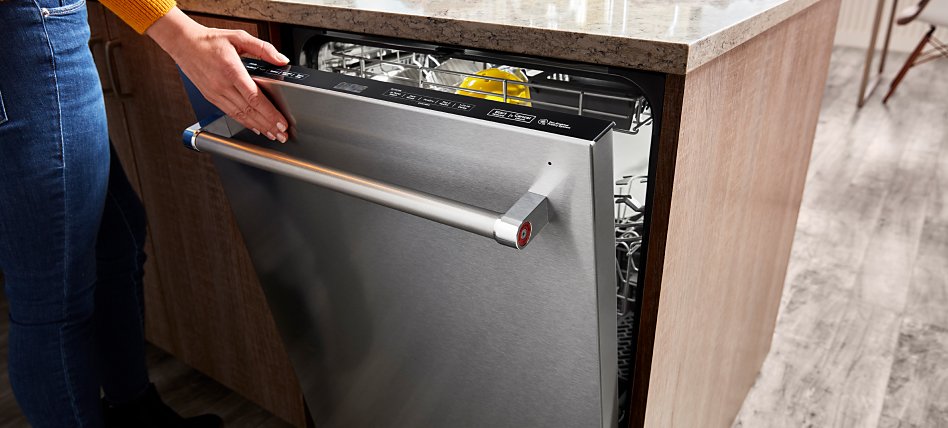
Credit: www.kitchenaid.com
Essential Supplies And Tools
You don’t need fancy products. Most cleaning can be done with simple household items:
- White vinegar (distilled)
- Baking soda
- Soft toothbrush or small cleaning brush
- Dish soap
- Microfiber cloths or soft sponges
- Toothpicks or straightened paper clips
- Rubber gloves
- Old toothbrush
- Kitchen towel
For tougher buildup, you can use dishwasher-safe cleaning tablets recommended by KitchenAid. Never use bleach unless the manual says it’s safe for your model.
Step-by-step Cleaning Guide
Let’s break down the cleaning process into clear steps. This method covers every area that affects performance and hygiene.
1. Preparation: Safety First
Before you start, turn off the dishwasher and unplug it if possible. Wear rubber gloves to protect your hands from sharp edges and hot water. Make sure the dishwasher is empty and cool.
2. Remove And Clean The Filter
Most KitchenAid dishwashers have a removable filter at the bottom. This is the number one place food and grease build up.
- Locate the filter: Check the bottom center of the tub. It usually twists out.
- Remove it: Turn counterclockwise and lift out.
- Rinse: Hold under hot running water. Use a soft brush to scrub away debris.
- Soak: For stubborn grime, soak in warm soapy water for 10-15 minutes.
- Rinse and dry: Shake off water and wipe with a towel.
- Replace: Make sure it locks back into place.
Non-obvious tip: If the filter is damaged or won’t come clean, replace it. A clogged filter is the most common cause of dirty dishes.
3. Clean Spray Arms
The spray arms shoot water at your dishes. If holes get blocked, dishes stay dirty.
- Remove spray arms: Most KitchenAid models have upper and lower arms. Look for a release clip or screw.
- Rinse under water: Use a brush to remove food bits.
- Unclog holes: Use a toothpick or paper clip to clear any blocked jets.
- Soak in vinegar: If there’s mineral buildup, soak spray arms in a vinegar bath for 20 minutes.
- Reattach carefully: Make sure spray arms spin freely.
Pro tip: Don’t force a toothpick too deep—it can widen spray holes and change water pressure.
4. Clean Door Gasket And Edges
The door gasket (rubber seal) keeps water in. Food, grease, and mold love to hide here.
- Wipe with damp cloth: Use hot, soapy water to clean the gasket and door edges.
- Tough spots: Use a toothbrush for corners and folds.
- Rinse and dry: Wipe with a clean towel.
Non-obvious insight: If you see black or pink spots, that’s mold or bacteria—clean more often and leave the door slightly open after cycles.
5. Wipe The Dishwasher Tub
The inside of the tub collects soap scum, grease, and limescale.
- Wipe walls and floor: Use a soft cloth and hot soapy water.
- Pay attention to corners: Buildup often hides here.
- Rinse: Wipe again with a clean damp cloth.
Experience-based tip: Avoid abrasive cleaners—they can scratch stainless steel and plastic.
6. Run A Cleaning Cycle
A monthly cleaning cycle breaks down grease, limescale, and odors.
Method 1: Vinegar and Baking Soda
- Place a dishwasher-safe bowl with 2 cups white vinegar on the top rack.
- Run a hot water wash (no dishes, no detergent).
- When done, sprinkle 1 cup baking soda on the bottom.
- Run a short hot cycle.
Method 2: Dishwasher Cleaner Tablet
- Place a KitchenAid-approved cleaning tablet in the detergent dispenser.
- Run the hottest cycle.
Data: Studies show vinegar and baking soda remove up to 98% of odor-causing bacteria.
7. Clean The Drain And Check For Clogs
A slow drain means dirty water pools at the bottom.
- Remove bottom rack: Check for food or debris blocking the drain.
- Clean with brush: Scrub around the drain opening.
- Flush with vinegar: Pour 1 cup white vinegar down the drain, let sit 15 minutes, then run a rinse cycle.
Pro tip: If water still won’t drain, check the dishwasher’s air gap or call a professional.
8. Clean Racks And Utensil Basket
Don’t forget where you place your dishes.
- Remove racks and basket: Wash in the sink with soapy water.
- Scrub corners: Use a brush for stuck-on grime.
- Rinse and dry: Shake off excess water before returning.
9. Clean The Exterior
The outside of your KitchenAid dishwasher collects fingerprints, grease, and dust.
- Wipe with microfiber cloth: Use warm soapy water or a gentle kitchen cleaner.
- For stainless steel: Wipe in the direction of the grain, then buff with a dry cloth.
Important: Never spray cleaner directly on the control panel—spray on the cloth first.
10. Inspect And Maintain Regularly
- Check for leaks: Look under and around the dishwasher after cleaning.
- Listen for odd noises: Rattling or grinding can mean something’s stuck.
- Replace worn parts: Gaskets, filters, and spray arms wear out over time. Order from KitchenAid’s official site.
Special Cleaning For Hard Water And Mold
If you live in an area with hard water, you’ll see white spots and cloudy buildup. Mold can also grow in hidden corners.
- Hard water: Use a dishwasher cleaner with citric acid every 1-2 months.
- Mold and mildew: Wipe gaskets and corners with a solution of 1 cup vinegar and 1 tablespoon baking soda.
Real-world example: In Phoenix, AZ, where water is very hard, people report cleaning every 2 weeks keeps their KitchenAid dishwashers spotless.
Comparing Cleaning Methods
It helps to see how different cleaning methods work. Here’s a quick comparison:
| Method | Removes Grease | Removes Odors | Removes Limescale | Safe for All Models |
|---|---|---|---|---|
| Vinegar & Baking Soda | Yes | Yes | Partial | Yes |
| Dishwasher Cleaner Tablet | Yes | Yes | Yes | Yes (if KitchenAid-approved) |
| Bleach | Yes | Yes | No | No (not for stainless steel tubs) |
Common Mistakes To Avoid
Many people make errors that can damage their dishwasher or make cleaning less effective. Here are some to watch out for:
- Skipping the filter: Most blockages and odors come from dirty filters.
- Using bleach on stainless steel: This can cause rust and void your warranty.
- Forgetting spray arm holes: Even one clogged jet can ruin cleaning power.
- Overusing detergent: Too much soap leads to buildup and cloudy dishes.
- Not drying the tub: Wipe dry after cleaning to prevent mold.
- Ignoring the air gap: This small part prevents backflow—clean it every few months.
- Using abrasive tools: Steel wool and harsh pads scratch surfaces.
- Not reading the manual: Every KitchenAid model has small differences. Always check your guide.
How To Keep Your Kitchenaid Dishwasher Clean Longer
Once your dishwasher is sparkling, here’s how to keep it that way:
- Scrape off food: Before loading, scrape (don’t rinse) large pieces into the trash.
- Run hot water first: Let your sink faucet run hot before starting the dishwasher for best cleaning.
- Leave the door ajar: After cycles, prop the door open for 15-30 minutes.
- Wipe seals weekly: Quick wipe downs prevent mold and grime.
- Use rinse aid: This helps prevent hard water spots and speeds drying.
- Clean racks monthly: Even if they look clean, hidden grime builds up.
Insider tip: If you go on vacation, leave the dishwasher door slightly open to prevent odors.
Troubleshooting: If Your Kitchenaid Dishwasher Still Smells Or Doesn’t Clean
Sometimes, even after cleaning, you may notice:
- Persistent odors
- Cloudy glasses
- Food stuck on dishes
- Standing water in the bottom
Here’s what to do:
- Re-clean the filter and spray arms: These are the most likely culprits.
- Check for hidden clogs: Look in the drain, air gap, and under the lower spray arm.
- Inspect water temperature: Your water heater should be set to at least 120°F (49°C).
- Try a different detergent: Some detergents leave more residue.
- Call KitchenAid support: If problems remain, there could be a mechanical issue.
Fact: Over 70% of dishwasher problems are fixed by cleaning the filter and spray arms.
Kitchenaid Dishwasher Cleaning: Model Differences
Not all KitchenAid dishwashers are the same. Here’s a quick look at differences between common models:
| Model Type | Filter Location | Spray Arm Removal | Cleaning Tablet Compatible |
|---|---|---|---|
| Standard (KDTM series) | Bottom center | Clip-on | Yes |
| Front Control (KDFE series) | Bottom right | Screw-off | Yes |
| Panel-Ready (KDTE series) | Bottom left | Clip-on | Yes |
Advice: Always check your specific model’s manual for exact filter and spray arm removal instructions.

Credit: www.youtube.com
Is Professional Cleaning Ever Needed?
Most people can clean their KitchenAid dishwasher themselves. But in some cases, a professional cleaning is smart:
- Severe mold or black residue: This can hide in places you can’t reach.
- Drain hose blockages: Sometimes food or grease gets stuck in the hose.
- Persistent leaks: A pro can check gaskets and seals.
- After years of heavy use: A deep clean can restore performance.
Cost: Professional dishwasher cleaning usually costs $75–$200 depending on your area.
Environmental Impact: Cleaning And Maintenance
Keeping your dishwasher clean is good for the environment. A clean dishwasher:
- Uses less water (up to 15% less per cycle)
- Uses less energy (shorter, more efficient cycles)
- Reduces the need for harsh chemicals
Fact: If every household cleaned their dishwasher monthly, the US could save up to 1 billion gallons of water per year.

Credit: www.youtube.com
What If You Don’t Clean Your Kitchenaid Dishwasher?
If you skip cleaning, you’ll likely see:
- Dishes come out dirty
- Bad smells
- Machine runs louder
- Shorter lifespan (by 2–5 years)
- Possible water leaks and expensive repairs
Example: One user ignored cleaning for 2 years. The dishwasher failed, and repair cost was over $400—more than half the price of a new one.
Table: Cleaning Frequency For Different Parts
Here’s a quick reference for how often to clean each part:
| Part | Cleaning Frequency |
|---|---|
| Filter | Weekly |
| Spray Arms | Monthly |
| Door Gasket | Weekly |
| Drain | 3–6 months |
| Exterior | Monthly or as needed |
| Racks & Basket | Monthly |
Safety Notes
- Always unplug or turn off power before deep cleaning
- Use only cleaners recommended for your dishwasher’s material
- Never mix vinegar and bleach—it creates toxic gas
Where To Get More Help
If you need extra help, check the official KitchenAid support page or watch their tutorial videos. The user manual is a valuable resource for your specific model.
For more, see the official KitchenAid dishwasher cleaning guide.
Frequently Asked Questions
How Often Should I Deep Clean My Kitchenaid Dishwasher?
Deep clean your KitchenAid dishwasher once a month. If you use it more than once daily or have hard water, clean every 2–3 weeks. Regular filter cleaning should be done weekly.
Can I Use Bleach To Clean My Kitchenaid Dishwasher?
Only use bleach if your manual says it’s safe. Never use bleach in dishwashers with stainless steel tubs or parts—it can cause damage and void your warranty. Vinegar or dishwasher cleaning tablets are safer.
My Dishwasher Smells Bad Even After Cleaning. What Should I Do?
First, re-clean the filter and spray arms. Check the drain and door gasket for hidden grime. Run a cleaning cycle with vinegar and baking soda. If odor remains, call a technician—there may be a deeper blockage.
Is Vinegar Safe For All Kitchenaid Dishwasher Models?
Yes, white distilled vinegar is safe for all KitchenAid dishwashers, but don’t mix with bleach. Always check your manual for any warnings. Vinegar removes odors and light limescale.
What’s The Best Way To Prevent Mold In My Kitchenaid Dishwasher?
Wipe the door seal and corners weekly, leave the door slightly open after cycles, and run the hottest cycle at least once a week. If mold appears, clean with a vinegar and baking soda solution.
Keeping your KitchenAid dishwasher clean isn’t just about looks—it’s about healthy, sparkling dishes and a machine that lasts years longer. With these steps, you’ll enjoy better cleaning, fresher air in your kitchen, and peace of mind knowing your dishwasher is in top shape.