
If you’ve ever tasted a sweet, chewy dried plum, you know how addictive they can be. Whether you call them prunes or dried plums, these treats are not only delicious, but also packed with nutrients and fiber. While store-bought versions are easy to find, making your own dried plums at home is surprisingly simple—and it gives you control over the process, flavor, and quality. You don’t need a special dehydrator, either. With a standard oven and some patience, anyone can dry plums at home. This guide will show you every step, from choosing the best plums to storing the finished product, so you can enjoy homemade dried plums all year round.
Why Dry Plums At Home?
Drying plums in your own kitchen has many benefits. First, you can pick the type of plum you like best. Some people prefer European plums for their classic flavor, while others enjoy the tartness of Japanese varieties. Drying your own plums also means you skip preservatives like sulfites, which are often used in commercial products. Homemade dried plums can be softer, fresher, and less sugary than most store-bought options.
Another big plus is cost. When plums are in season, you can often buy them in bulk at a much lower price. Drying them lets you enjoy summer fruit even in winter, and it cuts down on waste. Plus, the process is satisfying: there’s something special about enjoying a snack you made yourself, knowing exactly what’s inside.
Choosing The Right Plums
Not all plums are created equal when it comes to drying. The best dried plums start with the right fresh fruit. Here’s what you need to know to pick the perfect plums for oven drying.
Best Varieties For Drying
Some plums work better than others for drying. European plums—especially varieties like Italian Prune or Stanley—are famous for producing top-quality prunes. These plums have high sugar content and firm flesh, so they hold their shape and develop a rich flavor during drying.
Japanese plums (such as Santa Rosa or Satsuma) can also be dried, but their higher water content means they take longer and may come out softer. If you use Japanese plums, choose the firmest, ripest fruit available.
How To Select Plums
For the best results, pick plums that are:
- Fully ripe (deep color, slightly soft to the touch)
- Unbruised and free from cracks or mold
- Medium to large size (they shrink during drying)
- Even in size (so they dry at the same rate)
Avoid overripe plums, which can turn mushy in the oven, and underripe ones, which will be too tart and tough.
Quantity Needed
Plums lose about 75–80% of their weight during drying. For example, 1 kilogram of fresh plums yields around 200–250 grams of dried fruit. Plan accordingly if you want a certain amount of dried plums for recipes or snacks.
Preparing Plums For Oven Drying
Proper preparation is crucial for even drying and great flavor. Let’s break down each step so you get perfect results.
Washing And Inspecting
Rinse plums under cool water to remove any dirt or residue. Pat them dry with a clean towel. Check each fruit for blemishes, mold, or insect damage, and discard any that don’t look good.
Pitting And Halving
Most home drying methods call for halving and pitting plums. This exposes more surface area, speeds up drying, and ensures even results. To pit:
- Place the plum on a cutting board.
- Slice along the seam, all the way around.
- Twist the two halves apart.
- Remove the pit with your fingers or a small spoon.
If you’re drying small European plums, you can sometimes leave them whole after pitting, but halving is usually best.
Optional: Treating For Color
Plums can turn brown during drying due to oxidation. If you want to keep their color brighter, you can dip them in a simple solution:
- Mix 1 tablespoon of lemon juice per cup of water.
- Soak the halved plums for 5 minutes.
- Drain and pat dry.
This step is optional, but it can help the plums look more appealing.
Scoring The Skins
Some people gently score the skin of each plum half with a knife. This tiny cut helps steam escape and speeds up drying, especially for plums with thick skins. It’s not required, but it can make a difference for larger or waxier varieties.
Equipment You’ll Need
Drying plums in the oven doesn’t require special gear, but the right tools make things easier.
- Oven: Any standard kitchen oven will do. A convection oven works best because the fan helps circulate air, but a regular oven is fine.
- Baking sheets: Use large, rimmed sheets to catch any juices.
- Wire racks: If you have them, place the plums on wire racks set over the baking sheets. This allows air to reach all sides for even drying.
- Parchment paper: Prevents sticking if you don’t have racks.
- Sharp knife: For halving and pitting.
- Cooling rack: For letting dried plums cool after baking.
If you’re drying large batches, you might need several sheets and racks.
Setting Up Your Oven For Drying
Ovens aren’t designed for dehydration, so a few adjustments help mimic the slow, gentle heat of a dehydrator.
- Temperature: Set your oven to its lowest setting, usually between 50–70°C (120–160°F). The ideal temperature for drying plums is about 60°C (140°F). If your oven doesn’t go that low, prop the door open slightly with a wooden spoon to let heat escape.
- Airflow: Good air movement is key. If you have a convection setting, use it. Otherwise, opening the door a crack helps moisture leave the oven.
- Placement: Arrange racks in the center of the oven for even heating. If you use more than one rack, rotate them every hour or so.
Step-by-step: How To Dry Plums In The Oven
Now it’s time for the main event. Follow these detailed steps for consistent, tasty dried plums.
- Prepare the plums: Wash, pit, and halve as described above.
- Arrange on trays: Place plums cut-side up in a single layer. If using wire racks, set them over baking sheets to catch drips.
- Preheat oven: Set to the lowest temperature (ideally 60°C/140°F).
- Start drying: Place trays in the oven. If not using convection, crack the oven door.
- Check and rotate: After 2–3 hours, rotate trays for even drying. If some pieces dry faster, remove them early.
- Flip plums (optional): After several hours, you can flip the plums to speed up drying and prevent sticking.
- Continue drying: Total drying time ranges from 8 to 18 hours, depending on the type, size, and juiciness of your plums.
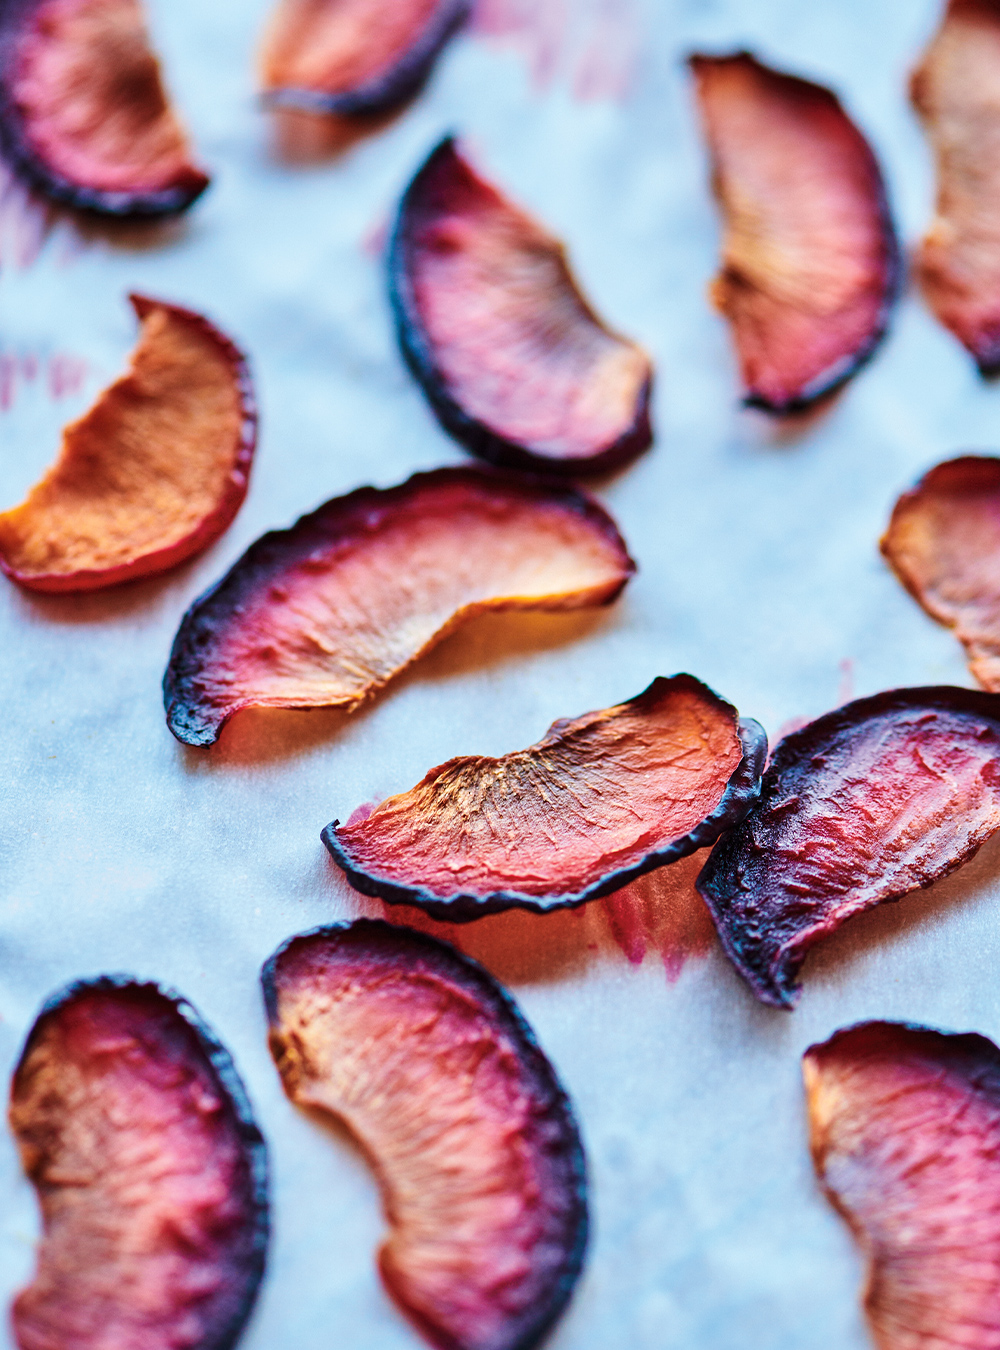
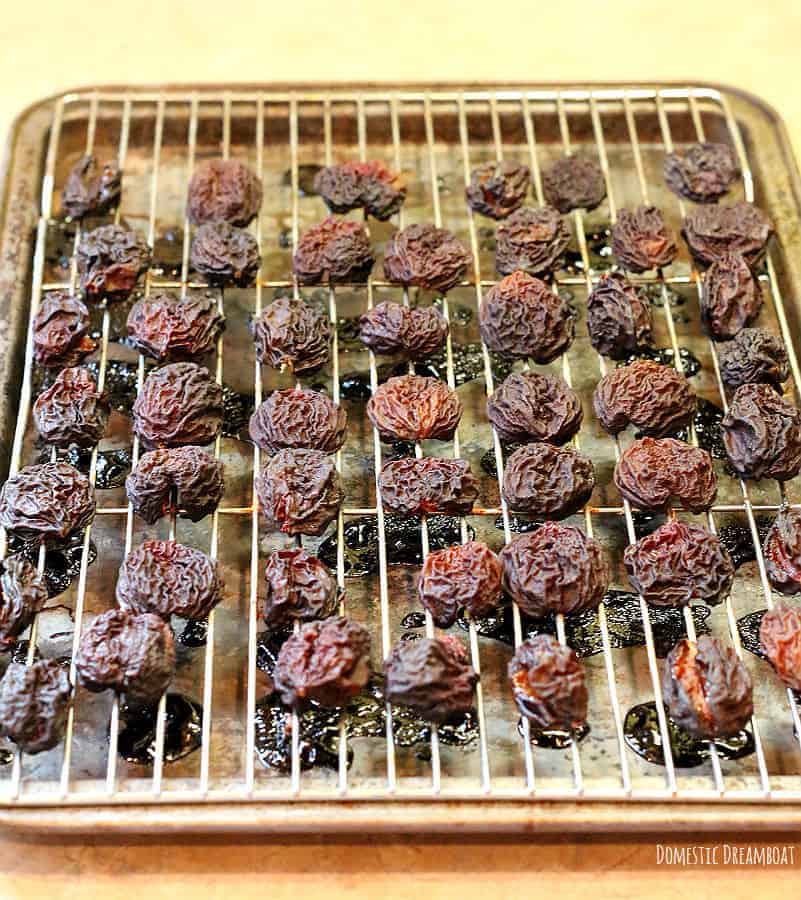
- Test for doneness: Plums are ready when they are leathery and pliable, but not sticky or wet. Tear one open—it should have no visible moisture but still feel soft.
- Cool and condition: Remove dried plums and let them cool completely. Conditioning helps equalize moisture (see below).
Drying time is affected by many factors. Larger or juicier plums take longer, while smaller ones dry faster. Don’t rush the process by increasing the temperature—this can cook or harden the fruit rather than drying it.
Credit: www.ricardocuisine.com
Typical Drying Times For Plums
Here’s a comparison of average drying times for different types of plums in the oven:
| Type of Plum | Preparation | Oven Temp (°C/°F) | Drying Time |
|---|---|---|---|
| European (Italian Prune) | Halved & pitted | 60°C / 140°F | 8–12 hours |
| Japanese (Santa Rosa) | Halved & pitted | 60°C / 140°F | 12–18 hours |
| Small plums | Whole & pitted | 60°C / 140°F | 14–20 hours |
Note: Always check for doneness rather than relying only on the clock.
Conditioning Dried Plums
Even after oven drying, your plums may have slightly different moisture levels. Conditioning is an important step that improves shelf life and prevents spoilage.
How To Condition
- Place cooled dried plums in a clean, airtight glass jar or food-grade plastic container.
- Fill only two-thirds full—this allows room to shake the fruit.
- Store at room temperature for 7–10 days. Shake the jar daily to mix the plums and distribute moisture.
- Watch for signs of condensation. If you see moisture inside the jar, return the plums to the oven for 1–2 more hours, then cool and repeat conditioning.
Conditioning helps all pieces reach the same dryness level. It’s a step many beginners skip, but it’s crucial for safe, long-term storage.
Storing Homemade Dried Plums
Proper storage keeps your dried plums safe and tasty for months—or even a year.
Storage Options
- Airtight containers: Use glass jars, vacuum-sealed bags, or food-grade plastic tubs.
- Cool, dark place: Store in a pantry, cupboard, or cellar. Avoid heat and direct sunlight.
- Refrigeration: For extra-long storage (over 6 months), keep dried plums in the fridge or freezer.
Stored correctly, dried plums stay good for up to 12 months at room temperature, and even longer if refrigerated or frozen.
Preventing Spoilage
- Check stored plums every few weeks for mold or odd smells.
- If you spot moisture or stickiness, re-dry the batch in the oven.
- Always use clean, dry hands or utensils when handling stored fruit.
Common Mistakes When Drying Plums
Many first-timers make similar errors when drying fruit at home. Here are some to avoid:
- Using unripe or overripe plums: This leads to tough or mushy results.
- Skipping the conditioning step: Increases risk of spoilage.
- Overcrowding the trays: Blocks airflow and causes uneven drying.
- Setting the oven too high: Cooks the fruit instead of drying it.
- Not checking for doneness: Each oven and batch is different; always test a few pieces.
- Neglecting storage rules: Moisture is the enemy of dried fruit—keep it sealed and dry.
Using Dried Plums
Homemade dried plums are incredibly versatile. Here are just a few ways to enjoy them:
- Snacks: Eat them as-is for a quick, healthy bite.
- Baking: Add chopped dried plums to muffins, breads, or cookies.
- Cooking: Toss into stews, tagines, or grain dishes for natural sweetness.
- Salads: Slice thinly and mix into green or grain salads.
- Compotes: Simmer with a bit of water and sugar for a simple dessert topping.
Dried plums can also be rehydrated in warm water, juice, or tea if you want a softer texture for certain recipes.
Nutritional Benefits Of Dried Plums
Dried plums are more than just a sweet treat—they’re a nutritional powerhouse. Here’s how they compare to other common dried fruits:
| Fruit (30g) | Calories | Fiber (g) | Potassium (mg) | Natural Sugars (g) |
|---|---|---|---|---|
| Dried Plums | 70 | 2.1 | 220 | 11 |
| Raisins | 85 | 1.0 | 215 | 18 |
| Dried Apricots | 67 | 2.0 | 325 | 8 |
| Dried Figs | 80 | 2.9 | 210 | 13 |
Dried plums are especially high in fiber and potassium, and they’re famous for helping with digestion. They also contain antioxidants, vitamin K, and small amounts of iron and magnesium. Unlike many commercial snacks, homemade dried plums have no added sugar or preservatives.

Credit: anoregoncottage.com
Two Insights Beginners Often Miss
- Drying time is not always predictable: Many think there’s a “perfect” number of hours for drying plums, but the process depends heavily on your oven, the fruit’s size, ripeness, and juiciness. Always rely on texture, not just time.
- Conditioning is a must for safe storage: Even slightly uneven moisture can lead to mold in storage. Conditioning may seem extra, but it’s the difference between plums that last and those that spoil early.
Troubleshooting: When Things Go Wrong
Even careful home cooks sometimes run into problems. Here’s how to solve the most common issues.
Plums Turn Out Too Hard
This usually means they were dried too long or at too high a temperature. Try soaking the hard plums in warm water for 30 minutes before eating or using in recipes.
Plums Are Still Sticky Or Wet
If your dried plums feel sticky or have visible moisture, return them to the oven at 60°C (140°F) for another hour or two. Let them cool and check again.
Mold Appears In Storage
Unfortunately, mold means the batch is not safe to eat. Always check for mold before eating stored dried plums. To avoid this, make sure plums are fully dried and conditioned before storing, and keep them in airtight containers away from heat and moisture.
Credit: domesticdreamboat.com
Drying Plums Vs. Buying Store-bought
You might wonder if it’s worth the effort to dry your own plums. Here’s a quick comparison:
| Homemade Dried Plums | Store-Bought Dried Plums |
|---|---|
| Control over ingredients No preservatives Can adjust texture Cost-effective in season | Convenient Often contain added sugar or sulfites Consistent texture Higher price per gram |
| Requires time and patience Flavor varies by batch | Ready to eat Stable shelf life Uniform taste |
If you want the healthiest, most natural option—and enjoy the process—homemade is best. For convenience, store-bought is fine, but always check the ingredient list.
How To Use An Oven Thermometer For Better Results
Most ovens are not perfectly accurate, especially at low temperatures. Using an oven thermometer helps ensure you’re drying at the right heat. Place the thermometer on the center rack where your plums will sit. Adjust the oven setting as needed until the thermometer reads close to 60°C (140°F). This small step can make a big difference in drying quality.
How To Make Flavored Dried Plums
For a twist on classic dried plums, try adding flavors before drying. Here are some ideas:
- Cinnamon sugar: Toss halved plums in a mix of cinnamon and a little sugar before baking.
- Citrus zest: Sprinkle grated orange or lemon zest over the plums for a bright, tangy note.
- Spiced: Mix plums with a pinch of ginger, nutmeg, or cardamom before drying.
These variations add complexity to your homemade snacks and work well in baked goods.
Eco-friendly Tips For Drying Plums
Drying fruit takes energy, but you can minimize waste:
- Dry large batches at once to make the most of each oven cycle.
- Save plum pits for crafts or compost.
- Use leftover plum juice (from pitting) in smoothies or drinks.
If you have access to solar power or a sun oven, you can further reduce the environmental impact.
Safety Tips For Oven Drying
- Never leave the oven unattended for long periods.
- Keep children and pets away from a hot, open oven.
- If drying overnight, check your oven manual to be sure it’s safe to operate for many hours.
Where To Learn More
Drying fruit is an ancient practice with a lot to explore. For more detailed science and advanced methods, the National Center for Home Food Preservation is a trusted resource. See their guide at NCHFP.
Frequently Asked Questions
How Do I Know When My Dried Plums Are Done?
Dried plums should feel leathery and flexible, not wet or sticky. Tear one in half; if the inside is dry but still soft, they’re ready. If you see any moisture, keep drying.
Can I Dry Plums Without Pitting Them?
It’s possible, especially with small European plums, but pitting helps with even drying and makes the finished product easier to eat. Unpitted plums may take longer and can be harder to check for doneness.
What’s The Best Way To Rehydrate Dried Plums?
Soak dried plums in warm water, juice, or tea for 20–30 minutes. This makes them plumper and softer, perfect for baking or making compote.
Are Dried Plums And Prunes The Same Thing?
Yes—prunes are simply dried plums, usually made from specific varieties like Italian prunes. All prunes are dried plums, but not all dried plums are labeled as prunes.
How Long Do Homemade Dried Plums Last?
When properly dried, conditioned, and stored in an airtight container in a cool, dark place, homemade dried plums can last up to 12 months. For longer storage, keep them in the fridge or freezer.
Drying plums in the oven is a simple, rewarding process that lets you enjoy this healthy snack any time of year. With a bit of planning and patience, you’ll have a supply of sweet, chewy dried plums—made just the way you like them.