
If you’ve ever admired a kitchen with beautiful plates displayed above the counter, you know how much character and color this simple touch adds. Hanging plates on your backsplash isn’t just about decoration—it’s a clever way to show off unique finds, family heirlooms, or a favorite pattern without taking up valuable shelf space. But the process can seem tricky, especially if you want to avoid damaging your tiles. Good news: with the right steps, tools, and a bit of planning, you can turn your backsplash into an eye-catching art wall that’s both safe and secure.
Whether you’re looking to add a single statement plate or create a full gallery, this guide will help you hang plates on your backsplash confidently. You’ll learn about the best tools, how to choose the right hanging method for your wall type, and how to avoid common mistakes.
There’s also advice on designing your arrangement, tips for renters, and clear answers to the most common questions. By the end, you’ll have everything you need to get started and enjoy your plates on display.
Why Hang Plates On A Backsplash?
Hanging plates on your backsplash is more than just a decorative idea. Here’s why it’s become such a popular choice:
- Maximize Space: Backsplashes are often underused. Hanging plates lets you decorate without cluttering countertops or shelves.
- Easy to Change: Unlike tile or paint, you can swap out plates for a new look any time.
- Personalize Your Kitchen: Plates tell a story—maybe they’re travel souvenirs, family pieces, or just a pattern you love.
- Affordable Art: Plates can be less expensive than framed artwork and come in endless designs.
- Hide Flaws: They’re a clever way to cover small chips, cracks, or stains on your backsplash.
Many people worry that hanging plates will damage their tiles or leave ugly marks. With modern hanging methods, you can often avoid any permanent harm, even in rental homes.
Choosing Plates For Your Backsplash Display
Not every plate is right for hanging above your counter. Here’s how to pick the best ones:
Plate Size And Weight
- Small plates (6–8 inches) are easier to hang and less likely to fall.
- Medium plates (9–11 inches) make a statement without overpowering the space.
- Large plates (12+ inches) work best as a single focal point or in big kitchens.
Heavier plates need stronger hangers. Always check the weight before choosing a hanging method.
Material Matters
- Ceramic and porcelain plates are common, but can be heavy.
- Melamine is lightweight but often less decorative.
- Glass plates offer a modern look but are fragile.
Avoid plates with cracks—they may break during hanging.
Plate Style
- Mix and match for an eclectic look.
- Use matching sets for a clean, organized style.
- Bold colors or patterns can brighten a neutral kitchen.
- Themed plates (like fruit, floral, or vintage) add personality.
Number Of Plates
You can hang a single plate, a pair, or create a whole wall. Odd numbers (three, five, seven) often look more natural in groupings.
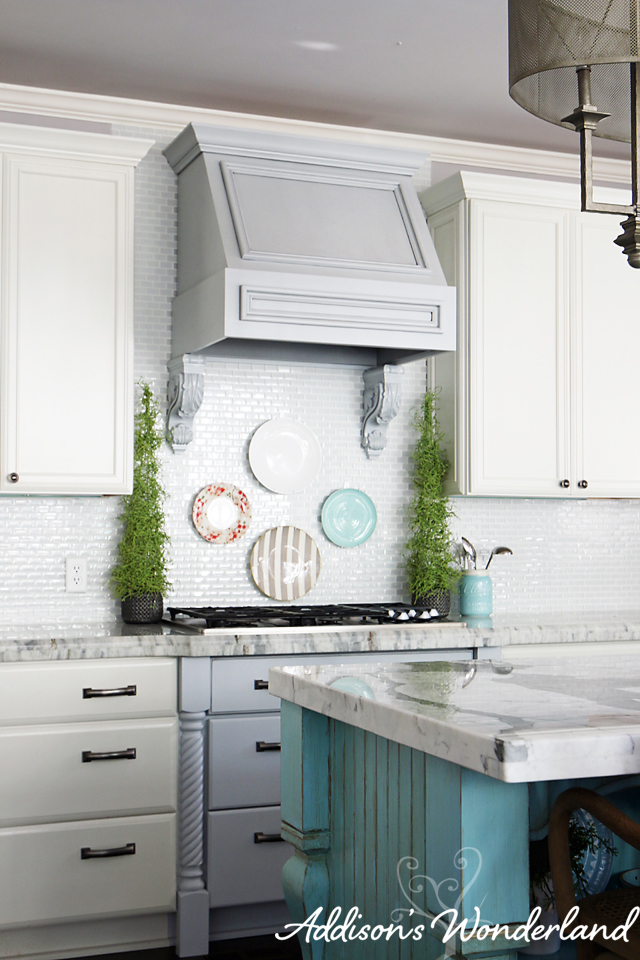
Credit: addisonswonderland.com
Planning Your Plate Arrangement
Good planning is key to a display that looks intentional, not cluttered. Here’s how to design your layout:
Map Your Space
Measure the area above your counter where you want to hang plates. Consider:
- Height between countertop and cabinets
- Width of the backsplash section
- Distance from stove or sink (avoid steam and splashes)
Try Layouts On Paper
Before you pick up a hammer, lay your plates out on a table or the floor. Rearrange until you find a grouping you like. Take a photo for reference.
Use Paper Templates
Cut out paper circles the size of your plates. Tape them to the wall using painter’s tape. This lets you:
- Try different arrangements without marking the wall
- Check spacing and symmetry
- Adjust for outlets or switches
Popular Plate Arrangements
- Straight line: Plates in a row, perfect for narrow spaces.
- Grid: Plates in a square or rectangle—neat and modern.
- Cluster: Plates grouped closely, overlapping or not, for a casual look.
- Diagonal or wave: Adds a sense of movement.
Spacing Tips
- Leave 1–3 inches between plates for balance.
- For very small plates, closer is better; for large plates, give them room.
- Make sure doors or cabinets can still open fully.
Choosing The Right Hanging Method
Your backsplash material and the plate’s weight decide the best hanging method. Here’s a look at the most popular options.
Adhesive Plate Hangers
Adhesive hangers stick to the back of your plate and have a hook for hanging. They’re great for:
- Light to medium-weight plates
- Smooth, flat backs
- Tile, glass, or metal backsplashes (no drilling needed)
Pros:
- No holes in the wall or tile
- Easy to remove (usually)
- Invisible from the front
Cons:
- Not for very heavy or textured plates
- Adhesive may fail in humid kitchens
Wire Plate Hangers
Wire hangers stretch across the plate’s back and hook over the top and bottom. Use these when:
- Hanging heavier plates
- Plate backs are uneven or textured
- You don’t mind a small hook or nail in the wall
Pros:
- Strong and secure
- Reusable
Cons:
- Visible from the side
- Usually need a wall hook or nail
Plate Display Racks
Display racks sit on the counter and lean against the backsplash. Good for:
- Renters who can’t make holes
- Plates you want to move often
Pros:
- No wall damage
- Easy to rearrange
Cons:
- Takes up counter space
- Not as secure
Command Strips And Hooks
Removable adhesive strips (like Command) are popular for temporary or rental-friendly displays. Choose hooks rated for your plate’s weight.
Pros:
- No wall damage
- Easy removal
Cons:
- Not for very heavy plates
- May lose grip in steamy kitchens
Drilling Into Tile
If you want a permanent display, you can drill into the tile and use anchors and screws.
Pros:
- Strongest option
- Holds any plate
Cons:
- Risk of cracking tile
- Permanent holes
If you go this route, use a diamond-tipped drill bit and drill slowly. Always wear eye protection.
Comparison Of Hanging Methods
Here’s a quick comparison to help you choose:
| Hanging Method | Max Plate Weight | Wall Damage | Best For |
|---|---|---|---|
| Adhesive Hanger | 2 lbs | None | Light plates, rentals |
| Wire Hanger + Nail | 5 lbs | Tiny hole | Heavy plates, permanent |
| Command Hooks | 3 lbs | None | Temporary, rentals |
| Display Rack | Any | None | No wall impact |
| Drilled Screw | 10+ lbs | Permanent hole | Very heavy plates |
Tools And Supplies You’ll Need
Before you start, gather these items. The right tools make the job neater and safer.
- Plates to hang
- Chosen hangers (adhesive, wire, hooks, or racks)
- Measuring tape for spacing
- Level to keep plates straight
- Pencil (or painter’s tape) for marking
- Rubbing alcohol for cleaning plate backs and wall
- Screwdriver or drill (if using screws)
- Diamond-tipped drill bit (for tile)
- Anchor screws (for heavy plates on tile)
- Painter’s tape (for marking wall and protecting tiles)
- Step stool (for higher spots)
- Eye protection (if drilling)
If you’re using adhesives, double-check the weight limits on the packaging.
Step-by-step Guide: Hanging Plates On A Backsplash
Let’s walk through the process for each main method. Choose the steps that fit your chosen hanger and wall type.
1. Clean And Prepare
- Wash the plates and dry thoroughly. Dust or grease can weaken adhesives.
- Clean the wall area with rubbing alcohol, especially if using adhesives.
2. Plan The Layout
- Use your paper templates or arrange plates on the counter to finalize the design.
- Mark the plate centers on the wall lightly with a pencil or use removable painter’s tape.
3. Attach Hangers To Plates
For Adhesive Hangers
- Moisten the adhesive if needed (some brands require water).
- Press the hanger onto the plate back, centered at the top.
- Let it cure for the time listed on the package (usually 12–24 hours).
For Wire Hangers
- Stretch the hanger over the plate so the hooks grip the top and bottom.
- Make sure it fits snugly and doesn’t slip.
4. Prepare The Wall
For Adhesive Hooks Or Command Strips
- Wipe the backsplash clean.
- Press the adhesive hook firmly onto the marked spot.
- Wait as directed before hanging plates.
For Nails Or Screws
- Place painter’s tape on the tile where you’ll drill (reduces slipping).
- Mark the spot.
- Drill slowly with a diamond-tipped bit.
- Insert a wall anchor if needed, then the screw or hook.
5. Hang The Plates
- Carefully hang each plate.
- Use a level to check that the plate is straight.
- Adjust as needed.
6. Final Adjustments
- Step back and check your arrangement from different angles.
- Make small shifts if plates look uneven or crowded.
Example: Hanging Plates With Adhesive Hangers
Suppose you want to hang three 8-inch ceramic plates above your stove on a subway tile backsplash. You choose adhesive hangers rated for 2 lbs each.
- Clean the plate backs and tiles with rubbing alcohol.
- Cut three paper circles and tape them on the wall to test the layout.
- Mark the center of each plate on the tile.
- Wet the adhesive disks, press onto plate backs, and let dry overnight.
- Attach adhesive hooks to the marked wall spots.
- Hang plates once both adhesives are fully cured.
- Adjust for level, then remove paper templates.
The whole process takes about a day (most of that is waiting for adhesives to dry), and the result is a clean, damage-free plate display.
Special Tips For Renters
Renting doesn’t mean you have to skip creative displays. Here’s how to make your backsplash beautiful without risking your deposit:
- Use Command hooks or similar removable adhesives. They hold well and come off cleanly.
- Try countertop display racks that lean against the backsplash.
- Avoid any drilling or permanent adhesives.
- If you use adhesive plate hangers, test them first on a hidden spot to ensure easy removal.
If you’re worried about sticky residue, a small amount of cooking oil or a dedicated adhesive remover can help clean up when it’s time to move.
Mistakes To Avoid
Here are common errors people make when hanging plates on a backsplash—and how to sidestep them:
- Ignoring weight limits: Always check the maximum weight your hanger or hook can hold. Overloading leads to falls and broken plates.
- Skipping wall prep: Dust, grease, or water on tiles can stop adhesives from sticking. Clean the area first.
- No layout planning: Hanging plates without testing the layout often leads to crooked or crowded displays. Use paper templates to preview.
- Drilling too fast: If you must drill into tile, go slowly and use the right bit. Rushing can crack tiles.
- Forgetting about heat and moisture: Plates hung right above a stove or next to a kettle may loosen over time. Choose the right adhesives or avoid those spots.
- Using the wrong hangers: Not all hangers work for all plates. Check that your plate’s back is flat enough for adhesives or that wires fit snugly.
Creative Plate Display Ideas
Hanging plates doesn’t have to be traditional. Try these creative twists:
- Mix round and square plates for contrast.
- Combine plates with framed art or small shelves for a gallery wall effect.
- Use vintage china for a cottage or farmhouse style.
- Hang tiny dessert plates in a zigzag or wave pattern.
- Create a color gradient from light to dark plates.
- Use holiday-themed plates and swap them by season.
Don’t limit yourself to the kitchen—this method works for laundry rooms, breakfast nooks, and more.
Plate Hanging By Backsplash Type
Different backsplash materials need different care. Here’s a breakdown:
| Backsplash Material | Best Hanging Method | Special Tips |
|---|---|---|
| Ceramic Tile | Adhesive, Command, Drill | Use painter’s tape before drilling |
| Glass Tile | Adhesive, Command | Avoid drilling, glass cracks easily |
| Metal | Adhesive, Magnets | Try strong magnets if steel, adhesives if aluminum |
| Stone/Marble | Adhesive, Drill | Use masonry bit, avoid heavy plates |
| Peel-and-Stick | Adhesive only | Test adhesive on a hidden spot first |
| Painted Drywall | Wire, Nail, Command | Standard wall anchors if heavy |
Cleaning And Maintaining Your Plate Display
Once your plates are up, a little care keeps them looking great:
- Dust regularly with a soft cloth or duster.
- If a plate is near the stove, wipe gently with a damp cloth to remove grease.
- Avoid harsh cleaners or too much water, especially with adhesive hangers.
- Check hangers every few months to ensure they remain secure.
- If you want to change plates, remove them carefully and clean any adhesive residue promptly.
Two Common Beginner Surprises
Even people who follow instructions closely can miss these less obvious points:
- Tiles aren’t always flat: Even a small bevel or grout line can affect how well adhesives stick. Always press adhesive hangers down firmly, and avoid placing them directly over grout.
- Temperature changes matter: Kitchens get hot and humid, especially near stoves or kettles. Some adhesives can soften and fail over time. If your kitchen gets steamy, check hangers seasonally or use wire hangers for extra safety.
Advanced Plate Hanging: Layering And Overlapping
If you want a bolder look, try layering plates or letting them overlap slightly. This technique is common in design magazines and gives a more curated, artistic effect.
- Start with the largest plate as your anchor.
- Overlap smaller plates partly in front, making sure each is securely attached.
- If plates touch, add small felt pads between them to prevent scratching.
- Use extra-strong adhesive or wire for plates that don’t sit flat.
Layering is best for decorative plates not meant to be used, as it makes removal harder.
When To Call A Professional
Most plate hanging projects are DIY-friendly. But you may want expert help if:
- Hanging very heavy or valuable plates
- Your backsplash is rare stone or high-gloss glass
- You need a complex or perfectly aligned grid
- You’re not comfortable drilling into tile
A handyman or decorator can ensure your display is safe and flawless.
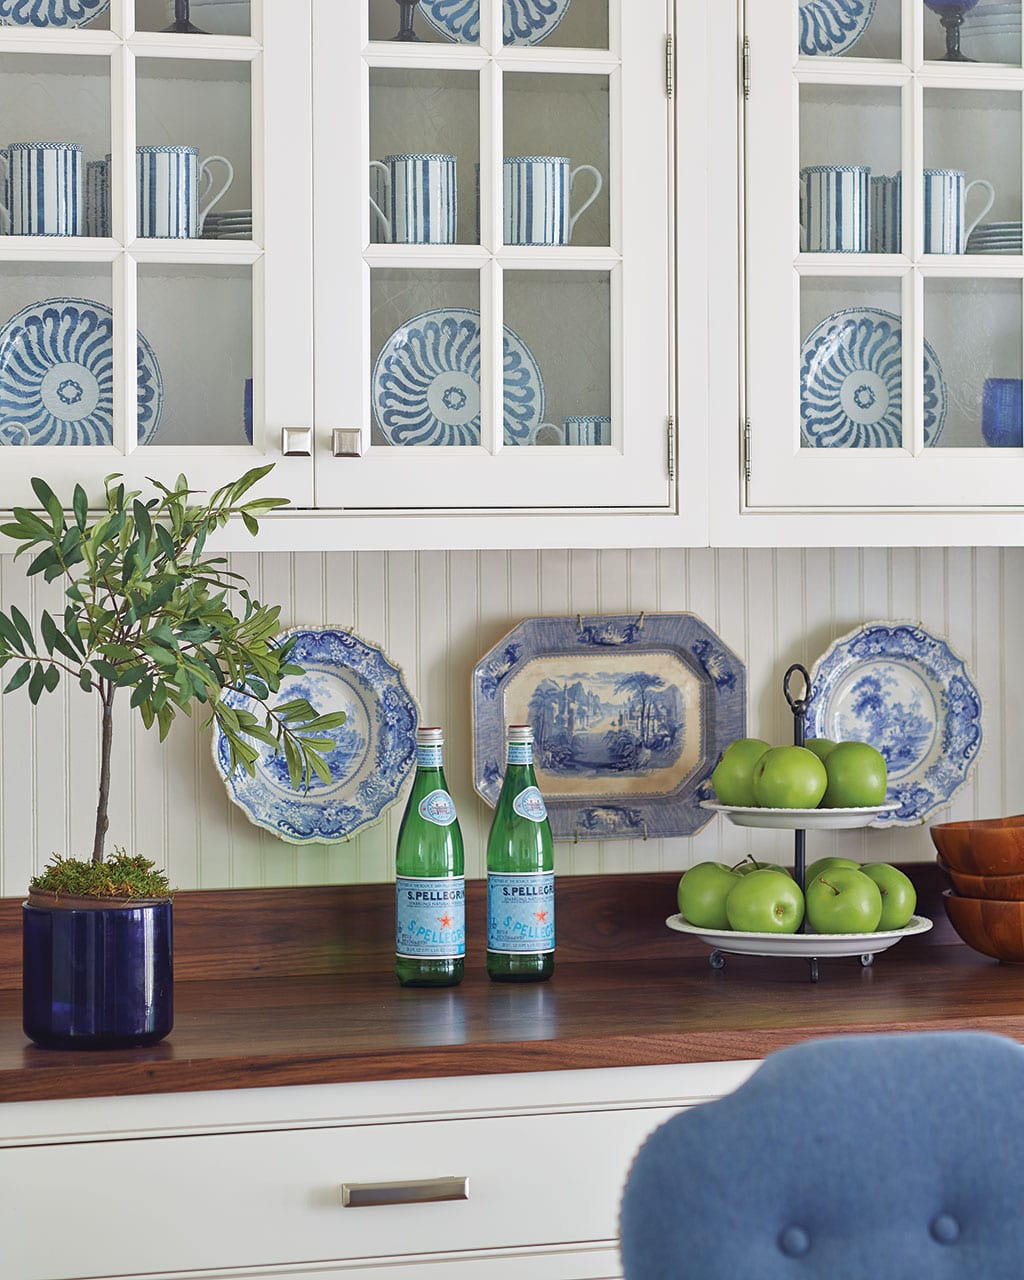
Credit: www.ballarddesigns.com
Recommended Resources
If you want to see detailed hanging tutorials or explore professional design ideas, visit House Beautiful for inspiration and step-by-step advice.
Frequently Asked Questions
How Do I Hang Plates On A Backsplash Without Drilling?
You can use adhesive plate hangers or removable Command hooks. These attach to the plate and/or tile with strong adhesive, hold up to several pounds, and can be removed without damaging your backsplash. Always clean the plate and wall first, and don’t overload the hanger.
Will Adhesive Hangers Damage My Backsplash?
Most modern adhesive hangers are designed to come off cleanly if used as directed. However, some adhesives can leave residue or pull off paint if removed too quickly. For tile, test a small hidden spot first. For delicate finishes or peel-and-stick tiles, be extra careful.
How Can I Make Sure My Plates Are Level?
Use a small bubble level or a smartphone level app when hanging each plate. If you’re using wire hangers, adjust the wire length slightly to fix any tilt. For grouped plates, measure the distance between each and step back frequently to check the overall look.
What If My Backsplash Gets Very Hot Or Steamy?
Adhesive hangers can lose strength in high heat or humidity. Avoid hanging plates right above a range or near a kettle. For those areas, use mechanical hangers (like screws and anchors) or choose spots farther from heat sources.
Can I Hang Plates On Glass Or Mirrored Backsplashes?
Yes, but you should avoid drilling into glass or mirrors, as they are likely to crack. Use adhesive plate hangers and removable hooks rated for smooth, non-porous surfaces. Always test on a small area first and be sure not to exceed weight limits.
Hanging plates on your backsplash is a fantastic way to express your style and make your kitchen truly yours. With careful planning, the right tools, and these expert tips, you can safely display your favorite plates—and enjoy their beauty every day.
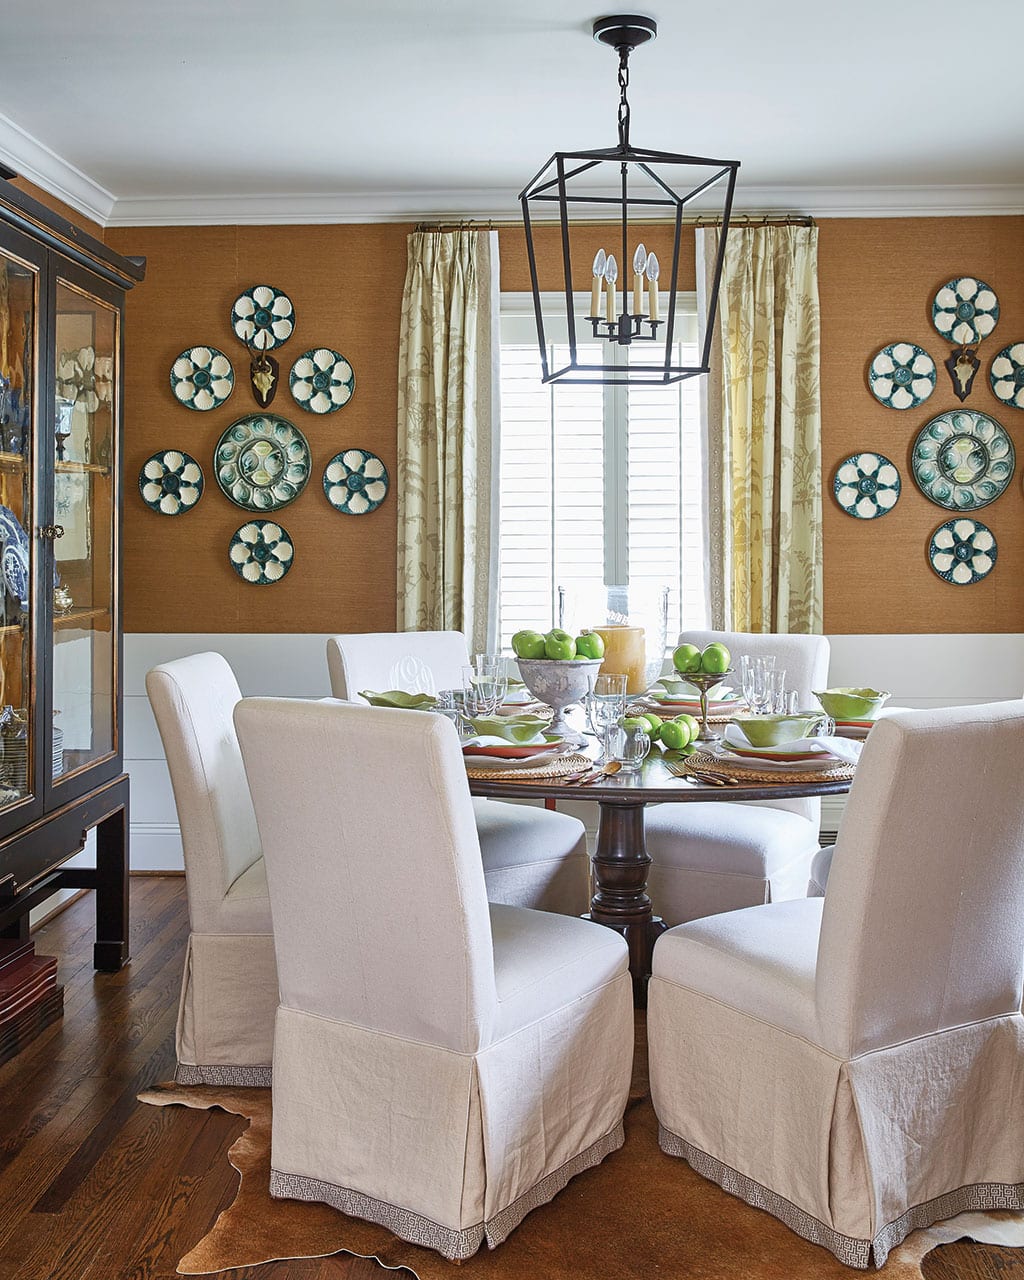
Credit: www.ballarddesigns.com