
Making your own covers for kitchen appliances is a smart way to protect your investments, keep your kitchen clean, and add a personal touch to your space. Many people want their kitchens to look tidy and organized, but clutter from small appliances can make this difficult.
Dust, grease, and sunlight can also damage appliances over time. Ready-made covers are easy to buy, but they often don’t fit well, can be expensive, and may not match your style. Creating custom covers at home gives you full control over the look, fit, and cost.
Whether you have a stand mixer, toaster, blender, or air fryer, you can design a cover that’s both functional and attractive.
This guide will walk you through everything you need to know about making kitchen appliance covers. You will learn about choosing materials, measuring appliances, sewing techniques, non-sewing options, and how to create covers for different shapes. You’ll also find tips on personalizing your covers and caring for them so they last for years.
Even if you’ve never sewn before, you’ll discover easy methods and avoid common mistakes. Let’s get started and give your kitchen a fresh, coordinated look.
Why Make Your Own Kitchen Appliance Covers?
Custom appliance covers offer several benefits that you may not have thought about before. First, they protect your machines from dust, splatters, and scratches, which can extend the lifespan of your appliances. This is especially useful for items you don’t use daily, like bread makers or slow cookers. Second, making your own covers means they will fit perfectly. Store-bought covers often hang loosely or are too tight, making them look untidy. With a tailored cover, every corner is smooth.
Another advantage is style and creativity. You can choose fabrics that match your kitchen’s colors or even use leftover material from curtains or tablecloths for a coordinated look. This is a chance to express your personality—fun prints, bold colors, or classic neutrals, it’s up to you. Homemade covers are also cost-effective. High-quality covers in stores can cost $20 or more, but making them yourself often costs less, especially if you use fabric scraps.
Many people don’t realize that appliance covers can help with noise reduction. Thick fabrics can make a difference for loud appliances, softening the sound when they’re moved or put down. Finally, covers keep your kitchen looking less cluttered. Instead of seeing a mishmash of gadgets, you see a neat row of coordinated covers.
Choosing The Right Materials
The material you choose is critical for the function and look of your kitchen appliance covers. Here’s what matters most:
- Durability: Kitchen covers need to stand up to frequent use. Choose sturdy fabrics like cotton canvas, quilted cotton, or denim. These fabrics resist wear, are machine washable, and won’t shrink easily.
- Washability: Kitchens are messy places. Spills are common, so pick fabrics that can be washed often without fading or losing shape.
- Thickness: Thicker fabrics give better protection against dust and sunlight. If you want a padded look, choose quilted fabric or add a layer of batting.
- Color and Pattern: Light colors show dirt easily. Patterns can hide stains, and dark colors often look tidier.
- Water Resistance: For appliances near the sink, consider fabrics with a water-resistant finish. Oilcloth or laminated cotton is a smart choice here.
- Budget: Fabric prices vary. Cotton is affordable, while specialty fabrics can be costly. Using leftover fabric saves money and reduces waste.
Comparing Popular Fabrics For Appliance Covers
Here’s a quick comparison to help you choose the right material:
| Fabric Type | Protection | Easy to Wash | Cost | Style Options |
|---|---|---|---|---|
| Cotton Canvas | High | Yes | Low | Many |
| Quilted Cotton | Very High | Yes | Medium | Many |
| Denim | High | Yes | Low | Few |
| Laminated Cotton | Medium | Wipe Clean | Medium | Some |
| Oilcloth | Medium | Wipe Clean | Low | Limited |
Non-obvious Insights
- Many beginners forget to pre-wash fabric. This step prevents shrinking and changes in shape later.
- Double-check if your fabric is colorfast—some colors bleed when washed and can stain other items.
Measuring Your Kitchen Appliances
Accurate measurements are the foundation of a good cover. A common mistake is to guess or use the box size, but this rarely matches the real appliance.
Steps For Measuring
- Width: Measure from one side to the other, across the front.
- Depth: Measure from the front edge to the back.
- Height: Measure from the bottom to the highest point, including knobs or handles.
- Shape details: Note if the top is curved, if there are side handles, or if the base is wider than the top.
Write down each number, adding 1–2 centimeters for seam allowances and a little extra if you prefer a looser fit. For curved or irregular shapes, make a quick paper template by tracing around the appliance on newspaper.
Measuring Tips
- Always measure with any attachments (like mixing bowls or lids) in place if you want them covered.
- For very large or small appliances, double-check your measurements before cutting fabric.
Basic Sewing Techniques For Appliance Covers
Sewing your own appliance covers is not as hard as it seems. Even with basic skills, you can make neat, strong covers. Here’s a simple step-by-step process:
What You’ll Need
- Fabric (pre-washed and ironed)
- Thread (matching or contrasting)
- Sewing machine (or needle if sewing by hand)
- Pins or fabric clips
- Measuring tape
- Scissors
- Iron
- Optional: Batting for padding, bias tape for edges, Velcro or buttons for closures
Step-by-step Instructions
- Cut your fabric: Use your measurements to cut main panels for the front, back, sides, and top. Add seam allowances.
- Join panels: Pin the side panels to the main front piece, right sides together. Sew along the edge. Repeat for the back and top pieces.
- Sew all seams: After joining all sides, sew the top piece to the sides, forming a box or dome shape.
- Finish edges: Fold the bottom edge inside and sew, or use bias tape for a neat finish.
- Try on the cover: Slip the cover over the appliance. Check fit and make adjustments if needed.
Common Mistakes And How To Avoid Them
- Skipping seam allowance: Always add extra fabric for seams, or your cover will be too small.
- Not pressing seams: Ironing after each seam makes the cover look professional.
- Forgetting to reinforce corners: Backstitch at corners to make them strong.
Credit: ncfamily.org
No-sew Methods For Making Appliance Covers
If you don’t have a sewing machine or don’t want to sew, you still have options. Here are two methods that work well:
Using Fabric Glue
Fabric glue creates strong seams without sewing. Choose a glue labeled washable. Cut your fabric pieces as you would for sewing. Apply glue to the edges, press together, and let dry completely before using.
Using Fusible Tape
Fusible tape melts and bonds fabric when ironed. Place tape between two fabric pieces, press with a hot iron, and let cool. This method works best for straight seams.
Non-obvious Insights
- For covers that get heavy use, sew at least the main seams. Glue and tape are best for light covers or temporary use.
- Avoid hot appliances with no-sew covers, as glue and tape can loosen with heat.
Making Covers For Common Kitchen Appliances
Each appliance has a different shape, so the cover design will change. Here’s how to approach the most popular items.
Stand Mixer Covers
Stand mixers are tall with a bowl at the bottom. A dome or box-shaped cover works best. Add extra height for the bowl. Many people add a small pocket for the attachments.
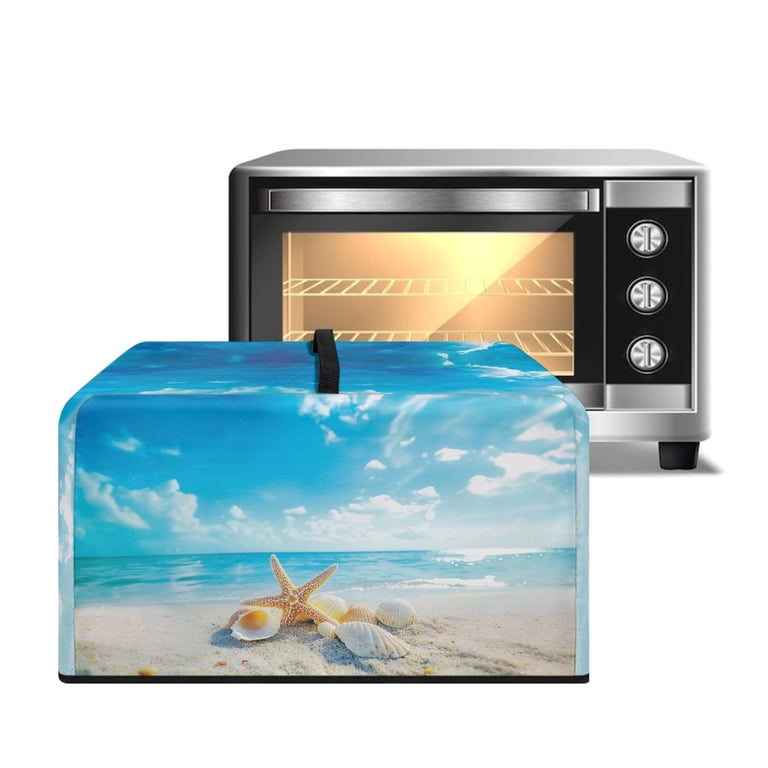
Toaster Covers
Toasters are usually rectangular. A simple box cover with a flap at the back for the cord is ideal. Choose a fabric that resists heat and crumbs.
Blender Covers
Blenders are tall and narrow. Use a tube or cylinder shape, or a box with a rounded top. Add extra width for handles.
Air Fryer Covers
Air fryers are large and round. Make a dome-shaped cover, measuring the widest part and the height. Use thick fabric to protect against oil stains.
Coffee Maker Covers
Coffee makers come in many shapes. Measure carefully, making sure to leave space for the water tank or carafe. A box shape with a curved top often fits best.
Slow Cooker And Rice Cooker Covers
These are round and low. A cylinder shape works well. Add a little extra space for handles.
Food Processor Covers
Many food processors are wide with attachments sticking out. Make a box cover with gussets (extra fabric panels) for the attachments or a drawstring at the bottom for a snug fit.
Microwave Covers
Microwaves are large and rectangular. If you want to cover yours, use heavy fabric and add a lining to block sunlight. Remember to remove the cover before using the microwave.
Adding Features To Your Appliance Covers
You can add useful features to your homemade covers for better function and style.
Pockets
Pockets hold small accessories, like mixer paddles or measuring spoons. Sew a flat pocket on the outside or inside of the cover.
Handles
Handles make covers easy to remove. Use a fabric loop sewn into the top or sides.
Closures
Velcro, buttons, or ties can help covers stay on, especially for appliances with unusual shapes.
Quilting Or Padding
Add batting between two layers of fabric for extra protection. Quilt in a simple pattern to keep everything in place.
Decorative Elements
Add embroidery, fabric paint, or patches for a personal touch.
Step-by-step Example: Making A Stand Mixer Cover
Let’s go through a full example so you can see each step in detail.
Materials
- 1 meter (or yard) of cotton canvas or quilted fabric
- Matching thread
- Measuring tape
- Scissors
- Pins
- Sewing machine
- Bias tape (optional)
Measuring
- Measure the width, depth, and height of your mixer with the bowl attached.
- Write down each number and add 2 cm for seams.
Cutting
- Cut one piece for the front and back, each the width and height.
- Cut one long piece for the sides and top. The length should be (2 × depth) + width of the top, and the width should be the height.
Assembly
- Pin the long strip to the front piece, right sides together. Sew around the edge.
- Pin and sew the back piece to the other side of the strip.
- Finish the bottom edge by folding under and sewing, or by attaching bias tape.
Final Steps
- Turn the cover right side out.
- Try it on your mixer. Adjust if needed.
- Add optional pockets or handles.
Personalizing Your Appliance Covers
Making covers at home means you can customize them to match your style. Here are a few ideas:
- Match your kitchen: Use the same fabric as your curtains, seat cushions, or tablecloths.
- Seasonal covers: Make different covers for holidays or seasons—bright colors for summer, cozy patterns for winter.
- Monograms or names: Embroider your initials or the appliance name to avoid mix-ups.
- Contrast lining: Line the inside with a different fabric for a fun surprise each time you use the appliance.
Cleaning And Caring For Your Appliance Covers
To keep your covers looking good, follow these care tips:
- Wash regularly, especially in kitchens with lots of grease or dust.
- Check the fabric label for washing instructions. Most cotton covers can be machine washed on cold.
- Air dry or use a low heat setting in the dryer to prevent shrinking.
- For covers with padding, reshape while damp and lay flat to dry.
- Spot clean stains right away to prevent them from setting.
When To Replace Or Update Your Covers
Even well-made covers wear out. Replace covers when:
- The fabric is stained or torn and cannot be cleaned or repaired.
- The fit becomes loose because the appliance has changed or you’ve bought a new model.
- You want a new look for your kitchen.
Common Mistakes To Avoid
- Using slippery fabric: Satin or silk looks nice but slides off appliances and stains easily.
- Ignoring washing instructions: Some fabrics shrink or fade if washed too hot.
- Skipping seam finishing: Unfinished edges fray quickly and make covers look messy.
- Forgetting about heat: Never use covers on hot appliances, especially with synthetic or glued seams.
Real-world Examples
Many people have created beautiful covers with simple tools. One home cook used leftover curtain fabric to make matching covers for her toaster, kettle, and food processor—her kitchen looked instantly coordinated. Another added a large pocket to the side of her stand mixer cover for attachments, saving drawer space.
Some crafty families make covers for every season, switching them out for holidays or special events.
Sustainability And Upcycling
Making your own covers is a great way to be eco-friendly. Use leftover fabric, old tablecloths, or even denim from worn-out jeans. Upcycling saves money and reduces waste. Plus, you get a unique product with a story. Many people don’t realize you can layer thinner fabrics together for strength—don’t throw away old linens; give them new life as appliance covers.

Credit: www.amazon.com
How To Store Covers When Not In Use
If you like to change your kitchen’s look, store extra covers in a dry, clean place. Fold covers neatly and keep them in a drawer or basket. Add a label so you know which cover fits which appliance. Avoid plastic bags, which can trap moisture and cause mildew.
Cost Comparison: Homemade Vs Store-bought Covers
Let’s compare the cost and benefits of homemade and store-bought covers.
| Feature | Homemade Cover | Store-Bought Cover |
|---|---|---|
| Average Cost | $3–$10 (using leftover fabric) | $15–$30 |
| Fit | Custom | Standard sizes only |
| Style | Unlimited | Limited |
| Durability | Depends on fabric | Often good, but not always washable |
| Personal Touch | High | None |
Credit: www.walmart.com
Troubleshooting: Fixing Common Problems
If your cover doesn’t fit or look right, don’t worry. Here’s how to fix common issues:
- Too tight: Open a seam and add a strip of matching or contrasting fabric.
- Too loose: Sew a tuck or add a drawstring at the base.
- Frayed edges: Finish seams with zigzag stitching or use pinking shears.
- Uneven hem: Trim and resew, or cover with bias tape.
Safety Notes
Never use appliance covers while the device is hot or in use. Covers can trap heat and cause damage or even start a fire. Always remove the cover before turning on any appliance.
Where To Learn More
If you want to take your sewing further, try online tutorials or community classes. Many free patterns are available online, and videos can show each step in detail. The Craftsy website is a great place to start for sewing tips and classes.
Frequently Asked Questions
How Do I Choose The Best Fabric For My Kitchen Appliance Cover?
Look for cotton canvas, quilted cotton, or denim for strength and easy cleaning. Avoid slippery or delicate fabrics. Make sure to pre-wash fabric so it doesn’t shrink later.
Can I Make Covers Without A Sewing Machine?
Yes, you can use fabric glue or fusible tape. These methods are quick and work well for light-use covers, but sewing gives the strongest seams for daily use.
How Do I Clean My Appliance Covers?
Most cotton covers can go in the washing machine on a cold setting. For padded or quilted covers, air dry to keep their shape. Always check the fabric care label before washing.
What If My Appliance Has An Unusual Shape?
Make a paper pattern by tracing around the appliance. Add extra fabric for seams and check fit with a test piece before cutting your final fabric.
Do Covers Really Protect Appliances?
Yes, covers keep out dust, grease, and sunlight. They help appliances last longer and look new. They also keep your kitchen looking neat and organized.
Making covers for your kitchen appliances is a useful and creative project. You protect your machines, add style, and save money—all with a little time and effort. With the information in this guide, you’re ready to start making covers that fit your kitchen and your personality perfectly.