
A Solo Stove can turn any outdoor gathering into a warm, memorable experience. Its clever design burns wood with high efficiency, producing less smoke and more heat than traditional fire pits. But after enjoying your evening, you need to put out a Solo Stove safely and properly. Doing this wrong can damage your stove, harm the environment, or even cause injuries. Many new users don’t realize that Solo Stoves don’t extinguish like regular campfires, and common mistakes can lead to cracked metal or lingering hot coals.
If you own a Solo Stove or plan to use one, knowing the right way to extinguish it is essential. This guide covers everything you need: safe extinguishing steps, what to avoid, cleaning tips, and advanced advice for different situations. By the end, you’ll be able to confidently put out your Solo Stove with no stress or surprises.
Understanding Your Solo Stove
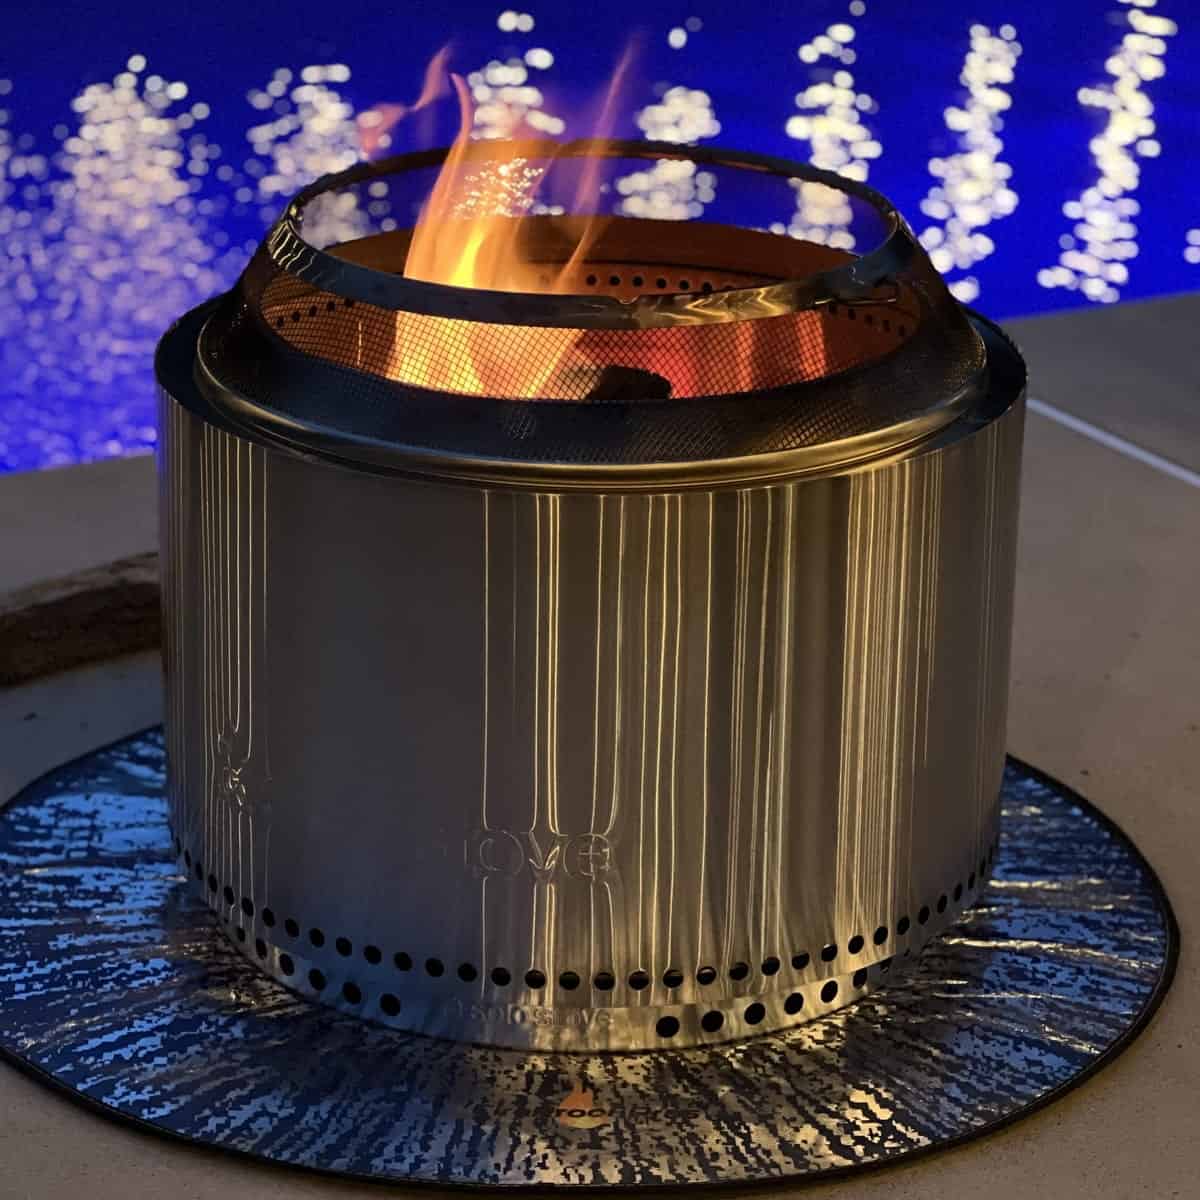
Before you start the process, it’s important to understand what makes a Solo Stove different. Solo Stove fire pits (like the Bonfire, Yukon, or Ranger) are double-walled, stainless steel units. They use a unique airflow system that burns wood more completely and with less smoke. This design means they get much hotter than standard fire pits and retain heat longer.
Why does this matter? Because putting out a Solo Stove incorrectly—such as pouring water on hot metal—can warp or crack the unit. The right method keeps both you and your stove safe.
Why You Should Not Use Water To Extinguish A Solo Stove
Many people’s first instinct is to pour water on a fire to put it out. For Solo Stoves, this is a mistake. Here’s why:
- Thermal shock: The rapid change in temperature can cause the metal to warp, crack, or even split.
- Steam burns: Pouring water on hot coals creates a burst of steam, which can burn your skin.
- Mess and rust: Water mixes with ash, creating a messy, muddy residue that’s hard to clean and encourages rust over time.
A Solo Stove manual specifically warns against using water for these reasons. The best way is to let the fire die down naturally—also called a “passive cool down. ”
Step-by-step: How To Put Out A Solo Stove Safely
Letting your Solo Stove burn out safely requires patience and a few simple steps. Here’s the process:
1. Stop Adding Fuel
When you’re ready to put out the fire, stop adding wood at least 30–60 minutes before you want to finish. This lets the current logs burn down to embers.
2. Let The Fire Burn Down
Allow the fire to consume the remaining wood completely. You’ll see the flames get smaller and the amount of visible smoke decrease. This step usually takes 30–45 minutes.
3. Spread Out The Embers
Use a long poker or stick to spread the hot embers around the bottom of the fire pit. This helps them cool down faster by exposing more surface area.
4. Starve The Fire Of Oxygen
Once the flames are gone and only embers remain, place the Solo Stove’s lid (if you have one) on top. This slows down airflow and helps extinguish the embers. If you don’t have a lid, use a heavy-duty metal tray or baking sheet as a temporary cover.
5. Wait For Complete Cooling
It can take 1–2 hours for the ashes and metal to become cool enough to touch. Do not rush this step. Some large models (like the Yukon) hold heat for even longer.
6. Check For Remaining Heat
Use the back of your hand to feel the temperature above the ashes. If you feel warmth, wait longer. If you have a laser thermometer, aim for a reading below 100°F (38°C).
7. Dispose Of Ashes (once Cold)
Scoop out the cooled ashes with a metal shovel or scoop. Place them in a metal container. Never dispose of warm or hot ashes in plastic bags or trash cans.
Example Timeline
If you stop adding wood at 10:00 p.m., expect these times:
- 10: 00–10:30 p.m.: Fire burns down naturally.
- 10: 30–11:00 p.m.: Embers cool with lid on.
- 11: 00 p.m. onward: Ashes ready for disposal.
Tools And Accessories That Help
The right tools make the process safer and easier. Here are some helpful items:
- Fire poker: For safely spreading embers.
- Heat-resistant gloves: Protects your hands when handling the lid or moving ashes.
- Metal ash scoop or shovel: For clean ash removal.
- Solo Stove lid: Designed to fit perfectly and block airflow.
- Metal ash bucket: For safe ash storage and disposal.
Investing in these accessories can save time and prevent injuries.
What To Do With Leftover Ashes
Ashes from your Solo Stove are mostly fine, white, and powdery due to the hot, efficient burn. Here’s how to handle them:
1. Ensure They’re Completely Cold.
Leaving them overnight is best.
2. Dispose Of Them Safely.
Place ashes in a metal container with a tight-fitting lid. Store outside, away from flammable materials, until trash day.
3. Optional: Use As Garden Amendment.
Wood ash can raise soil pH and add potassium. Use small amounts on your compost pile or garden beds (avoid acid-loving plants like blueberries).
Never dispose of ashes in paper bags, plastic bins, or near dry leaves or grass. Even tiny hot spots can start a fire hours later.
Cleaning Your Solo Stove After Extinguishing
A clean Solo Stove works better and lasts longer. Here’s how to keep yours in top condition:
1. Wait Until Completely Cool.
Never clean while hot.
2. Remove Ashes.
Use a scoop or vacuum designed for ash (never a household vacuum).
3. Wipe The Inside.
A dry or slightly damp rag removes soot. For stubborn stains, use a mix of water and mild dish soap.
4. Check For Rust Or Cracks.
Early detection helps prevent major damage.
5. Store Dry.
Keep your Solo Stove in a covered area or use a weatherproof cover.
Cleaning Frequency
- After every 2-3 uses: Remove ash and wipe down.
- Every 10 uses or monthly: Deep clean with soap and water, check all parts.

Credit: www.youtube.com
What Not To Do When Extinguishing A Solo Stove
Many common mistakes can damage your stove or create safety hazards. Here’s what to avoid:
1. Never Pour Water On Hot Metal.
This can cause warping or cracks.
2. Don’t Use Sand Or Dirt.
These can block airflow holes and are difficult to clean out.
3. Don’t Walk Away From Hot Coals.
Always supervise until everything is cold.
4. Avoid Using The Lid To “snuff” Large Flames.
Only use the lid when embers remain, not when the fire is still roaring.
5. Don’t Use Chemical Fire Extinguishers.
These leave residues that are hard to remove and may damage the finish.
6. Don’t Dispose Of Ashes Until Completely Cold.
Even a tiny hot spot can reignite.
Comparing Extinguishing Methods
It helps to see how Solo Stove’s best practices compare to putting out other types of outdoor fires.
| Method | Solo Stove | Standard Fire Pit | Campfire |
|---|---|---|---|
| Let burn out naturally | Recommended | Good | Good |
| Pour water | Not advised | Common | Common |
| Cover with lid | Safe for embers | Sometimes | Rarely used |
| Use sand/dirt | Not advised | Sometimes | Common |
As shown above, Solo Stoves require a gentler approach due to their double-walled design and high heat retention.
How Long Does A Solo Stove Take To Cool Down?
The exact cool-down time depends on several factors:
- Model size: Larger models hold heat longer.
- How much wood burned: Heavier fuel loads mean more heat.
- Outdoor temperature and wind: Cool, windy nights speed up cooling.
On average:
- Bonfire (medium): 1–2 hours to cool fully.
- Yukon (large): 2–3 hours or more.
- Ranger (small): About 1 hour.
If you need to put out the fire quickly, start the process earlier and plan for the cool-down.
Tips For Faster Cool-down
Sometimes, you may want to speed up the process—maybe you’re camping or the weather turns bad. Here are some safe tips:
1. Spread Out Embers Thoroughly.
More surface area means faster cooling.
2. Remove Big, Unburned Logs.
Use tongs or a poker to pull out any large pieces and set them aside to burn out or cool on their own.
3. Increase Ventilation (after Flames Die).
If it’s safe, gently fan the embers to release heat faster. Do not blow hard or stir up ash clouds.
4. Place The Lid On (only When Embers Remain).
This reduces oxygen and slows any remaining burn.
Never sacrifice safety for speed; always confirm everything is cool before handling ashes.
Seasonal And Weather Considerations
Extinguishing a Solo Stove isn’t the same in all conditions. Consider these factors:
Windy Days
- Wind can cause embers to fly out.
- Use the lid earlier, but make sure flames are out.
- Supervise the stove until it’s cold.
Rain
- Do not use rainwater to extinguish the fire.
- If rain is coming, stop adding wood early.
- Cover the stove after it cools to prevent rust.
Cold Or Snowy Conditions
- Metal cools faster in cold air.
- Ashes can hide hot embers under a layer of cold ash—always check carefully.
Dry Or Fire-prone Areas
- Ensure no embers escape.
- Use a spark screen if available.
- Leave ashes in the stove overnight if possible.
What To Do If You Need To Leave Quickly
Emergencies sometimes happen. If you absolutely must leave before the fire is fully out:
- Spread out embers as much as possible.
- Place the lid on tightly.
- Surround the area with non-flammable barriers (rocks, sand, metal sheets).
- Alert others nearby (such as campground staff) so they can monitor.
This is not ideal—if possible, always wait until the stove is cold.

Credit: www.youtube.com
Extinguishing A Solo Stove On Campsites Or Public Spaces
Some public areas require fires to be out before you leave. Check local rules. For campsites:
- Bring your own metal lid.
- Carry a metal bucket for ashes.
- Never dump hot ashes on the ground.
- Follow Leave No Trace principles.
Some parks may allow you to pour small amounts of water if the manufacturer approves. Check Solo Stove’s guidelines first.
Advanced Care: Extending Your Solo Stove’s Life
Proper extinguishing helps your Solo Stove last for years. Here’s how to go further:
1. Regularly Inspect For Damage.
Warping, cracks, or rust can start small and get worse.
- Apply a high-temperature paint (if rust appears).
Only use products rated for 1000°F/537°C or higher.
- Store indoors or use a cover in wet climates.
Stainless steel resists rust but is not immune.
4. Avoid Burning Trash, Plastics, Or Treated Wood.
These create residues that are hard to clean and can corrode metal.
5. Deep Clean At Season’s End.
Remove all ash, soak in mild soap, rinse, and dry thoroughly.
Common Solo Stove Owner Mistakes (and How To Avoid Them)
- Pouring water to put out fire: Damages metal and makes cleanup harder.
- Disposing of hot ashes: Risk of fire in trash.
- Using the wrong lid: Non-metal lids can melt or warp.
- Storing while wet: Leads to rust.
- Ignoring manufacturer advice: Always check your Solo Stove manual for specific instructions.
Real-world Example: Family Campfire Night
Imagine you host a backyard marshmallow roast. At 9:00 p.m., you decide to end the fire. Here’s what you do:
- 9: 00 p.m.: Stop adding wood.
- 9: 20 p.m.: Flames shrink, only embers left.
- 9: 25 p.m.: Use poker to spread embers. Place lid on.
- 10: 30 p.m.: Check with the back of your hand—no heat.
- 10: 35 p.m.: Scoop ashes into a metal bucket.
No water, no mess, and your Solo Stove is ready for next time.
Comparing Solo Stove Models: Cool-down And Extinguishing
Different Solo Stove models have slightly different extinguishing needs. Here’s a quick comparison:
| Model | Size (Diameter) | Approx. Cool-Down Time | Best Lid Option |
|---|---|---|---|
| Ranger | 15 inches | ~1 hour | Ranger Lid |
| Bonfire | 19.5 inches | 1–2 hours | Bonfire Lid |
| Yukon | 27 inches | 2–3 hours | Yukon Lid |
Choose the right lid for your model to ensure a safe extinguish.
Solo Stove Extinguishing: Step-by-step Summary
Here’s a quick recap for easy memory:
- Stop adding wood early.
- Let fire burn down to embers.
- Spread embers for faster cooling.
- Place lid on (when no flames).
- Wait until cool—do not rush.
- Remove ashes with metal scoop.
- Store ashes safely.
Following these steps guarantees safety and keeps your Solo Stove in top shape.
Credit: www.madbackyard.com
When Should You Replace Your Solo Stove?
A well-maintained Solo Stove can last many years. However, replace or repair if you notice:
- Warped or cracked metal.
- Holes in the double wall.
- Severe rust that can’t be cleaned or painted.
- Unstable base.
Contact Solo Stove customer service for warranty or replacement options.
Useful Resources
For more details, visit the official manufacturer’s website:
You’ll find more tips, video tutorials, and safety advice there.
Frequently Asked Questions
How Do You Put Out A Solo Stove Quickly?
Let the fire burn down to embers, spread out the coals, and cover with the Solo Stove lid. Never pour water on the stove. For fastest cooling, remove any large, unburned logs with tongs and use the lid to restrict oxygen.
Is It Safe To Leave A Solo Stove Burning Overnight?
No, it’s not safe. You should always supervise a burning fire. Even small embers can stay hot for hours and may restart if conditions change. Always ensure the stove is fully cool before leaving it unattended.
Can You Use Sand Or Dirt To Put Out A Solo Stove?
No. Sand or dirt can clog the airflow holes in the double-wall design, making future fires less efficient and harder to clean. Only use the passive cooling method described above.
What Should I Do If It Rains Before My Solo Stove Is Out?
If rain is coming, stop adding wood early so the fire can burn down. Never use rainwater to extinguish the fire. Once the stove is cool, dry it thoroughly to prevent rust and store it under cover.
Do I Need To Clean My Solo Stove After Every Use?
It’s a good idea to remove ashes and wipe down the inside every 2–3 uses. Deep cleaning and checking for damage should be done monthly or after every 10 uses. Regular cleaning helps prevent rust and keeps your Solo Stove working efficiently.
Putting out a Solo Stove is simple when you know the right steps. Take the time to do it safely, and your fire pit will give you years of safe, warm nights outside.