
Keeping your kitchen clean is not just about wiping counters and sweeping floors. Your oven is where much of the cooking magic happens, and it can also be one of the hardest appliances to clean. If you own a Samsung oven, you’re in luck: these ovens come with a self-cleaning feature that makes the job easier. But using it the right way, and knowing what to expect, is important for safety, performance, and the life of your oven. If you want to self clean your Samsung oven but aren’t sure where to start—or worry you might make a mistake—this guide is for you.
Self-cleaning ovens sound simple. You press a button, wait a few hours, and all the grime disappears, right? Not quite. There are important steps before, during, and after the self clean cycle. This article explains those steps in detail, plus extra tips, safety warnings, and troubleshooting advice that most beginners miss.
By the end, you’ll know how to safely and effectively use your Samsung oven’s self-clean mode, and what to do if things don’t go as planned.
How Samsung Oven Self-clean Works
The self-clean feature in Samsung ovens uses high heat to burn off food residue, grease, and spills inside the oven. This process, called pyrolytic cleaning, heats the oven to around 900°F (480°C). At this temperature, most food soils turn to ash, which you can wipe away easily after the cycle ends.
Most Samsung models offer different self-cleaning durations: 2, 3, or 5 hours. The length you choose depends on how dirty your oven is. Shorter cycles are good for light cleaning; longer cycles are for heavy, baked-on messes. Some ovens have both standard self-clean and a steam clean option (which uses water and lower heat).
Important: During a self-clean cycle, the oven door locks automatically for safety. The oven can get extremely hot, and opening the door is not possible until it cools down.
Preparing For The Self-clean Cycle
Proper preparation is one of the most important steps—and one that many people overlook. Skipping these steps can damage your oven or create smoke and odors.
1. Remove Everything Inside
Take out all racks, trays, pans, and foil from the oven. High self-cleaning temperatures can warp racks and damage non-oven-safe items. Even if your model says the racks are “self-clean safe,” removing them will help them last longer and stay shiny. Never leave foil or plastic inside—the heat will ruin them and may damage the oven.
2. Wipe Away Loose Debris
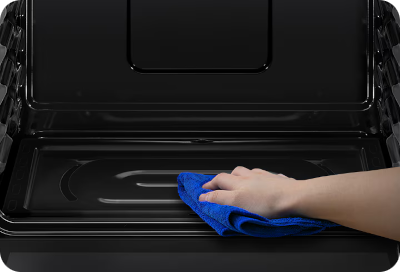
Use a damp cloth or sponge to wipe up large food pieces, crumbs, and heavy grease. Removing as much debris as possible before starting will make the self-clean more effective and reduce smoke and odor.
3. Clean Around The Door Gasket
The oven door gasket (the soft rubber or fiber seal around the door) helps keep heat inside during cleaning. Gently wipe it with a damp cloth, being careful not to scrub or pull. Never use harsh cleaners or sharp tools here—the gasket is delicate and expensive to replace.
4. Open Windows And Ventilate
Self-cleaning can produce smoke and burning smells, especially if there’s a lot of grease. Open kitchen windows and turn on your exhaust fan or range hood. If your smoke detector is close to the oven, you may want to temporarily move it or cover it (just for the cleaning cycle).
5. Check The Owner’s Manual
Not all Samsung ovens are exactly the same. Check your owner’s manual for specific instructions. Some models have extra features or warnings.
Non-obvious insight: Don’t forget to remove any oven thermometers or temperature probes before you start. The self-clean heat can permanently ruin these accessories.
Credit: www.samsung.com
Choosing The Right Self-clean Cycle
Selecting the right cycle makes a big difference in cleaning results and oven wear.
Standard Self-clean
- 2-hour cycle: Use if your oven is lightly soiled, with only small splatters or crumbs.
- 3-hour cycle: Good for moderate buildup, like occasional drips or sticky spots.
- 5-hour cycle: Best for heavy, baked-on grease or after roasting meats.
Steam Clean (if Available)
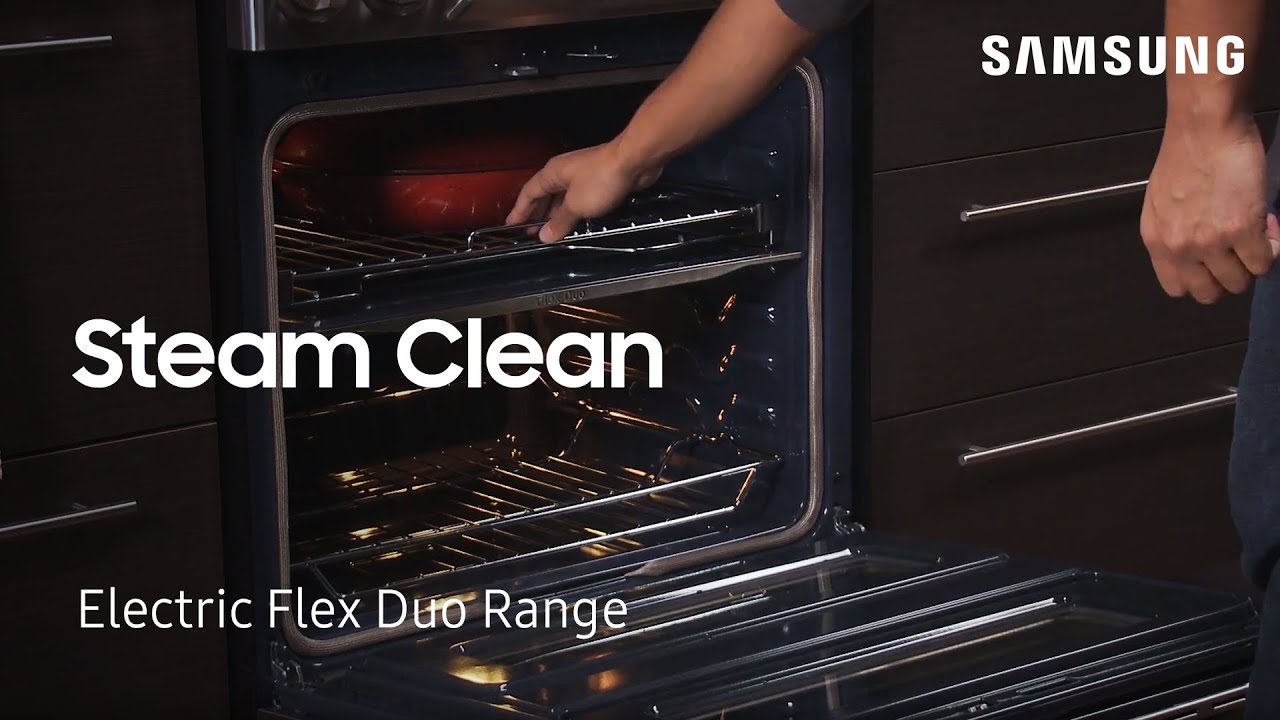
Some Samsung ovens offer a steam clean feature. This uses water and heat (but much less heat than pyrolytic cleaning) to soften grime.
- Cycle time: 20-30 minutes
- Best for: Light, fresh spills and quick cleaning between bigger self-clean cycles.
Non-obvious insight: Steam clean is much gentler on oven racks and accessories, so you can usually leave them inside during this cycle.
How To Start The Self-clean Process
Here’s a step-by-step guide to running the self-clean cycle on a Samsung oven. These steps are common for most models, but always check your manual for differences.
- Make sure the oven is empty and wiped out.
- Close the oven door tightly. The door will automatically lock when the cycle begins.
- Select the Self Clean button on your oven’s control panel.
- Choose the cycle duration (2, 3, or 5 hours) using the up/down arrows or selector knob.
- Press Start. The oven will display a message or light to show that the door is locked and the cycle is running.
During cleaning, the oven will get extremely hot. You may hear the fan running and smell smoke or burning odors. This is normal, but keep kids and pets away from the oven.
When the cycle is finished, the oven will take 30-90 minutes to cool down. The door will unlock automatically when it’s safe to open.
Pro tip: Don’t try to force the oven door open during or immediately after cleaning. You could break the locking mechanism, which is an expensive repair.
Credit: www.appliancesolutionstulsa.com
What To Do After Self-cleaning
Once the oven has cooled and the door unlocks, the cleaning job isn’t done yet. There are a few important finishing steps.
1. Wipe Out Ash And Residue
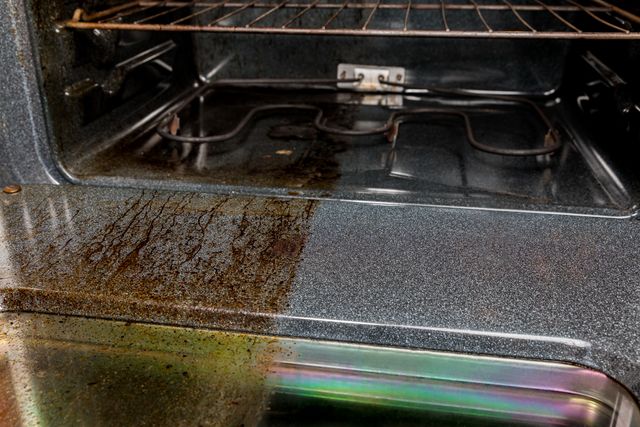
Inside, you’ll see white or gray ash on the oven floor and walls. Use a damp cloth or sponge to wipe it away. For stubborn spots, a little baking soda on a damp cloth can help.
2. Clean The Racks Separately
Wash oven racks with warm, soapy water in the sink. If they’re very greasy, let them soak for 30 minutes before scrubbing with a non-abrasive pad. Dry them completely before putting them back in the oven.
3. Wipe The Door And Gasket
Carefully clean the door glass and gasket again with a damp cloth. Avoid soaking the gasket or using anything abrasive.
4. Check For Missed Spots
If you see tough stains that didn’t come off, repeat a shorter self-clean cycle or use the steam clean option. For really stubborn areas, a paste of baking soda and water, left on for a few hours, can help.
Safety Tips During Self-clean
The high temperatures used during self-cleaning demand extra caution. Here’s how to keep your kitchen—and your oven—in top shape:
- Stay nearby while the cycle runs. Don’t leave home with the oven on self-clean.
- Keep pets and children away. The oven’s exterior can become hot enough to burn.
- Watch for smoke. If you see large amounts of smoke, turn off the oven, let it cool, and check for forgotten food or grease.
- Never block the oven vent. This can cause dangerous heat buildup.
- Don’t use oven cleaners or sprays before a self-clean cycle. The chemicals can create harmful fumes at high heat.
- Do not use self-clean if the oven is damaged (broken glass, warped door, etc. )—this can make things worse.
Practical example: Some users forget to remove plastic cookware or silicone mats. At self-cleaning temperatures, these will melt and cause strong odors or even damage your oven.
Common Issues And How To Fix Them
Even when you follow the steps, sometimes things don’t go as planned. Here are some typical problems and solutions.
Excessive Smoke Or Odor
If you see or smell a lot of smoke during self-clean, it usually means there was too much grease or food left inside. Next time, wipe out the oven more thoroughly before starting. If you have a vent, turn it on high and open windows.
Self-clean Cycle Stops Early
This can happen if the oven gets too hot or if there’s a power cut. Let the oven cool down fully, then try again. If the cycle keeps failing, check for error codes on the display and consult your manual.
Oven Door Won’t Unlock
If the door stays locked after cooling, try unplugging the oven for 5 minutes, then plugging it back in. If it’s still locked, you may need service.
White Residue Or Ash Remains
This is normal. Just wipe out the ash with a damp cloth. If it sticks, use a little vinegar or baking soda.
Racks Don’t Slide Smoothly
Self-clean can make oven racks lose their shine and glide less easily. Wipe them with a thin layer of vegetable oil after cleaning.
Non-obvious insight: If your oven racks are blue, they are porcelain-coated. Do not use steel wool or abrasive pads, as these can scratch and ruin the coating.
How Often Should You Self Clean A Samsung Oven?
The right frequency depends on how much you use your oven and what you cook.
- Light use (once a week baking): Self clean every 4-6 months.
- Heavy use (daily cooking, roasting meats): Every 2-3 months.
- Frequent spills: Steam clean as needed between full self-cleans.
Important: Don’t overuse self-clean. The high heat can wear out oven parts over time. For most households, 2-3 times per year is plenty.
Credit: www.youtube.com
Steam Clean Vs. Self Clean: Which Should You Use?
Many Samsung ovens have both steam clean and pyrolytic self clean. Which is better? Here’s a quick comparison:
| Feature | Steam Clean | Self Clean (Pyrolytic) |
|---|---|---|
| Cleaning Power | Light spills | Heavy, baked-on messes |
| Cycle Time | 20-30 minutes | 2-5 hours |
| Heat Level | Low (below 250°F) | Very high (900°F) |
| Safe for Racks | Yes | No (remove racks) |
| Energy Use | Low | High |
| Odor/Smoke | Minimal | Can be strong |
If you clean up spills soon after they happen, steam clean is fast, easy, and gentle. For deep cleaning, stick with the full self-clean.
Self-cleaning And Oven Longevity
Many people worry that using self-clean will shorten the life of their oven. Here’s what you need to know:
- High heat stresses oven parts, especially the control board, door lock, and gaskets.
- Using self-clean too often can increase the risk of a breakdown.
- A study by appliance repair companies found that about 20% of oven service calls are related to problems after a self-clean cycle.
Tips to protect your oven:
- Use the shortest self-clean cycle that gets the job done.
- Avoid self-cleaning before big holidays or events—if something goes wrong, you’ll be stuck without an oven.
- Keep your oven clean with regular wipe-downs and steam cleans, so you rarely need the full self-clean.
What Not To Do When Self-cleaning
Even experienced cooks make mistakes. Avoid these common errors:
- Don’t use oven cleaner before self-clean. The chemicals can release dangerous fumes.
- Don’t leave racks, foil, or pans inside. High heat can damage these items.
- Don’t block the oven vent. This can cause dangerous heat buildup.
- Don’t try to open the door during cleaning. The lock is for your safety.
- Don’t self-clean with a broken oven door or glass. This can cause more damage.
Experience-based tip: Always check your oven for forgotten items—like pizza stones, thermometers, or utensils—before starting the cycle.
Real User Experiences
Hearing from real Samsung oven owners can help you avoid surprises.
- “I didn’t open windows the first time, and my whole house smelled like burnt toast for hours. Now I always ventilate before starting!”
- “I left my racks inside once, and they turned dull and never slid smoothly again. Always take them out.”
- “My oven door stayed locked after cleaning. I unplugged it for ten minutes, and it finally opened.”
- “Steam clean is great for small messes, but for big spills, only self-clean worked.”
These stories show that small details—like removing racks and ventilating—make a big difference in your results.
Step-by-step Example: Self Cleaning A Samsung Oven
To make this guide even more practical, here’s a real-world example using a common Samsung model.
- Remove racks and accessories. Take out everything, even the temperature probe.
- Wipe up crumbs and large spills. Use a damp cloth to get as much loose food as possible.
- Close the oven door. Make sure it’s fully shut.
- Select Self Clean. On the control panel, press “Self Clean.”
- Pick the cycle length. For a light mess, choose 2 hours.
- Start. Press “Start.” The oven door will lock and the cycle begins.
- Ventilate. Open a window and turn on your kitchen fan.
- Wait for the cycle to finish and cool down. Don’t open the door until it unlocks automatically.
- Wipe out ash. Use a damp cloth to clean the inside.
- Clean racks in the sink. Wash, rinse, and dry before putting back.
- Inspect the oven. Make sure all residue is gone.
Pro tip: If you notice white streaks on the glass door after cleaning, use a 50/50 mix of vinegar and water to wipe them away.
Comparing Samsung Oven Self-clean To Other Brands
How does Samsung’s self-clean feature compare to competitors like LG, Whirlpool, or GE? Here’s a quick overview:
| Brand | Self-Clean Cycle Length | Steam Clean Option | Energy Use | User Ratings (out of 5) |
|---|---|---|---|---|
| Samsung | 2-5 hours | Yes (on most models) | High for pyrolytic | 4.3 |
| LG | 2-4 hours | Yes | Medium-High | 4.2 |
| Whirlpool | 2-5 hours | Some models | High | 4.1 |
| GE | 3-5 hours | Yes | High | 4.4 |
Samsung’s self-cleaning ovens are competitive in both cleaning power and features, with steam clean available on most recent models. User ratings are high, but all brands can experience issues if preparation steps are skipped.
When To Call For Service
If you notice any of these problems after self-cleaning, it’s best to call a professional:
- The oven door remains locked after hours of cooling.
- The control panel is unresponsive or shows error codes.
- There is a strong, ongoing burning smell even after cleaning.
- You see smoke or flames coming from the oven vent.
- The oven does not heat up during normal cooking after self-clean.
Attempting DIY repairs on oven locks, electronics, or seals can be dangerous or make things worse. For safety, contact Samsung support or a licensed repair service.
Frequently Asked Questions
How Long Does A Samsung Oven Self-clean Cycle Take?
Self-clean cycles on Samsung ovens typically last 2, 3, or 5 hours. The exact length depends on your model and the level of cleaning you select. After the cycle, allow another 30–90 minutes for the oven to cool and unlock.
Is It Safe To Leave The House While My Oven Is Self-cleaning?
No, it’s best to stay home and nearby during self-cleaning. The oven reaches very high temperatures, and there’s a small risk of smoke or malfunction. Always supervise the oven while the cycle is running.
Can I Use Oven Cleaner Before Or After Self-cleaning?
Never use oven cleaner before self-cleaning. The chemicals can cause dangerous fumes at high heat. After the cycle, you can use mild cleaners or baking soda to remove any stubborn spots, but only when the oven is cool.
Why Does My Oven Smell Bad After Self-cleaning?
Some odor is normal, especially if there was a lot of grease inside. Open windows and ventilate your kitchen. If the smell doesn’t go away after a day or two, wipe out the oven with water and vinegar.
Where Can I Find More Help For My Samsung Oven?
For detailed troubleshooting, manuals, and support, visit the Samsung Official Support page.
Keeping your Samsung oven clean doesn’t have to be stressful. With the right steps and a little preparation, the self-clean feature can save you hours of scrubbing—while keeping your kitchen safe and smelling fresh. Remember, the small details matter, and a little extra care before and after the cycle will give you the best results every time.