
Packing up your kitchen for a remodel can feel overwhelming. The kitchen is the heart of any home, filled with everyday essentials, sentimental items, and many small objects. As the remodel date gets closer, you might wonder where to start, how to stay organized, or how to keep your life running smoothly during the chaos.
The good news is, with the right approach, you can pack up your kitchen confidently and avoid common mistakes that slow down renovations or damage your belongings.
This guide gives you simple, practical steps to make packing efficient and stress-free. You will learn how to sort what to keep, pack fragile items safely, store food, and set up a temporary kitchen. Along the way, you’ll find helpful checklists, real-life examples, and expert tips that save time and trouble.
Whether you’re remodeling yourself or hiring professionals, these strategies will help you protect your kitchen items and keep your household on track. If you want your kitchen remodel to go smoothly from day one, read on for a complete, easy-to-follow plan.
Why Packing Your Kitchen Right Matters
Packing your kitchen correctly is about more than just putting things in boxes. The kitchen contains breakable dishes, sharp tools, and food that can spoil. Poor packing can lead to broken glasses, lost utensils, or even pest problems if food is missed. Good packing saves money, reduces stress, and helps your remodel finish on time.
Most people forget how much time unpacking takes. If you pack thoughtfully now, you will be able to find what you need later and return everything to its place easily. Investing a little extra time in good packing now pays off when your new kitchen is ready.
Planning Your Kitchen Packing
Before you touch a single dish, it’s important to have a plan. This step helps you stay organized and avoid surprises.
- Set a Timeline: Start packing at least two weeks before your remodel. Give yourself more time if you have a large kitchen or a busy schedule.
- Gather Supplies: Collect strong boxes, packing paper, bubble wrap, tape, markers, and labels. Consider special dish boxes for fragile items.
- Create a Packing Zone: Clear a countertop or table to use as your packing station. This keeps you from spreading clutter all over the house.
- Sort and Declutter: Go through each drawer and cabinet. Decide what to keep, donate, throw away, or store elsewhere.
- Make a “Last to Pack” List: List the items you use daily, such as a coffee maker, a few plates, and utensils. These will be packed last and unpacked first.
Example Timeline
| Days Before Remodel | Task |
|---|---|
| 14-10 | Declutter, donate, or toss unwanted items |
| 9-7 | Pack rarely used appliances and special dishes |
| 6-4 | Pack extra pots, pans, and bakeware |
| 3-2 | Pack most food, glassware, and utensils |
| 1 | Pack essentials and set up temporary kitchen |
Non-obvious tip: Make a quick video of every cabinet before you pack. This visual record will help you remember where things go when you unpack.
Decluttering: What To Keep, Donate, Or Toss
Remodeling is the perfect time to cut down on kitchen clutter. Here’s how to decide what stays and what goes:
- Keep: Items you use weekly, things with sentimental value, or quality pieces in good condition.
- Donate: Duplicates, working gadgets you rarely use, or extra mugs and dishes.
- Toss: Broken items, chipped plates, expired food, or single-use gadgets you never touch.
Example: If you have five spatulas but only use two, keep your favorites and donate the rest. If your blender hasn’t worked for years, now is the time to let it go.
Insight: Many people forget about expired spices and food hiding in the back of cabinets. Check every container and toss out-of-date items before packing.
Gathering Packing Supplies
You need the right materials to keep everything safe. Here’s what works best:
- Sturdy boxes in various sizes (small for heavy items, large for light items)
- Dish pack boxes for fragile plates and glasses
- Bubble wrap and packing paper to cushion breakables
- Plastic wrap to keep small parts together
- Strong tape to close boxes securely
- Permanent markers and labels for easy identification
- Resealable bags for screws, small parts, or utensils
Don’t use newspaper for wrapping dishes, because the ink can rub off. Packing paper is safer and keeps your items clean.
Pro tip: Ask local grocery stores for free boxes, but avoid fruit boxes since they may attract bugs.
Credit: www.neilkelly.com
Packing Different Kitchen Zones
Packing your kitchen works best if you tackle one zone at a time. This helps keep things organized and less stressful.
Pantry And Food Items
Start with non-perishable food. Check expiration dates, wipe containers, and sort items by type.
- Keep: Canned goods, sealed grains, and spices you use often.
- Donate: Unopened, unexpired food you won’t use to a local food bank.
- Toss: Expired items or opened bags that won’t survive storage.
Pack food in small boxes so they don’t get too heavy. Use plastic bins with tight lids for flour, sugar, and rice to keep out pests.
Non-obvious tip: If you’re storing food during a long remodel, add a bay leaf to flour and grains. This natural method helps repel pantry bugs.
Dishes, Glasses, And Fragile Items
Fragile items need extra care:
- Wrap each dish in packing paper or bubble wrap.
- Stack plates vertically in boxes, like records. This reduces breakage.
- Fill empty spaces in boxes with crumpled paper or towels.
- Mark these boxes as FRAGILE on all sides.
Example: For wine glasses, wrap each one separately and use cardboard dividers if you have them. Never put heavy items on top of delicate glassware.
Pots, Pans, And Bakeware
Heavy cookware should go in small, sturdy boxes:
- Nest smaller pots inside larger ones with packing paper between them.
- Wrap glass lids separately.
- Avoid overfilling boxes, or they may break.
Pro tip: If you use a slow cooker or Instant Pot often, keep it out for your temporary kitchen.
Small Appliances
Blenders, coffee makers, and toasters should be cleaned, dried, and packed with their cords secured.
- If possible, use original boxes.
- Remove loose parts and pack them in resealable bags.
- Label each box with the appliance’s name.
Insight: Many people forget to empty crumbs from toasters or coffee grounds from machines. Clean everything before you pack to prevent odors or pests.
Utensils And Cutlery
Group similar items together:
- Bundle knives with the blade wrapped for safety.
- Use a utensil tray or roll utensils in towels.
- Place small gadgets in labeled bags.
Safety tip: Mark boxes with knives clearly so you remember to open them carefully.
Cleaning Supplies
Most cleaning products should not be packed away for long periods. Many movers will not transport chemicals.
- Keep out what you’ll use for cleaning up during and after packing.
- Safely dispose of almost-empty or expired bottles.
- Store the rest in a safe, clearly labeled box.
Reminder: Never mix cleaning chemicals, and keep them out of reach of children and pets.
Miscellaneous Drawers
Every kitchen has a “junk drawer.” Sort these carefully:
- Throw away old batteries, broken tools, or expired coupons.
- Bag small, useful items (like rubber bands or twist ties) together.
- Label boxes with the contents for easier unpacking.
Pro tip: Take photos of how you organized your junk drawer so you can recreate it later.
Labeling And Inventory
Good labeling saves hours of frustration later. Here’s how to do it right:
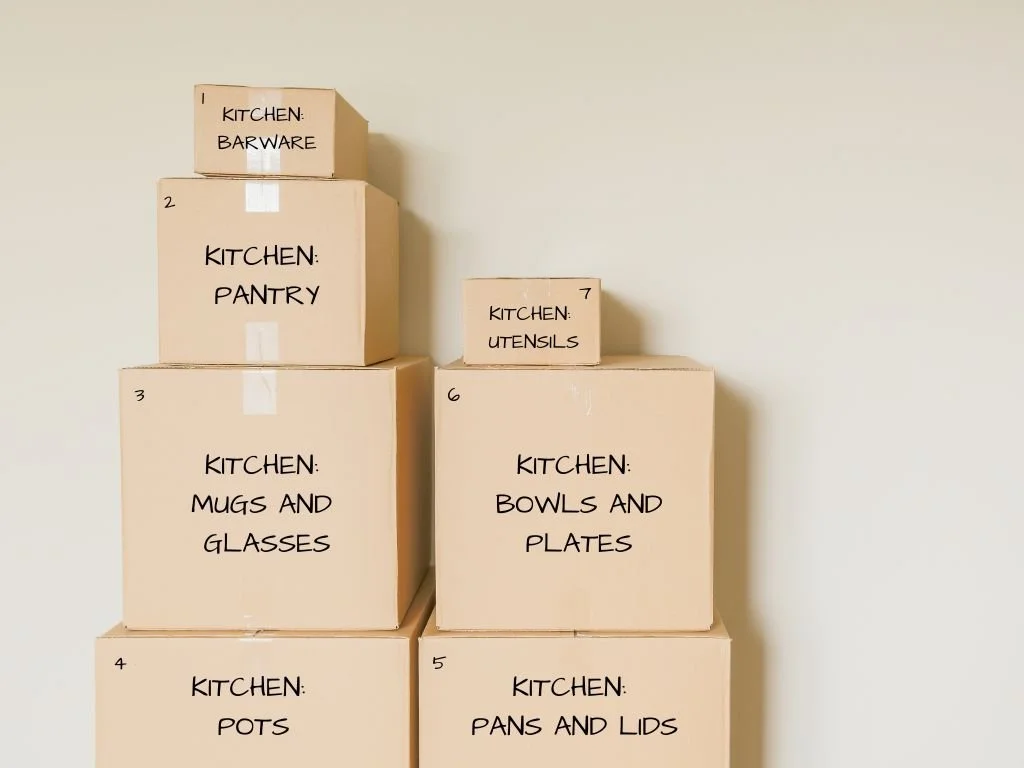
- Label every box: Write the main contents and the zone it belongs in (e.g., “Glasses – Upper Cabinet Left”).
- Number your boxes: Keep a master list with each box number and what’s inside.
- Mark priority boxes: Put a star or “Open First” sticker on boxes with essentials.
Example: Box #3 – Baking pans, rolling pin, cookie cutters (Lower cabinet next to fridge).
Non-obvious insight: Snap a quick phone photo of each box’s contents before sealing it. These images are easy to scroll through when you need to find something during or after the remodel.
Credit: www.jennifergardnerdesign.com
Setting Up A Temporary Kitchen
Remodels can last weeks or months. Setting up a temporary kitchen helps your family eat well and stay comfortable.
Choosing A Space
Pick an area near water and electricity—like a laundry room, basement, or even a corner of the living room. Use a folding table for prep and a shelf or rolling cart for storage.
Essential Items To Keep Out
Keep only what you need for daily meals. A basic temporary kitchen includes:
- A microwave or toaster oven
- A slow cooker or Instant Pot
- One or two pans
- A cutting board and sharp knife
- A few plates, bowls, and utensils
- Dish soap and a sponge
- Resealable containers for leftovers
- Coffee maker or kettle (if needed)
Pack these last and unpack them first.
Cooking During The Remodel
- Plan simple meals (salads, sandwiches, slow cooker recipes).
- Use disposable plates and cutlery to reduce washing up.
- Grill outside when possible.
- Stock up on snacks and ready-to-eat foods.
Example: During a remodel, one family set up their coffee maker and toaster in the laundry room. They kept cereal, bread, and peanut butter handy for quick breakfasts.
Managing Food Storage
If your refrigerator will be out of commission, use a mini fridge or cooler for essentials. Buy groceries in smaller amounts to avoid waste.
Pro tip: Share meals with friends or neighbors, or try meal delivery for a few weeks if your schedule is very busy.
Packing Tips For Special Kitchen Items
Some kitchen items need extra attention. Here’s how to handle them:
Fine China And Heirlooms
Wrap each piece in multiple layers of bubble wrap. Use small boxes and place extra padding at the bottom and sides. Label as “Fragile – Heirlooms” and consider storing these separately, out of the work zone.
Wine And Liquor
Seal bottles tightly and store them upright. Use a wine box with dividers if possible. Avoid packing in areas that will get hot or cold, as temperature changes can damage wine.
Spices And Oils
Spices should be packed in small boxes or resealable bags to avoid spills. Oil bottles can leak—wrap caps with plastic wrap and store upright in a bin.
Plants And Decor
Move plants to another room, away from dust and work. Wrap decorative items in paper and pack with towels or linens for extra cushioning.
Pet Food And Bowls
Keep pet food in sealed containers. Move pet bowls and toys to the temporary kitchen area so your pets’ routine is not disrupted.
Non-obvious insight: Some people forget about things stored above cabinets or on top of the refrigerator. Check all high places before you finish packing.
Storing Kitchen Boxes During Remodel
Where you store boxes depends on your home and the length of your remodel.
- Short remodel (a few days): Store boxes in a nearby room, garage, or basement.
- Long remodel (weeks to months): Use a spare bedroom or rent a storage unit, especially for fragile or valuable items.
Storage Location Comparison
| Option | Pros | Cons |
|---|---|---|
| Garage | Close by, easy access | Humidity, temperature swings, possible pests |
| Basement | Protected from weather | Can be damp, risk of flooding |
| Spare Room | Safe, climate controlled | Takes up living space |
| Storage Unit | Secure, out of the way | Extra cost, less convenience |
Pro tip: If storing for more than a month, avoid attics or garages unless boxes are sealed tightly and items inside can handle temperature changes.
Common Packing Mistakes To Avoid
Even careful homeowners make mistakes when packing for a remodel. Here’s what to watch out for:
- Rushing at the last minute: This leads to broken items and lost essentials.
- Using oversized boxes for heavy items: These can break and are hard to lift.
- Forgetting to label boxes: Unlabeled boxes slow down unpacking and cause confusion.
- Packing dirty items: Food residue can attract bugs and cause smells.
- Ignoring perishable foods: These spoil quickly if not managed.
- Not setting aside enough essentials: You may need a coffee mug or the can opener before you expect it.
- Mixing cleaning chemicals: Dangerous if they leak or react during storage.
- Storing food with non-food items: Strong odors can transfer, or containers may leak.
- Forgetting about warranties or manuals: Keep these with your appliances or in a safe spot.
- Missing hidden storage spots: Always check above cabinets, pantries, and deep drawers.
Insight: It’s easy to underestimate how much space your packed kitchen will take. Allow extra room in your storage plan.
Credit: bellaorganizing.com
Unpacking And Returning To Normal
Once your remodel is finished, unpacking carefully is as important as packing. Here’s how to make the transition smooth:
- Clean new cabinets before putting anything away.
- Unpack essentials first, such as everyday dishes and utensils.
- Refer to your inventory list or box photos to find what you need.
- Place items in logical spots—think about how you use your kitchen daily.
- Take your time—there’s no need to unpack everything in one day.
Pro tip: If you used a video or photos before packing, use them to help restore your favorite kitchen setup.
Real-life Packing Example
Let’s look at how one family managed their kitchen remodel:
The Smiths had a two-month kitchen remodel planned. They started packing three weeks in advance and used the dining room for storage. They set up a folding table in the laundry room as a temporary kitchen with their microwave, toaster, and a coffee maker.
Each family member had one plate, bowl, and mug to use and wash daily.
They donated extra gadgets and old dishes to a local shelter. Their detailed labels and photos made it easy to find things when they needed them. After the remodel, they unpacked the essentials first and gradually organized the rest. Their careful planning saved time, money, and a lot of stress.
Top Packing And Storage Products For Kitchen Remodels
Certain products make packing easier and safer. Here are some of the most useful:
- Dish pack boxes: These have reinforced sides for heavy plates and bowls.
- Bubble wrap rolls: Protects fragile items better than paper alone.
- Plastic bins with lids: Great for food and items that need to stay dust-free.
- Label stickers: Color-coding boxes makes finding things simple.
- Stretch wrap: Holds drawers or small parts together for easier unpacking.
- Drawer organizers: Keep utensils and small gadgets sorted.
Non-obvious insight: Store smaller boxes inside larger bins for double protection if your storage area is not climate controlled.
Working With Professional Movers Or Remodelers
If you are hiring movers or your remodeling company offers packing services, ask these important questions:
- Will they pack everything, or just large items?
- Are they insured for breakage or loss?
- Do they provide packing supplies, or do you need to buy them?
- What items will they not handle (like cleaning chemicals or food)?
- How do they label and inventory boxes?
Tip: Even if movers pack for you, it’s wise to pack sentimental or valuable items yourself.
Keeping Your Remodel On Track
Packing up your kitchen is just one part of a successful remodel. Stay in communication with your contractor, be flexible, and remember to check your schedule often. Delays happen, but an organized packing plan keeps you ready for anything.
Interesting fact: According to the National Kitchen & Bath Association, the average kitchen remodel lasts 6-8 weeks, but packing and setup can add up to two more weeks before and after. Planning ahead saves real time.
If you want more kitchen remodel tips, check out This Old House for expert advice and inspiration.
Frequently Asked Questions
How Early Should I Start Packing My Kitchen For A Remodel?
Ideally, start at least two weeks before your remodel begins. If you have a large kitchen or lots of items, start three to four weeks in advance. This gives you time to sort, declutter, and pack without stress.
Can I Leave Anything In My Kitchen During The Remodel?
It’s best to remove everything, even from closed cabinets. Dust, debris, and vibrations from construction can damage or dirty your items. Only leave items if your contractor says it’s safe.
What Should I Do With Perishable Food During A Remodel?
Eat or donate perishables before your remodel. If your refrigerator will be unplugged, use a mini fridge or cooler for essentials. Avoid buying large amounts of fresh food until your kitchen is finished.
How Do I Keep My Kitchen Functional During The Remodel?
Set up a temporary kitchen in another room with basic appliances, dishes, and food. Plan simple meals and use disposable plates to make cleanup easy. Keep snacks and drinks handy for your family.
How Can I Make Unpacking Easier After The Remodel?
Label every box clearly, keep a list or take photos of contents, and mark boxes with essentials. Unpack daily items first, and use your pre-remodel kitchen photos or videos as a reference to speed up the process.
Packing up your kitchen for a remodel takes effort, but with good planning, the right supplies, and a few smart strategies, you can keep your life running smoothly and protect your belongings. When your new kitchen is ready, you’ll be glad you took the time to do it right.