Replacing an Intermatic Timer With a Digital Alternative: A Step-by-Step Guide
Are you tired of your old Intermatic timer? Maybe it’s making a loud ticking sound, missing its set times, or just looks outdated. Many homeowners and facility managers are switching from mechanical timers like Intermatic to digital timers for better control, energy savings, and convenience. If you’re thinking about this upgrade, you probably want the process to be smooth, safe, and future-proof.
This guide will walk you through everything you need to know about replacing an Intermatic timer with a digital model. Whether you’re managing pool pumps, outdoor lights, or irrigation systems, you’ll learn what to expect, how to prepare, and the exact steps for a successful replacement.
Along the way, you’ll get practical tips that even many electricians overlook—plus clear warnings about common pitfalls. By the end, you’ll be ready to enjoy modern, hassle-free scheduling for your home or business.
Why Replace Your Intermatic Timer?
Intermatic timers have been a standard in American homes and businesses for decades. They’re known for their reliability, but mechanical models have clear limitations compared to digital types.
- Accuracy: Mechanical timers can drift over time, especially if the power goes out.
- Programming Flexibility: Digital timers offer more settings, like multiple on/off cycles per day and randomization features.
- Energy Efficiency: Better scheduling means less wasted power.
- Noise: Mechanical timers can be noisy, especially in quiet environments.
- Smart Features: Many digital models connect with smart home systems or can be programmed remotely.
Upgrading to a digital timer isn’t just about convenience—it can help you save money and reduce headaches in the long run.
Understanding Your Existing Intermatic Timer
Before you start, you need to know exactly what you’re working with. Intermatic makes a range of timers, from simple wall switches to large outdoor boxes. Most replacements involve intermatic mechanical box timers (like the T101 series) used for pools, water heaters, or outdoor lighting.
Key Details To Identify
- Model Number: Usually found inside the cover.
- Voltage: Commonly 120V or 240V. Using the wrong voltage is dangerous!
- Wiring: Note the number and color of wires.
- Load Type: Are you controlling lights, a pump, or something else?
- Location: Indoor or outdoor? Damp or dry area?
Take a clear photo of the wiring before touching anything. This is your reference for later.
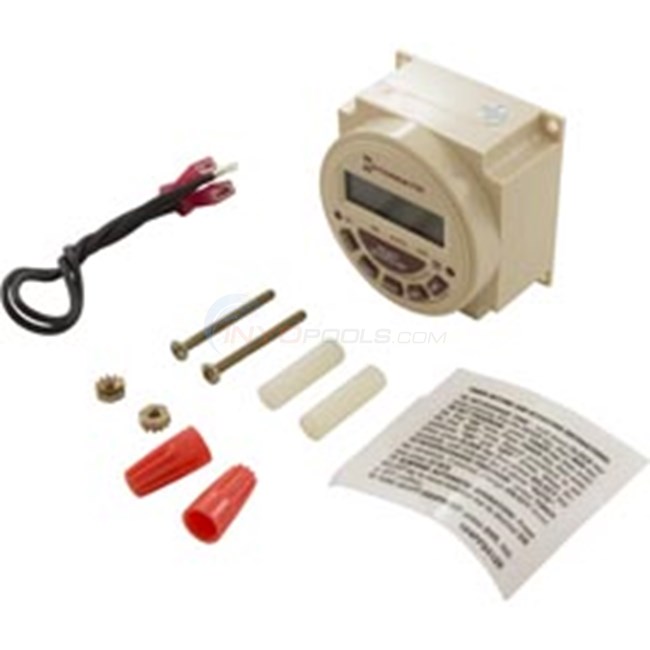
Credit: www.inyopools.com
Choosing The Right Digital Timer Replacement
Not all digital timers are created equal. Picking the best model for your needs is crucial. Here’s how to make a smart choice.
Main Factors To Consider
1. Voltage Compatibility
Your new digital timer must match the voltage (120V or 240V) of your old Intermatic. Using the wrong one can destroy the timer and pose a fire risk.
2. Load Type And Amperage
Check the amp rating on your current timer and the device you’re controlling. Most home loads (lights, small pumps) are 15A or less, but larger pool pumps can be 20A or more.
3. Number Of Circuits
Are you controlling just one thing, or multiple items from the same box? Some timers can handle two or more loads.
4. Indoor Or Outdoor Use
Outdoor models need weatherproof enclosures.
- Features
- Multiple programs per day
- Battery backup (keeps time during power outages)
- Astronomic setting (tracks sunrise/sunset)
- Smart home compatibility (Wi-Fi, Zigbee, Z-Wave)
- Physical Space
Will the new timer fit in the existing box? Measure before buying.
Popular Digital Timer Brands
- Intermatic (they make digital models too)
- Honeywell
- GE
- Woods
- Leviton
- Tork
Common Buyer Mistakes
- Ignoring voltage and amperage ratings
- Choosing indoor models for outdoor use
- Forgetting about physical space and box fit
- Buying advanced timers with features you’ll never use
Tools And Materials You’ll Need
Gather your tools before starting. This avoids frustration later.
- Flathead and Phillips screwdrivers
- Voltage tester or multimeter (for safety)
- Wire strippers/cutters
- Needle-nose pliers
- Electrical tape
- Wire nuts (correct size for your wires)
- Pencil or marker
- Your new digital timer
- Camera or phone (for wiring photos)
- Safety gloves and goggles
If your new timer is a different size or shape, you may also need mounting screws, drill, or a new enclosure.
Safety First: Before You Begin
Electricity is dangerous. If you’re not comfortable working with wiring, hire a licensed electrician. However, many homeowners can handle timer replacement safely if they follow precautions.
- Turn off power at the breaker. Double-check with a voltage tester.
- Lock the breaker box or leave a note so no one turns it back on while you work.
- Never rush—mistakes with electricity can be deadly.
Step-by-step Guide: Replacing An Intermatic Timer With A Digital Model
Follow each step carefully. Take your time, and refer to your wiring photos as needed.
1. Shut Off Power And Confirm
Go to your breaker panel. Switch off the breaker that powers the timer circuit. Use a voltage tester to check the wires inside the timer box. Only begin when you are sure there is no power.
2. Open The Timer Box
Use a screwdriver to open the cover. Some Intermatic timers have a latch; others use screws. Keep the cover and screws handy.
3. Take Photos Of Wiring
Use your phone to take detailed photos of all wires connected to the timer. Capture:
- Wire colors and their positions
- Labels (if any) inside the box
- Ground and neutral wire connections
This reference is crucial for wiring the new timer correctly.
4. Label The Wires
Using masking tape and a marker, label each wire (“Line,” “Load,” “Ground,” “Neutral,” etc. ) As you disconnect them. This step is often skipped but makes installation much easier.
5. Disconnect The Old Timer
Loosen the terminal screws and gently pull each wire free. If there are wire nuts, unscrew them. Keep all hardware in a safe spot.
6. Remove The Timer Mechanism
Most Intermatic timers are mounted with two or four screws. Remove these and lift out the old timer. Some units are attached to a metal bracket—save this if it fits your new timer.
7. Prepare The New Timer
Before mounting, compare the old and new timers side-by-side. Check:
- Wire terminal layout
- Size and mounting holes
- Space in the box
If the new timer is much smaller or larger, you may need to adjust the mounting bracket or box.
8. Connect The Wires To The New Timer
Follow the instructions for your digital timer. Usually, this involves:
- Line (power in): Connect to the terminal marked “Line” or “L.”
- Load (power out): Connect to “Load” or “Output.”
- Neutral: Some digital timers require a neutral wire. If you don’t have one, you may need to run an extra wire or choose a timer that works without neutral.
- Ground: Connect to the green screw or designated ground terminal.
Use wire nuts for connections if needed, and make sure all connections are tight. Loose wires can cause arcing or malfunctions.
9. Mount The New Timer
Secure the timer in place using the provided screws or the old mounting bracket. The timer should sit firmly with no wobble.
10. Double-check Everything
Before powering up:
- Confirm all wires are connected to the correct terminals.
- Check for exposed copper or loose connections.
- Make sure the timer is properly grounded.
- Refer to your wiring photos if you’re unsure.
11. Power On And Test
Go back to the breaker panel and switch power back on. Your new digital timer should light up or display a welcome message.
Set the clock and program your desired on/off cycles. Test the timer by switching between on and off manually and automatically.
12. Secure The Cover
Once you’re sure everything works, close the cover. For outdoor timers, ensure the cover seals tightly to keep out moisture.
Example: Wiring Comparison
Here’s a simple comparison of common Intermatic and digital timer wiring layouts:
| Timer Type | Line (Power In) | Load (Power Out) | Neutral | Ground |
|---|---|---|---|---|
| Intermatic Mechanical | Required | Required | Often Not Used | Usually Present |
| Digital Timer | Required | Required | Often Required | Usually Present |
Non-obvious tip: Many digital timers won’t function without a neutral wire. If your existing box doesn’t have one, you may need to run a new wire from the panel or select a “no neutral required” timer.
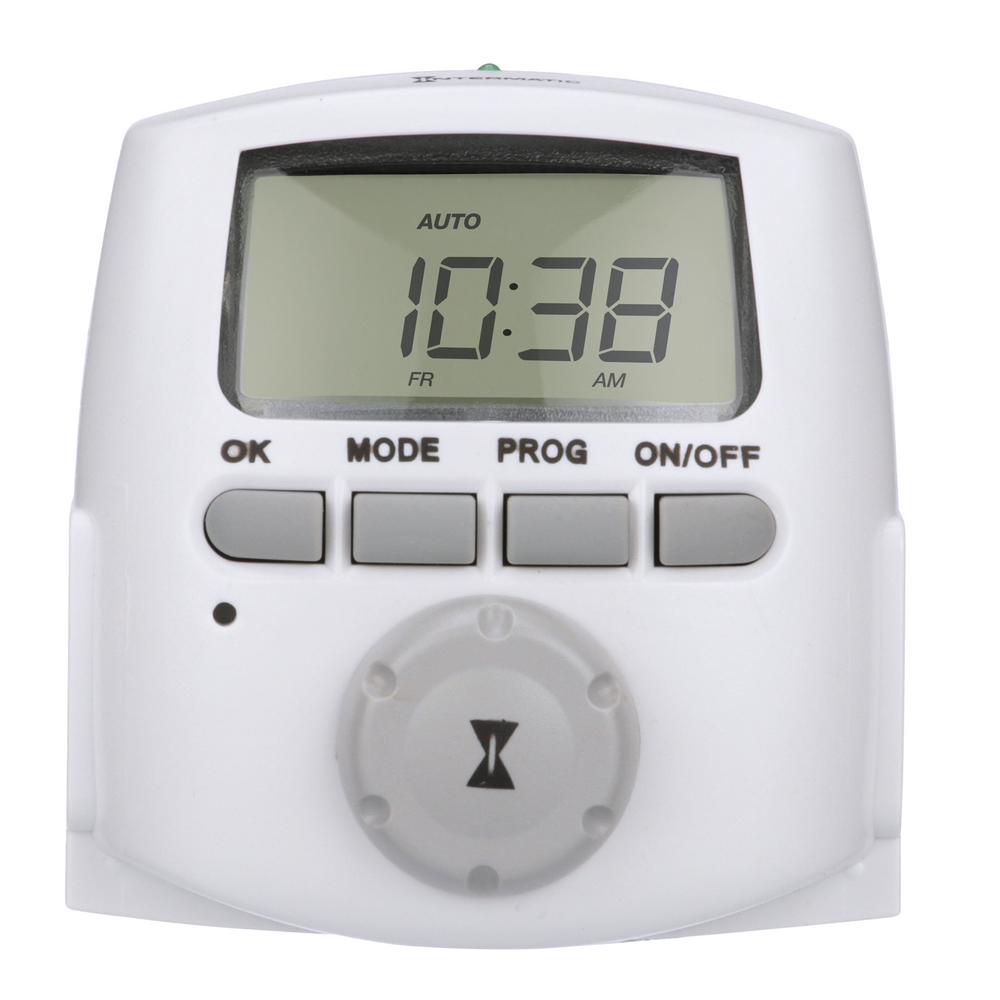
Programming Your New Digital Timer
Digital timers can seem overwhelming at first, but programming is usually straightforward. Here’s what you need to know.
Basic Steps
- Set the Clock: Use the “Clock” or “Time” button.
- Choose AM/PM or 24-Hour Format.
- Program On/Off Times: Select the days and times you want the device to turn on and off.
- Set Additional Cycles: Some timers allow multiple programs.
- Test the Settings: Use manual override to check operation.
Example: Digital Timer Programming Comparison
| Feature | Mechanical Intermatic | Digital Timer |
|---|---|---|
| Number of Programs | 1–2 | Up to 20+ |
| Accuracy | +/- 10 min/day | +/- 1 min/month |
| Battery Backup | No | Yes (most models) |
| Smart Integration | No | Some models |
Pro tip: Write down your programming steps as you go. This makes future changes much easier, especially if you need to reset the timer after a power outage.

Credit: www.amazon.com
Troubleshooting Common Issues
Sometimes, things don’t work right after installation. Here’s how to fix common problems.
Timer Doesn’t Power On
- Check the breaker—is power really on?
- Confirm wiring—did you connect line, load, neutral, and ground correctly?
- Look for a fuse inside the timer that may need replacing.
- Test the outlet—plug in a lamp to check if there’s power.
Device Does Not Turn On/off As Programmed
- Review your program settings—did you set AM/PM correctly?
- Double-check the current time on the timer.
- Check for manual override—make sure the timer isn’t stuck in “manual” mode.
Timer Flashes Or Loses Time After Outage
- Replace the backup battery if your timer has one.
- Check the wiring—a missing neutral can cause power loss issues.
Timer Feels Warm Or Buzzes
- Loose connections can cause overheating. Recheck all terminals.
- Overloaded circuit—make sure your load isn’t above the timer’s rating.
Advanced Features And Upgrades
Modern digital timers offer features that go far beyond old mechanical models.
- Vacation Mode: Randomly turns devices on/off for security.
- Sunrise/Sunset Programming: Adjusts automatically with the seasons.
- Remote Programming: Some models let you program from your phone or computer.
- Voice Control: Integrates with Alexa, Google Home, or Apple HomeKit.
If you want to future-proof your setup, consider these features. But remember, more features can mean a steeper learning curve.
When To Call An Electrician
Not every timer replacement is a DIY job. Here’s when you should hire a pro:
- You’re unsure about wiring or voltage
- No neutral wire is present, and the new timer requires one
- Outdoor installations with complex weatherproofing
- Multiple circuits or large commercial loads
A licensed electrician can ensure everything is up to code and safe.
Cost And Time Estimates
Most timer replacements are inexpensive, but planning helps avoid surprises.
- Digital timer cost: $30–$150, depending on features.
- Electrician labor: $75–$250, depending on complexity and region.
- DIY time: 45–90 minutes for most replacements.
Unexpected costs can come from needing a new box, running a neutral wire, or upgrading old wiring.
Environmental And Energy Benefits
Switching to a digital timer isn’t just about convenience. It can help the environment and lower your bills.
- Precise scheduling means you only use power when needed.
- Advanced features (like sunrise/sunset) save even more energy.
- Reduced wear and tear on appliances, extending their life.
According to the U. S. Department of Energy, using timers for pool pumps and outdoor lights can cut electricity use by up to 30%.
Real-world Example: Pool Pump Upgrade
Imagine you have an old Intermatic T104 controlling your pool pump. It’s noisy, and the pins slip out of place. You replace it with a digital Intermatic PE153.
- Programming: Now you set three cycles per day, including one at night for energy savings.
- Remote control: If you install the app, you can adjust the schedule before you come home.
- Result: Your pump runs less, your pool is cleaner, and you save about $20/month on power.
Tips For A Smooth Upgrade
- Keep your wiring photos for future reference.
- Write down your timer’s model and settings in case you need support.
- Test all functions before closing the box.
- Check local electrical codes if you’re unsure about DIY work.
Hidden insight: Some digital timers “learn” your schedule and suggest energy-saving adjustments after a few weeks of use. Check your model’s manual for these advanced features.
Summary Table: Digital Vs. Mechanical Timer Features
| Feature | Mechanical Intermatic | Digital Timer |
|---|---|---|
| Programming Options | 1–2 cycles/day | Multiple cycles, randomization |
| Accuracy | Can drift | Highly accurate |
| Noise | Ticking | Silent |
| Backup Battery | No | Yes |
| Smart Features | No | Yes (some models) |
| Outdoor Use | Yes | Yes (select models) |
Credit: www.intermatic.com
Frequently Asked Questions
How Do I Know If My New Digital Timer Needs A Neutral Wire?
Most digital timers require a neutral to power their display and logic. Check your new timer’s manual—look for wiring diagrams. If you only have two wires in your box (line and load), you may need to add a neutral or choose a timer that works without one.
Can I Use A Digital Timer Outdoors?
Yes, but only if it’s rated for outdoor use and installed in a weatherproof enclosure. Look for timers marked “Outdoor Rated” or “NEMA 3R.” For added safety, always use weatherproof boxes in wet or damp locations.
Will A Digital Timer Save Me Money?
Absolutely. More accurate scheduling means less wasted power. Even simple upgrades can save $5–$20 per month on outdoor lighting or pool pumps. Timers with advanced features (like sunrise/sunset programming) can save even more.
What If My Timer Stops Working After A Power Outage?
Many digital timers have a battery backup. If yours doesn’t, you’ll need to reprogram it after an outage. To avoid this, choose a model with a backup battery or non-volatile memory.
Is It Safe To Replace A Timer Myself?
If you’re comfortable with basic wiring and follow safety steps (turning off power, double-checking connections), most homeowners can handle timer replacement. When in doubt, hire a licensed electrician.
For more details about electrical safety and wiring codes, you can refer to the National Electrical Code.
Upgrading from a mechanical Intermatic timer to a digital model is one of the best ways to modernize your home’s electrical system. With the right timer, careful installation, and a few simple tips, you’ll enjoy years of reliable, flexible control—no more ticking, drifting, or missed cycles.