
Building a DIY Tanning Ledge for Your Above Ground Pool: The Ultimate Guide
Imagine relaxing in your backyard, feet dipped in cool water, sun on your face, while you lounge on a shallow, beautiful tanning ledge built right into your above ground pool. If you think tanning ledges are only for luxury in-ground pools, think again. With the right planning and a bit of creativity, you can build your own DIY tanning ledge for your above ground pool—without breaking the bank.
This guide will walk you through everything you need to know, from materials and design ideas to step-by-step instructions and practical tips only experienced DIYers talk about. You’ll learn about common mistakes to avoid, safety considerations, and how to customize your project to fit your space and budget.
Whether you’re looking for a simple, affordable solution or want to create a backyard showpiece, you’ll find answers here.
What Is A Tanning Ledge And Why Add One?
A tanning ledge—sometimes called a Baja shelf or sun shelf—is a shallow platform in a pool where you can lay, sit, or play while partially in the water. For above ground pools, it creates a resort-style relaxation area that’s perfect for sunbathing, reading, or letting young kids splash safely.
Benefits Of A Tanning Ledge
- Shallow relaxation: Enjoy the water without fully swimming.
- Sunbathing: Get a tan while staying cool.
- Safe play: Shallow area for kids and pets.
- Stylish look: Turns a standard pool into a high-end feature.
Many homeowners find that a tanning ledge becomes the most popular spot in their pool. It’s a way to upgrade your pool’s function and appearance in one project.
Planning Your Diy Tanning Ledge
Before you start buying materials or making plans, it’s important to consider several factors. A well-planned tanning ledge will be safer, more comfortable, and last longer.
Measuring And Choosing A Location
Start by deciding where to install the ledge. For above ground pools, options include:
- Inside the pool: Building a ledge that sits in the water, attached to the pool wall.
- Outside or overhanging: Creating a deck or platform that extends over the pool edge, with the ledge at water level.
- Freestanding platform: A removable shelf or bench that can be placed inside and taken out when not in use.
Use a measuring tape to check your pool’s width, depth, and available space around it. Most tanning ledges are 6 to 12 inches deep, with a platform size of 4 to 8 feet wide and 2 to 4 feet long.
However, your ledge can be customized to your needs.
Pro tip: Make sure you leave enough pool area for swimming. Don’t let the ledge take up more than 25% of your pool’s usable surface.
Key Design Considerations
Think about:
- Weight support: The ledge must support adults safely.
- Water movement: Avoid blocking pool filtration or creating stagnant water.
- Entry/exit: Make sure it’s easy to get on and off the ledge.
- Removability: Do you want a permanent or temporary ledge?
- Aesthetics: Choose materials that match your pool and backyard style.
Non-obvious insight: Many beginners forget to check local pool codes. Some areas require certain distances from the pool edge for safety. Always check before building.
Materials And Tools You’ll Need
The right materials are essential for a tanning ledge that’s safe, comfortable, and durable. Your choice will depend on budget, design, and whether the ledge is permanent or temporary.
Common Materials For Diy Tanning Ledges
- Pressure-treated wood: Affordable, easy to work with, but must be sealed for water exposure.
- Composite decking: Long-lasting, slip-resistant, and low maintenance.
- PVC or plastic panels: Lightweight and water-resistant.
- Concrete pavers or blocks: Very sturdy, suitable for ground-supported ledges.
- Aluminum or steel frame: Strong but needs rust protection.
- Outdoor cushions or foam mats: For extra comfort on top of your ledge.
Expert tip: Use stainless steel screws and hardware to prevent rust and staining.
Essential Tools
- Circular saw or hand saw
- Power drill and bits
- Measuring tape and level
- Rubber mallet
- Screwdriver set
- Sandpaper or sanding block
- Waterproof sealant or paint (if using wood)
- Safety gear (gloves, goggles)
Cost Comparison
Below is a comparison of typical costs for different tanning ledge materials, based on a 4×6 foot platform:
| Material | Cost Range (USD) | Durability | Maintenance |
|---|---|---|---|
| Pressure-treated wood | $80 – $150 | 5-7 years | Seal every year |
| Composite decking | $200 – $350 | 10-20 years | Low |
| PVC panels | $120 – $220 | 8-12 years | Low |
| Concrete blocks | $60 – $110 | 20+ years | Very low |
While wood is cheapest, composite and PVC are best for low maintenance. Think about the climate and how much effort you want to put into upkeep.
Types Of Diy Tanning Ledges For Above Ground Pools
Let’s look at the most practical and popular tanning ledge designs for above ground pools. Each comes with pros, cons, and construction tips.
1. Removable Tanning Shelf
A removable shelf is a platform you can set inside the pool when you want to use it and take out when you don’t. It’s ideal if you want to keep your pool open for swimming or need an easy winter solution.
How it works: The shelf sits on legs, with non-slip feet to protect the pool liner. The top is just below the water surface.
Pros: Easy to install and remove, no permanent changes to the pool.
Cons: Must be stored when not in use, may shift if not weighted properly.
Materials: Composite decking or PVC with plastic legs.
2. Built-in Platform Ledge
A built-in platform attaches to the pool wall inside the pool. It can be supported by legs or brackets and is often fixed in place for the season.
How it works: The platform is bolted or clamped to the pool frame, with legs resting on the pool floor for support.
Pros: Sturdy, feels like a real ledge. Custom-fit to your pool.
Cons: More complicated to build, may void pool warranty if not careful.
Materials: Pressure-treated wood, composite, or aluminum.
3. Overhanging Deck Extension
For pools with a surrounding deck, you can build a deck extension that overhangs the pool edge, creating a shallow tanning ledge right at water level.
How it works: The extension is built as a wide step or platform, with its bottom just touching the pool water.
Pros: Looks professional, easy to blend with existing deck.
Cons: Needs a deck, may require permits.
Materials: Decking boards, support beams.
4. Floating Tanning Raft
A floating tanning raft is a large, stable float that acts as a tanning ledge. It’s the easiest to “build,” and great for renters.
How it works: Made of closed-cell foam or plastic, it floats on the water and can be anchored with weights.
Pros: No pool modifications, very flexible.
Cons: Less stable, may drift or flip with movement.
Materials: Foam raft, optional anchors.
5. Concrete Block Or Stone Platform
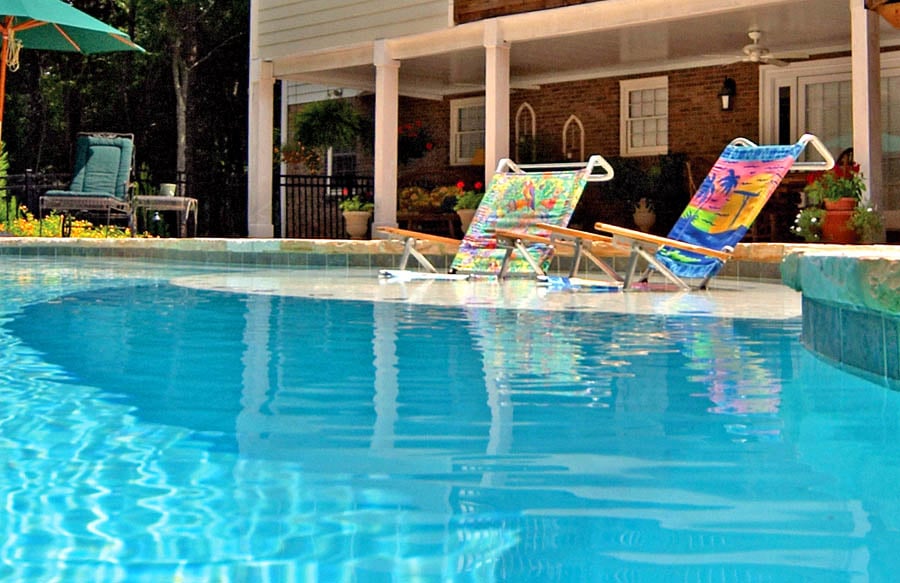
If your above ground pool is semi-buried or has a sloped yard, a concrete block ledge can be built around the pool, with the platform at water level.
How it works: Blocks or pavers are stacked and leveled, with a smooth top for sitting or laying.
Pros: Super durable, blends into landscaping.
Cons: Permanent, heavy, not movable.
Materials: Concrete blocks, pavers, mortar.

Credit: poolpromag.com
Step-by-step Guide: Building A Basic Diy Tanning Ledge
Here’s how to build a simple, removable tanning shelf for an above ground pool. Adjust measurements and materials as needed for your pool size.
Step 1: Measure And Plan
Measure the area where you want the ledge. Mark the width (for example, 4 feet) and the depth (for example, 2 feet). Decide how high you want the ledge—usually 6-12 inches under the water.
Non-obvious tip: Check the curve of your pool walls. Many above ground pools aren’t perfectly straight, so you may need to adjust the shelf width.
Step 2: Cut The Platform
Using composite decking or waterproof plywood, cut the top platform to your desired size. Sand edges for comfort.
Step 3: Build The Support Legs
Cut four legs (or more for larger ledges) from PVC pipe, composite boards, or sealed wood. The length should match the distance from the ledge top to the pool floor.
Add non-slip rubber caps to the bottom of each leg to protect the pool liner.
Step 4: Attach The Legs
Screw or bolt the legs securely to the platform corners. If using wood, seal all cut surfaces with waterproof sealant.
Pro tip: Angle the legs slightly outward for better stability.
Step 5: Add Weight Or Anchors
If the shelf floats, add sandbags or weights to keep it steady. For heavier materials, this may not be needed.
Step 6: Install And Test
Gently lower the ledge into the pool, making sure the legs sit flat on the bottom. Step on gently to test stability. Adjust as needed.
Step 7: Add Comfort
Lay waterproof foam mats or outdoor cushions on top for extra comfort. Make sure they’re secured so they don’t float away.
Step 8: Safety Check
Double-check that all hardware is tight, edges are smooth, and the ledge does not block pool circulation.
Customizing Your Tanning Ledge
A tanning ledge is more than just a platform. You can add features to make it more comfortable, stylish, or fun.
Built-in Umbrella Holders
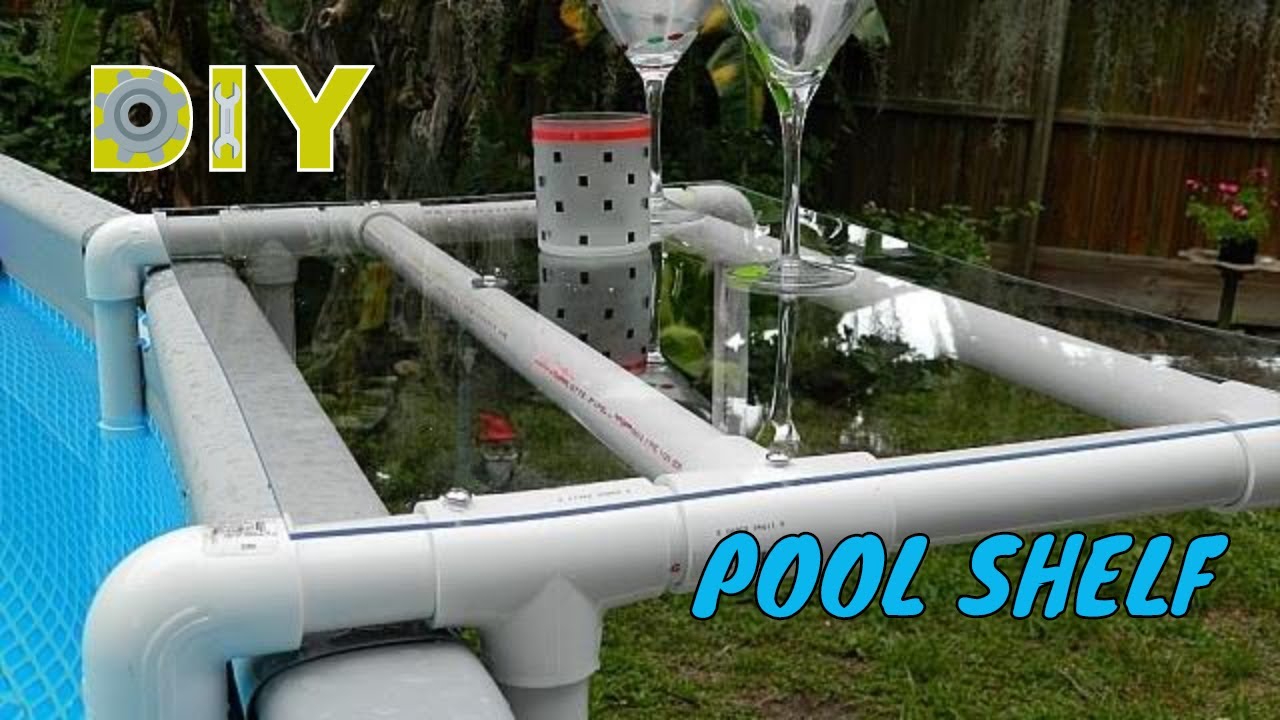
Drill a hole in one corner for a removable umbrella. This provides shade for hot days.
Cup Holders And Storage
Install cup holders or a small basket under the ledge for drinks, sunscreen, or pool toys.
Non-slip Surface
Apply a non-slip coating or add outdoor rug material to prevent slipping when wet.
Lighting
Add waterproof LED strip lights under the ledge for night swimming.
Color And Decor
Paint or stain your ledge with pool-safe paint. Add patterns or stencils for a custom look.
Practical tip: Keep all accessories pool-safe and easy to remove for cleaning.
Credit: www.youtube.com
Safety Considerations
Safety is critical when adding anything to your pool, especially a tanning ledge.
- Always use rounded corners and smooth edges to prevent cuts.
- Do not block pool skimmers or returns. Good water flow is essential for clean, safe swimming.
- Place the ledge in an area visible from your house or deck, especially if children will use it.
- Never exceed the weight limit of your materials or design.
- Remove the ledge before winterizing or covering the pool.
Extra insight: Inspect your ledge weekly for loose hardware, sharp edges, or algae buildup.
Maintenance Tips For Your Diy Tanning Ledge
A well-maintained ledge will last for years. Here’s what to do:
- Clean the surface weekly with mild soap and water.
- Rinse off sunscreen or oils to prevent buildup.
- Check hardware and supports for looseness or rust.
- Reseal wood surfaces at least once per season.
- Store removable ledges indoors during winter or storms.
Non-obvious tip: If your pool uses saltwater, rinse metal parts regularly to prevent corrosion.
Common Mistakes To Avoid
Many DIYers run into trouble with tanning ledges because of overlooked details. Here’s what to watch out for:
- Using wrong materials: Untreated wood or regular steel will rot or rust quickly.
- Not sealing edges: Water will get into any crack or cut, causing damage.
- Incorrect measurements: A ledge that’s too high or low won’t be comfortable.
- Blocking pool equipment: Placing the ledge over a skimmer or return can cause cloudy water or algae.
- Ignoring weight limits: Too many people or heavy objects can cause collapse.
- No slip protection: Wet surfaces are slippery—always add non-slip coverings.
Extra insight: Test your ledge with weights before letting kids or guests use it.
Budgeting And Cost-saving Ideas
DIY tanning ledges can fit many budgets. Here’s how to save money:
- Use leftover deck boards or pallets (but seal them well).
- Look for discounted composite decking at local stores.
- Repurpose old furniture frames as supports.
- Share materials with neighbors doing similar projects.
- Build a smaller ledge and expand later.
Real-world example: A homeowner in Texas built a 3×4 foot ledge for under $90 using recycled pallet wood and PVC pipe.
Comparing Diy Vs. Store-bought Tanning Ledges
There are commercial tanning ledges for above ground pools, but are they worth it? Here’s a quick comparison:
| Feature | DIY Ledge | Store-Bought Ledge |
|---|---|---|
| Cost | $80 – $350 | $400 – $1200 |
| Customization | Fully customizable | Limited options |
| Installation | DIY effort needed | Plug-and-play |
| Durability | Depends on materials | Usually high |
| Appearance | Personalized look | Standard design |
DIY is best for those who want a unique, affordable solution and don’t mind some work.
Real-life Examples And Creative Ideas
Homeowners have created some amazing DIY tanning ledges. For example:
- A family in Florida built a curved ledge using composite boards and PVC legs, matching the pool’s shape perfectly.
- In California, a couple added LED lighting and a built-in cooler to their deck extension tanning ledge.
- A DIYer in Australia used foam insulation panels covered with marine vinyl to make a super-comfy, removable shelf.
Tip: Browse pool forums and social media for inspiration. You’ll find creative ideas for every budget.
Environmental Impact And Sustainability
If you care about the environment, you can make your tanning ledge eco-friendly:
- Use recycled or reclaimed wood, sealed with eco-safe finishes.
- Choose composite decking made from recycled plastics.
- Avoid harsh chemicals for cleaning.
- Recycle materials at the end of the ledge’s life.
For more on eco-friendly pool ideas, visit the EPA’s Greener Pools page.
Troubleshooting Guide
If you run into problems, here’s how to fix the most common issues:
- Ledge floats or moves: Add more weight, or anchor legs with suction cups.
- Surface feels rough: Sand edges and apply a smooth finish.
- Mold or algae: Clean weekly, use a diluted bleach solution if needed.
- Ledge sags: Add more support legs or reinforce the frame.
- Water gets cloudy: Check that you’re not blocking skimmers or returns.
Credit: articles.bluehaven.com
Frequently Asked Questions
How Deep Should A Tanning Ledge Be In An Above Ground Pool?
Most tanning ledges are 6 to 12 inches deep. This depth lets you sit or lay with water over your legs but not fully submerged. Adjust depth based on user comfort and pool size.
Can I Add A Tanning Ledge To A Pool With A Liner?
Yes, but be careful. Always use non-slip, liner-safe feet on any supports. Never use sharp or rough materials that could tear the liner. Removable shelves are safest for lined pools.
What’s The Best Material For A Diy Tanning Ledge?
Composite decking and PVC panels are best for most people. They’re water-resistant, durable, and low maintenance. Pressure-treated wood works if sealed well, but needs more upkeep.
Will A Tanning Ledge Affect My Pool’s Water Circulation?
If designed correctly, no. Place the ledge away from skimmers and returns. Make sure water can flow freely around and under the ledge. Avoid blocking any equipment.
How Do I Winterize Or Remove The Tanning Ledge?
For removable ledges, simply lift them out, rinse, and store indoors. For permanent or built-in ledges, drain the pool below the ledge, check for damage, and cover securely for winter. Always follow your pool manufacturer’s advice.
Adding a DIY tanning ledge to your above ground pool transforms it into a true backyard retreat. With the right design, materials, and care, you’ll enjoy a resort-style relaxation spot for years. Remember to plan carefully, use safe materials, and customize your ledge to fit your style and needs.
Whether you choose a removable shelf, built-in platform, or creative floating raft, your pool will never be the same—and you’ll have the satisfaction of knowing you built it yourself.