
Replacing an AC compressor without a vacuum pump is a task that many car owners face, especially when professional tools are not available. While the standard method uses a vacuum pump to clear moisture and air from the system, there are ways to handle the replacement without one.
This guide walks you through the process, explains the risks, and shares practical advice from real-world experience. If you are ready to tackle this job, read carefully—every step matters.
Why Replace An Ac Compressor Without A Vacuum?
The AC compressor is the heart of your vehicle’s air conditioning system. When it fails, the cool air stops, and you are left with uncomfortable heat inside the car. Usually, the replacement process involves a vacuum pump to remove air and moisture, ensuring optimal performance. However, many DIY mechanics don’t have access to this tool, and local shops may charge high fees for their services.
Some reasons why people choose to replace the compressor themselves without a vacuum pump:
- Cost savings: Professional AC service is expensive.
- Tool limitations: Not everyone owns a vacuum pump.
- Time constraints: Waiting for shop appointments is inconvenient.
- DIY satisfaction: Many enjoy fixing their own vehicles.
It is important to understand the risks, alternatives, and necessary steps to achieve the best results without a vacuum. Even though skipping the vacuum pump is not the preferred method, understanding why you might do it helps you better prepare for the job and avoid surprises during the process.
Understanding Risks And Limitations
Replacing an AC compressor without a vacuum pump is possible, but not ideal. The main risks include:
- Moisture in the system: Water can damage AC components and reduce cooling efficiency.
- Air contamination: Air reduces system performance and can cause compressor failure.
- Shorter compressor life: Moisture and air lead to corrosion and wear.
When air or moisture remains inside, it reacts with the refrigerant and forms acids that slowly damage internal parts. You may not notice the effects immediately, but over time, this can lead to expensive repairs. Many first-time DIYers are surprised when their new compressor fails after only a year or two because they overlooked these risks.
While these problems are real, careful work can minimize them. With proper preparation and attention to detail, you can achieve good results. If you do not have a vacuum pump, you must be extra careful with every step to prevent avoidable issues.
Credit: wagendass.com
Tools And Materials Needed
Before starting, gather all the necessary tools and materials. Missing items can cause delays and mistakes.
Essential tools:
- New AC compressor (compatible with your vehicle)
- Set of wrenches and ratchets
- Screwdrivers
- AC manifold gauge set
- AC refrigerant (R134a or as specified)
- AC flush kit or compressed air
- New receiver/drier or accumulator
- O-ring kit (for AC fittings)
- AC oil (specific type for your compressor)
- Safety glasses and gloves
Optional tools:
- AC line disconnect tools
- Refrigerant scale
- Leak detector spray
Extra preparation tip: Have clean rags and a container ready to catch any oil that may spill. Also, keep a notepad to record the amount of oil and refrigerant added. This avoids confusion and helps you double-check your work. The more organized you are, the less likely you’ll forget a step.
Having everything ready will make the process smoother.
Step-by-step Guide: Replacing Ac Compressor Without Vacuum
Follow these steps carefully to replace your AC compressor. Each step includes practical tips and warnings to help you avoid common mistakes.
1. Preparation And Safety
Safety should always come first. AC systems are under pressure and refrigerants can be dangerous.
- Park your vehicle in a well-ventilated area.
- Wear safety glasses and gloves.
- Disconnect the battery to prevent electrical shorts.
Check the system for leaks using a leak detector spray. If you find leaks, fix them before moving forward.
Extra detail: Always work on a cool engine. Hot components can cause burns, and refrigerant gas escaping from a pressurized system can cause frostbite if it comes in contact with your skin. Lay out your tools within easy reach and keep pets and children away from your workspace.
2. Recovering Old Refrigerant
It is illegal and unsafe to release refrigerant into the atmosphere. If possible, use a recovery machine or take the vehicle to a shop for safe refrigerant removal.
If you must proceed, open the service valves slowly and let the refrigerant escape outside, away from people and pets. This is not recommended, but some DIYers use this method. Always follow local laws and regulations.
A common mistake is to rush this step. Even after the system appears empty, some pressure may remain. Wear gloves and stand to the side while loosening fittings. If you hear hissing, pause until it stops. This prevents accidental exposure to refrigerant gas.
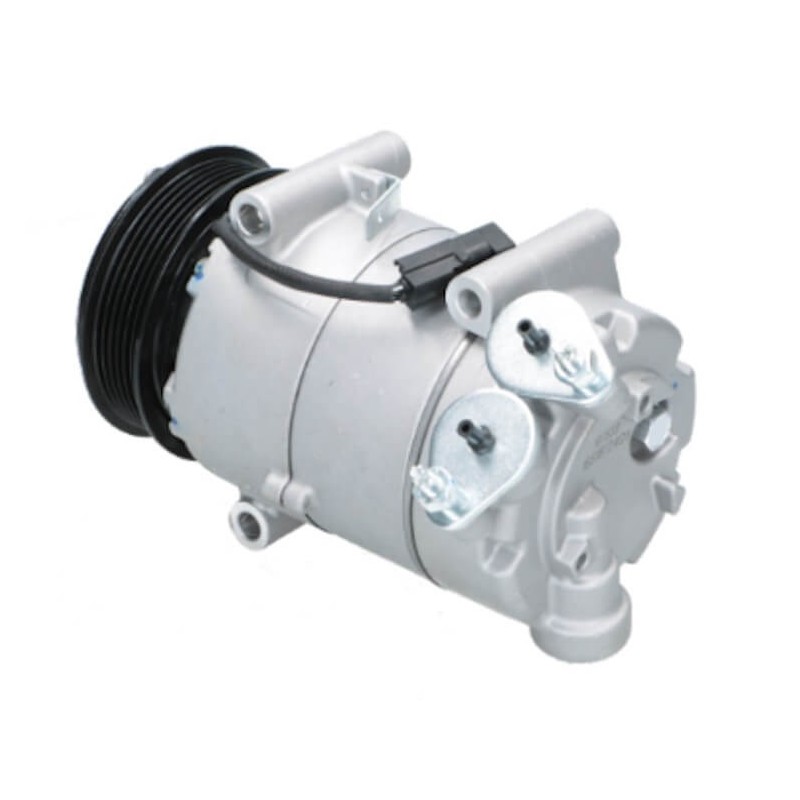
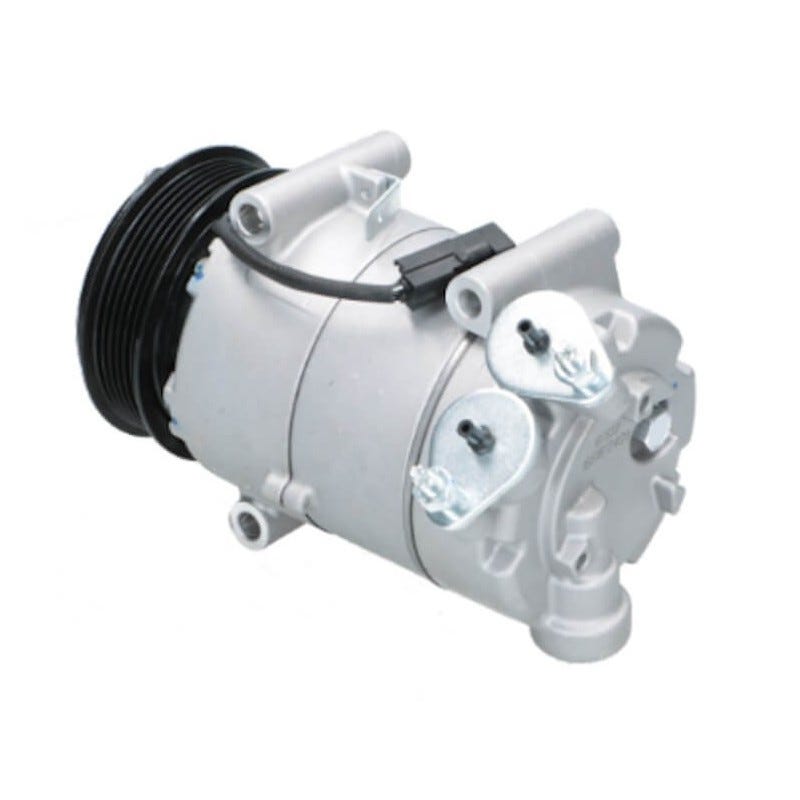
3. Removing The Old Compressor
- Locate the AC compressor (usually near the engine).
- Remove the serpentine belt.
- Disconnect electrical connectors and refrigerant lines.
- Remove mounting bolts and take out the compressor.
Inspect the removed compressor for signs of failure, such as metal shavings or burnt oil. If you find debris, the system needs to be flushed.
Tip: Take photos as you remove components. This makes reassembly easier, especially if you haven’t worked on your AC system before. Label any wires or hoses if you worry about forgetting their positions.
4. Flushing The Ac System
Flushing is critical to remove old oil, debris, and moisture.
- Use an AC flush kit or compressed air to clean the lines, condenser, and evaporator.
- Avoid flushing through the expansion valve or orifice tube.
- Repeat until the flush fluid comes out clean.
Replace the receiver/drier or accumulator to ensure no moisture remains. These components trap water and must be replaced whenever the system is opened.
Extra explanation: If you do not flush out all the old oil and debris, small particles can quickly block the orifice tube or expansion valve, causing poor cooling or total failure. Use short bursts of compressed air and alternate with flush solvent to get the best results. Allow all parts to dry fully before reassembly.
5. Installing The New Compressor
- Pour the correct amount of AC oil into the new compressor. Check the manual for the right type and quantity.
- Install new O-rings on all fittings. Lubricate them with AC oil.
- Mount the compressor and secure bolts.
- Connect refrigerant lines and electrical connectors.
- Reinstall the serpentine belt.
Double-check all connections for tightness.
Practical detail: Rotate the compressor clutch by hand before installation. This ensures the oil is distributed and prevents a dry start. Do not overtighten bolts—use a torque wrench if possible. Over-tightening can crack aluminum components.
6. Adding Refrigerant Without Vacuum
This is the most critical and tricky part. Since you do not have a vacuum pump, you need to “purge” air from the system as much as possible.
Common method:
- Open the low-side service port.
- Start the engine and turn the AC on maximum.
- Begin adding refrigerant slowly.
- As refrigerant enters, air will be pushed out through the port.
- When you see cold air and pressure stabilizes, stop filling.
Alternative technique:
- Use a refrigerant can with a built-in hose and gauge.
- Add refrigerant in short bursts, allowing the compressor to cycle and pull air through the system.
- Stop when the gauge shows the correct pressure.
Important tips:
- Do not overfill. Too much refrigerant can damage the compressor.
- Monitor pressure with gauges. Typical low-side pressure is 25-45 PSI; high-side is 200-250 PSI.
- If the system does not cool, stop and check for leaks.
Additional insight: Let the system rest for a few minutes between refrigerant bursts. This allows the pressure to stabilize and makes it easier to detect problems early. If the compressor cycles rapidly, that may mean too much air remains or the charge is still low.
7. Purging Moisture And Air
Since you skipped the vacuum, you need to purge as much air and moisture as possible.
The “triple evacuation” trick:
- Fill the system with a small amount of refrigerant.
- Run the AC for 5-10 minutes.
- Release the refrigerant through the service port.
- Repeat 2-3 times before final filling.
This process helps to flush out air and moisture, improving performance.
Extra tip: When venting, do not release refrigerant directly near painted surfaces. Refrigerant can remove paint and damage plastic. Use a clear hose to guide the gas away from the car if possible.
8. Checking For Leaks
Once filled, check all connections for leaks.
- Use leak detector spray or soapy water.
- Look for bubbles indicating a leak.
- Tighten any loose fittings and retest.
Even small leaks can lose enough refrigerant to stop cooling within a week. Double-check all service ports and connections. If you find a leak, replace the O-ring or fitting immediately.
9. Testing The System
Let the AC run for at least 15 minutes.
- Check for cold air from the vents.
- Listen for strange noises from the compressor.
- Monitor pressures with the manifold gauge.
If the system works well, you have succeeded. If not, troubleshoot for leaks, low refrigerant, or electrical issues.
Advanced check: Test the system under different engine speeds and outside temperatures. Sometimes, a problem only appears when the car is driven or the weather is very hot. Drive with the AC on and monitor performance for the next few days.
Comparing Methods: With Vs Without Vacuum Pump
To understand the impact of skipping the vacuum pump, see this comparison.
| Method | Moisture Removal | System Performance | Compressor Life | Cost |
|---|---|---|---|---|
| With Vacuum Pump | Excellent | Optimal | Long | Higher |
| Without Vacuum Pump | Moderate | Good (if careful) | Medium | Lower |
Insight: While using a vacuum pump is best, careful DIY methods can produce good results if you purge air and moisture thoroughly. But remember, results can vary based on your attention to detail.
Practical Tips And Real-world Advice
Many beginners miss key details that make a big difference:
- Replace the receiver/drier or accumulator every time you open the system. Old units hold moisture and ruin your new compressor.
- Flush the system even if the old compressor looks clean. Small particles can block valves and cause failures.
- Add the right amount of oil. Too little or too much will damage the compressor.
- Use new O-rings on every fitting. Old O-rings leak and cause expensive repairs.
Non-obvious insight: Most people think adding refrigerant is easy, but the real challenge is removing air. The “triple evacuation” trick is rarely discussed but helps a lot.
Another tip: After replacing the compressor, check the AC operation in the morning and afternoon. Temperature and humidity can change system performance. Also, listen for clicking or clattering noises—these are early signs of trouble.
Credit: www.youtube.com
Common Mistakes To Avoid
Avoid these errors for a successful compressor replacement:
- Skipping system flush: Debris will ruin your new compressor.
- Reusing old O-rings: Leads to leaks.
- Overfilling refrigerant: Causes poor cooling and compressor failure.
- Not replacing receiver/drier: Moisture stays in the system.
- Ignoring leak checks: Small leaks can empty your system in days.
- Adding the wrong oil: Each compressor requires a specific oil; check the manual.
Extra example: Some people forget to tighten the compressor’s electrical connector, leading to the compressor clutch not engaging. Always check every connection before starting the engine.
Detailed Example: Honda Civic Ac Compressor Replacement
Let’s look at a real-world example. A Honda Civic owner replaced their AC compressor without a vacuum pump.
Steps followed:
- Old compressor removed and system flushed with compressed air.
- Receiver/drier replaced.
- New compressor installed with correct PAG oil.
- O-rings replaced.
- Refrigerant added slowly through the low-side port.
- “Triple evacuation” method used to purge air.
- Leak check performed with soapy water.
Results:
- System produced cold air (45°F at vent).
- Pressures were in the correct range.
- No leaks detected after one week.
Lesson: Careful work and patience can achieve good results, even without a vacuum pump.
Added detail: After one month, the owner checked the system again. It was still blowing cold air, and there were no strange noises or leaks. This shows that even with basic tools, long-term success is possible if you do not rush the steps.
Ac Oil And Refrigerant Amounts
Proper oil and refrigerant amounts are essential. Here is a quick reference for common vehicles.
| Vehicle | Compressor Oil | Refrigerant (R134a) |
|---|---|---|
| Honda Civic | 5.5 oz PAG46 | 16 oz (450g) |
| Toyota Corolla | 4.6 oz PAG46 | 17 oz (480g) |
| Ford F-150 | 8 oz PAG100 | 28 oz (800g) |
| Chevrolet Silverado | 8 oz PAG46 | 32 oz (900g) |
Always check your vehicle’s manual for exact specifications.
Advanced tip: If you cannot find the specs, look for a sticker under the hood or near the radiator. Many cars list the refrigerant amount and oil type there. Using the wrong amount can make the AC blow warm or damage the compressor.
How Long Will The Compressor Last?
Skipping the vacuum pump affects compressor life. Here is an estimate based on real-world data.
| Installation Method | Expected Life | Cooling Performance |
|---|---|---|
| With Vacuum | 5-8 years | Excellent |
| Without Vacuum | 2-5 years | Good |
Insight: If you drive in hot climates or use the AC heavily, compressor life may be shorter.
Extra perspective: Many owners report that compressors replaced without a vacuum pump work fine for a few years, but performance can drop during very humid or rainy seasons due to hidden moisture. A vacuum pump is always best if you want maximum longevity.
Credit: medium.com
Alternatives To Vacuum Pump
If you do not have a vacuum pump, consider these alternatives:
- AC flush kit: Removes debris and moisture.
- Compressed air: Helps push out air from lines.
- Triple evacuation: Purges air and moisture using refrigerant cycles.
- Local shop service: Some shops offer “vacuum only” service for a fee.
While not perfect, these options can improve results.
A tip many miss: If a friend or neighbor is a car enthusiast, ask if they own a vacuum pump. Many car clubs and online communities lend tools for free or a small fee. This can boost your results without buying expensive equipment.
How To Tell If Your Compressor Needs Replacement
Knowing when to replace the compressor is important. Signs include:
- No cold air from vents.
- Loud noises or rattling from compressor.
- Visible leaks around compressor.
- Burnt smell from AC.
- Compressor clutch not engaging.
If you see these symptoms, the compressor likely needs replacement.
Extra sign: If your AC pressure readings are much higher or lower than normal, this can also mean the compressor is failing or the internal valves are stuck.
Environmental Considerations
Handling refrigerant is serious. R134a and other gases harm the environment if released. Always try to recover refrigerant properly, and never vent it intentionally.
Fact: One pound of R134a can warm the planet as much as 1,430 pounds of CO2. Safe handling protects the environment.
For more details on refrigerant safety, visit EPA Refrigerant Handling.
Another practical tip: Many auto parts stores accept old refrigerant for recycling. Check with your local store before starting your project.
Final Checks Before Driving
Before you finish, review these steps:
- All connections tight.
- No leaks detected.
- Correct oil and refrigerant levels.
- AC blows cold air.
- Compressor runs smoothly.
Take your vehicle for a short drive and test the AC under different conditions. If problems appear, review the steps and fix any issues.
Extra check: After your test drive, let the car sit for a few hours and check for oil or refrigerant spots under the vehicle. This can reveal slow leaks you missed during your initial inspection.
Frequently Asked Questions
What Happens If I Skip The Vacuum Pump When Replacing The Ac Compressor?
Skipping the vacuum pump leaves moisture and air in the system. This can lower cooling performance, cause corrosion, and shorten compressor life. While you can purge most air using the “triple evacuation” method, the results are not as good as a full vacuum.
Can I Use A Compressed Air Source To Flush The Ac System?
Yes, compressed air can help flush lines and remove old oil and debris. However, it does not remove all moisture. Always replace the receiver/drier or accumulator after flushing.
How Much Refrigerant Should I Add After Compressor Replacement?
Check your vehicle’s manual for the exact refrigerant amount. Most cars use between 16 and 32 ounces (450–900g) of R134a. Overfilling can damage the compressor, so use an AC manifold gauge to monitor pressure.
Is It Safe To Drive With Air In The Ac System?
Driving with air in the AC system is not ideal. Air lowers performance and can cause compressor damage over time. If you must drive, try to purge as much air as possible using the triple evacuation trick.
What Is The Best Alternative To A Vacuum Pump For Diy Mechanics?
The triple evacuation method is the best alternative. It involves cycling refrigerant to flush out air and moisture. While not perfect, it improves system performance and compressor life compared to skipping all purging.
Replacing an AC compressor without a vacuum pump is challenging but possible. With careful preparation, attention to detail, and smart techniques, you can restore cool air to your car and save money. Remember: patience, proper parts, and thorough leak checks are key to success. If in doubt, seek help from experienced mechanics or consult your vehicle’s manual. Good luck with your AC repair project!