
When you look at your backyard pool, you might notice the area around your above ground pool feels unfinished. Many pool owners want a clean and attractive look but are unsure where to start. Putting rocks around your above ground pool is a practical solution. It not only makes your pool area look beautiful, but it also helps with maintenance and safety. This guide will show you everything you need to know to do it right—from planning and choosing the best rocks, to installation, safety, and care. By the end, you’ll have all the knowledge you need to create a poolside space that is both stylish and easy to manage.
Why Put Rocks Around An Above Ground Pool?
Choosing to put rocks around your pool is more than just a design decision. Rocks provide important benefits for you and your pool.
1. Prevents Erosion and Mud
Rain can wash away soil around your pool, making a mess and sometimes causing the ground to shift. Rocks create a barrier that holds soil in place and stops mud from splashing into your pool.
2. Improves Drainage
Water that sits around your pool can cause rust or damage. Rocks help water flow away, reducing the risk of rusting the metal frame or creating slippery areas.
3. Adds Style
With so many types of rocks, you can match your pool area to your own taste. Whether you like a natural, modern, or tropical look, rocks can create the style you want.
4. Protects Pool Walls
Sharp tools, lawn mowers, or even pets can damage pool walls. Rocks form a gentle barrier, protecting the pool from everyday wear.
5. Reduces Maintenance
Grass and weeds growing near the pool can be hard to cut. Rocks create a clean edge, making it easier to keep the area neat.
Non-obvious insight: Many people don’t realize that rocks also help to keep pool water cleaner. When there’s a border of rocks, less grass, dirt, or mulch gets kicked into the pool by wind or feet.
Planning: What You Need Before Starting
Before you start putting rocks down, a little planning can save you time and effort. Here’s what you need to consider.
Check Pool Manufacturer Guidelines
Some pool makers have rules about landscaping around their products. Always check your owner’s manual or the manufacturer’s website. Some may suggest a certain distance for rocks or recommend specific materials to avoid damaging the liner.
Measure The Area
Walk around your pool and measure how wide and long you want the rock border to be. Most people use a border 12 to 24 inches wide. Write down your measurements—this will help you buy the right amount of rock.
Check Your Yard’s Drainage
Notice where rainwater flows after a storm. If water pools around your pool, you may need to fix drainage before adding rocks. Rocks can help, but they’re not a fix for big water problems.
Decide On A Weed Barrier
A weed barrier fabric is a must. It keeps weeds from growing up through the rocks. The fabric should be strong, but allow water to drain through. Plastic sheeting is not a good choice, as it can cause water to collect under the pool, leading to rust or mold.
Calculate How Much Rock You Need
Use your measurements to figure out how many cubic feet or yards of rock you need. Most garden centers can help you with this calculation.
Non-obvious insight: It’s smart to buy 10-15% more rock than your calculation. Rocks settle, and you may need extra for touch-ups later.
Choosing The Right Rocks For Your Pool
Not all rocks are the same. Choosing the best type helps with drainage, safety, and style.
Types Of Rocks
Here are some popular choices for pool landscaping:
1. River Rock
These are smooth, rounded stones. They come in various colors and sizes. River rocks are gentle on bare feet and great for a natural look.
2. Pea Gravel
Small, smooth stones (usually under ½ inch). Pea gravel is affordable, easy to walk on, and works well for pool borders.
3. Crushed Stone
Broken pieces of rock, often limestone or granite. They are sharp-edged and lock together well, but can be rough on feet.
4. Mexican Beach Pebbles
Dark, smooth, and polished stones. These are more expensive, but they look beautiful and are very comfortable to walk on.
5. Lava Rock
Lightweight, porous, and bold in color. Lava rocks add a dramatic look but can be sharp.
6. Marble Chips
Bright white rocks that reflect heat and sunlight. They create a modern look but can be slippery when wet.
Rock Size Comparison
To help you choose, here’s a simple comparison of popular rock sizes and their best uses:
| Rock Size | Best For | Pros | Cons |
|---|---|---|---|
| Pea Gravel (1/4″–1/2″) | Walking, borders | Soft feel, easy to spread | Can move underfoot |
| River Rock (1″–3″) | Natural look, drainage | Stays in place, looks good | Heavier, more expensive |
| Crushed Stone (3/4″) | Drainage, weed control | Locks together, affordable | Rough on feet |
| Marble Chips (1/2″–1″) | Modern look | Reflects heat, bright color | Can be slippery |
Color And Style
Choose colors that match your pool, home, and landscape. Dark rocks can get hot in the sun, while light rocks stay cooler. If you want to walk barefoot, avoid dark or rough stones.
Tools And Materials Needed
Getting your tools and materials ready before you start will make the process smoother. Here’s a list of what you’ll need:
- Landscape fabric (weed barrier)
- Utility knife or scissors
- Garden rake
- Shovel
- Wheelbarrow (for moving rocks)
- Edging material (optional, for a neat border)
- Measuring tape
- Stakes and string (to mark the border)
- Gloves and safety glasses
- Rocks (your chosen type)
- Mulch or sand (optional, for under the fabric)
Step-by-step Guide: How To Put Rocks Around An Above Ground Pool
Now, let’s walk through each stage of the process. Take your time—good preparation means a better result.
1. Mark The Area
Use stakes and string to outline where you want your rock border. Keep it at least 12 inches from the pool wall. This space gives you room to work and helps with drainage.
If you want a curved or circular border, use a garden hose to lay out the shape before marking with stakes.
2. Clear The Ground
Remove all grass, weeds, and debris. Use a shovel to dig down about 2–3 inches. This helps the rocks stay in place and keeps the border level with the yard.
Tip: If you have tough grass or roots, water the area a day before. It will make digging easier.
3. Level The Soil
After clearing, use a garden rake to make the soil as flat as possible. Check for low spots where water could pool. Fill those with soil and tamp down.
4. Install Edging (optional)
Edging keeps rocks from spreading into your yard. You can use plastic, metal, stone, or rubber edging. Install it along your marked border, making sure it is level and secure.
5. Lay Down Weed Barrier Fabric
Roll out the landscape fabric to cover the entire border area. Overlap edges by 4–6 inches to stop weeds from sneaking through. Cut the fabric to fit around the pool wall.
Pin the fabric down with landscape staples every few feet. Make sure the fabric is tight to the ground, with no wrinkles.
Note: Don’t use plastic sheeting—it can trap water and cause problems.
6. Add Sand Or Mulch (optional)
Some people add a thin layer (½–1 inch) of sand or mulch under the rocks for extra drainage. This is not necessary for most pools, but it can help if your yard holds water.
7. Spread The Rocks
Pour rocks over the fabric, starting at the pool and working outward. Use a rake to spread them evenly. Aim for a layer about 2–3 inches deep.
If you have heavier rocks (like river stones), pour them slowly to avoid tearing the fabric.
Tip: Wear gloves to protect your hands. Rocks can be sharp or dusty.
8. Check For Level And Gaps
Walk around and check that the rocks are level and cover all the fabric. Fill in any gaps, especially along the pool wall and edging.
9. Water And Settle
Lightly spray the rocks with a garden hose. This washes away dust and helps the rocks settle. You may need to add more rocks after they settle.
10. Clean Up
Pick up any leftover rocks, tools, or debris. Sweep or rake the area to give it a finished look.
Practical example: If you used pea gravel, you might notice some stones roll away from the edge. Use extra edging or larger rocks to hold them in place.
Safety Tips And Common Mistakes To Avoid
Even simple landscaping can go wrong if you’re not careful. Here’s how to avoid the most common problems.
Safety Tips
- Wear gloves and safety glasses when moving rocks to avoid cuts or eye injuries.
- Don’t lift heavy bags alone. Rocks are dense—use a wheelbarrow, and ask for help if needed.
- Keep rocks away from walkways to prevent tripping.
- Be careful with sharp rocks. If you have children, choose smooth stones.
Common Mistakes
1. Placing Rocks Right Against The Pool Wall
Leave a small gap (about 1–2 inches). Rocks pressing against the wall can damage liners or paint.
2. Skipping Weed Barrier Fabric
Weeds will grow through even the heaviest rocks. The fabric saves you hours of maintenance.
3. Choosing The Wrong Rock Size
Large rocks look nice but are hard to walk on and can trap debris.
4. Forgetting About Drainage
If your yard doesn’t drain well, rocks alone won’t fix the problem. You may need to add a French drain or regrade the soil.
5. Not Buying Enough Rocks
Running out mid-project is frustrating. Always buy a little extra.
6. Using Colored Rocks That Fade
Cheap colored rocks can lose their look in the sun. Ask if the color is natural or painted.
Non-obvious insight: Some pool owners forget to check for underground cables or pipes before digging. Always call local utilities if you’re digging deeper than a few inches.
How Rocks Compare To Other Pool Borders
You might wonder if rocks are better than other materials. Here’s a quick look at how rocks compare to mulch and rubber.
| Material | Durability | Maintenance | Cost | Safety |
|---|---|---|---|---|
| Rocks | Very high | Low | Medium to high | Good if smooth |
| Mulch | Low | High (needs replacing) | Low | Good, but can be messy |
| Rubber | High | Low | High | Very good, soft feel |
Conclusion: Rocks last much longer than mulch and don’t blow away in wind or float in water. Rubber is soft and lasts a long time, but it’s usually more expensive and sometimes looks less natural.
Design Ideas: Making Your Rock Border Stand Out
Rocks don’t have to be boring. Here are ways to add style and personality to your pool area.
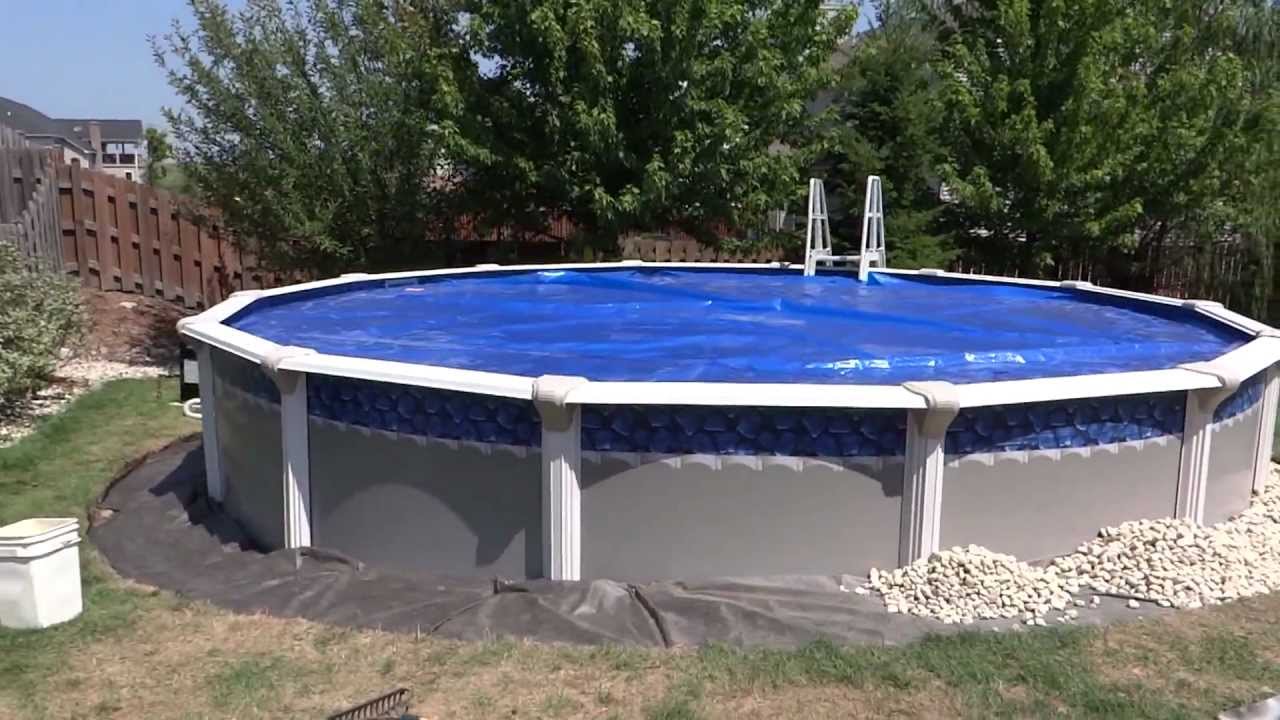
Mix Rock Types
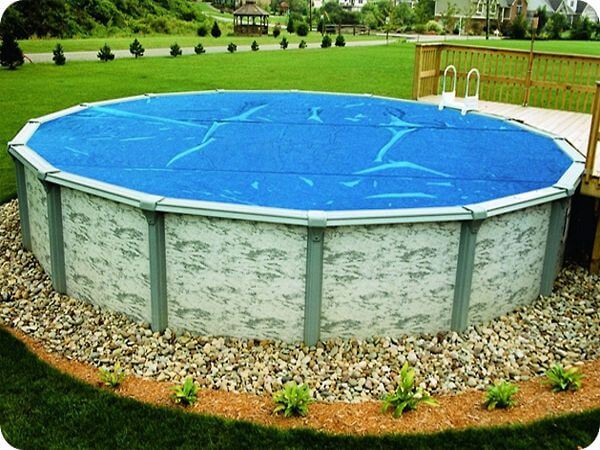
Try using two types of rocks—like large river stones near the pool and pea gravel farther out. This creates a layered look and can help with drainage.
Add Stepping Stones
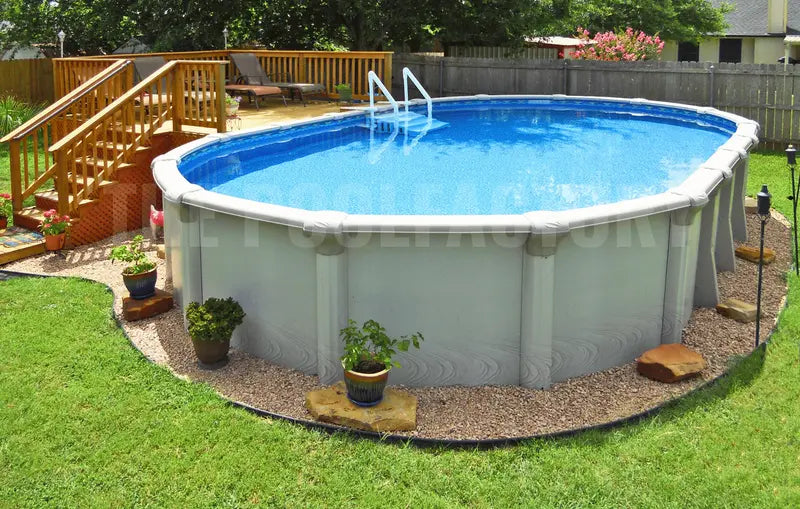
Set flat stones or pavers into the rock border to make a walkway. This protects your feet and adds a decorative touch.
Plant Drought-resistant Plants
Low-growing plants like sedum or ornamental grasses look great between rocks and need little care.
Use Lighting
Solar-powered path lights or spotlights can make your pool border glow at night. Place them between rocks for a soft look.
Include Decorative Items
Add small statues, driftwood, or even colored glass stones for extra flair.
Practical tip: Don’t overcrowd your border. Leave some open space for easy cleaning and to keep the look from being too busy.
Credit: www.youtube.com
Maintenance: Keeping Your Rock Border Looking Great
Once your rocks are in place, they don’t need much care. Here’s how to keep them looking their best.
Remove Leaves And Debris
Use a leaf blower on a low setting or a soft broom to clear leaves and dirt. This keeps your pool and rocks clean.
Check For Weeds
Even with fabric, some weeds may sneak through. Pull them by hand before they spread.
Rake Rocks Occasionally
Over time, rocks may shift. Use a rake to smooth them out and fill in any bare spots.
Replace Or Add Rocks As Needed
If you notice thin spots or rocks sinking into the soil, add a few more. This keeps the border looking full.
Watch For Ants Or Insects
Sometimes, ants like to nest under rocks. If you see a lot of activity, treat the area with a safe insect control product.
Non-obvious insight: If you use chlorine in your pool, avoid washing pool water into the rock border, as it can harm plants and some types of rocks.
Cost Breakdown: What To Expect
The price of putting rocks around your pool depends on the size of your border and the type of rock. Here’s a typical cost range:
- Pea gravel: $30–$60 per ton
- River rock: $80–$150 per ton
- Lava rock: $100–$180 per ton
- Landscape fabric: $20–$50 for a large roll
- Edging: $20–$100 depending on material
You may also need to rent a wheelbarrow or pay for delivery if you order a large amount of rock.
Example Cost Calculation
For a 24-foot round pool with a 2-foot border:
- Area = (π × (14²)) – (π × (12²)) = 615 sq ft (rounded up)
- At 2 inches deep, you need about 3.8 cubic yards of rock.
If pea gravel costs $50 per ton (about 0.66 cubic yards per ton), you’d need about 6 tons:
6 tons × $50 = $300 for rock.
Add fabric, edging, and tools: Total $400–$600 (DIY). Hiring someone can double or triple the cost.
Environmental Considerations
Choosing rocks is a sustainable option. They don’t need to be replaced every year and don’t add chemicals to your yard. However, consider these points:
- Use local rocks when possible to reduce shipping impacts.
- Avoid colored or painted rocks if you have pets or wildlife, as some dyes can be harmful.
- Let some space for rainwater to soak into the ground to prevent runoff.
When To Call A Professional
Most people can put rocks around a pool with basic tools and patience. However, you may want to call a landscaper if:
- The area is very large or sloped.
- There are drainage issues or water pooling.
- You want a custom design with plants, walls, or lighting.
Professionals can also help if you have back problems or no time for heavy lifting.
Credit: intheswim.com
Real-life Example
Sarah, a pool owner in Texas, wanted a cleaner look for her pool. She chose a 2-foot border of river rock, installed with her family in a weekend. She spent about $500 on materials. A year later, she reports less mud, no weeds, and a pool area that looks great and is easy to maintain.
Tip: Take “before and after” photos. You’ll be surprised at the difference a rock border can make.
Frequently Asked Questions
What Is The Best Type Of Rock To Use Around An Above Ground Pool?
Pea gravel and river rock are the most popular. They’re smooth, easy to walk on, and help with drainage. River rock is best for a natural look, while pea gravel is more affordable and simple to install.
How Deep Should The Rock Layer Be?
A layer of 2 to 3 inches is usually enough. This covers the weed barrier, keeps weeds down, and helps with drainage without making the border too deep to walk on.
Can I Put Rocks Right Up Against The Pool Wall?
It’s better to leave a small gap of 1–2 inches between rocks and the pool wall. This prevents pressure on the liner or frame and makes it easier to check for leaks or problems.
Do I Need Edging For My Rock Border?
Edging is optional but recommended. It keeps rocks in place, gives a neat look, and stops rocks from spilling into your yard or garden.
Will Rocks Around My Pool Attract Bugs Or Snakes?
If you keep the area clean and weed-free, rocks are less likely to attract pests than mulch or tall grass. However, some bugs may live under rocks. Check the area regularly, especially if you live in a region with snakes.
For more guidance on pool landscaping and safety, you can visit WikiHow’s landscaping guide.
Putting rocks around your above ground pool is a smart way to improve your pool area. With the right planning, materials, and care, you’ll have a border that’s beautiful, safe, and long-lasting. Enjoy your new poolside look!
Credit: www.thepoolfactory.com