
Removing plastic pins from your pool is a task many pool owners face, but few feel fully prepared for. Whether you have a new above-ground pool, an aging in-ground model, or a spa with removable features, those small plastic pins and fasteners can become a real headache.
Over time, they might break, get stuck, or simply need to be replaced when you’re doing maintenance. If you try to remove them the wrong way, you risk damaging your pool liner, scratching the frame, or making your work even harder next time.
The good news is, with the right methods and tools, you can remove plastic pins safely and efficiently—often without calling a professional.
This guide gives you step-by-step advice on how to remove plastic pins from your pool, explains why the right technique matters, and shares tips most pool owners overlook. You’ll discover which tools work best, how to avoid common mistakes, and what to do if a pin breaks or gets stuck.
By the end, you’ll be confident handling plastic pins in any pool—saving money and frustration while keeping your pool in top shape.
Understanding Plastic Pins In Pools
Before jumping into removal, it’s important to know what plastic pins are and why they’re used in pools. Plastic pins (sometimes called rivets, clips, or retainers) hold different pool parts together. You’ll find them securing ladders, rails, skimmer baskets, liner locks, and sometimes even pool covers. They’re chosen because they’re rust-resistant, lightweight, and affordable. Unlike metal fasteners, they don’t corrode in chlorinated water.
There are several types of plastic pins:
- Push Rivets: These are pushed into a hole and expand to hold tightly.
- Barbed Clips: Designed with small barbs that grip the surrounding plastic or metal.
- Screw-In Pins: Have threads and need to be unscrewed.
- Snap-Fit Pins: Snap into place and may require pinching or a tool to remove.
- Locking Pins: Feature a locking mechanism that must be released before removal.
Knowing the type you have helps you pick the safest removal method. Trying to pull out a locking pin without releasing its mechanism, for example, can break it or damage the pool.
Why Remove Plastic Pins?
Plastic pins don’t last forever. Here are the main reasons you might need to remove them:
- Replacement: Over time, pins can become brittle, crack, or lose their grip.
- Maintenance: To repair or clean ladders, rails, or skimmer baskets, the pins must come out.
- Upgrades: Installing a new pool ladder or cover system often means removing old pins.
- Accidents: Sometimes pins fall in the water or jam, making removal necessary for safety.
Removing old, broken, or unnecessary pins keeps your pool safe and looking good. It also prevents issues like liner tears or wobbly railings.
Tools And Supplies You’ll Need
Having the right tools makes the job faster and safer. Here’s a list of essentials:
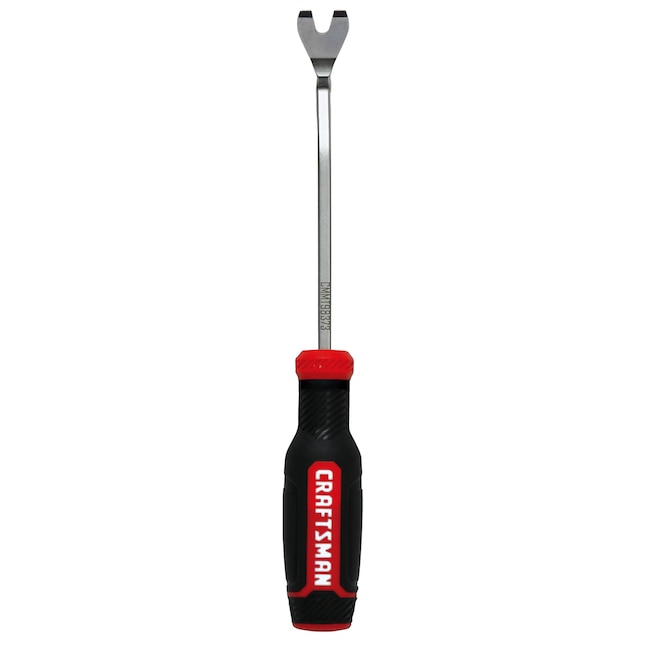
- Plastic Pry Tool: Looks like a flat screwdriver but made of plastic. Won’t scratch pool surfaces.
- Needle-Nose Pliers: For gripping and pulling pins.
- Pin Removal Pliers: Special tool for push rivets and barbed clips.
- Flathead Screwdriver: For prying stubborn pins.
- Utility Knife: To carefully cut damaged pins if needed.
- Lubricant Spray: Like silicone spray, helps loosen stuck pins.
- Towel or Rag: To dry off wet areas and get a better grip.
- Protective Gloves: Protect your hands from sharp edges or chemicals.
Not every pin requires every tool, but having these nearby prevents frustration. For difficult jobs, a small drill with a tiny bit can help break up the center of broken pins.
Preparing Your Work Area
Preparation matters more than most people realize. Working in a rush, or with wet hands, can lead to slips that damage your pool or hurt your fingers. Here’s how to prepare:
- Clean the Area: Remove any debris, sand, or algae around the pin.
- Dry the Surface: Water makes tools slip. Pat the area dry with a towel.
- Check Water Chemistry: If you’re removing pins near the waterline, make sure chlorine levels are normal. High chlorine can irritate your skin during the process.
- Organize Tools: Lay out your tools within arm’s reach.
- Identify Pin Type: Double-check which type of pin you’re dealing with.
Most beginners forget to dry the area or clean off sand, leading to scratched liners and pin slippage.
Step-by-step Guide: How To Remove Plastic Pins From Your Pool
Now let’s get into the actual process. Adjust these steps based on the type of pin and the part of the pool you’re working on.
1. Examine The Pin
Look closely at the pin. Is it flush with the surface or sticking out? Does it have a center post or a visible head? If you’re unsure, use your phone to take a close-up photo. Many pool stores will help identify it if you bring the photo in.
2. Clear Debris And Dry
Small bits of dirt or sand can scratch the pool’s finish as you work. Gently brush the area with a soft brush or towel. Pat it dry so your tools get a good grip.
3. Lubricate Stuck Pins
If the pin looks dirty or feels stuck, spray a tiny amount of silicone lubricant around the base. Let it sit for 2–3 minutes. Avoid using WD-40 or oil-based lubricants, as they can damage pool liners.
4. Removing Push Rivets
Most push rivets have a small post in the middle. Use a plastic pry tool or a flathead screwdriver to gently lift the center post a few millimeters. Once it pops up, grip it with needle-nose pliers and pull straight out.
If the post is missing or broken:
- Slide a flathead screwdriver under the edge of the rivet.
- Twist gently to lift it.
- If the rivet cracks, don’t force it. Cut the head off with a utility knife and pull out the rest.
5. Removing Barbed Clips
Barbed clips are harder because the barbs grip tightly. Use a pin removal pliers if available. Slide the tips under the clip and squeeze. If you don’t have the tool, try this:
- Insert the plastic pry tool under one edge.
- Wiggle gently to lift one side.
- Once the barb starts to release, use pliers to pull it out slowly.
If the clip won’t budge, try pushing it through into the pool (if safe to do so) and retrieve it later.
6. Removing Screw-in Pins
These work like tiny screws. Use a screwdriver with the correct size tip. Turn counterclockwise while pressing firmly. If the pin is stripped, wedge a rubber band between the screwdriver and pin for extra grip.
Never force a stuck screw-in pin. If it won’t turn, drip warm water on it to expand the plastic, then try again.
7. Removing Snap-fit And Locking Pins
Some snap-fit pins have a tab or button you must press while pulling. Read your pool’s manual if you’re unsure.
- Press the tab with one hand.
- While holding the tab, pull the pin out with pliers.
- For locking pins, look for a small notch or hole—insert a paperclip or pin to release the lock, then pull.
8. Handling Broken Or Stuck Pins
If a pin breaks off flush with the surface, don’t panic. Use a thin drill bit to make a small hole in the center. Insert a screw, then use pliers to pull the whole pin out. If the pin is stuck deep, you may need a specialty tool called an extractor.
Beginners often try to dig out broken pins with sharp tools, which can gouge the liner. Always work slowly and switch to a safer method if you meet resistance.
9. Clean Up And Inspect
Once the pin is out, clean the area. Check for sharp edges or cracks. If you see damage, patch the liner or sand the area gently. Replace the pin with the correct size and type—never reuse a cracked or bent pin.
Comparing Plastic Pin Types And Removal Difficulty
To help you choose the right removal strategy, here’s a comparison of common plastic pin types and their removal difficulty:
| Pin Type | Where Found | Removal Difficulty | Recommended Tool |
|---|---|---|---|
| Push Rivet | Ladders, rails | Easy | Pry tool, pliers |
| Barbed Clip | Skimmer baskets, covers | Medium | Pin removal pliers |
| Screw-In Pin | Rails, steps | Easy/Medium | Screwdriver |
| Snap-Fit Pin | Safety covers | Medium/Hard | Pry tool, pliers |
| Locking Pin | Some pool covers | Hard | Paperclip, pliers |
As you can see, push rivets are usually the fastest to remove, while locking pins may require more patience and the right tool.
Mistakes To Avoid When Removing Plastic Pins
Many pool owners damage their pool or hurt themselves by making simple mistakes. Here are the most common errors to watch for:
- Using Metal Tools on Plastic Surfaces: Metal can scratch or gouge pool liners. Always use plastic tools when possible.
- Forcing Stuck Pins: If the pin doesn’t move, stop. Apply lubricant or try a different method.
- Working with Wet Hands: Tools slip easily, increasing the risk of injury or damage.
- Skipping Identification: Not all pins are removed the same way. Forcing a locking pin like a push rivet can break both the pin and the part it’s holding.
- Leaving Debris Behind: Bits of broken plastic can clog filters or scratch the liner if left in the pool.
- Not Replacing Damaged Pins: Always use new, undamaged pins to ensure safety.
What To Do If A Pin Falls Into The Pool
Sometimes, a pin slips out of your grip and falls into the water. Here’s what to do:
- Turn off the pool pump to prevent the pin from being sucked into the filter.
- Use a pool net or skimmer to retrieve the pin if it’s visible.
- For heavy or hard-to-see pins, use a small underwater vacuum or a pool magnet (if the pin has a metal core).
- Never leave a pin in the pool, as it can damage the liner or clog equipment.
Credit: www.ebay.com
When To Call A Professional
Most plastic pin removals can be done yourself, but sometimes it’s better to call a pool technician:
- The pin is part of a safety-critical system (like a pool cover anchor).
- The pin is stuck in a structural part and you risk damaging the pool.
- You’ve tried all safe methods and the pin still won’t budge.
- You notice cracks, tears, or leaks around the pin.
Professionals have specialized tools and experience. Spending a little on expert help can save much more in repairs later.
How To Choose Replacement Pins
When you remove an old pin, you’ll usually need to install a new one. Choosing the right replacement is crucial for safety and longevity.
| Pin Feature | Why It Matters | What to Look For |
|---|---|---|
| Material | Some plastics resist UV and chlorine better. | UV-stabilized nylon or polypropylene |
| Size | Wrong size leads to loose or tight fit. | Match diameter and length to original |
| Head Shape | Flat heads are less likely to snag. | Flat or low-profile for ladders, rounded for covers |
| Color | Blends with pool hardware, looks better. | White or grey for most pools |
Always bring your old pin to the pool store or compare carefully online. Buying in bulk can save money if you have many to replace.
Tips For Making The Job Easier
Over years of pool maintenance, these tips make plastic pin removal much smoother:
- Work in the morning or evening to avoid hot surfaces and slippery sweat.
- Keep a small parts tray nearby to hold removed pins and tools.
- Label baggies with the location of each pin if you’re removing many at once.
- Take photos before removal so you remember how things fit together.
- Use gentle twisting, not brute force. A little patience prevents most problems.
A common beginner mistake is losing track of which pin came from where, especially if they’re different sizes. Organizing as you go saves hours later.
Real-life Example: Removing Ladder Pins From An Above-ground Pool
Let’s walk through a realistic scenario. You have an above-ground pool with a wobbly ladder. The ladder is held with four white plastic push rivets.
- Identify the Rivet: It’s a push-type, with a center post.
- Gather Tools: Plastic pry tool, needle-nose pliers, towel.
- Dry the Area: Wipe down the ladder mount.
- Pry the Center: Gently lift the post with the pry tool.
- Pull Out Rivet: Use pliers to grip and pull the post, then the main body.
- Inspect for Damage: Check the hole for cracks.
- Clean and Replace: Wipe area, insert new rivet.
- Test the Ladder: Make sure it’s secure.
This process usually takes less than 10 minutes per pin if you have the right tools and don’t rush.
Preventing Future Problems With Plastic Pins
Prevention is always better than cure. Here’s how to keep plastic pins from becoming a problem:
- Rinse pins with fresh water after using the pool, especially if you use saltwater or have hard water.
- Check pins monthly for cracks, looseness, or discoloration.
- Replace pins in spring before the swim season starts.
- Store pool covers and accessories in a cool, shaded place to reduce UV damage.
- Use a small dab of silicone lubricant on new pins during installation to make future removal easier.
Many pool owners wait until a pin breaks, but replacing them regularly saves much more time and money.
Environmental Considerations: Disposing Old Plastic Pins
Plastic waste is a growing problem. When you remove old pins, avoid tossing them in the regular trash if possible. Many hardware stores and recycling centers accept small plastics—check their guidelines.
- Clean pins first to remove pool chemicals.
- Store in a sealed bag until you can recycle.
- Never drop broken pins in the pool—they can harm wildlife if water is drained.
Even small steps help reduce environmental impact.
Credit: www.lowes.com
Advanced Tip: Removing Pins Without Draining The Pool
Some people think you must drain the pool to reach certain pins. This is almost never necessary. Most pins can be accessed from above the waterline with the right tool. For those just below the surface, use a snorkel mask and work slowly.
If you must reach deeper, a professional has long-handled tools or can do the work underwater.
What If You Can’t Identify The Pin?
Occasionally, a previous owner or installer may use an unusual or generic pin. If you’re stuck, try these steps:
- Take a photo and show it at a pool supply store.
- Search for your pool model’s manual online.
- Ask in pool owner forums or social media groups.
- Bring the pin to the store for a side-by-side comparison.
Don’t guess—using the wrong removal method can cause damage.

Credit: www.amazon.ae
Common Questions Beginners Forget To Ask
- Do I need to replace all pins at once?
- No, only replace pins that are cracked, brittle, or loose.
- Can I use metal pins instead of plastic?
- Usually not. Metal can rust and damage pool parts. Stick to plastic unless your pool’s manual says otherwise.
- Is it safe to swim after removing pins?
- Yes, as long as you replace them or cover the holes to prevent injury.
- What if the pin hole enlarges after removal?
- Use a slightly larger replacement pin or a pool-safe filler. Never leave an oversized hole unaddressed.
- Will removing pins void my pool warranty?
- Check your pool manual. Some parts are covered only if serviced by a professional.
Frequently Asked Questions
How Do I Know If A Plastic Pin Needs To Be Removed?
If you notice cracks, discoloration, looseness, or if the part it secures wobbles, it’s time to remove and replace the pin. Pins also need removal during pool upgrades or if you hear rattling noises near hardware.
What Should I Do If A Pin Breaks During Removal?
Stop and assess the situation. Use a thin drill bit to make a small hole in the broken pin, insert a screw, and pull it out with pliers. Never dig aggressively—this can damage the pool surface. If you’re unsure, call a pool technician.
Can I Reuse Old Plastic Pins?
It’s not recommended. Old pins may be brittle or weak even if they look fine. New pins are inexpensive and provide better safety.
Are There Universal Pins For All Pools?
No. Pins come in many sizes and shapes. Always match the replacement to your pool’s make and model. If you’re unsure, bring the old pin to the store for comparison.
Where Can I Learn More About Pool Maintenance?
For more in-depth pool care tips and technical guides, check resources like the Wikipedia swimming pool page or consult your pool manufacturer’s website.
Keeping your pool in top shape is easier when you know how to handle even the small details like plastic pin removal. With the right tools, clear steps, and a little patience, you’ll avoid damage, save time, and enjoy a safer swim season.