
Putting river rock around an above ground pool does much more than just improve looks. It’s a practical way to prevent mud, reduce weeds, and keep your pool area clean. Many pool owners want to make their backyard space beautiful and easy to maintain, but they worry about making mistakes or not knowing the right steps.
If you’ve ever wondered how to use river rocks around your above ground pool, you’re in the right place. This guide explains every step, from planning to finishing touches, so you can create a safe, attractive, and long-lasting pool border.
Why Use River Rock Around An Above Ground Pool
Choosing river rock as a pool border is popular for good reasons. First, river rocks are smooth, rounded stones that come in different sizes and colors. Unlike sharp gravel or mulch, they are gentle underfoot and won’t blow away in the wind. They help with drainage, keeping water from pooling and causing rust or mold near your pool wall. River rock also stops grass and weeds from growing too close, reducing yard work and chemical use.
Besides function, river rock adds natural beauty. The mix of shapes and shades creates a calm, spa-like look. It can make even a basic pool stand out. Many homeowners find river rock to be a smart investment because it lasts for years with little upkeep. But to get these benefits, it’s important to install river rock the right way.
Planning Your River Rock Border
Before you start, make a clear plan. Rushing leads to uneven results, wasted money, and future problems. Here’s how to get it right from the beginning.
Measuring And Marking The Area
Walk around your pool and decide how wide you want the river rock border. Most people choose 12 to 24 inches wide, but you can go wider if you want more space for chairs or plants. Use a tape measure and a garden hose or rope to mark the border shape. Remember to leave space for your pool ladder, filter, and pump access.
Estimating How Much River Rock You Need
River rock is sold by the cubic yard or by the bag. To avoid running out (or overspending), calculate the total amount you need. Measure the length and width of your border, and decide how deep you want the rock layer (usually 2-3 inches).
Here’s a quick example:
- Pool circumference: 90 feet (for a 27-foot round pool)
- Desired border width: 18 inches (1.5 feet)
- Area = 90 x 1.5 = 135 square feet
- Depth: 3 inches (0.25 feet)
- Cubic feet needed: 135 x 0.25 = 33.75
- Cubic yards needed: 33.75 ÷ 27 = 1.25 cubic yards
Always add 10% extra for settling or errors.
Choosing The Right River Rock
Not all river rocks are the same. Some are very small, while others are large and heavy. For pool borders, most people pick rocks 1 to 2 inches in diameter. These won’t get stuck in pool equipment or wash away easily. For best looks, choose rocks with a mix of colors that match your home and yard.
Planning For Drainage And Weed Control
Don’t skip planning for drainage and weed barriers. Without them, you risk soggy ground, rust, and weeds growing up through the rocks. Plan to use a quality landscape fabric under the river rocks to block weeds. Also, check that water will flow away from the pool, not toward it.
Gathering Tools And Materials
Having the right tools ready will save you hours and prevent frustration. Here’s what you’ll need:
- River rock (enough for your measured area)
- Landscape fabric (weed barrier)
- Edging material (plastic, metal, stone, or rubber)
- Shovel and rake
- Wheelbarrow (for moving rock)
- Utility knife (for trimming fabric)
- Garden hose (for marking and cleaning)
- Measuring tape
- Gloves and safety glasses
Optional but useful: tamper tool (for flattening soil), scissors, and stakes for securing fabric or edging.
Preparing The Ground
A strong foundation makes all the difference. Skipping these steps is a common mistake that leads to rocks sinking, weeds coming through, or water pooling.
Clearing The Area
Remove all grass, weeds, and debris from the area where the river rock will go. Use a shovel to dig out roots and smooth the ground. If you leave even a little grass, it can grow back and push through your rocks.
Leveling And Grading
Use a rake to level the soil. A gentle slope away from the pool helps water drain. If the ground is very uneven, use a tamper tool or the back of a shovel to pack it down. This prevents rocks from sinking later.
Adding Edging
Install your chosen edging before putting down fabric or rocks. Edging keeps the rocks in place, gives your border a clean look, and stops grass from creeping in. There are many edging options:
- Plastic or rubber edging: Flexible, easy to install, and affordable.
- Metal edging: Strong and long-lasting.
- Stone or brick: Natural look, but heavier and more expensive.
Dig a small trench for the edging, set it in, and secure according to the instructions. Make sure it sits slightly above ground level to contain the rocks.
Laying Landscape Fabric
Landscape fabric is a key step for weed prevention and drainage. Many people skip this, but they regret it later.
- Roll out the fabric over the cleared area.
- Overlap edges by at least 6 inches to block weeds.
- Use landscape staples or stakes to hold the fabric in place.
- Cut holes where needed for pool equipment or posts with a utility knife.
- Double-check that the fabric is smooth and covers all soil.
Landscape fabric lets water drain through but keeps weeds out. Avoid using plastic sheeting—it traps water and can cause rot.
Placing The River Rock
Now for the main event—putting down the river rock. This is where your pool area starts to look finished and inviting.
Spreading The River Rock
Pour the river rock onto the landscape fabric. Use a shovel and wheelbarrow for large amounts. Start at one end and work your way around the pool.
- Spread rocks to a depth of 2-3 inches. Too thin, and fabric will show; too thick, and rocks can shift easily.
- Use a rake to level and spread rocks evenly.
- Make sure rocks cover the fabric completely and reach up to the edging.
Checking For Gaps And Uneven Areas
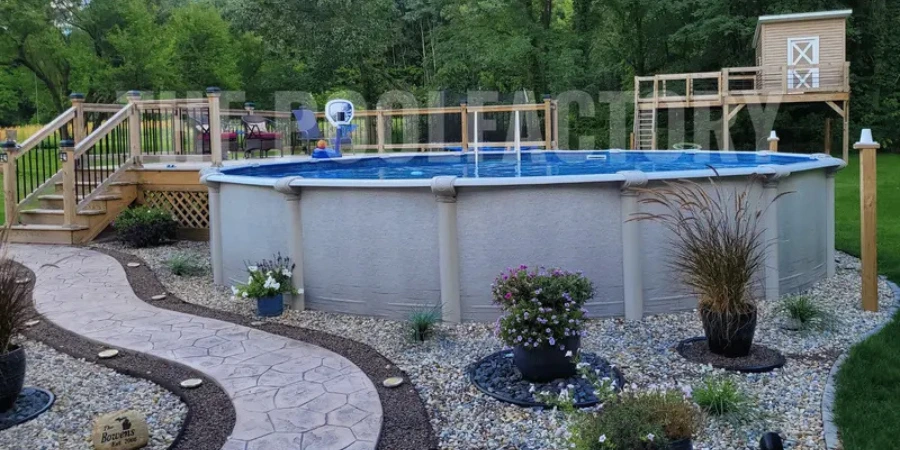
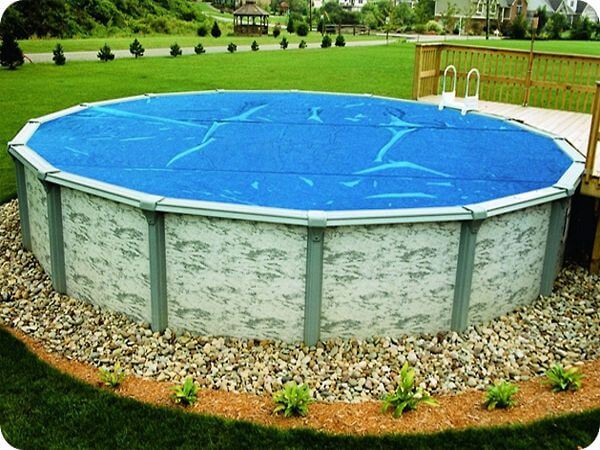
Walk around the pool to check for thin spots or bare patches. Add more rock as needed. Avoid piling rocks against the pool wall—leave a small 1-2 inch gap to let air flow and prevent rust.
Washing And Settling The Rock
If your river rock is dusty, rinse it with a garden hose. This brings out the natural color and helps rocks settle in place. Wait a few days for the rocks to settle, then add more if you see low spots.
Credit: www.milorganite.com
River Rock Compared To Other Border Materials
Not sure if river rock is best for your pool? Here’s a quick comparison with common alternatives.
| Material | Looks | Maintenance | Drainage | Weed Control | Durability |
|---|---|---|---|---|---|
| River Rock | Natural, attractive | Low | Excellent | Good (with fabric) | High |
| Mulch | Soft, natural | Medium (needs replacing) | Good | Fair | Low |
| Gravel | Industrial, rough | Low | Excellent | Good (with fabric) | High |
| Concrete | Modern, clean | Very low | Poor | Excellent | Very high |
| Artificial Turf | Green, tidy | Low | Fair | Excellent | High |
As you can see, river rock offers a mix of beauty, drainage, and durability that many other materials lack.
Cost Breakdown For River Rock Borders
Many pool owners worry about the cost. Here’s a rough breakdown to help you plan your budget.
| Item | Average Cost per Unit | Estimated Total (for 90 ft border, 18” wide) |
|---|---|---|
| River Rock | $60 per cubic yard | $75–$90 |
| Landscape Fabric | $0.40 per sq. ft. | $55 |
| Edging | $2 per linear foot | $180 |
| Labor (DIY) | Free | $0 |
| Labor (hired) | $1.50 per sq. ft. | $200 |
Prices vary by region and supplier. If you do the work yourself, you can expect to spend $200–$350 for a standard above ground pool. Doing it right the first time saves money in the long run.
Common Mistakes And How To Avoid Them
Even careful people make mistakes when installing river rock. Here’s what to watch out for:
- Skipping landscape fabric: This leads to endless weeds. Always use quality fabric.
- Not installing edging: Rocks will spread and mix with grass.
- Piling rocks against the pool wall: Causes rust and moisture problems. Leave a small gap.
- Using rocks that are too small: Small stones get into pool pumps and are hard to walk on.
- Not leveling the ground: Uneven surfaces make rocks shift and look messy.
- Forgetting about drainage: Water should flow away from the pool, not toward it.
- Choosing the wrong rock color: Light rocks show dirt, dark rocks get very hot in sun.
By planning ahead and following each step, you avoid costly fixes later.
Maintenance Tips For Your River Rock Border
The good news is that river rock borders need little care. Still, a little attention each season keeps them looking great.
- Check for weeds: Pull any that pop up, especially near the edge.
- Rake the rocks: After storms or heavy use, smooth out uneven areas.
- Add more rock if needed: Rocks can settle or get pushed aside. Top up thin spots each year.
- Clean with water: If rocks look dusty or dirty, spray with a hose to brighten them.
- Inspect edging: Make sure it’s secure and adjust if you see rocks spilling over.
With these simple habits, your pool border will stay neat and inviting for many summers.
Credit: intheswim.com
Design Ideas And Creative Uses
River rock is flexible and works with many styles. Here are some ways to make your pool area unique:
- Mix rock sizes: Use larger stones for the outer edge and smaller ones closer to the pool.
- Add stepping stones: Place flat stones for a path to the pool ladder or seating area.
- Incorporate plants: Choose drought-tolerant plants in pockets along the border.
- Create patterns: Arrange rocks by color or size for a custom look.
- Combine with mulch: Use mulch in flower beds and river rock near the pool for contrast.
These touches make your pool area stand out and reflect your personal taste.
Safety And Environmental Considerations
River rock borders are safe, but a few precautions help protect your family and the environment.
- Check for sharp stones: Even river rock can have a few rough edges. Remove any you find.
- Avoid slippery surfaces: Wet rocks can be slick. Choose stones with some texture and avoid very polished types.
- Don’t block pool equipment: Always leave room for pool filters, pumps, and drains.
- Use safe weed barriers: Avoid plastic sheets that block water or break down into microplastics.
- Recycle old materials: If you remove old mulch or edging, recycle or compost when possible.
River rock is a natural material that doesn’t harm pets or plants. With the right setup, it’s a low-impact, long-lasting choice for your yard.
:max_bytes(150000):strip_icc()/thespruce-abovegroundpoollandscaping-Cleardesign1-f390e7dfa5e04e0ab49081b2b3201c15.jpg)
Credit: www.thespruce.com
Real-life Example: Transforming A Basic Pool Area
Consider the story of Maria, a homeowner who wanted to upgrade her 24-foot above ground pool. She had problems with mud after rain, weeds growing up the side, and a messy look. After following the steps in this guide, Maria used 1.
5 cubic yards of river rock, installed black plastic edging, and chose a fabric weed barrier. She added a few stepping stones for a path.
The results were dramatic. Her pool area stayed clean, the rocks looked beautiful year-round, and mowing the lawn became easier. Maria said the project took a weekend and cost less than $300. Most importantly, she avoided the common mistakes by following a clear plan.
Pros And Cons Of River Rock Borders
Every material has benefits and drawbacks. Here’s a quick summary:
Pros:
- Attractive, natural look
- Great for drainage and weed control
- Lasts for years with little upkeep
- Helps prevent mud and grass in the pool
Cons:
- Rocks can be hot under bare feet in summer
- Higher upfront cost than mulch
- Heavy to move and install
- Not as soft as grass or rubber
If you value durability, easy care, and looks, river rock is hard to beat.
When To Call A Professional
Most DIYers can handle this project, but some situations need expert help:
- Steep or uneven ground that needs grading
- Large pools with wide borders (over 3 feet)
- Problems with drainage or standing water
- If you have physical limits or little time
A professional landscaper can install a river rock border quickly and safely. Expect to pay more, but you’ll get a polished result.
River Rock Installation: Step-by-step Summary
To review, here’s a quick checklist of the process:
- Measure and mark your border area.
- Calculate rock volume and buy materials.
- Remove grass and level the soil.
- Install edging to define the border.
- Lay down landscape fabric and secure it.
- Pour and spread river rock evenly.
- Rinse rocks and check for low spots.
- Inspect and touch up each season.
Following these steps ensures your pool border will look great and last.
Frequently Asked Questions
How Deep Should The River Rock Be Around An Above Ground Pool?
A depth of 2 to 3 inches is best. This covers the landscape fabric, stops weeds, and keeps rocks stable. Too shallow, and the fabric will show; too deep, and the rocks may shift or pile up.
Can I Use Pea Gravel Instead Of River Rock?
You can use pea gravel, but it has drawbacks. The stones are smaller and may get stuck in pool filters or feel rough underfoot. River rock (1–2 inches) is smoother and stays in place better.
Does River Rock Help With Pool Drainage?
Yes, river rock allows water to flow away from the pool, reducing mud and standing water. For best results, combine river rock with a landscape fabric that lets water pass through.
How Do I Keep Weeds From Growing Through The River Rock?
Use a quality landscape fabric under the rocks. Overlap edges by at least 6 inches and secure with landscape staples. This blocks most weeds. Pull any that appear quickly before they spread.
Where Can I Learn More About Landscaping Materials?
For more details on river rock and other landscaping options, check out this helpful guide from the Spruce.
Creating a river rock border around your above ground pool is a smart way to upgrade your yard’s look and function. With careful planning and the right steps, you’ll enjoy a clean, beautiful pool area for years to come.