
Shaker cabinets are a favorite in homes around the world. Their simple design, clean lines, and timeless look fit almost any kitchen style. But even the best cabinets need care to stay beautiful. Dust, grease, fingerprints, and spills can make them look old and dull.
If you want your Shaker cabinets to look fresh year after year, you need the right cleaning routine.
This guide will show you everything you need to know about cleaning Shaker cabinets. You’ll learn the safest methods, what products to use, and how to avoid mistakes. Whether your cabinets are painted or stained, in the kitchen or bathroom, these steps will help you keep them sparkling. With expert advice and practical tips, you can protect your investment and enjoy cabinets that look like new.
What Makes Shaker Cabinets Unique
Shaker cabinets stand out for their simple, flat-panel doors and square edges. They don’t have fancy carvings or decorations. This makes them easier to clean than many other cabinet styles. But their flat surfaces can show dirt and grease more quickly.
Most Shaker cabinets are made from wood or MDF (medium-density fiberboard), finished with paint or stain. These finishes need gentle care to prevent fading or scratching. The inside edges of the panel can collect dust and crumbs, so cleaning them thoroughly is important.
Common Materials And Finishes
- Solid wood: Strong, durable, usually stained or painted. Needs gentle cleaners.
- MDF: Smooth, often painted. More sensitive to water and harsh chemicals.
- Painted finish: Popular for white or colored Shaker cabinets. Shows dirt easily.
- Stained finish: Shows wood grain, hides fingerprints better.
Knowing your cabinet’s material and finish helps you pick the right cleaning method.
Why Cleaning Shaker Cabinets Is Important
Clean cabinets are not just about looks. Dirt, grease, and moisture can damage the finish, cause wood to warp, and lead to mold. In kitchens, food spills and cooking oils can attract pests. Regular cleaning keeps your cabinets healthy and prevents expensive repairs.
Benefits Of Regular Cleaning
- Preserves beauty: Prevents fading, stains, and scratches.
- Protects the finish: Keeps paint and stain from breaking down.
- Improves hygiene: Removes bacteria, mold, and allergens.
- Extends lifespan: Reduces wear and tear.
- Saves money: Avoids costly replacements.
Cleaning is a simple habit that gives big rewards over time.

Credit: nelsonkb.com
Tools And Products You Need
Before you start, gather the right tools. Using the wrong products can ruin your cabinets. Here’s what you need for safe and effective cleaning:
Essential Tools
- Soft microfiber cloths: Trap dust and prevent scratches.
- Non-abrasive sponges: For sticky spots.
- Small soft-bristle brush: Cleans corners and grooves.
- Bucket: For mixing cleaning solution.
- Spray bottle: Helps control the amount of cleaner.
Safe Cleaning Products
- Mild dish soap: Cuts grease without harming the finish.
- White vinegar: Safe for most finishes, but must be diluted.
- Baking soda: Removes stubborn spots, gentle on wood.
- Warm water: Never use hot water—it can damage finishes.
Avoid harsh chemicals like bleach, ammonia, or strong degreasers. These can strip paint and discolor wood.
Comparison Of Cleaning Products
Here’s a quick look at how different cleaning products affect Shaker cabinets:
| Product | Safe for Painted Cabinets | Safe for Stained Cabinets | Effectiveness |
|---|---|---|---|
| Mild dish soap | Yes | Yes | High |
| White vinegar (diluted) | Yes | Yes | Medium |
| Baking soda | Yes (spot use) | Yes (spot use) | Medium |
| Bleach | No | No | High (but unsafe) |
| Ammonia | No | No | High (but unsafe) |
Choose products that are safe for your cabinets. When unsure, test on a hidden spot.
Step-by-step Cleaning Routine
Cleaning Shaker cabinets is easy if you follow the right steps. Here’s a detailed routine for daily, weekly, and deep cleaning.
Daily Maintenance
Small steps each day keep cabinets looking good.
- Wipe spills right away: Use a dry or slightly damp cloth. Don’t let liquid sit—especially on painted surfaces.
- Dust cabinet fronts: Use a microfiber cloth to remove dust and crumbs.
- Check for fingerprints: Kitchens and bathrooms often get greasy spots. Wipe these off as you see them.
Weekly Cleaning
A more thorough cleaning once a week keeps cabinets fresh.
- Mix a safe cleaner: Use warm water with a few drops of mild dish soap.
- Dampen a microfiber cloth: Never soak the cloth; water should not drip.
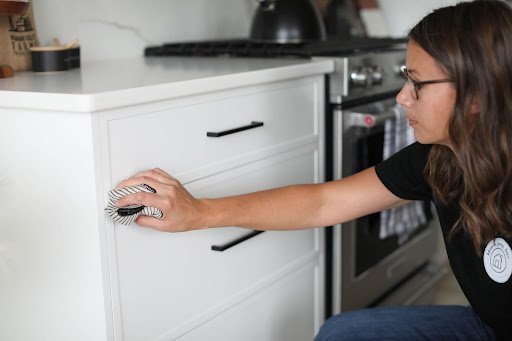
- Wipe cabinet doors and frames: Move in the direction of the wood grain.
- Clean grooves and edges: Use a soft brush for corners.
- Dry immediately: Use another clean cloth. Moisture can ruin the finish.
Deep Cleaning (monthly Or As Needed)
Sometimes, cabinets need a deeper clean—especially after heavy cooking or spills.
- Remove cabinet hardware: Take off handles or knobs if they are dirty.
- Clean hardware separately: Soak in warm, soapy water. Dry completely.
- Make a stronger solution: Mix water, dish soap, and a bit of vinegar.
- Scrub stubborn stains: Use baking soda on a damp cloth. Rub gently.
- Clean inside the cabinet: Remove items, wipe shelves, and dry.
- Check for mold or odors: Use vinegar to kill bacteria.
Example: Removing Grease
Grease is common near the stove or sink. For greasy spots:
- Make a solution of warm water and dish soap.
- Dampen a sponge, squeeze out excess water.
- Rub gently in circles.
- Rinse with a clean damp cloth.
- Dry with a towel.
If grease remains, use diluted vinegar. Avoid scrubbing too hard—this can damage paint.
Practical Tips For Cleaning
- Always use soft cloths. Rough materials scratch the finish.
- Don’t let water sit on the surface. Wipe dry immediately.
- Clean spills fast—especially sauces, oils, and colored liquids.
- Use gentle pressure. Pressing too hard can dent MDF or chip paint.
- Work in small sections. This helps you notice missed spots.
How To Clean Painted Vs. Stained Cabinets
The method depends on your cabinet’s finish. Painted cabinets need extra care to avoid fading. Stained cabinets show less dirt but can lose their shine.
Painted Cabinets
- Use only mild cleaners.
- Avoid acidic products like lemon or undiluted vinegar.
- Never use abrasive sponges.
- Clean regularly to prevent dirt buildup.
Stained Cabinets
- Can handle a bit more cleaning power.
- Use wood-friendly polish after cleaning to restore shine.
- Avoid cleaners with alcohol—they can dry out wood.
Comparison Table: Painted Vs. Stained Cabinet Care
| Care Task | Painted Cabinets | Stained Cabinets |
|---|---|---|
| Cleaner type | Mild soap only | Mild soap or wood cleaner |
| Handling stains | Gently with damp cloth | Baking soda or wood polish |
| Water exposure | Very sensitive | Moderately sensitive |
| Polishing | Rarely needed | Recommended after cleaning |
Always check your cabinet manufacturer’s cleaning advice.
Common Mistakes To Avoid
Many people make cleaning mistakes that can ruin their cabinets. Here are pitfalls to watch out for:
- Using too much water: Water can seep into wood and MDF, causing swelling or damage.
- Scrubbing with rough materials: Steel wool or rough sponges scratch paint and wood.
- Using strong chemicals: Bleach, ammonia, and harsh degreasers can destroy finishes.
- Ignoring grooves and edges: These areas collect dirt and can cause mold if not cleaned.
- Letting spills sit: Dried spills are harder to clean and can stain permanently.
- Forgetting to dry: Moisture left after cleaning leads to warping and peeling.
Non-obvious Insight: Hidden Moisture
One thing many beginners miss is hidden moisture. Water can get trapped in the grooves or behind cabinet hardware. Always dry these areas carefully after cleaning.
Another overlooked point: cabinets near the stove often get a layer of sticky grease that is invisible but attracts dust. Clean these areas more often.
Cleaning Cabinet Hardware
Handles, knobs, and hinges get dirty quickly. They also spread germs. Clean hardware at least once a month.
- Remove hardware if possible.
- Soak in warm, soapy water for 10-15 minutes.
- Scrub gently with a soft brush.
- Rinse and dry completely before reinstalling.
For hardware that cannot be removed, wipe with a damp cloth and dry carefully.
How To Remove Tough Stains
Some stains won’t come off with regular cleaning. Here’s how to tackle them:
Grease Stains
- Mix equal parts water and vinegar.
- Apply with a cloth, rub gently.
- Rinse and dry.
Food Stains
- Use baking soda paste (mix with water).
- Apply to stain, let sit for 5 minutes.
- Rub gently, rinse, and dry.
Marker Or Ink
- Use a small amount of rubbing alcohol on a cloth.
- Test on a hidden area first.
- Rub stain gently, rinse, and dry.
If stains remain, consult a cabinet specialist. Never use paint thinner or harsh chemicals.
Deep Cleaning Inside Cabinets
Cleaning inside is as important as the outside. Shelves and corners can harbor crumbs, spills, and even pests.
Steps For Cleaning Inside
- Remove all items from the cabinet.
- Vacuum crumbs and dust.
- Wipe with a damp cloth and mild soap.
- Dry completely.
- Check for mold, mildew, or odors. Use diluted vinegar if needed.
Data Table: Common Cabinet Odors And Solutions
| Odor Cause | Recommended Solution | Frequency |
|---|---|---|
| Food spills | Wipe with soap and water | Weekly |
| Mold/mildew | Use diluted vinegar | Monthly or as needed |
| Pet odors | Baking soda paste | As needed |
| Smoke | Air out, use odor absorber | As needed |
Keep cabinets dry and well-ventilated to avoid smells.
How Often Should You Clean Shaker Cabinets?
Frequency depends on your home and habits. Kitchens need more frequent cleaning than bathrooms. Here’s a practical schedule:
- Daily: Wipe spills and fingerprints.
- Weekly: Clean cabinet fronts and hardware.
- Monthly: Deep clean inside cabinets and corners.
- Seasonally: Inspect for mold, polish wood, and check hardware.
Homes with children or pets may need more frequent cleaning. Cooking often, especially with oils, means weekly deep cleaning.

Credit: www.youtube.com
Special Care For Bathroom Shaker Cabinets
Bathroom cabinets face moisture, soap, and cosmetics. Here’s how to keep them safe:
- Wipe off water spots quickly.
- Clean soap or makeup spills right away.
- Use a fan or open window to reduce humidity.
- Avoid strong cleaners—stick to mild soap and water.
Bathroom cabinets are more likely to suffer from moisture damage. Dry them well after cleaning.
How To Clean Cabinet Glass Inserts
Some Shaker cabinets have glass panels. These need special care:
- Use glass cleaner or diluted vinegar.
- Wipe with a lint-free cloth.
- Clean both sides if possible.
- Avoid spraying cleaner directly on wood—spray onto the cloth.
Clean glass inserts weekly for a clear, streak-free look.
Credit: columbuscabinetscity.com
Preventing Cabinet Damage
Cleaning is just part of cabinet care. Preventing damage is equally important.
Tips For Protecting Shaker Cabinets
- Use cabinet liners: Protect shelves from spills and scratches.
- Install soft-close hinges: Prevent slamming doors and chips.
- Avoid hanging wet towels: Moisture damages wood and paint.
- Keep heat sources away: Don’t place hot pans or appliances near cabinet surfaces.
- Check for leaks: Especially under sinks. Fix plumbing issues quickly.
Non-obvious Insight: Cabinet Placement
Cabinets next to the stove or sink wear out faster due to heat and moisture. These areas need extra attention and more frequent cleaning.
Eco-friendly Cleaning Options
If you want a safer, greener cleaning routine, try these alternatives:
- Vinegar and water: A natural, effective cleaner.
- Baking soda paste: Removes stains without chemicals.
- Olive oil polish: Restores shine to stained wood.
Avoid commercial cleaners with harsh chemicals and fragrances. They can harm your cabinets and indoor air quality.
What To Do If Cabinets Are Damaged
Sometimes, cleaning reveals damage like chipped paint or warped wood. Here’s what to do:
- Small chips: Touch up with matching paint or stain.
- Warped doors: Consult a professional for repair.
- Mold: Clean with vinegar, let dry fully, and fix leaks.
- Scratches: Use a wood polish or repair kit.
Don’t ignore damage. Small problems grow bigger if left untreated.
Expert Advice For Long-lasting Cabinets
If you want cabinets to last, follow these expert tips:
- Clean regularly, but gently.
- Protect from moisture, heat, and rough handling.
- Use only safe, recommended products.
- Inspect hardware and hinges often.
- Touch up paint and stain as needed.
For more tips on cabinet care, visit Better Homes & Gardens.
Frequently Asked Questions
How Do I Clean Sticky Grease From Shaker Cabinets?
Mix warm water and mild dish soap. Dampen a soft cloth and rub gently. For stubborn grease, use diluted vinegar. Always rinse and dry after cleaning.
Can I Use Vinegar To Clean Painted Cabinets?
Yes, but always dilute it with water. Undiluted vinegar can damage paint. Test on a hidden area first.
How Do I Prevent Water Damage On Bathroom Cabinets?
Wipe off water spots quickly. Use a fan or open window to reduce humidity. Dry cabinets after cleaning. Avoid placing wet items inside.
What Should I Do If My Cabinet Paint Chips?
Clean the area, then touch up with matching paint. For larger chips, consult a cabinet specialist. Avoid using strong cleaners that can worsen the damage.
How Often Should I Deep Clean My Shaker Cabinets?
Deep clean at least once a month. In busy kitchens or bathrooms, clean more often. Always clean after spills, heavy cooking, or visible dirt.
Cleaning Shaker cabinets does not have to be a difficult job. With the right routine and products, you can keep them looking beautiful for years. Regular care protects your investment and adds value to your home. By avoiding common mistakes and using smart techniques, your cabinets will stay as stylish and practical as the day they were installed.