
Drilling holes for cabinet pulls might sound simple, but if you want your kitchen or bathroom cabinets to look perfect, every detail matters. Even professionals sometimes struggle with getting pulls aligned and at the right spot. Whether you’re updating old cabinets or installing new ones, knowing how to drill holes for cabinet pulls is a must-have skill for any DIY enthusiast or homeowner.
With the right approach, you can avoid crooked handles, chipped paint, or wasted hardware—and give your cabinets a custom, high-end look.
This guide will walk you through everything: the tools you need, how to measure and mark, the best drilling techniques, and pro tips for a flawless finish. Along the way, you’ll find tables to compare tools and templates, real-life examples, and answers to questions beginners often ask. Let’s get started so you can upgrade your cabinets with confidence and precision.
Why Accurate Drilling For Cabinet Pulls Matters
Most people notice handles before they notice wood grain or paint color. Cabinet pulls are not just functional—they’re a design highlight. If holes are off even by a few millimeters, the pulls won’t line up, and the mistake will be obvious every time you open a door.
Crooked or uneven pulls can also cause problems over time. You might find that drawers do not close smoothly, or that the stress on the hardware causes screws to loosen or chip away at the wood. Plus, correcting mistakes often means filling holes, repainting, and starting over, which takes time and effort.
A little planning and patience up front saves frustration and repair work later. You’ll also save money by not wasting expensive hardware.
Tools And Materials You Need
Before you pick up your drill, gather all the necessary tools. Using the right tool for each step makes the job easier and gives a cleaner result.
Essential Tools
- Measuring tape or ruler (steel preferred)
- Pencil or fine-tip marker
- Drill (cordless or corded, with variable speed)
- Drill bits (usually 3/16″ or 5mm for most pulls, but check your hardware)
- Center punch or nail (for marking drill spots)
- Cabinet hardware jig or template (optional, but highly recommended)
- Masking tape
- Screwdriver (manual or electric)
- Level (small torpedo level works well)
- Safety glasses
Optional Tools
- Clamps (for holding jig or template steady)
- Awl (for finer marking)
- Painter’s tape (to avoid splinters on back side)
Common Hardware Types
Cabinet pulls come in many sizes and shapes. Most have two screws, with hole spacing (center-to-center distance) that ranges from 3 inches (76mm) to over 6 inches (152mm). Always check the spacing before you mark or drill.
Tool Comparison
Below is a comparison of common drilling tools and their uses for cabinet pulls:
| Tool | Best For | Advantages | Disadvantages |
|---|---|---|---|
| Drill/Driver | General drilling | Versatile, powerful | Heavier, needs charging (if cordless) |
| Manual Screwdriver | Securing pulls | Controlled, prevents over-tightening | Slower than electric |
| Cabinet Jig/Template | Accurate, repeatable holes | Speeds up work, consistency | Extra cost |
| Awl/Center Punch | Marking drill spots | Prevents drill slip | Extra step |
Planning And Measuring For Perfect Placement
Proper planning is the most important step. This is where most beginners make mistakes—either by eyeballing the spot or measuring only once. Small errors show up quickly when you step back and look at a row of cabinets.
Standard Pull Placement
While there’s no single rule, there are common practices for where to put cabinet pulls:
- Cabinet doors: Usually, the pull is placed 2.5 to 3 inches from the bottom corner (for upper cabinets) or top corner (for base cabinets).
- Drawers: For pulls with two screws, center the pull both vertically and horizontally. For longer drawers, pulls are often centered, but two pulls can be used for very wide drawers.
Steps For Laying Out Your Pulls
- Check manufacturer’s instructions for recommended hole spacing.
- Decide on the look: Do you want all pulls at the same height, or centered on each cabinet? Consistency is key.
- Measure and mark the exact spot for each hole. Use a pencil or masking tape for markings. Double-check all measurements.
- Use a template or hardware jig if you have many cabinets. This saves time and ensures every pull lines up.
Common Measurement Errors
One common mistake is measuring from the edge of the cabinet frame rather than the door itself. Another is forgetting to account for door thickness, which can affect how screws fit. If doors or drawers are not perfectly square, always measure from the same reference point.
How To Make A Simple Drilling Template
If you’re installing more than a few pulls, a template makes the job faster and more accurate. You can buy a plastic or metal jig, or make your own from cardboard, plywood, or acrylic.
Making Your Own Template
- Cut a piece of stiff cardboard or thin wood a little smaller than your cabinet door.
- Mark reference edges that will always align with the cabinet’s top and side.
- Measure and mark the drill hole positions on your template.
- Drill holes in the template at these marks. Check the spacing with your actual hardware.
- Test fit the template on the door or drawer front to make sure everything lines up.
Store-bought Jigs Vs. Diy Templates
Here’s a side-by-side comparison:
| Type | Cost | Precision | Best For |
|---|---|---|---|
| Store-bought Jig | Medium to high | Very high | Multiple cabinets, pro jobs |
| DIY Template | Low | Good, if careful | Small projects, one-time jobs |
A ready-made jig can speed up work and reduce mistakes, but a DIY template is usually enough for a small kitchen or bathroom project.
Step-by-step: How To Drill Holes For Cabinet Pulls
Let’s walk through the actual process. Even if you’ve never used a drill before, these steps will help you get clean, accurate results.
1. Position And Mark The Drill Holes
First, measure carefully and mark exactly where each hole should go. Use a sharp pencil or a piece of masking tape on the cabinet surface to avoid marking the wood directly. Double-check your measurements—mistakes at this stage are hard to fix later.
- For doors, measure from the top or bottom edge, and from the side edge.
- For drawers, find the center line (both vertically and horizontally).
2. Set Up A Template Or Jig
If you’re using a jig, adjust it to the correct hole spacing and position it on the cabinet. If you made a DIY template, align it with your reference edges.
Clamp the template in place if necessary so it doesn’t move while you mark or drill.
3. Use A Center Punch
Before drilling, use a center punch or even a sharp nail to make a small dent at the drill spot. This helps guide the drill bit and prevents it from slipping on the hard cabinet surface.
4. Apply Masking Tape
Stick a small piece of masking tape on the back of the door or drawer where the drill will exit. This helps prevent splintering or “blowout” as the bit comes through the other side.
5. Choose The Right Drill Bit
Select a drill bit that matches the screw size for your pulls. For most modern hardware, this will be 3/16″ (about 5mm), but always check the hardware instructions.
If you’re unsure, start with a smaller bit—you can always enlarge the hole, but you can’t make it smaller.
6. Drill Slowly And Steadily
Hold the drill perpendicular (at 90 degrees) to the cabinet surface. Drill at a slow to medium speed. Let the bit do the work—don’t force it. For thick or hardwood cabinets, you may want to drill halfway from one side, then finish from the other, using your marks for perfect alignment.
7. Clean Up And Test Fit
After drilling, brush away any sawdust. Insert the pull and screw it in place by hand to check alignment. If everything fits, tighten the screws gently with a screwdriver—never over-tighten, or you risk stripping the wood.
Tips For A Professional Finish
Even if you follow all the steps, small details can make your work look even better. Here are some expert tips:
- Always drill a test hole in a piece of scrap wood or an unused part of the cabinet first. This lets you check fit and alignment.
- Use painter’s tape both on front and back to avoid splinters.
- Keep drill bits sharp. Dull bits can tear up the surface.
- Don’t rush. Take your time with measuring and marking.
- Check level often, especially when installing a row of pulls. Even a small tilt will be noticeable.
- Match screw length to the thickness of your cabinet doors. If screws are too long, they can poke through or split the wood.
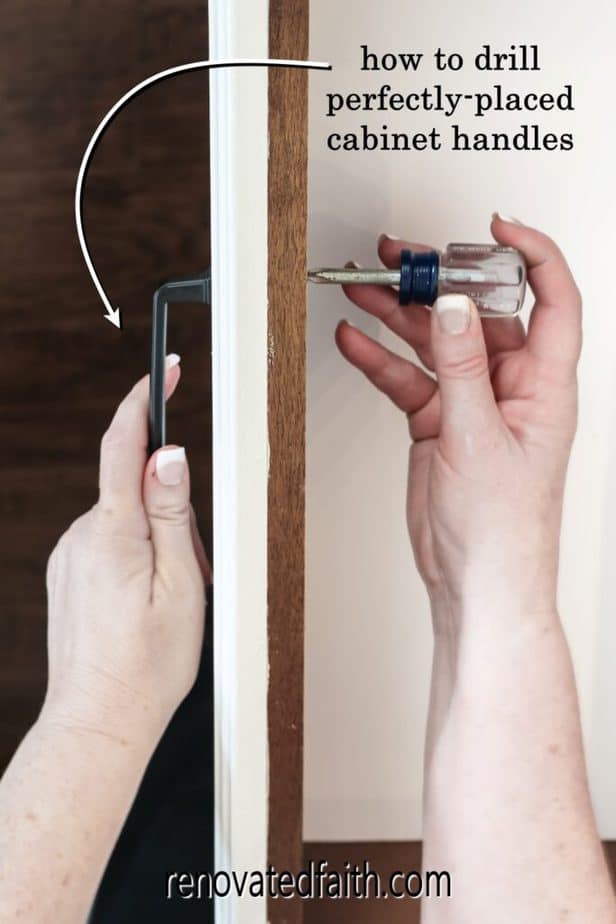
Credit: renovatedfaith.com
Common Mistakes And How To Avoid Them
No one wants to patch holes or redo a cabinet face. Here are the most frequent errors and how to prevent them:
- Misaligned pulls: Caused by poor measuring or template movement. Double-check every mark before drilling.
- Splintered wood: Usually from drilling too fast, using a dull bit, or not using tape. Drill slowly, and always use tape.
- Wrong hole size: If the hole is too large, the pull will wobble. If too small, the screw won’t fit. Start small and enlarge if needed.
- Over-tightening screws: This can strip the hole or crack the cabinet. Tighten by hand for the last few turns.
Special Situations: Glass, Laminate, And Fragile Cabinets
Not all cabinets are made from solid wood. Here’s how to handle tricky materials:
Glass-front Cabinets
- Use a glass drill bit (spear-point or diamond tip).
- Drill at low speed with light pressure.
- Place masking tape over the spot to prevent slipping.
- Always support the glass from behind.
Laminate Cabinets
- Use a sharp brad-point bit for clean edges.
- Tape both sides for best results.
- Drill slowly to avoid cracking the laminate surface.
Thin Or Fragile Wood
- Use a backing block (scrap wood) behind the drilling spot.
- This supports the wood and reduces “blowout.”
- Use shorter screws to avoid going all the way through.
Drilling For Knobs Vs. Pulls
Although this guide focuses on pulls (handles with two screws), many people also install knobs (single screw). The main difference is in the marking:
- Knobs: Centered both vertically and horizontally on the drawer or door edge.
- Pulls: Holes must be drilled for both ends, using careful measurement to match the hardware’s spacing.
Using the wrong process for each can lead to off-center or uneven hardware.
What If You Make A Mistake?
Even with careful measuring, mistakes happen. If you drill a hole in the wrong spot:
- Fill the hole with wood filler or a dowel and wood glue.
- Sand smooth, repaint or touch up as needed.
- Redrill the hole in the correct spot.
For painted cabinets, matching the paint perfectly can be tricky. Take a door to the paint store for a custom match if needed.
How To Drill Holes For Multiple Cabinets Quickly
If you’re working on a whole kitchen, speed and accuracy matter. Here’s how pros work efficiently:
- Set up an assembly line: Mark, drill, and install each pull in sequence.
- Use a jig: For more than 5-6 doors, a metal or plastic jig saves hours and prevents mistakes.
- Check alignment: Every few cabinets, step back and check that all pulls line up across the row.
- Teamwork: One person marks, another drills, a third installs hardware.
How To Choose The Right Drill Bit For Cabinet Pulls
Not all drill bits are the same. Here’s a comparison to help you pick the right one for your project.
| Drill Bit Type | Best For | Surface Finish | Notes |
|---|---|---|---|
| Twist Bit | General wood, soft materials | Good | Most common, affordable |
| Brad-Point Bit | Hardwood, laminate | Excellent | Sharp point prevents wandering |
| Glass Bit | Glass, tile | Very clean | Requires low speed, water cooling |
| Forstner Bit | Large, flat-bottom holes | Very clean | Rarely needed for pulls |
For most cabinet pulls, a sharp brad-point bit or standard twist bit is enough.
Safety Precautions
Drilling might seem safe, but there are risks. Protect yourself and your cabinets by following these safety tips:
- Always wear safety glasses to protect your eyes from wood chips.
- Keep your hands clear of the drill bit.
- Clamp workpieces when possible to prevent slipping.
- Unplug or remove the battery from your drill when changing bits.
- Work slowly and avoid distractions.
Cleaning Up After Installation
Once all your pulls are installed, take a few extra steps to finish your project:
- Wipe away pencil marks or tape residue.
- Clean hardware with a soft cloth.
- Check every pull for tightness.
- Open and close each cabinet to make sure nothing binds.
- Dispose of all wood shavings and dust to keep your kitchen or bathroom tidy.

Credit: www.youtube.com
How To Upgrade Existing Pulls
If you’re replacing old hardware, first check if the new pulls use the same hole spacing. If not, you’ll need to fill and redrill the holes.
- Remove the old hardware carefully to avoid damaging the finish.
- Clean the cabinet face before installing new hardware.
- Follow the same marking and drilling steps as above.
Some modern pulls have “adjustable” bases to fit old holes—these can save time if you want to avoid patching and repainting.
Advanced Tips For A Designer Look
Want your cabinets to look like they were installed by a pro? Here are some advanced tips:
- Stagger pull heights slightly for tall pantry doors to match the eye line.
- For shaker-style doors, align pulls with the inner frame for a balanced look.
- Use a laser level for perfect alignment across a row of cabinets.
- Consider the “feel” of the pull—test grip and clearance before final installation.
Environmental And Cost Considerations
Drilling holes for pulls is a simple job, but mistakes can be expensive—especially if you have to replace a door or drawer front. Using a template or jig is a small investment that can save you time, money, and materials.
If you’re working with reclaimed or antique cabinets, be extra careful—old wood can be brittle, and mistakes are harder to fix. Always use the right bit and go slowly.
Real-life Example
Imagine you’re updating a kitchen with 20 cabinet doors and 10 drawers. If you use a jig, you can finish the marking and drilling in about 2-3 hours. Without a jig, it might take twice as long, and the risk of misalignment goes up with every cabinet.
One homeowner reported that their first kitchen project took almost a full weekend because they had to redo three misaligned pulls. On their next project, using a store-bought jig, they finished in a single afternoon with perfect results.
Where To Learn More
Many hardware manufacturers offer free templates and guides. For more in-depth information, the This Old House website has videos and articles about cabinet hardware installation.
Frequently Asked Questions
How Do I Center Cabinet Pulls On A Drawer?
Find the horizontal and vertical center of the drawer front using a measuring tape or ruler. Mark the center, then use your hardware’s hole spacing to measure out from the center point. Mark both screw holes, then drill.
What Size Drill Bit Should I Use For Cabinet Pulls?
Most cabinet pulls use screws that require a 3/16″ (about 5mm) drill bit. Always check the specific hardware instructions, and start with a smaller bit if unsure.
Can I Use A Regular Drill For Cabinet Pulls, Or Do I Need A Special Tool?
A regular drill (corded or cordless) is fine for most cabinets. The key is to use a sharp bit, drill slowly, and keep the bit perpendicular to the surface. For glass or tile, use a special bit.
How Do I Avoid Splintering When Drilling Cabinet Doors?
Apply painter’s tape or masking tape to the area before drilling. Drill slowly, and support the back side with a piece of scrap wood if possible. Use a sharp bit for best results.
Is It Better To Use Knobs Or Pulls For Cabinets?
Both are good choices. Knobs are simpler to install (one hole) and are often used for doors. Pulls give a modern look and are easier to grip, especially on drawers. The choice depends on style, comfort, and the look you want.
Adding cabinet pulls can instantly upgrade your kitchen or bathroom—if you take your time, measure carefully, and use the right tools, you’ll enjoy perfect results for years to come. With the guidance above, even first-time DIYers can achieve a professional look.
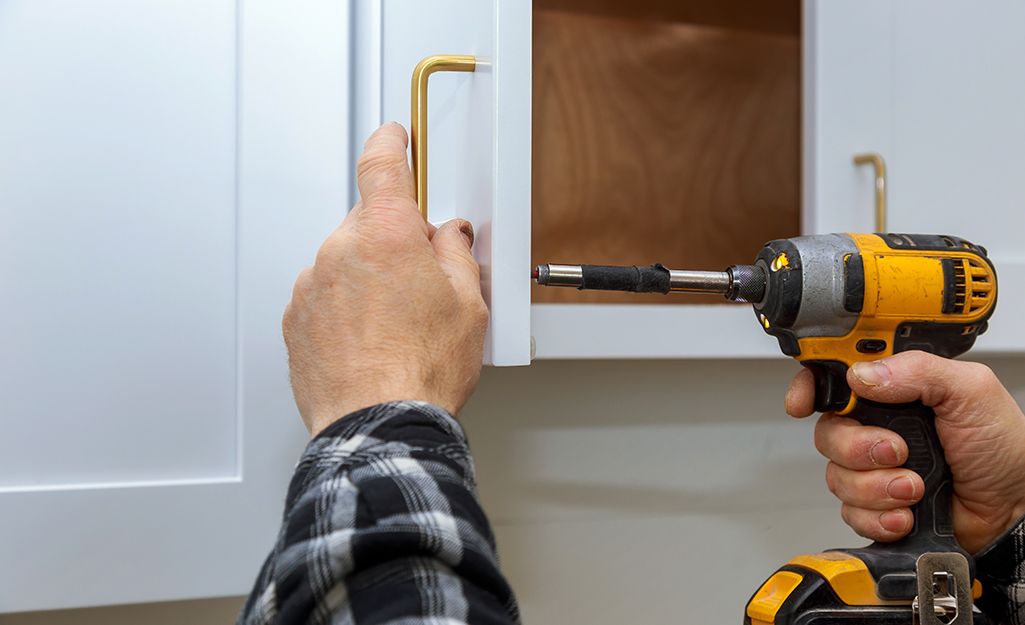
Credit: www.homedepot.com