
Antiquing kitchen cabinets is a creative way to add warmth and character to your kitchen, making it feel cozy and timeless. If your kitchen cabinets look too modern or plain, you might want to give them an aged or distressed look.
This process, called “antiquing,” doesn’t require you to buy new cabinets or invest in expensive remodeling. With some patience, the right techniques, and a little creativity, you can transform your kitchen and make it truly unique.
Many people are surprised at how a few simple changes can create a completely different atmosphere. This guide will walk you through every step of how to antique kitchen cabinets, from understanding different finishes to avoiding common mistakes. Whether you want a light, subtle effect or a bold, rustic feel, you’ll find clear instructions and practical advice here.
Let’s explore how you can give your kitchen cabinets a beautiful, antique finish that looks professional—even if you’re new to DIY projects.
Understanding Antiquing: What Does It Mean?
Antiquing is not just painting your cabinets a new color. It’s a way of making new or ordinary cabinets look older, with a sense of history and depth. The goal is to highlight details—like wood grain, corners, and edges—so your cabinets look like they’ve been used and loved for many years.
There are several ways to antique cabinets, including:
- Distressing: Making small scratches, dents, or worn areas to mimic natural aging.
- Glazing: Applying a thin, tinted layer over paint or stain to add depth and highlight details.
- Layered Paint: Using two or more colors, then sanding some areas to reveal the base color.
- Crackling: Creating a cracked paint surface that resembles old, dried paint.
Not all techniques suit every kitchen. Think about the style you want: rustic, vintage, French country, or classic farmhouse. Each approach has its own look and steps.
Planning Your Project: What You Need To Know
Before you begin, take time to plan. Antiquing cabinets is not difficult, but it does require patience and attention to detail. Here’s what you should consider first:
- Cabinet Material: Solid wood is ideal for antiquing because it holds up to sanding and distressing. Laminate or MDF (medium-density fiberboard) can work, but you’ll need different products and more careful prep.
- Kitchen Style: Match the antiquing effect to your kitchen. For example, heavy distressing suits rustic kitchens, while subtle glazing fits a more classic style.
- Timeline: Antiquing takes several days. You need time for cleaning, priming, painting, glazing, and drying between steps.
- Budget: Most supplies are affordable. Expect to spend $50–$200, depending on your kitchen size and the products you choose.
- Work Area: Choose a well-ventilated place and protect floors and counters. Working outdoors is best for sanding and painting doors.
Pro tip: Take photos of your cabinets before you start. This helps you track progress and compare the transformation.
Tools And Materials: What You’ll Need
Gather all supplies before you start. Having everything ready prevents delays and helps you stay organized.
Basic supplies:
- Screwdriver or drill (for removing doors and hardware)
- Sandpaper (grits 120, 220, and 320)
- Tack cloth or lint-free rags
- Painter’s tape
- Drop cloths or old sheets
- Paintbrushes (angled and flat)
- Small foam roller (for smooth finishes)
- Paint tray
- Clean bucket and sponge
- Protective gloves and safety goggles
- Stir sticks
For antiquing:
- Primer (bonding type for slick surfaces)
- Base paint (latex or chalk paint)
- Glaze (pre-mixed or DIY with clear glaze and paint)
- Topcoat (matte or satin polyurethane, or clear wax)
- Distressing tools (optional: Hammer, chain, screwdriver, steel wool)
- Wood filler (for repairing deep scratches if needed)
Optional:
- Crackle medium (for crackle effect)
- Stain (for darker glaze or aging)
Choosing the right products: For beginners, water-based paints and glazes are easier to clean and control. Chalk paint is popular for vintage looks and doesn’t require heavy sanding.
Non-obvious insight: Many beginners forget to buy extra hinges or screws in case original hardware is damaged or lost. Have a few spares on hand.
Preparing Your Kitchen Cabinets
Preparation is the foundation of a good antiquing job. Skipping steps here will lead to poor results, like peeling paint or uneven finishes.
Step 1: Remove Cabinet Doors and Hardware
Take off all cabinet doors, drawers, and hardware (knobs, handles, and hinges). Label each piece with masking tape so you know where it goes. Place screws and hardware in a container.
Step 2: Clean Thoroughly
Kitchens are greasy places. Use a degreaser or a mix of warm water and dish soap to scrub all surfaces. Rinse with clean water and let dry completely. Even small bits of grease will prevent paint from sticking.
Step 3: Repair Damage
Inspect the cabinets for cracks, holes, or dents. Fill deep scratches or holes with wood filler. Let dry, then sand smooth.
Step 4: Sand Surfaces
Lightly sand all surfaces with 120 or 220-grit sandpaper. This helps paint and glaze adhere. For smooth surfaces like laminate, use a bonding primer after sanding.
Step 5: Protect Surroundings
Cover countertops and floors with drop cloths. Use painter’s tape to protect walls and areas you don’t want painted.
Non-obvious insight: Number each door and drawer with a small piece of tape. This avoids confusion during reinstallation.
Choosing Your Antiquing Style
There are several ways to antique cabinets. Each method creates a different look. Think about the effect you want before you start painting.
1. Simple Glazing
This is the most common antiquing method. You paint your cabinets, then brush on a glaze, wiping some off. The glaze settles in grooves and corners, making details stand out.
Best for: Subtle, classic antique look.
2. Heavy Distressing
This style uses sandpaper and tools to wear away paint, especially on edges and corners. It creates a rustic, lived-in feel.
Best for: Farmhouse or country kitchens.
3. Two-tone Layered Paint
Start with a dark base coat, then a lighter top coat. Sand some areas to reveal the dark color underneath.
Best for: Vintage or French country styles.
4. Crackle Finish
A special medium makes the top paint layer crack as it dries, mimicking old, cracked paint.
Best for: Dramatic, aged effect.
Here is a comparison of antiquing methods:
| Method | Skill Level | Dry Time | Best For |
|---|---|---|---|
| Glazing | Beginner | 1-2 days | Classic, subtle antique look |
| Distressing | Intermediate | 1-2 days | Rustic, farmhouse style |
| Layered Paint | Intermediate | 2-3 days | Vintage, French country |
| Crackle | Advanced | 2-3 days | Heavily aged, dramatic effect |
Tip: If unsure, try your technique on a scrap piece of wood or inside a cabinet door first.
Step-by-step Guide To Antiquing Kitchen Cabinets
Now let’s walk through the process, from start to finish, using the most popular method: glazing with optional distressing. You can adapt these steps for other techniques.
Step 1: Prime The Cabinets
After cleaning and sanding, apply a high-quality primer. This is especially important for glossy or laminate cabinets.
- Use a brush for corners and a roller for flat surfaces.
- Let primer dry for at least 4 hours (follow the product instructions).
Step 2: Apply The Base Paint
Choose a color that matches your kitchen’s style. Whites, creams, and light grays are popular, but deep blues or greens also look beautiful.
- Stir paint well and pour into a tray.
- Paint in thin, even layers, working with the grain.
- Allow the first coat to dry (usually 2–4 hours).
- Apply a second coat if needed for full coverage.
Practical tip: Avoid thick coats; they can drip and won’t look as natural.
Step 3: Distress (optional)
If you want a more rustic look, distress the cabinets after the paint is fully dry.
- Use 220-grit sandpaper to lightly sand corners, edges, and raised details.
- For a heavier effect, gently tap some areas with a hammer or drag a chain for dents.
- Wipe away dust with a tack cloth.
Warning: Start with gentle distressing—you can always do more, but you can’t undo heavy damage.
Step 4: Apply The Glaze
Glazing adds the antique “patina. ” You can buy pre-mixed glaze or make your own by mixing clear glaze with a little brown or gray paint.
- Brush glaze into corners, crevices, and over details.
- Let it sit for 1–2 minutes.
- Wipe off the excess with a clean, lint-free rag. The glaze will stay in details and grooves.
- Work in small sections to avoid drying before wiping.
Pro tip: If you want a darker effect, leave more glaze on. For a subtle look, wipe off more.
Step 5: Seal The Finish
Once the glaze is dry (usually 12–24 hours), protect your work with a clear topcoat.
- Use a water-based polyurethane for durability and easy cleaning.
- Apply with a clean brush or foam roller.
- Let dry, then sand lightly with 320-grit sandpaper and add a second coat.
For a soft, vintage look: Use clear wax instead of polyurethane, but remember to re-wax every year.
Step 6: Reassemble Cabinets
Once everything is dry, reinstall doors and hardware. Take time to clean or update the hardware—aged brass or black iron looks great with antique finishes.
Non-obvious insight: If your hinges and handles look too new, you can “antique” them with spray paint or a patina solution.

Credit: www.youtube.com
Advanced Techniques For Unique Effects
If you want your cabinets to stand out, try these advanced antiquing methods. These require more practice but can create stunning results.
Crackle Finish
A crackle medium creates fine cracks in the top paint layer, giving a dramatic aged look.
- Paint the base color and let dry.
- Apply crackle medium, following instructions.
- When tacky, brush on a contrasting top color. Cracks will appear as it dries.
Tip: Use a brush, not a roller. Work quickly and avoid going over the same area twice.
Color Washing
This technique uses a thin wash of color over the base paint for a faded, layered look.
- Mix paint with water (about 1: 3 ratio).
- Brush over the cabinets.
- Wipe off excess with a rag, leaving some color behind.
Dry Brushing
Dry brushing highlights edges and details.
- Dip just the tip of a dry brush in paint.
- Wipe most paint off on a paper towel.
- Lightly drag the brush over edges and details.
Pro tip: Layer dry brushing over glaze for more depth.
Using Stain For Aging
Instead of glaze, you can use a wood stain for a darker, richer patina.
- Apply stain with a brush, then wipe off.
- Oil-based stains are harder to control than glaze, so practice first.
Warning: Stain can darken paint quickly—wipe away immediately for a lighter effect.
Common Mistakes And How To Avoid Them
Many people make similar mistakes when antiquing cabinets. Knowing these will help you get great results the first time.
- Skipping Prep: Not cleaning or sanding leads to peeling paint and uneven glaze.
- Rushing Dry Times: Each layer must dry completely. Rushing causes smudges and poor adhesion.
- Using Wrong Products: Not all paints, glazes, or primers work on all surfaces. Choose products for cabinets and follow label instructions.
- Over-distressing: Too much distressing can make cabinets look damaged, not antique.
- Not Protecting Work Area: Paint drips are hard to remove from floors and counters.
- Applying Thick Coats: Thick paint or glaze layers take longer to dry and can look unnatural.
- Ignoring Hardware: Shiny new knobs can ruin the vintage effect. Update or antique hardware for a consistent look.
Expert tip: Test your full process on a small area first. This lets you adjust colors and techniques before starting on all cabinets.

Credit: georgecabinetry.com
How Long Does It Take?
Antiquing kitchen cabinets is not a quick project. Here’s a general timeline:
| Step | Time Needed | Notes |
|---|---|---|
| Prep (clean, sand, remove doors) | 4–6 hours | May take longer for large kitchens |
| Priming | 2–3 hours + 4 hours dry time | Let dry fully before painting |
| Painting | 3–4 hours + 4 hours dry time | Two coats recommended |
| Distressing | 1–2 hours | Optional |
| Glazing | 2–3 hours + 24 hours dry time | Work in sections |
| Sealing | 2–3 hours + 8 hours dry time | Two coats recommended |
| Reassembly | 2–3 hours | Label doors for easy reinstallation |
Total time: 3–5 days for a typical kitchen, including drying. Plan to use your kitchen less during this project.
Maintaining Antique Kitchen Cabinets
Once your cabinets look beautifully aged, you’ll want to keep them that way. Here’s how to maintain them:
- Clean gently: Use a soft cloth with mild soap and water. Avoid harsh chemicals or scrubbing.
- Touch up as needed: Keep extra glaze and paint for quick fixes if you get chips or scratches.
- Protect from water: Wipe up spills quickly, especially near the sink.
- Re-seal every few years: If you used wax, reapply once a year. For polyurethane, check for worn areas and add a new coat as needed.
Non-obvious insight: Sunlight fades paint and glaze over time. Close blinds or curtains during strong sunlight hours to keep colors vibrant.
Upgrading Hardware For A Complete Look
The final touch for antique cabinets is the hardware. Changing out knobs and pulls can make a huge difference.
Popular choices:
- Glass knobs for vintage style
- Aged brass for classic charm
- Matte black or oil-rubbed bronze for farmhouse or rustic looks
- Porcelain handles for French country
You can “antique” shiny metal hardware at home:
- Lightly sand with steel wool.
- Apply black or bronze spray paint (designed for metal).
- For a patina look, use a chemical patina kit (follow safety instructions).
Quick tip: Lay out hardware before installing to make sure you like the look.
When To Call A Professional
Antiquing is a great DIY project, but sometimes it’s better to call a pro. Consider hiring help if:
- Your cabinets are laminate and you’re not comfortable with specialty primers.
- You want a complex finish (like heavy crackle or layered color washes) and have no experience.
- You have a large kitchen and limited time.
- There’s significant cabinet damage or water stains.
A professional painter can complete the job faster and guarantee a high-quality finish. If you’re unsure, get quotes and compare options.
Real-life Example: Transforming A Basic Kitchen
Imagine you have plain, white, builder-grade cabinets. You want a cozy, farmhouse kitchen. Here’s how one homeowner transformed their space:
- Chose a soft cream for the base paint.
- Distressed edges and corners with sandpaper and a chain.
- Used a brown glaze, focusing on grooves and raised details.
- Updated hardware to aged bronze pulls and knobs.
- Added beadboard wallpaper to the cabinet ends for extra charm.
The result: a warm, inviting kitchen that looks custom—without new cabinets.
Frequently Asked Questions
How Durable Is An Antique Finish On Kitchen Cabinets?
An antique finish is durable if you follow all prep and sealing steps. Using a high-quality sealer like water-based polyurethane protects the paint and glaze from scratches, stains, and water. With gentle cleaning and regular maintenance, your cabinets can look beautiful for many years.
Can I Antique Laminate Cabinets?
Yes, you can antique laminate cabinets, but you must use a bonding primer made for slick surfaces. Sand lightly, clean well, and avoid heavy distressing (laminate won’t show wood underneath). Glazing and color washing work well, but stick to gentle techniques.
What’s The Best Paint For Antiquing Kitchen Cabinets?
Chalk paint and high-quality latex paint are both popular choices. Chalk paint requires less prep and gives a matte, vintage look, while latex paint is durable and easy to clean. Avoid oil-based paints—they’re harder to work with and clean up.
Do I Need To Remove All Cabinet Doors Before Antiquing?
Removing doors and hardware makes painting and glazing much easier and neater. You can antique cabinets without removing doors, but you’ll have to work carefully to avoid drips and missed spots. For the best results, take the extra time to remove them.
Where Can I Find Inspiration And More Detailed Instructions?
You can find excellent inspiration and step-by-step guides at sites like This Old House, which offers photos and practical tips for all skill levels.
Giving your kitchen cabinets an antique look can completely change the feel of your home. With careful planning, the right tools, and a bit of creativity, you can create a warm, inviting space full of character. Whether you want a subtle change or a dramatic transformation, antiquing is a rewarding project that adds value and charm to your kitchen for years to come.
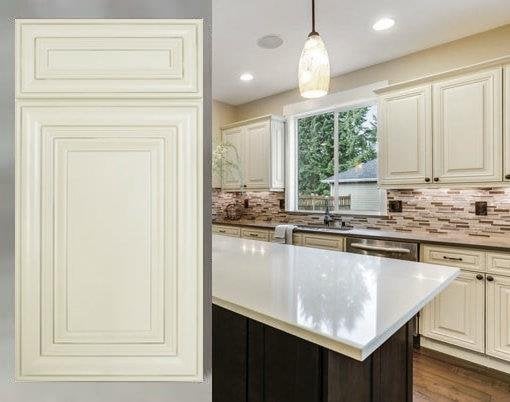
Credit: www.kitchencabinetdepot.com