
Getting a cabinet finish that looks like it just came from the factory is something many homeowners and DIYers dream about. That smooth, flawless surface—no brush marks, no uneven color, just a rich, beautiful finish that almost looks too perfect to touch.
But achieving this level of quality at home isn’t just about slapping on some paint and hoping for the best. It’s about careful preparation, the right tools, and knowing what professional finishers do differently. If you want your cabinets to look like they just rolled out of a high-end workshop, you’ll need to follow a process that leaves nothing to chance.
Many people start with great excitement but soon feel frustrated. The paint looks streaky, dust settles on the surface, or the color just doesn’t match expectations. These problems are common because getting a factory finish on cabinets involves more than basic painting. It’s a skill, but with the right guidance, you can get there—without needing a full workshop or special training.
This guide explains every step, from choosing materials to the final polish. You’ll learn what really matters, what can ruin your results, and how to avoid common mistakes. By the end, you’ll have a clear path to transforming your cabinets into pieces that look like they came straight from a professional factory.
Why Factory Finish Matters
A factory finish isn’t just about looks. It’s about durability, smoothness, and the way light reflects off the surface. Cabinets with a high-quality finish are easier to clean, resist stains better, and hold up to years of use. A poor finish, on the other hand, chips easily, attracts dirt, and can make even new cabinets look old.
Achieving a factory finish also adds value to your home. Whether you’re remodeling for your own enjoyment or planning to sell, beautifully finished cabinets create a sense of quality that buyers notice. It’s an upgrade that stands out in kitchens and bathrooms—two places where details matter most.
But perhaps most importantly, a flawless finish is satisfying. Every time you walk into your kitchen, you’ll notice the smooth feel and rich color. It’s a result you can be proud of, and one that makes all the effort worthwhile.
Sometimes, the cabinets become the centerpiece of the room, setting the tone for the whole space. The satisfaction doesn’t fade with time—good finishes continue to look fresh and elegant for years.
Another often-overlooked aspect is how a factory finish protects the underlying wood. Proper sealing prevents moisture from soaking into the wood, which can cause swelling, warping, or mold growth. This is especially important in humid environments, such as kitchens and bathrooms, where steam and spills are common.
Key Ingredients: Tools And Materials
Before you start, gather the right tools and materials. Many mistakes happen simply because people use the wrong brush or skip a key product. Here’s what you’ll need for a true factory finish:
Essential Tools
- High-quality sprayer (HVLP or airless)
- Sanding blocks (various grits: 120, 220, 320)
- Vacuum with brush attachment
- Tack cloths (lint-free)
- Putty knife
- Paint trays and mixing sticks
- Microfiber cloths
- Drill or screwdriver (for removing hardware)
- Painter’s tape
- Drop cloths or plastic sheeting
- Respirator mask
The right tools make a huge difference. For example, using a high-quality sprayer saves hours and results in a much smoother finish compared to a brush or roller. Sanding blocks of several grits help you create a perfectly even surface at each stage, while a tack cloth is great for picking up even the tiniest dust particles that a vacuum might miss.
Best Materials
- Degreaser (such as TSP or a citrus-based cleaner)
- Wood filler or putty
- Primer (high-adhesion, stain-blocking type)
- Cabinet-grade paint (acrylic enamel or polyurethane)
- Topcoat (water-based polyurethane or similar)
- Sandpaper (120, 220, 320 grit)
- Paint strainers
- Label stickers or bags (to organize hardware)
Choosing the right paint and primer can mean the difference between a finish that chips off in a few months and one that lasts for years. The best products are designed to bond well, resist stains, and level themselves for a factory-smooth result.
Non-obvious Insight 1:
Many beginners skip paint strainers, but straining your paint removes tiny lumps and dust—critical for a perfect finish. Even “new” paint sometimes contains debris that can ruin smoothness. If you’re using leftover or previously opened paint, straining becomes even more important, as dried bits can easily get mixed in and ruin your finish.
Non-obvious Insight 2:
A respirator mask is a must, especially with spray painting. Not only does it protect your health, but it also prevents you from inhaling fine mist that can irritate your lungs and skin. Even water-based paints can release fine particles, and solvents in some primers or topcoats can be harmful over time.
Preparation: The Foundation For Perfection
Preparation is where most people go wrong. In the factory, every cabinet goes through detailed cleaning and sanding. At home, it’s tempting to rush this step—but that leads to disappointment.
Cleaning And Degreasing
Cabinets, especially in kitchens, collect grease and dust. If you skip cleaning, paint won’t stick and may peel within months.
- Remove all hardware: Handles, knobs, and hinges. Place them in labeled bags.
- Clean every surface with a degreaser. Use a scrub pad for stubborn spots.
- Rinse with clean water and let dry completely.
Don’t underestimate how much hidden grease can affect your finish. Sometimes, even seemingly clean cabinets have a thin film that prevents proper adhesion. A good cleaner and thorough rinsing are essential, especially around handles and near the stove.
Removing Doors And Drawers
Don’t try to paint cabinets while the doors and drawers are attached. Remove them, and label each one (with tape or a marker) so you know where it goes later. This makes painting easier and gives access to all surfaces.
Many people make the mistake of stacking the doors randomly or forgetting to keep track of which piece goes where. Taking a quick photo or drawing a simple diagram can also help with reassembly.
Filling Holes And Dings
Inspect for dents, holes, or scratches. Fill with wood filler and let dry. Sand smooth with 120-grit paper. This step is critical: even small imperfections stand out after paint.
Be generous but neat with the filler. Overfilling and sanding back is better than underfilling, as paint makes even tiny dents more obvious. For larger holes or damage, let the filler dry fully—sometimes overnight—before sanding.
Sanding: The Secret Step
Sand all surfaces thoroughly. Start with 120-grit to remove old finish, then 220-grit for smoothness. Always sand in the direction of the wood grain. After sanding, vacuum up the dust and wipe with a tack cloth.
Example:
If you see any shiny spots, sand them again. Shiny areas often mean old finish remains, which will prevent new paint from sticking. If you feel roughness, keep sanding until the surface feels consistently smooth to your hand—this tactile check is as important as the visual one.
Masking And Protecting Areas
Use painter’s tape to mask walls, countertops, and inside cabinet boxes. Lay drop cloths on the floor. Professional results depend on keeping paint only where it should go.
Be careful to press the edges of the tape down firmly. Paint can seep under loose tape, making lines uneven. Consider using a high-quality tape for cleaner edges.
The Right Primer: Why It’s Essential
Primer does two things: it helps paint stick and prevents stains from bleeding through. Choose a high-adhesion, stain-blocking primer made for cabinets.
Applying Primer
- Stir and strain the primer.
- Use a sprayer for the smoothest result. If you must use a brush, choose a high-quality synthetic brush and work quickly.
- Apply thin, even coats. Don’t flood the surface.
- Let dry fully (follow manufacturer’s times).
- Sand lightly with 220-grit paper after drying. Remove dust with a tack cloth.
A second coat is sometimes needed for old cabinets, especially if the wood is dark, red, or prone to tannin bleed (like oak or cherry). Always check the surface after the first coat—if any wood grain or stains show through, another primer layer will help lock them out.
Non-obvious Insight:
One coat of primer is usually enough, but for dark woods or old cabinets, two coats may prevent stains from showing through. Always check after the first coat. Also, don’t forget the edges and corners—these are easy to miss but will show flaws if not primed properly.
Choosing The Best Paint For Factory Finish
Not all paints are equal. For a real factory finish, you need something durable, smooth, and self-leveling.
Top Paint Types
- Acrylic enamel: Dries hard, resists yellowing, and is easy to clean. Water-based, so safer at home.
- Polyurethane-based paint: Extremely tough, great for kitchens and bathrooms.
- Hybrid alkyds: Combine oil-based toughness with water cleanup.
Data Comparison: Paint Types For Cabinets
| Paint Type | Durability | Ease of Use | Cleanup | Finish Quality |
|---|---|---|---|---|
| Acrylic Enamel | High | Easy | Water | Excellent |
| Polyurethane | Very High | Moderate | Water/Solvent | Excellent |
| Hybrid Alkyd | High | Moderate | Water | Very Good |
| Latex | Moderate | Easy | Water | Good |
Paint Finish Levels
For cabinets, satin, semi-gloss, or high-gloss are best. Flat or matte finishes show fingerprints and are harder to clean.
Each level of gloss has its own look. Satin gives a soft, subtle shine that hides small flaws. Semi-gloss is brighter and more reflective, giving a crisp, modern look. High-gloss is like a mirror—stunning but less forgiving of imperfections.
Non-obvious Insight:
Self-leveling paints are worth the extra cost. They naturally smooth out brush marks, giving a glassy surface. Look for this feature on the paint label. Not all brands advertise this clearly, so ask at the paint counter or check online reviews.
The Art Of Spraying Cabinets
Spraying is what gives factory-finished cabinets their flawless look. Brushing can work but will never be as smooth.
Types Of Sprayers
- HVLP (High Volume Low Pressure): Best for home use. Fine mist, less overspray.
- Airless sprayer: Faster, but more overspray. Needs more practice.
If you’re new to spraying, practice on cardboard or scrap wood first. This helps you get a feel for the speed, distance, and coverage before working on your cabinets.
Setting Up For Spraying
- Work in a well-ventilated area. Garage or workshop is ideal.
- Hang plastic sheeting to contain overspray.
- Place doors on painter’s pyramids or blocks for easy access to edges.
- Strain paint before filling the sprayer.
If you don’t have painter’s pyramids, you can use clean soup cans or small blocks of wood. The main goal is to keep the doors off the surface so you can spray the edges in one pass.
Spraying Technique
- Hold the sprayer 8-10 inches from the surface.
- Start moving before you pull the trigger.
- Overlap each pass by 50%.
- Keep the sprayer moving at a steady pace.
The most common mistake is to pause or move unevenly, which can cause uneven coverage or drips. Try to keep your wrist straight and move your whole arm for smoother passes.
Data Table: Sprayer Comparison
| Sprayer Type | Best For | Overspray | Finish Quality | Ease of Use |
|---|---|---|---|---|
| HVLP | Detailed Work | Low | Excellent | Moderate |
| Airless | Large Surfaces | High | Very Good | Harder |
| Brush/Roller | Small Jobs | None | Good | Easy |
Common Mistake:
Spraying too much paint at once causes drips and sags. Always apply light, even coats—even if it takes three or four rounds. If you notice a drip forming, let it dry, sand it flat, and touch up with a thin coat.
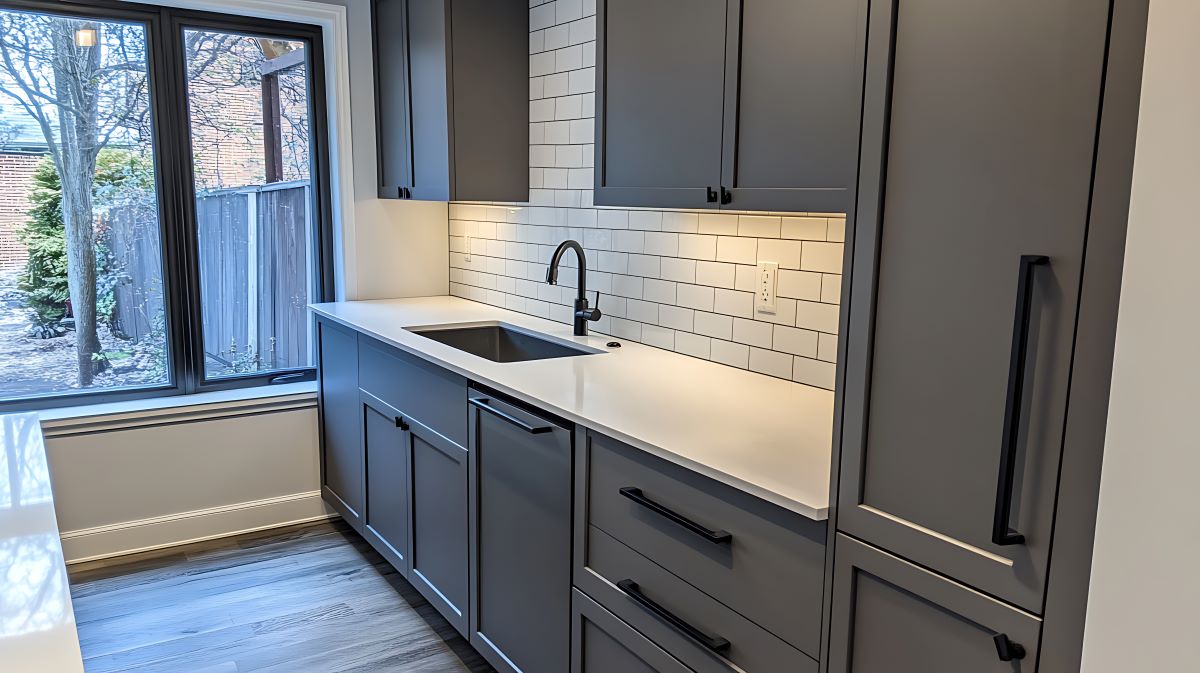
Credit: drcabinet.com
Drying And Sanding Between Coats
Patience is key. Each coat of paint must dry fully before sanding and applying the next. If you rush, you’ll get a sticky or uneven finish.
- Wait the full drying time listed on your paint (often 4-6 hours).
- Sand lightly with 320-grit paper between coats to remove dust nibs and smooth the surface.
- Wipe with a tack cloth before the next coat.
Two or three thin coats are better than one thick coat. The finish will look deeper and last longer.
If you’re working in a humid climate, allow extra drying time. Paint that feels dry to the touch can still be soft underneath—press gently in a hidden spot to check.
Topcoat: The Final Layer Of Protection
A clear topcoat gives cabinets that extra shine and makes the finish last. Polyurethane or acrylic topcoats are best.
How To Apply Topcoat
- Stir and strain the topcoat.
- Use a clean sprayer, or a new high-quality brush for small areas.
- Apply in thin, even layers.
- Let dry and sand lightly between coats (320-grit).
- Apply two coats for kitchens and bathrooms, where cabinets get heavy use.
For an even finish, avoid going back over areas you’ve already coated—this can cause streaks or uneven gloss. If you spot a missed area after drying, lightly sand and recoat that section.
Non-obvious Insight:
Even if your paint is labeled “cabinet-grade,” a clear topcoat adds durability and makes cleaning easier. Factories always use a topcoat for this reason. It also helps prevent discoloration from sunlight or kitchen oils.
Reassembly And Final Touches
Once the finish is fully cured (usually a few days after the last coat), it’s time to put everything back together.
- Reinstall all hardware. If you want an upgrade, this is the perfect time to add new handles or knobs.
- Attach doors and drawers using your labels to match locations.
- Remove masking tape and clean up.
Final Inspection
Check for any missed spots, dust specks, or rough edges. Touch up with a fine brush if needed. Don’t rush to use the cabinets—full curing can take up to a week, depending on humidity and temperature.
Walk around and view the cabinets from different angles and lighting. Sometimes flaws only show from a certain view. Running your hand over the surface can also help you find rough spots that need a light sanding or another coat.
Troubleshooting: Fixing Common Problems
Even careful painters sometimes face issues. Here’s how to solve the most common ones:
Paint Drips Or Sags
Wait for the paint to dry, then sand smooth with fine grit and re-coat lightly.
Dust In The Finish
Sand lightly and wipe with a tack cloth before adding another coat. Work in a dust-free area.
Orange Peel Texture
This bumpy look comes from spraying too far away or at the wrong pressure. Sand smooth and adjust your technique.
Bleed-through Stains
If yellow or brown spots appear, add another coat of stain-blocking primer before continuing.
Cloudy Or Uneven Sheen
If your topcoat looks cloudy or dull, it may be due to humidity or contamination. Allow extra drying time and consider applying another thin, even coat for a consistent gloss.

Credit: stylebyemilyhenderson.com
Maintaining Your Factory Finish
A great finish is tough, but not indestructible. To keep cabinets looking new:
- Clean with mild soap and water—never harsh chemicals.
- Wipe spills quickly to prevent stains.
- Avoid slamming doors and drawers.
- Use felt pads under small appliances or decorations.
Consider regular dusting with a microfiber cloth to keep surfaces looking shiny. If you ever need to refresh the finish, a light sanding and another topcoat can restore the original gloss without a full repaint.
Factory Finish Vs. Regular Painting: What’s The Difference?
Factory-finished cabinets use advanced techniques. At home, you can get close by using the right products and methods. Here’s a quick comparison:
| Aspect | Factory Finish | DIY Finish |
|---|---|---|
| Surface Smoothness | Perfectly smooth, no brush marks | Nearly as smooth with spraying, some texture with brushing |
| Durability | Very high, baked-on finishes | High, with topcoat and proper prep |
| Color Consistency | Exact match, controlled environment | Very close, may vary with lighting |
| Cost | High (professional shop) | Lower (DIY labor) |
| Time Required | Fast (industrial process) | Slower, more drying time |
With attention to detail, your home-finished cabinets can rival the look and feel of factory pieces—at a fraction of the price.

Credit: www.youtube.com
Professional Tips For The Perfect Cabinet Finish
- Always work in a clean, dust-free area.
- Label every piece during disassembly to avoid mix-ups.
- Test your paint and topcoat on a scrap piece before starting.
- Let each coat dry fully. Rushing is the #1 cause of problems.
- Invest in quality materials. Cheap brushes and paints show poor results.
- Don’t skip the topcoat—even if the paint claims to be “one coat.”
- Store leftover paint and topcoat in airtight containers for future touch-ups.
- Use good lighting during painting and inspection. Shadows can hide flaws.
Frequently Asked Questions
How Long Should I Wait Before Using My Cabinets After Finishing?
It’s best to wait at least five to seven days for the finish to fully cure. Paint may feel dry after a few hours, but it takes longer to reach full hardness. Avoid heavy use during this period.
Can I Use A Roller Instead Of A Sprayer For A Factory Finish?
A small foam roller can give good results for flat surfaces, but it won’t match the ultra-smooth look of spraying. For best results, use a sprayer—especially on doors and drawer fronts. If you must use a roller, choose the highest-density foam for minimal texture.
What Is The Best Paint Brand For A Factory-like Finish On Cabinets?
Look for brands known for cabinet and furniture paint, such as Benjamin Moore Advance, Sherwin-Williams Emerald Urethane, or Behr Alkyd Enamel. These are designed for smooth, durable finishes.
Do I Have To Remove All Cabinet Doors And Hardware?
For a real factory finish, removing doors and hardware is essential. It allows you to paint all surfaces evenly and prevents paint from getting on hinges or handles. Skipping this step usually leads to messy edges and uneven coverage.
Where Can I Learn More About Professional Cabinet Finishing Techniques?
A great place to start is the This Old House kitchen cabinet painting guide, which covers advanced tips and troubleshooting.
Getting a factory finish on cabinets is a project that takes time, patience, and attention to detail. But the results are worth it: beautiful, durable cabinets that look brand new and bring a feeling of craftsmanship to your home. With this step-by-step approach, you’re well equipped to tackle the job and enjoy your “factory-fresh” cabinets for years to come.