Cleaning a zester might seem simple, but anyone who uses this kitchen tool often knows the challenge: zest sticks stubbornly to the blades, holes clog up, and a quick rinse never seems enough. Whether you use a classic microplane zester, a box grater, or a specialized citrus zester, proper cleaning is crucial. Clean tools not only last longer but also help you avoid mixing flavors or harboring bacteria. This guide will show you every method, trick, and tip for cleaning a zester, so you can enjoy fresh flavors without the mess.
Why Cleaning A Zester Matters
A zester’s sharp edges and small holes are perfect for removing fine citrus zest or grating hard cheese, but these same features make it a magnet for food buildup. Over time, this residue can:
- Harbor bacteria, especially if left damp
- Cause rust or corrosion on metal surfaces
- Transfer unwanted flavors to your next dish
- Reduce the sharpness and effectiveness of the tool
A clean zester is safer, more efficient, and gives you the pure taste you want in your recipes.
Understanding Different Types Of Zesters
Not all zesters are the same, and how you clean them depends on their design and materials. Here’s a quick overview:
| Type of Zester | Common Materials | Cleaning Difficulty | Best Cleaning Tools |
|---|---|---|---|
| Microplane Zester | Stainless Steel, Plastic | Medium | Brush, Running Water |
| Box Grater | Stainless Steel | High | Sponge, Brush, Soak |
| Citrus Channel Knife | Stainless Steel, Plastic | Low | Sponge, Toothpick |
Knowing your zester’s type helps you pick the right cleaning approach.

Credit: www.reddit.com
Basic Cleaning Steps After Each Use
Cleaning your zester immediately after use prevents food from hardening. Follow these steps for quick daily care:
- Rinse Immediately: Right after you finish zesting, hold the zester under warm running water. This washes away most fresh residue.
- Brush Away Stuck Bits: Use a small kitchen brush or even an old toothbrush to scrub both sides of the blades. Pay attention to the underside where zest can cling.
- Use Dish Soap: Add a drop of mild dish soap. Gently scrub with your brush or a non-abrasive sponge. Avoid steel wool, which can scratch and dull the zester.
- Rinse Thoroughly: Make sure to remove all soap and food particles.
- Dry Completely: Use a clean towel to dry, or let it air dry. This prevents rust and keeps the blades sharp.
If you clean your zester after every use, you’ll rarely need deep cleaning.
Deep Cleaning For Stubborn Residue
Sometimes, zest or cheese dries and sticks to the holes. When that happens, try these steps:
- Soak in Warm Soapy Water: Fill a basin with warm water and a squirt of dish soap. Let the zester soak for 10–15 minutes. This softens dried bits.
- Use a Toothpick or Skewer: Carefully poke out any remaining bits from the holes. Work gently to avoid bending or damaging the metal.
- Scrub with a Brush: After soaking, use a brush to dislodge any loosened residue. Scrub in the direction of the blades.
- Rinse and Inspect: Hold the zester up to the light. If you see any food stuck, repeat the process or focus on those areas.
- Dry Fully: Moisture leads to rust, so always dry your zester right away.
Pro Tip
For hard-to-remove cheese, use a bit of white vinegar during soaking. Vinegar breaks down dairy proteins and helps lift sticky residue. Just rinse well to remove the smell.
Credit: www.thekitchn.com
Cleaning A Zester In The Dishwasher
Many modern zesters are labeled dishwasher safe. Here’s how to clean them in your dishwasher:
- Place the zester on the top rack. This protects it from intense heat and pressure.
- Avoid placing it with sharp blades facing up, which can scratch other items or dull the blades.
- Use a standard cycle with regular detergent.
However, some zesters (especially those with wooden handles or non-stainless steel parts) are not suited for dishwashers. Always check the manufacturer’s instructions.
Dishwasher Vs. Handwashing
| Method | Pros | Cons |
|---|---|---|
| Dishwasher | Convenient, thorough | Possible dulling, not for all materials |
| Handwashing | Gentle, works for all types | More effort, time-consuming |
Handwashing is always safest if you want your zester to last.
Special Cleaning Techniques For Different Foods
What you zest matters for cleaning. Different foods leave different residues.
Citrus Fruits (lemon, Lime, Orange)
Zest is soft but can dry quickly and stick in holes. Rinse immediately with warm water, then brush.
Hard Cheese (parmesan, Pecorino)
Cheese is oily and sticky. After zesting cheese, soak the zester in warm soapy water for at least 10 minutes. Use a brush and, if needed, a toothpick to clear holes.
Chocolate
Chocolate can melt and then harden in the holes. Soak in warm water, then use a brush. For stubborn chocolate, pour hot (not boiling) water over the zester to soften it.
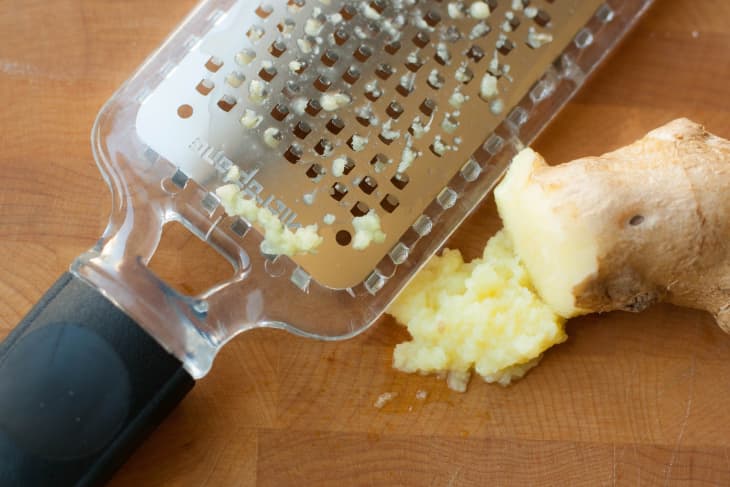
Garlic, Ginger, Or Spices
These can leave strong odors. Wash with soapy water, then wipe with a lemon wedge to remove smells. Rinse well.
:max_bytes(150000):strip_icc()/__opt__aboutcom__coeus__resources__content_migration__serious_eats__seriouseats.com__images__2016__06__20160613-cleaning-microplane-grater-vicky-wasik-3-8feaa792dc9843b29ebb9838d11e1425.jpg)
Credit: www.seriouseats.com
How To Remove Rust From A Zester
Even stainless steel can develop rust spots if left wet. Here’s how to remove them:
- Mix Baking Soda Paste: Combine baking soda and a little water to make a thick paste.
- Apply and Scrub: Spread the paste on rusty areas and scrub gently with a brush or sponge.
- Let Sit: Leave the paste for 15–20 minutes.
- Rinse and Dry: Rinse off all paste, then dry completely.
For stubborn rust, a small amount of white vinegar can help. Avoid harsh abrasives or steel wool, which scratch the zester.
Keeping Your Zester Sharp And Safe
A dull zester makes cleaning harder and increases the risk of slipping. Take these steps to protect your tool:
- Clean Right Away: Dried food is tough to remove and requires harder scrubbing.
- Avoid Abrasive Cleaners: These can dull the blades.
- Store Separately: Keep your zester in a sheath or drawer away from other utensils to prevent nicks.
If your zester becomes dull, it may be time to replace it. Most cannot be sharpened at home.
Cleaning Tools And Accessories That Help
Using the right cleaning tools makes the process much easier. Here are some helpful items:
- Small brush: A toothbrush or a dedicated kitchen brush fits perfectly in zester holes.
- Toothpick/skewer: For poking out stubborn bits.
- Sponge or dishcloth: For wiping the surface and handle.
- Rubber gloves: Protect your hands from sharp edges.
Investing in a zester brush (designed for fine graters) can make a big difference if you zest often.
Cleaning Zester Handles And Non-metal Parts
Many zesters have plastic, wooden, or rubber handles. Here’s how to clean them:
- Plastic: Wash with warm soapy water. Rinse and dry.
- Rubber: Same as plastic, but avoid soaking for long periods.
- Wood: Wipe with a damp cloth. Do not soak or put in the dishwasher—wood can swell or crack.
Always check the handle for cracks or trapped food, as these can harbor bacteria.
Sanitizing Your Zester
After cleaning, you may want to sanitize your zester, especially if you use it for raw foods.
- Dilute Vinegar Solution: Mix 1 part white vinegar with 2 parts water.
- Wipe or Soak: Wipe the zester with a cloth dipped in the solution, or soak for 5 minutes.
- Rinse and Dry: Rinse well to remove any acid residue, then dry.
Do not use bleach, as it can damage the metal and leave a smell.
How Often To Clean Your Zester
- After each use: Rinse and brush.
- Weekly (if used often): Deep clean with soaking and scrubbing.
- Monthly: Check for rust and sanitize.
Frequent cleaning is easier and keeps your zester in top shape.
Common Mistakes To Avoid
Even experienced cooks sometimes damage their zesters. Here are mistakes to watch out for:
- Letting food dry on the zester: Dried bits are much harder to remove.
- Using harsh abrasives: Steel wool or scouring pads scratch the blades.
- Soaking wooden handles: This can cause swelling or cracks.
- Ignoring the underside: Food often clings here, so always check both sides.
- Not drying completely: Moisture leads to rust and bacteria.
Avoid these errors to keep your zester safe and effective.
Eco-friendly Cleaning Tips
If you want to reduce your use of chemicals and water, try these:
- Lemon juice: Use the leftover lemon half to scrub your zester. The acid cleans and removes odors.
- Baking soda: Natural and gentle, baking soda scrubs without scratching.
- Reuse water: Soak your zester in leftover dishwater before rinsing to save water.
These methods are effective and better for the environment.
How To Store Your Zester After Cleaning
Proper storage prevents damage and keeps your zester clean:
- Use a blade cover or sheath: Many zesters come with one. If not, wrap in a clean cloth.
- Store upright in a utensil holder: Keeps blades from bumping other items.
- Hang on a hook: If your zester has a hole in the handle, hang it to air dry and avoid drawer clutter.
Do not toss your zester into a crowded drawer—this can dull or bend the blades.
Troubleshooting: When Cleaning Fails
If you’ve tried all the steps and your zester is still dirty, consider these options:
- Try a zester-specific brush: Some brushes have bristles designed for tiny holes.
- Use a high-pressure faucet sprayer: The force helps push out stuck food.
- Soak overnight: For extreme buildup, let the zester soak in soapy water overnight, then brush again in the morning.
- Replace if necessary: If rust or damage is severe, it may be safer to buy a new zester.
Comparing Cleaning Methods: What Works Best?
Here’s a quick comparison of the most popular cleaning methods:
| Method | Best For | Time Needed | Effectiveness |
|---|---|---|---|
| Immediate Rinsing | Fresh zest, daily cleaning | 1-2 minutes | High |
| Soaking and Brushing | Dried food, cheese | 10-20 minutes | Very High |
| Dishwasher | Stainless steel, plastic handles | 30-60 minutes | Medium |
| Baking Soda Paste | Rust removal | 20-30 minutes | High for rust, not for food |
For most users, a combination of immediate rinsing and occasional deep cleaning works best.
Non-obvious Tips Most Beginners Miss
- Clean both sides: Many people only brush the top, but zest collects underneath too.
- Use hot water, not boiling: Boiling water can warp some plastic handles or damage rubber parts. Hot tap water is safest.
- Lemon for odors: Rubbing with a lemon wedge removes garlic or onion smells—much gentler than harsh cleaners.
- Don’t forget the handle: Bacteria can hide where the handle meets the blade.
Paying attention to these details saves time and keeps your food tasting fresh.
When To Replace Your Zester
No tool lasts forever. Replace your zester if you notice:
- Blades are dull: Zesting takes much more effort or produces larger pieces.
- Rust that won’t go away: Especially near the blades.
- Broken or bent parts: This can make the tool dangerous.
- Loose handle: Risk of the zester slipping during use.
A new zester is a small investment that makes cooking easier and safer.
Cleaning A Zester While Cooking
Sometimes you need to reuse your zester during a recipe. Here’s what to do:
- Quick Rinse: Shake off loose bits and rinse under hot water.
- Wipe with a Damp Cloth: Remove any remaining residue.
- Dry with a Paper Towel: Prevents slipping and keeps flavors separate.
This quick method is not a substitute for deep cleaning but works in a pinch.
Cleaning A Zester In A Professional Kitchen
Professional kitchens use zesters heavily. Here’s how chefs keep them clean:
- Immediate rinsing: After each use, even between tasks.
- Dedicated brushes: Kept at each workstation.
- Sanitizing stations: Quick dips in sanitizing solution between ingredients.
- Staff training: Everyone knows how to clean and store tools.
These steps ensure safety and consistent food quality.
How To Clean A Zester For People With Limited Mobility
If you have arthritis or limited hand strength, cleaning a zester can be hard. Try these tips:
- Use a zester brush with a large handle: Easier to grip.
- Soak longer: Softens residue so less scrubbing is needed.
- Use a dishwasher if possible: Choose dishwasher-safe models.
- Ask for help: Family or caregivers can assist with tough cleaning.
Choosing an ergonomic zester also makes daily use and cleaning easier.
Best Practices For Long-term Care
To keep your zester in top condition for years:
- Clean after every use: Prevents buildup.
- Deep clean weekly: Especially if you zest cheese or chocolate.
- Check for rust and damage: Monthly.
- Store safely: Away from other utensils.
- Replace when dull or damaged: Don’t risk injury or bad flavors.
Long-term care means better performance and safer food.
Frequently Asked Questions
How Do I Clean Zest Stuck In The Holes Of My Zester?
First, soak the zester in warm, soapy water for 10–15 minutes. Use a small brush or toothbrush to scrub both sides, focusing on the holes. For stubborn bits, gently poke with a toothpick or skewer. Rinse thoroughly and dry.
Is It Safe To Put My Zester In The Dishwasher?
Most stainless steel and plastic zesters are dishwasher safe, but always check the manufacturer’s instructions. Place on the top rack and avoid dishwashing if your zester has a wooden handle, as this can cause damage.
How Do I Remove Odors From My Zester After Zesting Garlic Or Ginger?
Rub the zester with a cut lemon wedge or soak in a vinegar-water solution (1 part vinegar, 2 parts water) for 5 minutes. Rinse well and dry. This removes strong smells naturally.
Can I Use Steel Wool To Clean My Zester?
No, avoid steel wool or abrasive pads. They can scratch and dull the blades, making your zester less effective. Use a soft brush or sponge instead.
What Should I Do If My Zester Starts To Rust?
Make a paste with baking soda and water. Apply it to rusty areas and scrub gently. Let it sit for 15–20 minutes, then rinse and dry. For severe rust, try white vinegar. If rust persists, it may be time to replace your zester.
For more kitchen tool cleaning tips, you can also visit Serious Eats.
Keeping your zester clean doesn’t have to be a chore. With the right steps, tools, and a bit of attention, your zester will last for years and deliver fresh, pure flavors every time. Clean tools not only make cooking more enjoyable but also ensure your meals are safe and delicious.