
Drying cranberries in the oven for potpourri is a simple yet rewarding craft. With their rich red color and slightly tart scent, cranberries add a festive and natural touch to any homemade potpourri mix. Whether you are preparing for the holidays, making gifts, or simply looking to freshen your home, learning to dry cranberries properly ensures they last longer and look beautiful.
This guide will walk you through every step, from choosing the right berries to storing your finished potpourri. Along the way, you’ll find practical advice, creative ideas, and expert tips to get the best results.
Why Use Dried Cranberries In Potpourri?
Cranberries bring more than just a splash of color to potpourri. Their natural aroma and tough skin make them ideal for drying and mixing with other botanicals. Unlike many fruits, cranberries keep their shape well and resist mold when dried correctly. They pair beautifully with scents like cinnamon, cloves, and citrus, making them a favorite in both winter and autumn blends.
Many people are surprised to learn that dried cranberries can last for months in potpourri if stored right. Their bright red color doesn’t fade quickly, and their size makes them stand out among petals, pinecones, and spices.
One big advantage is that dried cranberries are less messy than fresh or juicy fruits. When they’re dried properly, they don’t leak or make other ingredients damp. This means your potpourri stays fresh and attractive for a longer time. Also, cranberries have a unique tart scent that works well with both spicy and sweet notes, making them more versatile than some other fruits.
Another benefit is their symbolism. Cranberries are often associated with winter holidays, warmth, and togetherness. Including them in your potpourri can make your home feel cozy and festive, even during cold months. It’s a small detail, but it adds a special touch to your seasonal decorations.
Essential Tools And Ingredients
Before you start, gather the right tools and ingredients. Preparation is key for even drying and attractive results.
Tools You’ll Need
- Baking sheet: A flat tray for spreading the cranberries.
- Parchment paper: Prevents sticking and burning.
- Sharp knife or skewer: For piercing the berries.
- Fine mesh strainer: Useful for rinsing and draining.
- Oven: Standard home ovens work perfectly.
- Cooling rack: Optional, for faster drying after baking.
- Slotted spoon: If blanching, this makes it easier to transfer berries from hot water to an ice bath.
- Mixing bowl: Helpful for tossing cranberries with lemon juice or vinegar, if using.
Ingredients
- Fresh cranberries: Choose firm, bright red berries.
- Water: For rinsing and blanching.
- Optional: Lemon juice or vinegar: Helps keep color vibrant.
It’s best to work with small batches, especially if you’re drying cranberries for the first time. This way, you can control the process and avoid wasting ingredients if something goes wrong.
How To Select The Best Cranberries
Picking the right cranberries is the first step for success. Not all berries dry equally well, and quality at this stage affects both appearance and longevity in your potpourri.
- Firmness: Choose berries that feel solid when squeezed. Soft or wrinkled cranberries are likely overripe or drying out already.
- Color: Look for a deep, even red. Pale or yellow spots mean the berry is underripe.
- Size: Uniform size helps ensure even drying. Large berries may need extra time in the oven.
For the freshest cranberries, buy them in season (late fall to early winter). If possible, avoid frozen cranberries for potpourri, as they may split or lose shape during drying.
If you’re picking cranberries yourself or buying from a farmer’s market, check for any blemishes or cuts. Even small breaks in the skin can cause the berries to spoil or mold during drying. Don’t worry if you have a few imperfect berries; just set them aside for another use.
A good tip is to gently roll the cranberries over a flat surface. If they roll smoothly and don’t wobble, they’re likely fresh and evenly shaped. This isn’t essential, but it can help you spot any soft or uneven berries.
Preparing Cranberries For Drying
Preparation affects both how your cranberries look and how long they last.
- Rinse thoroughly under cool water to remove any residue or pesticides.
- Sort and discard any soft, shriveled, or damaged berries.
- Pierce each berry with a sharp knife, skewer, or toothpick. This helps moisture escape during drying, leading to better texture and less risk of mold.
- Optional blanching: To help cranberries keep their red color and reduce drying time, blanch them in boiling water for 1–2 minutes, then transfer to an ice bath. This process also helps split the skins slightly, which aids drying.
Piercing the cranberries might seem like a small detail, but it’s very important. Cranberries have tough skins that can trap moisture inside. If you skip this step, the berries might stay wet inside and could mold later. Some crafters find that using a toothpick is faster than a knife, especially if working with a lot of berries.
Blanching is also helpful if you want to keep the color bright. It’s not required, but it makes a visible difference. After blanching, the skins will look a bit lighter and will dry faster in the oven. Just be careful not to leave the berries in hot water for too long, or they may burst.
Drying Cranberries In The Oven: Step-by-step
Drying cranberries in the oven is simple, but requires patience and attention to detail. Follow these steps for best results.
Step 1: Preheat The Oven
Set your oven to 200°F (93°C). Some ovens have a lower “warm” setting, but avoid going below 170°F (77°C) as this can increase the risk of spoilage.
If you’re using a convection oven, you may want to reduce the temperature by 10–15 degrees. Convection ovens circulate air, which can dry the cranberries faster and more evenly, but they can also cause the berries to dry out too quickly if the temperature is too high.
Step 2: Prepare The Baking Sheet
Line your baking sheet with parchment paper. Spread the cranberries in a single layer, making sure they aren’t touching too much. Crowded berries dry unevenly.
If you don’t have parchment paper, you can use a silicone baking mat. Avoid using aluminum foil, as it can stick to the berries or cause them to brown too quickly.
Step 3: Initial Drying Phase
Place the baking sheet in the oven. Leave the oven door slightly ajar—about 1–2 inches—by wedging a wooden spoon or heatproof utensil in the door. This helps moisture escape and speeds up drying.
The open door is important because cranberries release a lot of steam as they dry. If you keep the door closed, the moisture stays inside, which can slow the process and cause uneven drying. If you have a kitchen fan or vent above your oven, turn it on to help remove steam.
Step 4: Monitor And Rotate
Every 30–45 minutes, check the cranberries. Gently move them around with a spatula so all sides dry evenly. If some are drying faster than others, remove those early.
It’s normal for some cranberries to finish before others. Oven heat isn’t always perfectly even, and some berries may be thinner-skinned or smaller. Don’t be afraid to take out the finished ones and let the rest keep drying. This way, you avoid over-drying and get the best color and texture.
Step 5: Check For Doneness
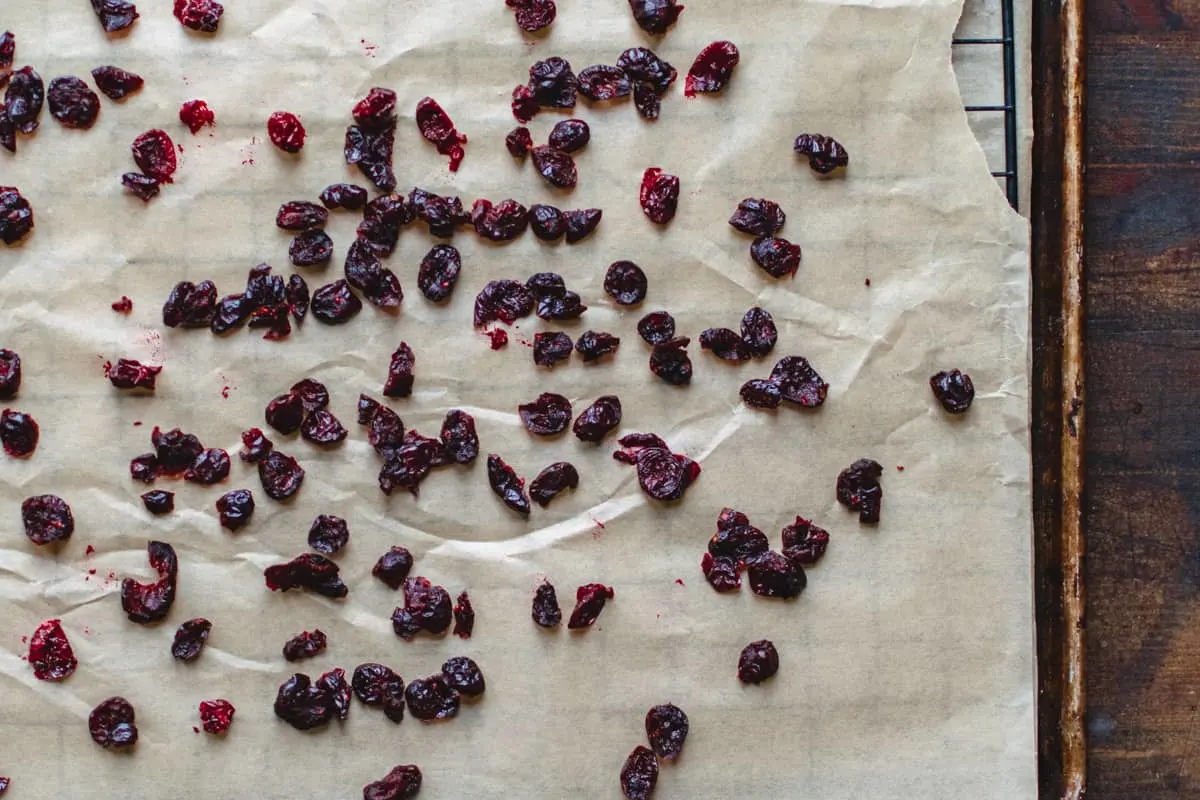
Oven drying cranberries can take 3–5 hours. When done, the berries should feel leathery and slightly tacky, not sticky or wet. They will shrink and wrinkle but keep their color.
If you’re unsure, take one out, let it cool for a minute, then squeeze it gently. If juice comes out, it’s not done. If it feels dry but still bends, it’s ready.
Step 6: Cool And Cure
Remove the baking sheet and let the cranberries cool completely. For the best texture, let them “cure” by spreading them on a cooling rack for 12–24 hours in a dry area. This helps any remaining moisture evaporate.
Curing is a step many beginners skip, but it makes a difference. If you store cranberries before they’re fully cool and cured, trapped heat can create condensation and lead to mold. Give them time to finish drying in the open air before storing or mixing with other potpourri ingredients.
Typical Oven Drying Times And Factors
Oven drying time for cranberries varies depending on berry size, oven accuracy, and humidity. The table below shows typical times and factors that affect drying.
| Factor | Effect on Drying Time |
|---|---|
| Berry size | Larger berries take longer (4–5 hours); smaller berries may finish in 3 hours |
| Oven temperature | Lower temps (170°F/77°C) increase time; higher temps (200°F/93°C) decrease it, but may darken berries |
| Oven airflow | Leaving door ajar speeds up drying; closed door slows process |
| Humidity | High humidity environments slow drying |
Pro tip: Don’t rush by turning up the heat. High temperatures can burn or discolor cranberries, ruining both scent and appearance.
If you live in a humid climate, consider drying on a less humid day or using a dehumidifier in your kitchen. Even the best technique can be slowed by wet weather.
A less-known tip is to dry cranberries in the evening when your kitchen is cooler and less busy. This reduces the chance of temperature swings from opening and closing the oven for other cooking.
Common Problems And How To Avoid Them
Even experienced crafters sometimes run into issues. Here are some common problems and how to fix them:
- Sticky or wet cranberries: Usually caused by under-drying or crowding on the tray. Return them to the oven for another 30 minutes.
- Burnt or brown cranberries: Oven was too hot, or berries were left in too long. Use the lowest setting and check often.
- Uneven drying: Berries were not rotated or moved during drying. Always stir or flip berries every 30–45 minutes.
- Loss of color: Over-blanching or excessive heat can cause fading. Blanch for only 1–2 minutes and keep oven at recommended temp.
If you notice any cranberries with a white or gray film after drying, this could be a sign of sugar crystallization or early mold. Sugar is harmless, but mold means those berries should be discarded. It’s safer to check every berry before adding to your potpourri.
Another challenge is cranberries sticking to the parchment paper. If this happens, let them cool slightly and then gently lift with a spatula. Don’t force them while hot—they may tear.
Safety Tips For Oven Drying
Drying fruits in the oven is safe if you follow a few basic rules:
- Never leave the oven unattended for long periods.
- Use a timer to remind yourself to check regularly.
- Keep a close eye on the first batch to learn how your oven performs.
- Let cranberries cool before touching—they stay hot longer than you expect.
- Keep children and pets away from the oven, especially with the door ajar.
Oven drying can make your kitchen smell wonderful, but be cautious. Strong scents can attract insects if you leave windows open. Make sure your workspace is clean and free of crumbs or spills.
If you have sensitive skin, wear gloves while handling hot cranberries or working with essential oils during potpourri mixing.
How To Tell When Cranberries Are Fully Dried
Knowing when cranberries are perfectly dried is more art than science. The key signs include:
- Texture: Leathery, not brittle. When squeezed, they should spring back, not squish.
- Color: Bright, deep red with a slight sheen.
- No visible moisture: If you see juice when squeezing, keep drying.
For long-lasting potpourri, it’s better to slightly over-dry than under-dry. Any leftover moisture can cause mold later.
A helpful trick is to cut a cranberry in half. If the inside looks dry (not glossy), they’re ready. If it looks wet or shiny, give them more time.
For those who want to be extra sure, you can weigh the cranberries before and after drying. They should lose most of their weight (up to 70–80%) when fully dry.
Creative Ways To Use Dried Cranberries In Potpourri
Once you’ve mastered drying, you can start creating beautiful potpourri blends. Cranberries work well with many other ingredients, both for scent and appearance.
Pairing Ideas
- Cinnamon sticks: Warm and spicy aroma pairs with the tart cranberry scent.
- Cloves and star anise: Add depth and a hint of sweetness.
- Dried citrus slices: Oranges and lemons add bright color and fresh notes.
- Pinecones and cedar tips: Bring an outdoorsy, winter feel.
- Bay leaves: Add a subtle herbal note and a nice green color.
- Dried rose petals: For a soft floral scent and a pop of pink.
- Juniper berries: For a wintry, woodsy aroma.
You can also use dried cranberries as a decorative topping on potpourri bags or in clear ornaments for gifts.
Example Winter Potpourri Blend
Combine the following for a classic holiday potpourri:
- 1 cup dried cranberries
- 3–4 dried orange slices
- 2 cinnamon sticks, broken
- 1 tablespoon whole cloves
- 3–4 small pinecones
- Optional: A few drops of essential oil (orange, clove, or cinnamon)
Mix gently and display in a decorative bowl. Refresh with extra oil as needed.
For a more personalized mix, let family members pick their favorite scents or colors to add. This makes the process more fun and meaningful, especially if you’re making gifts.

Credit: www.mommyskitchen.net
Storing Dried Cranberries For Potpourri
Proper storage keeps your dried cranberries fresh and mold-free for months.
- Airtight containers: Use glass jars, zip-top bags, or sealed tins.
- Cool, dry location: Avoid direct sunlight and moisture.
- Add silica packets: These help absorb any remaining humidity, extending shelf life.
If you’re not using the cranberries right away, label the date and contents. Dried cranberries can last up to 12 months if stored properly.
A lesser-known tip is to avoid storing cranberries with strong-smelling spices (like star anise or cloves) if you want to keep their scent clear. If you plan to blend your potpourri later, store each ingredient separately and mix just before use.
If you ever see signs of mold or smell a musty odor, discard the batch. Even a small amount of moisture can spoil the whole container.
Making Potpourri Last Longer
Potpourri can lose scent and color over time. Here’s how to keep it fresh:
- Add a few drops of essential oil every 2–3 weeks.
- Stir the mix gently to release trapped scents.
- Refresh with new dried cranberries or botanicals as needed.
Non-obvious insight: If your potpourri starts to smell musty, it often means hidden moisture. Remove any items that feel damp and replace them. Sometimes, just spreading the mix out on a tray for a few hours can revive it.
To keep color bright, store potpourri out of direct sunlight. Sun can fade the red of cranberries and other botanicals. If you want to change scents for a new season, just add different essential oils or swap in new ingredients.
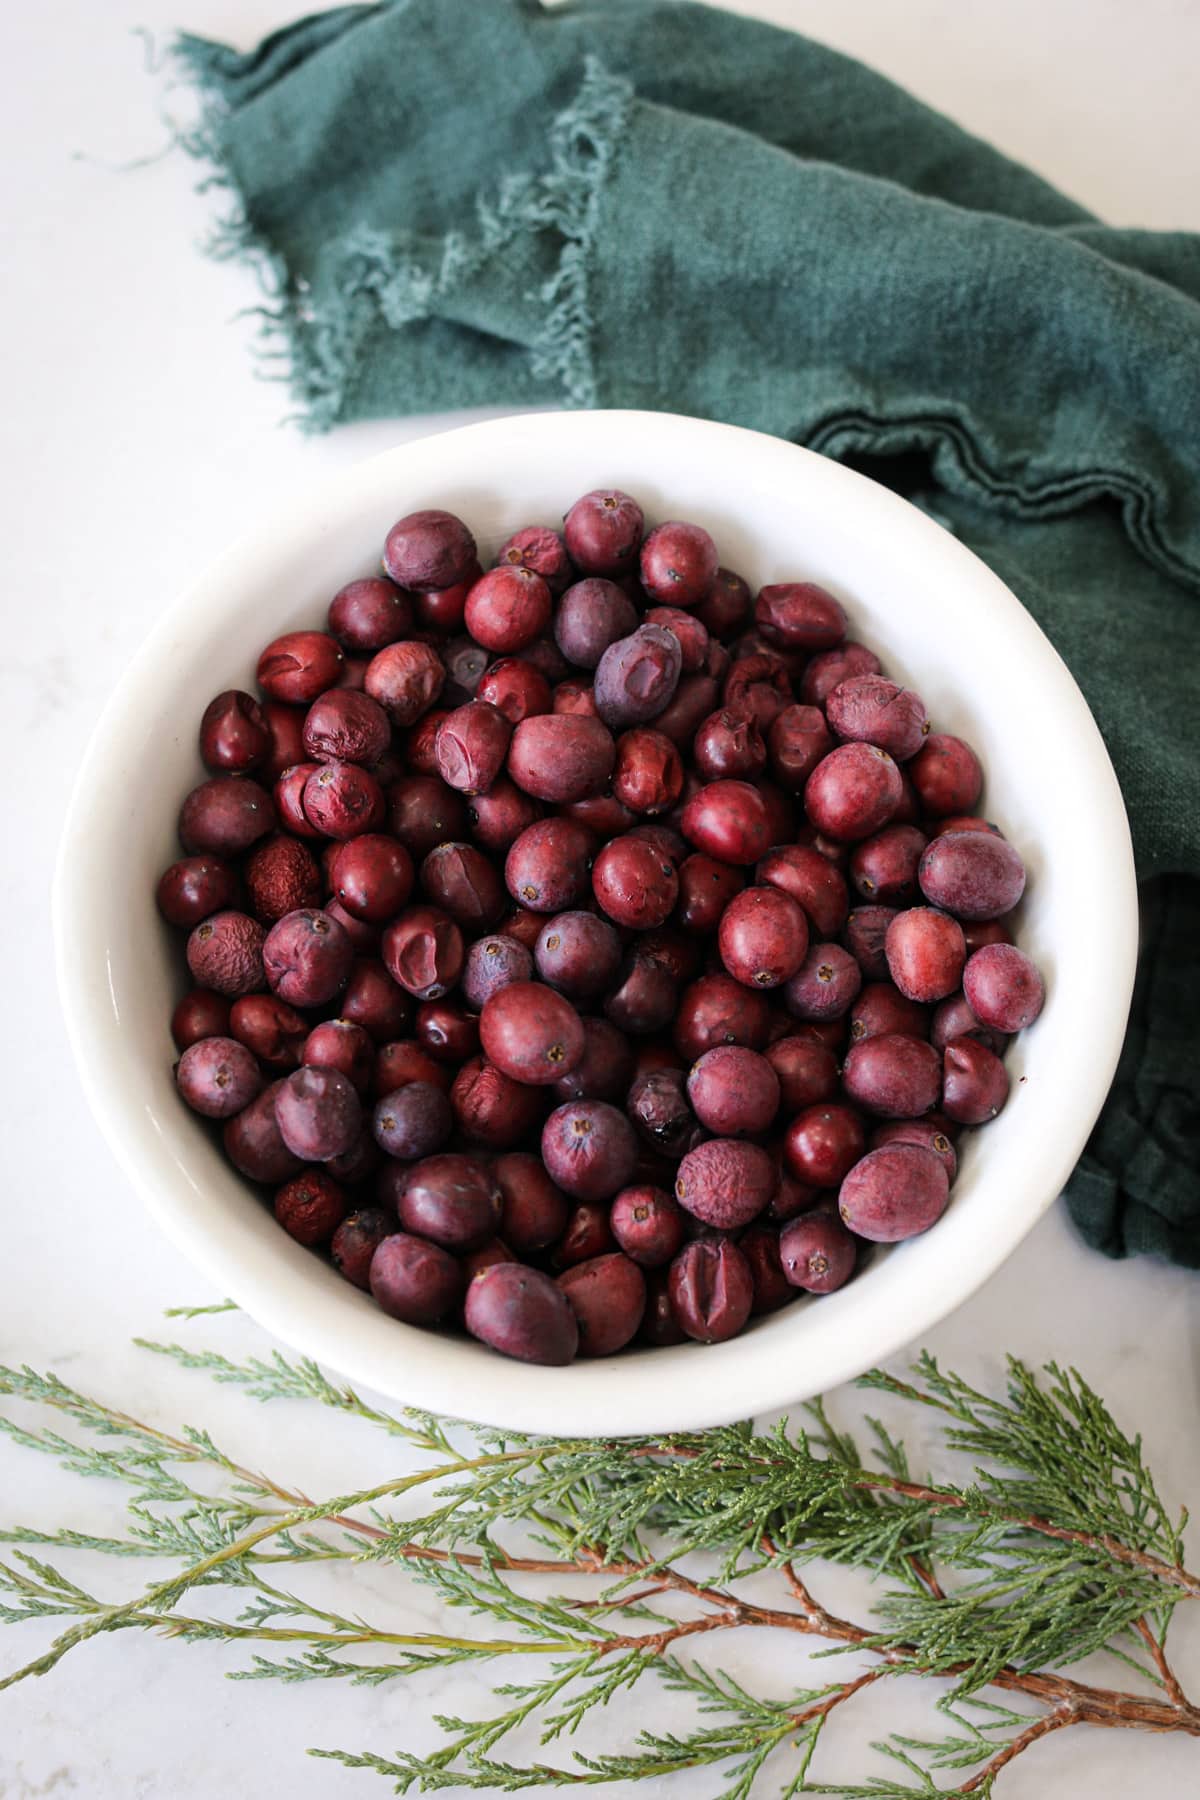
A trick for long-lasting aroma: Place a cotton ball soaked in essential oil at the bottom of your potpourri bowl, under the cranberries and botanicals. This helps the scent last even longer.
Credit: www.tidbits-cami.com
Comparing Oven Drying With Other Methods
You might wonder how oven drying compares to other techniques. Here’s a simple comparison to help you decide which method suits your needs best.
| Method | Drying Time | Pros | Cons |
|---|---|---|---|
| Oven drying | 3–5 hours | Fast, reliable, available in most homes | Uses energy, needs supervision |
| Dehydrator | 8–12 hours | Even drying, less risk of burning | Requires special equipment, longer time |
| Air drying | Several days to weeks | No energy needed, gentle on color | Depends on climate, higher risk of mold |
For most people, oven drying is the best balance between time, cost, and results.
A non-obvious insight: If you plan to dry many different fruits or herbs for potpourri, investing in a dehydrator may be worthwhile. They give you more control over temperature and airflow, leading to more consistent results, especially in humid climates.
Air drying is the most energy-efficient, but it requires patience and the right environment. If you live somewhere damp, oven drying is safer and more reliable.
Tips For Better Results And Unique Finishes
A few small adjustments can make your dried cranberries stand out:
- Toss with lemon juice before drying to help preserve color.
- Roll in sugar after drying (if you don’t mind stickiness) for a frosted look.
- Mix with dried herbs like rosemary or sage for a different scent profile.
Another non-obvious trick: If you want cranberries with a glossy finish, brush them lightly with a bit of vegetable oil after drying. They’ll stay shiny for weeks.
For a sparkly effect, roll the cooled cranberries in fine glitter (food-safe, if possible) before adding to decorative potpourri. This is especially nice for holiday gifts.
If you want extra fragrance, soak dried cranberries in essential oil for a few hours, then let them air dry again before adding to your mix. This gives the berries a stronger scent.
Don’t be afraid to experiment with different combinations and finishes. Potpourri is a craft, not a science, and your personal touch makes each batch unique.
Credit: thefrozenbiscuit.com
Frequently Asked Questions
How Can I Tell If My Cranberries Are Too Dry?
If cranberries feel hard and break when squeezed, they are over-dried. For potpourri, a slightly leathery texture is best. Over-drying doesn’t ruin them, but they may lose some color and aroma.
Can I Use Frozen Cranberries For Drying?
It’s possible, but not ideal. Frozen cranberries often split or turn mushy when thawed, leading to uneven drying. If you must use them, thaw gently and blot dry before oven drying.
Do I Need To Add Preservatives?
No preservatives are needed if cranberries are fully dried and kept in a dry, airtight container. For extra protection, you can add a silica packet to your storage container.
Can I Dry Cranberries At A Higher Temperature To Save Time?
It’s not recommended. High temperatures can burn or brown the cranberries, and may cause them to lose color. Stick to 170–200°F (77–93°C) for best results.
Where Can I Find More Information About Safe Food Drying?
For detailed safety tips and more drying techniques, visit the National Center for Home Food Preservation.
Drying cranberries in the oven is a simple way to make your homemade potpourri special. With the right technique and a little patience, you can create beautiful, long-lasting decorations that fill your home with natural scent and color. Whether you’re a beginner or a seasoned crafter, these steps and tips will help you get the best results every time.
Enjoy your crafting—and the fresh, festive feeling it brings!