
Building your own bifold cabinet doors can give your kitchen, laundry room, or closet a stylish update without the high cost of buying custom doors. Many people think bifold doors are hard to make, but with clear steps, simple tools, and the right materials, even a beginner can create doors that look professional and last for years.
In this guide, you’ll learn everything you need to know to make bifold cabinet doors from scratch, including material selection, measuring, cutting, assembly, finishing, and installation. You’ll also discover common mistakes, troubleshooting tips, and answers to the most frequently asked questions.
Whether you want to save money, match existing cabinetry, or just enjoy the satisfaction of a DIY project, this article will walk you through the process, so you end up with bifold doors you can be proud of.
What Are Bifold Cabinet Doors?
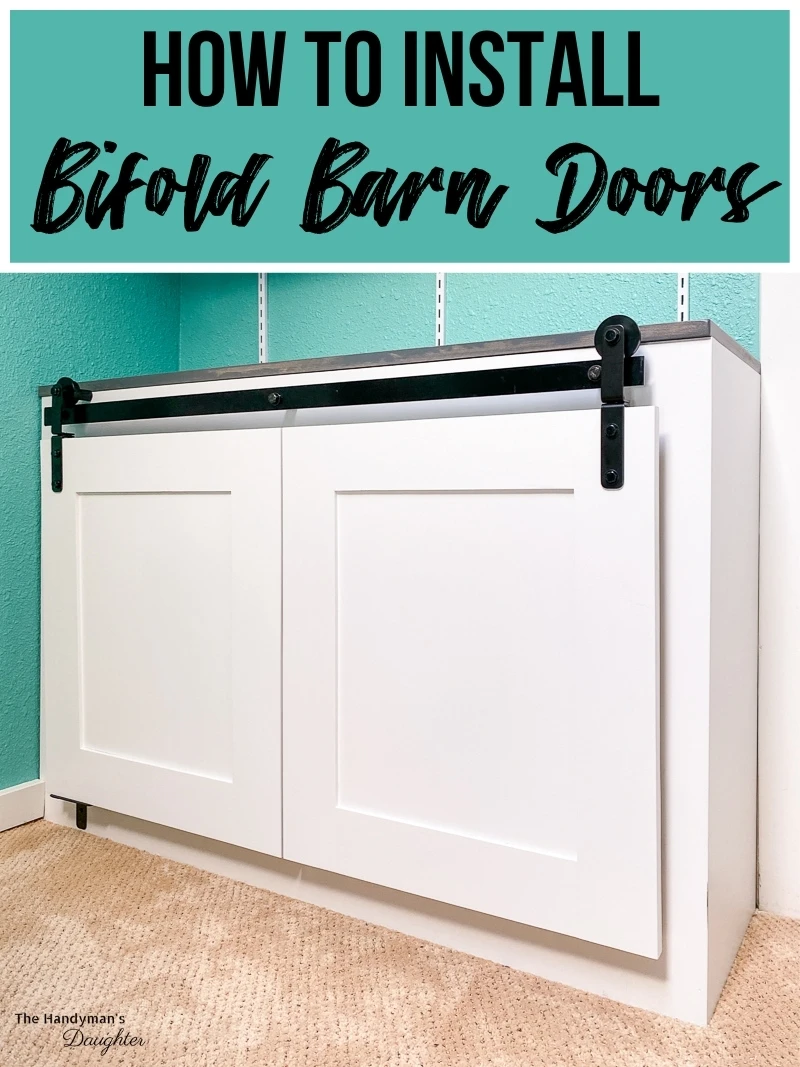
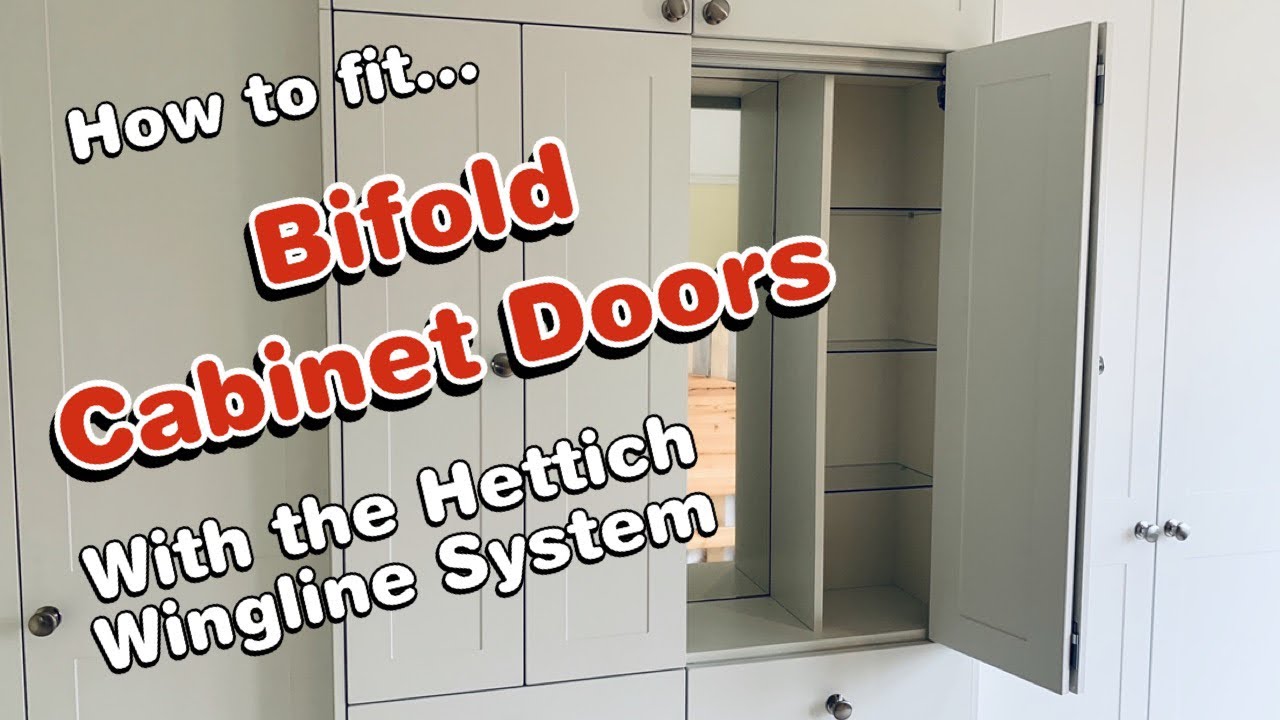
Bifold cabinet doors are made of two panels joined by hinges that fold when you open the door. Instead of swinging out wide like a normal cabinet door, they fold in the middle, making them ideal for spaces where a full-size door would get in the way.
You often see bifold doors on closets, pantries, laundry cupboards, or narrow kitchen cabinets.
These doors are popular because they:
- Save space in tight rooms
- Allow wider openings
- Look clean and modern
But making them at home has extra benefits—you can choose materials, sizes, and finishes to match your style and needs.
Tools And Materials: What You Need
Before you start, gather all your tools and materials. Missing something halfway through a project can slow you down or even ruin your work. Here’s what you’ll need for standard bifold cabinet doors:
Basic Tools:
- Circular saw or table saw
- Power drill and bits
- Wood chisel
- Clamps (at least 4)
- Tape measure
- Carpenter’s square
- Screwdriver (manual or electric)
- Sander or sanding block
- Paintbrush or roller (if finishing)
Materials:
- Wood panels (plywood, MDF, or solid wood)
- Wood glue
- Cabinet-grade hinges (bifold/piano hinges)
- Screws (1″ or as needed)
- Cabinet pulls/knobs
- Wood filler
- Primer and paint or stain
- Clear coat or polyurethane (optional)
- Bifold door hardware kit
Optional for Advanced Look:
- Trim or molding for shaker style
- Glass inserts
Material Comparison Table
Choosing the right material is key. Here’s how common options compare:
| Material | Durability | Cost | Finish Options | Best Use |
|---|---|---|---|---|
| Plywood | High | Medium | Paint, Stain | All cabinets |
| MDF | Medium | Low | Paint only | Indoor, low humidity |
| Solid Wood | Very High | High | Paint, Stain | High-end projects |
Tip: Beginners often choose MDF for its smooth surface, but it swells with moisture. If your cabinet is near a sink or in a humid room, plywood or solid wood is safer.
Credit: www.thehandymansdaughter.com
Measuring Your Opening: Getting It Right
Correct measurements are the foundation of a successful project. Even a small error can cause poor fit, gaps, or rubbing doors.
- Measure the Height and Width: Use a tape measure to get the inside height and width of the cabinet opening. Measure both the top and bottom for width, and both left and right sides for height, as cabinets are rarely perfectly square.
- Subtract for Clearance: Deduct 1/8″ (3mm) from the width and height to allow the doors to open and close smoothly. For bifold doors, divide the width by two (for each panel), then subtract 1/16″ from each panel for the center gap.
- Check for Obstacles: Look for handles, face frames, or shelves that might block the door swing.
Example: If your opening is 24″ wide and 30″ high:
- Door panel width: (24″ / 2) – 1/16″ = 11-15/16″ each
- Door panel height: 30″ – 1/8″ = 29-7/8″
Non-obvious insight: Always check if your cabinet is level and plumb. If not, adjust your door measurements so the gap looks even after installation.
Cutting The Panels
With your measurements ready, it’s time to cut your panels. Accuracy here means less sanding and fewer problems later.
- Mark Your Cuts: Use a pencil and a straightedge or carpenter’s square to mark lines on your wood. Double-check before you cut.
- Cut Slowly: Use a circular saw with a fine-tooth blade for clean edges. A table saw is even better for long, straight cuts.
- Label the Panels: Mark each piece (e.g., “Left Outer,” “Right Inner”) so you don’t mix them up.
- Dry Fit: Place the panels in the cabinet opening to check for fit before assembly. Sand the edges if needed.
Mistake to avoid: Rushing cuts can splinter the wood or create uneven panels. Always support the wood to prevent tear-out.
Creating The Door Style
Now decide if you want simple flat panels, shaker-style, or something more decorative.
Shaker Style
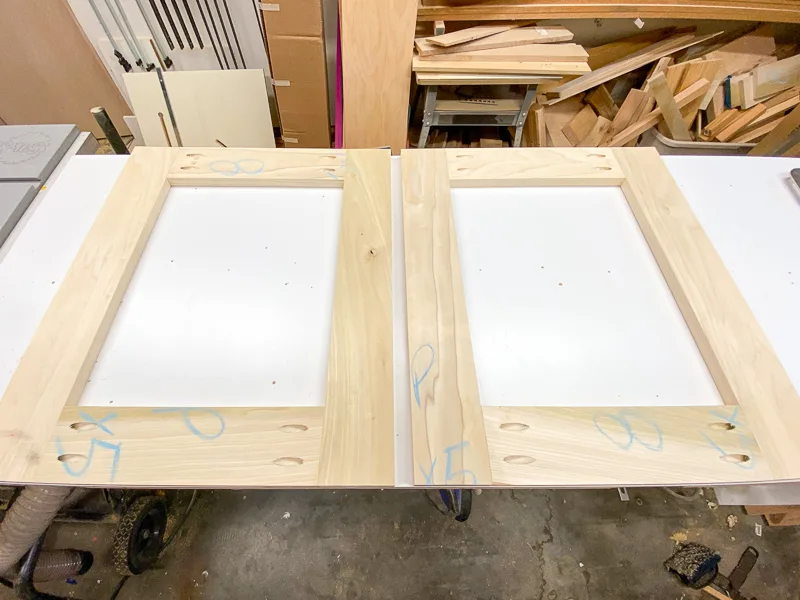
Shaker-style is popular for its clean lines. It uses a flat center panel with a frame around it.
Steps:
- Cut strips (usually 2″-2.5″ wide) from your wood for the frame.
- Glue and clamp the frame around the main panel, flush with the edges.
- Use pocket holes or dowels for extra strength if you have the tools.
Flat Panel
A simple flat panel is fastest. Just use your cut boards with sanded edges.
Adding Trim Or Molding
For a classic look, attach thin molding or trim around the panel’s edge with wood glue and small nails.
Non-obvious insight: Make sure any trim does not interfere with the folding hinge—test the door fold before final nailing.
Prepping For Hinges
Bifold cabinet doors need special hinges that allow the panels to fold. These are different from regular cabinet hinges.
- Choose Your Hinges: The most common are piano hinges (continuous) or special bifold hinges. The hardware kit usually includes instructions.
- Mark the Hinge Locations: Place hinges about 6″ from the top and bottom of the panels.
- Chisel Recesses (if needed): Some hinges need a shallow recess in the wood. Mark the outline, then use a chisel to remove the wood.
- Pre-drill Holes: This prevents the wood from splitting when you screw in the hinges.
Comparison Table: Piano Hinge vs. Bifold Hinge
| Hinge Type | Appearance | Strength | Ease of Install | Best Use |
|---|---|---|---|---|
| Piano Hinge | Continuous, hidden | Very High | Medium | Heavy doors |
| Bifold Hinge | Small, visible | Medium | Easy | Most cabinets |
Tip: For most home projects, bifold hinges are easier and look fine. Use piano hinges if you want a completely hidden joint.
Assembling The Doors
Now it’s time to put the panels together.
- Lay the Panels Flat: Place both panels side by side, inside faces up, with a small gap (about 1/16″) between them for hinge movement.
- Attach the Hinges: Screw the hinges into the panels, keeping them straight. Check that the panels fold flat.
- Test the Fold: Fold and unfold the doors several times. If they rub, sand the edges.
- Glue and Clamp (if using frames): Apply wood glue to the joints, clamp until dry, and wipe away excess glue.
- Fill Holes: Use wood filler for any screw holes, dents, or gaps. Let dry, then sand smooth.
Common beginner mistake: Not leaving enough gap between the panels. This makes the doors bind and not close smoothly.
Finishing: Sanding, Painting, And Sealing
A good finish makes your doors look professional.
- Sand All Surfaces: Start with 120-grit sandpaper, then move to 220-grit. Sand with the grain for a smooth finish.
- Remove Dust: Wipe with a damp cloth or tack cloth.
- Prime: Use wood primer if painting. For stain, use wood conditioner for an even color.
- Paint or Stain: Apply thin, even coats. Let dry between coats. Two coats are usually best.
- Seal: Use a clear coat for protection, especially on kitchen cabinets.
- Attach Hardware: Screw in your handles or knobs.
Pro tip: Paint or stain the panels before assembling if you want to avoid visible brush marks on the hinges.
Installing The Bifold Doors
With your doors finished, it’s time to install them on the cabinet.
- Install the Track (if needed): Some bifold doors use a top or bottom track. Follow the hardware kit instructions.
- Mount the Doors: Hold the doors in the cabinet opening, align, and attach the outer edge to the cabinet frame using standard cabinet hinges.
- Connect the Panels: The inner edges are joined with bifold hinges, as you assembled earlier.
- Adjust for Fit: Most hinges allow minor adjustments. Open and close the doors, checking for rubbing or uneven gaps.
- Install Door Pulls: Make sure pulls are positioned for easy opening without interfering with the fold.
Second non-obvious insight: Mark screw locations with an awl or nail before drilling. This keeps the bit from wandering and misaligning your hinges.
Troubleshooting: Fixing Common Problems
Even careful builders run into issues. Here’s how to solve the most common ones:
- Doors don’t fold smoothly: Check if the hinges are too tight or the panels are touching. Sand the edges or loosen screws slightly.
- Gaps are uneven: Cabinet frames are rarely perfectly square. Adjust the hinges or sand the door edges for an even look.
- Doors sag or won’t close: The hinges may be too weak, or the screws may be loose. Use longer screws, or upgrade to stronger hinges.
- Finish looks blotchy: For paint, sand and re-coat. For stain, use wood conditioner before staining next time.
Customizing Your Bifold Cabinet Doors
One of the biggest advantages of making your own bifold cabinet doors is customizing them for your space and taste.
Adding Glass Inserts
If you want a modern or display look, you can replace the center panel with glass.
- Cut the frame with a rabbet (a groove for the glass).
- Order tempered glass cut to size.
- Secure with silicone or small trim pieces.
Decorative Trim Or Molding
Add thin strips of trim or molding for a more classic or unique style. Attach with wood glue and small nails.
Different Pulls And Knobs
Choose cabinet hardware that matches your room. Modern pulls, classic knobs, or even finger pulls can make a big difference in style and usability.
Painting With Patterns
Use painter’s tape to create stripes, chevrons, or geometric designs. This adds personality, especially in kids’ rooms.
Maintenance Tips For Long-lasting Doors
To keep your bifold cabinet doors working and looking great for years:
- Clean regularly: Use a damp cloth—avoid harsh chemicals.
- Check hinges: Tighten loose screws every few months.
- Re-coat finish: Every 2–3 years, lightly sand and add a new clear coat.
- Lubricate hardware: A drop of oil on the hinges keeps them quiet and smooth.
Cost And Time Comparison: Diy Vs. Pre-made
Is it worth making your own bifold cabinet doors? Here’s a breakdown to help you decide.
| Option | Average Cost (per door) | Time Needed | Customization | Durability |
|---|---|---|---|---|
| DIY | $20–$50 | 6–10 hours | Full control | High (if done well) |
| Pre-made | $60–$150 | 1–2 hours (install only) | Limited sizes/styles | Medium–High |
DIY is cheaper and allows you to match any cabinet, but takes more time and effort. Pre-made doors are fast but may not fit perfectly or match your style.
Safety Tips For Diy Cabinet Doors
Many injuries happen with power tools or during installation. Stay safe with these tips:
- Wear safety glasses when cutting or sanding wood.
- Use hearing protection with power saws.
- Clamp your wood before cutting or drilling.
- Keep fingers away from blades and bits.
- Work in a well-ventilated area, especially when painting or staining.
- Read and follow the instructions for all hardware and finishes.
Pro insight: Never wear gloves near spinning blades—they can catch and pull your hand into the tool.
Credit: www.youtube.com
When To Call A Professional
Making bifold cabinet doors is a solid DIY project, but not for everyone. Consider hiring a professional if:
- You lack the tools or space for safe cutting.
- You need many doors or custom shapes.
- The cabinet opening is very out-of-square.
- You want a specialty finish, like spray lacquer or routed patterns.
A pro can handle difficult projects quickly, but you’ll pay more for the convenience.
Frequently Asked Questions
How Do I Keep My Bifold Cabinet Doors From Sagging Over Time?
Use strong, quality hinges and make sure the screws are driven into solid material, not just thin veneer. Periodically check the screws and tighten if needed. If sagging develops, adjust the hinges or add a support bracket inside the cabinet.
Can I Make Bifold Doors Out Of Mdf?
Yes, MDF is easy to cut and paint, making it popular for DIY cabinet doors. However, it’s not moisture-resistant. Avoid using MDF in humid rooms, like bathrooms or near sinks, unless you seal all edges and surfaces carefully.
What’s The Best Way To Paint Bifold Cabinet Doors?
Remove the doors and hardware, sand the surfaces smooth, and apply a high-quality primer. Use a small foam roller for large areas and a brush for edges. Let each coat dry fully. Two thin coats of paint followed by a clear protective finish give the best results.
How Much Gap Should I Leave Between Bifold Cabinet Doors?
Leave a 1/16″ to 1/8″ gap between panels to allow smooth folding. Also, leave a similar gap around the doors inside the cabinet frame. This prevents rubbing and gives room for seasonal wood movement.
Where Can I Find Hardware For Bifold Cabinet Doors?
You can buy bifold hinges and hardware kits at most home improvement stores or specialized cabinet hardware shops. For more choices and installation tips, visit Family Handyman.
Building bifold cabinet doors is a rewarding project that upgrades your space and adds real value to your home. With the right tools, careful measurements, and attention to detail, you’ll enjoy custom doors that fit perfectly and reflect your style.
Don’t rush—take your time, and you’ll get results that look great for years to come.
Credit: www.thehandymansdaughter.com