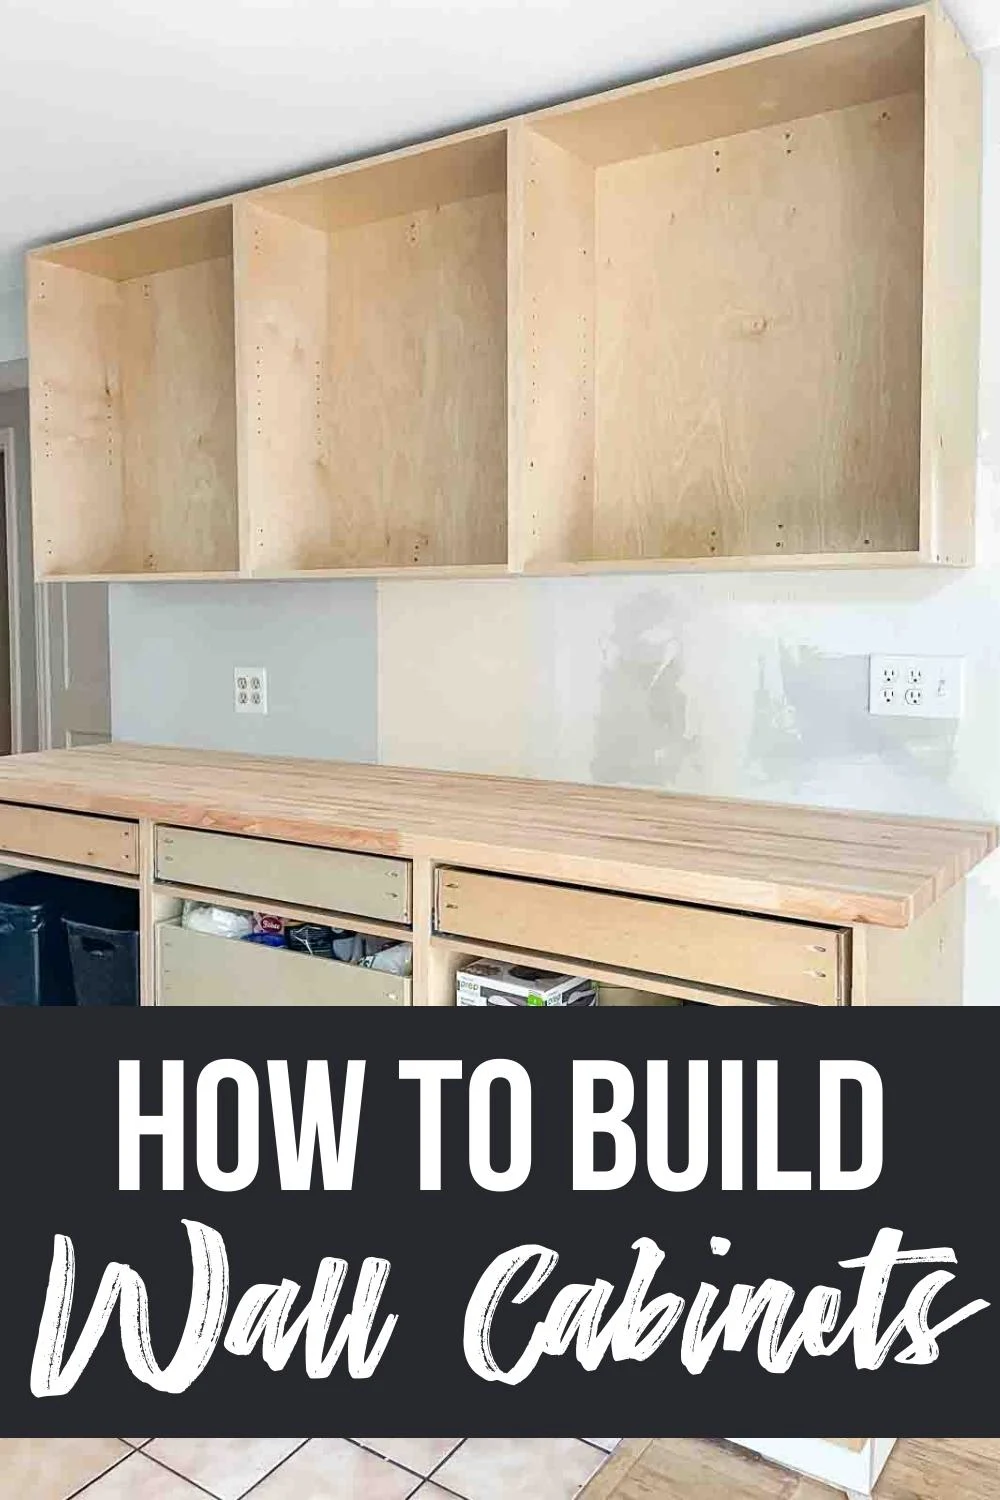
Building your own wall cabinets may seem like a big challenge, but it’s one of the best ways to add custom storage and style to your home. Whether you want more space in your kitchen, bathroom, garage, or even a laundry room, learning how to make wall cabinets can save you money and give your space a professional look.
You don’t need to be a master carpenter to succeed—just some basic tools, patience, and a clear plan.
In this guide, you’ll find everything you need to build sturdy, attractive wall cabinets from start to finish. We’ll look at planning, measuring, materials, step-by-step building instructions, and expert tips to avoid common mistakes. You’ll also see helpful tables to compare materials, door styles, and hinge types, so you can make the best choices for your space and budget.
By the end, you’ll have the confidence and know-how to create wall cabinets that fit perfectly and last for years.
Understanding Wall Cabinets
Wall cabinets are mounted on the wall, above counters or workspaces. They’re used in kitchens, bathrooms, workshops, and more. Unlike base cabinets, which sit on the floor, wall cabinets are hung at eye level or above, making them excellent for storing dishes, food, toiletries, or tools.
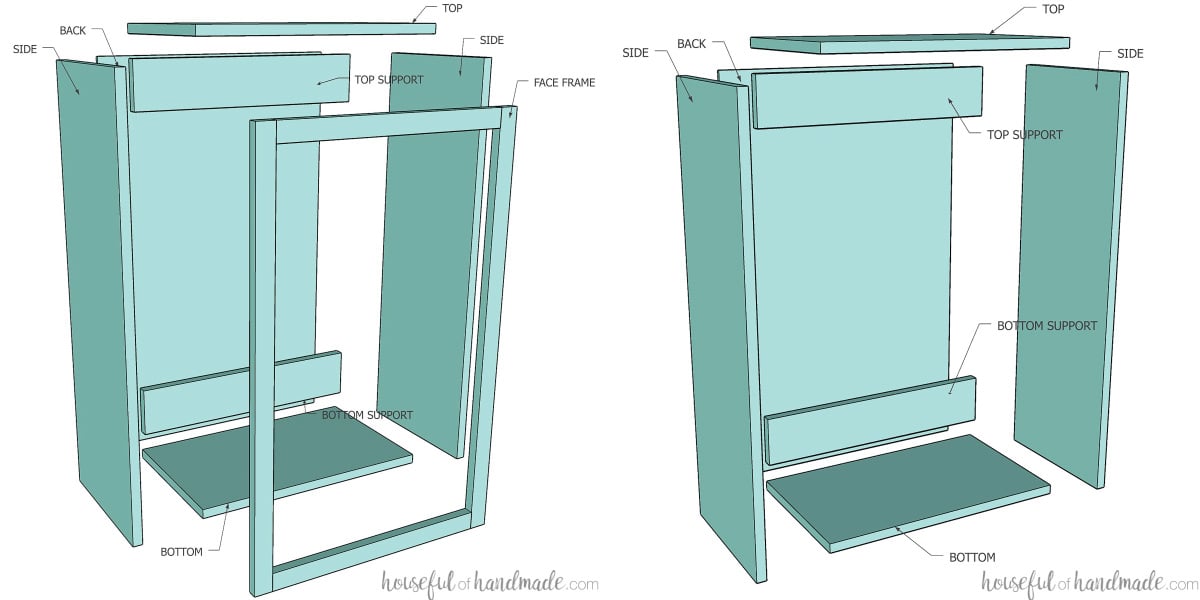
Wall cabinets usually have these key parts:
- Cabinet box (sides, top, bottom, back)
- Shelves (fixed or adjustable)
- Doors (single or double)
- Face frame (optional, for style and strength)
- Hardware (hinges, handles, mounting brackets)
Many people buy ready-made cabinets, but custom DIY cabinets let you control the size, style, and quality. You can make them fit awkward spaces or match your décor. Building your own is also often cheaper—sometimes as little as half the cost of store-bought cabinets.
Planning Your Wall Cabinets
Careful planning is the most important step. If you skip this, you may end up with cabinets that don’t fit, look odd, or aren’t strong enough.
Measure Your Space
Use a tape measure to get the exact width, height, and depth where you want your wall cabinets. Standard kitchen wall cabinets are usually 12 to 18 inches deep and 30 to 42 inches tall, but you can adjust for your needs. Don’t forget to:
- Measure from the ceiling and countertop to see how much space you have.
- Check for outlets, switches, windows, or pipes that might be in the way.
- Consider how much room you want above the cabinet for molding or below for a backsplash.
Pro tip: Always double-check your measurements. Even 1/8-inch mistakes can cause problems when you install the cabinet.
Decide The Cabinet Size And Quantity
Think about whether you want one long cabinet or several smaller ones. Wider cabinets can hold more but are harder to lift and install. Most DIYers find 24-36 inches wide is a good range for a single wall cabinet.
If you need several cabinets, sketch a simple layout on paper. Mark where each cabinet starts and ends on your wall using painter’s tape. This helps you visualize the final look and adjust before cutting any wood.
Choose A Cabinet Style
Wall cabinets come in different styles:
- Frameless (European-style): Simple, modern, and easier for beginners. No front face frame; doors cover the edges.
- Face frame: Traditional look; a wood frame covers the front edges, making the cabinet stronger and giving a classic appearance.
Both styles work well, but frameless cabinets are quicker to build and waste less material.
Pick Your Door Type
Doors are a big part of your cabinet’s look. Options include:
- Slab: Flat panels, simple and modern.
- Shaker: Flat center with raised edges, very popular.
- Raised panel: More decorative, often found in classic kitchens.
- Glass-front: For display or to make a small room look bigger.
See the table below for a quick comparison.
| Door Style | Best For | Difficulty | Estimated Cost |
|---|---|---|---|
| Slab | Modern, simple rooms | Easy | Low |
| Shaker | All styles, especially kitchens | Medium | Medium |
| Raised Panel | Traditional, formal rooms | Hard | High |
| Glass-front | Display/storage, small rooms | Medium | High |
Credit: housefulofhandmade.com
Gathering Tools And Materials
Choosing the right materials and tools will make your project easier and your cabinets stronger.
Essential Tools
For most DIY wall cabinets, you’ll need:
- Tape measure
- Pencil
- Circular saw or table saw (for cutting wood)
- Drill and bits
- Screwdriver
- Level
- Clamps
- Square (for marking right angles)
- Sander or sandpaper
- Stud finder (for installation)
Optional but helpful tools:
- Pocket hole jig (for strong, hidden joints)
- Miter saw (for angled cuts)
- Nail gun
- Router (for fancy edges or doors)
Material Choices
The most common materials for wall cabinets are:
- Plywood: Strong, light, resists warping. Use at least 1/2-inch for sides, 3/4-inch is better.
- MDF (Medium-Density Fiberboard): Smooth, easy to paint, but heavier and less strong than plywood.
- Solid wood: Beautiful but expensive and can warp.
- Melamine or particleboard: Cheapest option, covered in plastic, but not as durable.
For most DIYers, plywood is the best balance of strength, price, and workability.
Here’s a comparison of common materials:
| Material | Strength | Cost | Finish | Best Use |
|---|---|---|---|---|
| Plywood | High | Medium | Paint, stain | Cabinet boxes, shelves |
| MDF | Medium | Low | Paint | Doors, panels |
| Solid Wood | High | High | Stain, clear coat | Face frames, doors |
| Melamine | Low-Medium | Low | Plastic finish | Low-cost cabinets |
Hardware And Accessories
Don’t forget:
- Hinges: Choose concealed (European) for a modern look or visible for classic style.
- Handles or knobs
- Mounting screws/brackets: At least 2.5-inch screws for attaching to wall studs.
- Shelf pins or supports if you want adjustable shelves.
- Edge banding to cover plywood edges.
Cutting And Preparing Your Parts
Now that you know your sizes and materials, it’s time to cut and prepare all the cabinet pieces.
Making A Cut List
A cut list is a simple chart showing the size and number of every part you need. For one basic wall cabinet, you’ll need:
- 2 sides (height x depth)
- 1 top (width x depth)
- 1 bottom (width x depth)
- 1 back panel (width x height, usually thinner)
- 1-2 shelves (width x depth)
- 1 or 2 doors (height x width, slightly bigger than opening)
Tip: Cut the back panel about 1/4 inch smaller in both directions so it’s easy to fit.
Write your cut list on paper. Double-check that all pieces fit together before cutting.
Cutting The Wood
- Use a circular saw with a straight edge or a table saw for straight cuts.
- Mark all pieces clearly with a pencil.
- Always cut the biggest pieces first, then use scraps for smaller parts.
- Sand all edges smooth.
If you’re cutting multiple cabinets, mark each piece so you don’t mix them up.
Drilling Shelf Pin Holes (optional)
If you want adjustable shelves:
- Use a shelf pin jig or measure carefully.
- Drill holes about 2 inches from the front and back edges, every 2 inches apart.
Building The Cabinet Box
This is where your project starts to take shape. The box is the main structure, and it must be square and strong.
Assembling The Sides, Top, And Bottom
- Lay out the pieces on a flat surface.
- Drill pilot holes for screws (to avoid splitting wood).
- For a frameless cabinet, attach the top and bottom between the sides using wood glue and screws.
- Use clamps to hold everything square while you screw the box together.
- Check with a carpenter’s square—corners must be exactly 90 degrees.
Non-obvious tip: If your box isn’t perfectly square, doors won’t line up and may swing open by themselves.
Adding The Back Panel
- Cut the back from thin plywood (1/4 inch is common).
- Place the box face-down and attach the back with nails or short screws.
- Make sure the back helps square the box—don’t force it if it doesn’t fit.
The back adds a lot of strength and keeps the cabinet from racking (twisting).
Building A Face Frame (if Needed)
If you want a traditional look:
- Cut strips of solid wood (usually 1.5 to 2 inches wide).
- Attach them around the front edges with glue and nails.
- Sand flush with the sides.
Face frames hide the plywood edges and make the cabinet stronger, but they add a few extra steps.
Making And Attaching The Shelves
Shelves can be fixed (glued and screwed in place) or adjustable (rest on pins).
Fixed Shelves
- Cut shelves to fit inside the box.
- Drill pilot holes through the cabinet sides.
- Attach with glue and screws.
Fixed shelves are very strong, good for heavy items.
Adjustable Shelves
- Drill holes for shelf pins on the inside faces.
- Cut shelves about 1/8 inch narrower than the box width.
- Set the shelf on pins at your desired height.
Adjustable shelves are more flexible, perfect if you change what you store.
Building Cabinet Doors
Many beginners find doors the hardest part. With some planning, you’ll get a great result.
Sizing The Doors
- For frameless cabinets, doors usually cover the box front with a small gap (about 1/8 inch) all around.
- For face frame cabinets, doors cover just the opening, or you can use an overlay style.
Measure the opening carefully and add the overlay (if any).
Making Simple Slab Doors
- Cut plywood or MDF to size.
- Sand the edges smooth.
- You can add edge banding or wood strips for a fancier look.
Making Shaker Or Raised Panel Doors
These styles need more tools. Most DIYers use a rail and stile method:
- Cut four pieces for the frame (top, bottom, left, right).
- Cut a thin flat panel for the center.
- Groove the frame pieces and insert the panel.
- Glue and clamp.
If you don’t have a router, you can buy ready-made doors or use a simple slab.
Installing Hinges And Hardware
The right hinges let your doors open smoothly and last for years.
Choosing Hinges
- Concealed (European) hinges: Hidden from view, allow easy adjustment.
- Butt hinges: Visible, classic look, easy to install.
See the table for a quick comparison:
| Hinge Type | Visible? | Adjustment | Best For |
|---|---|---|---|
| Concealed | No | 3-way | Modern cabinets |
| Butt | Yes | None | Traditional cabinets |
| Piano | Yes | None | Heavy doors |
Installing Hinges
- Mark the hinge position on the door and cabinet.
- Drill pilot holes.
- Attach the hinges to the door first.
- Hold the door in place and screw hinges to the cabinet box.
- Adjust so the door hangs straight and closes smoothly.
Hidden insight: The most common beginner mistake is placing hinges too close to the door edge, causing splitting. Stay at least 2 inches from the top and bottom.
Adding Handles Or Knobs
- Mark the spot for each handle or knob.
- Drill a hole straight through.
- Attach hardware with screws.
Handles should be at a comfortable height—usually 2-3 inches from the edge.
Finishing Your Cabinets
A good finish protects your cabinets and makes them look professional.
Sanding
- Sand all surfaces smooth, starting with coarse (80 grit) and finishing with fine (180-220 grit).
- Wipe away dust with a damp cloth.
Painting Or Staining
- Use a primer if you’re painting bare wood or MDF.
- Apply 2-3 thin coats of paint or stain for even coverage.
- Let each coat dry completely before sanding lightly and adding the next.
Oil-based finishes are more durable, but water-based paints are easier to use and clean up.
Applying Edge Banding
If you used plywood, cover the front edges with edge banding:
- Cut banding to length.
- Iron or glue it on.
- Trim the excess with a sharp knife.
Edge banding gives a factory look and protects the wood.
Mounting The Cabinets On The Wall
This step is critical for safety. If not done well, the cabinet could fall and cause damage or injury.
Find The Wall Studs
- Use a stud finder to locate wood studs behind the wall.
- Mark their centers with a pencil.
Wall cabinets must always be screwed into studs, not just drywall.
Pre-drill Mounting Holes
- Drill two or more holes through the cabinet back, aligning with the stud marks.
- If your cabinet is large, add more screws for safety.
Lift And Level The Cabinet
- Get help—wall cabinets are heavy and awkward.
- Hold the cabinet in place at the right height.
- Use a level to make sure it’s straight.
Attach The Cabinet
- Drive long cabinet screws (2.5 to 3 inches) through the back into the studs.
- Check the level again before tightening fully.
- For multiple cabinets, start at one end and screw each cabinet to the wall, then screw cabinets together through the sides.
Non-obvious insight: If you’re working alone, screw a temporary ledger board to the wall at the bottom edge of the cabinet. It will hold the weight while you attach the screws.
Final Adjustments
Once your cabinet is mounted:
- Adjust doors so the gaps are even.
- Add shelves.
- Install any extra accessories (like under-cabinet lights).
- Clean up dust and fingerprints.
Take A Step Back And Admire Your Work!
Common Mistakes And How To Avoid Them
Even experienced DIYers make mistakes. Knowing them ahead of time can save time and frustration.
- Poor measurements: Always measure twice, cut once.
- Unsquare cabinet boxes: Use clamps and check with a square as you assemble.
- Wrong hinge placement: Read the hinge instructions and test fit before drilling.
- Not hitting studs: Screwing into drywall alone is dangerous. Find and use studs.
- Skipping sanding: Paint or stain will look rough if you don’t sand.
- Overloading shelves: Use thicker shelves or add supports for heavy items.
- Forgetting about doors: Plan door size and swing direction before building.
Bonus tip: If your doors don’t hang straight, loosen the hinge screws, adjust, and retighten. Most problems can be fixed with small tweaks.

Credit: www.youtube.com
Cost And Time Breakdown
Making your own wall cabinets is usually cheaper than buying, but let’s look at the real numbers.
Estimated cost for one 30” x 30” x 12” cabinet:
- Plywood: $40–$60
- Hinges: $10–$20
- Screws, glue, hardware: $15–$30
- Paint or stain: $10–$20
- Handles/knobs: $5–$15
- Edge banding (optional): $5–$10
Total: $85–$155 per cabinet (compared to $200–$400 for store-bought)
Time needed: For one cabinet, expect:
- Planning and measuring: 1–2 hours
- Cutting and prepping: 1–2 hours
- Assembling box: 1–2 hours
- Doors and finishing: 2–3 hours
- Mounting: 1 hour
So, plan for a weekend project if you’re a beginner.
When To Call A Professional
Most people can build and install basic wall cabinets with patience. But consider hiring a pro if:
- You need cabinets for a full kitchen or a commercial space.
- You want fancy features (curved corners, glass doors, custom paint).
- You don’t have the right tools or a safe workspace.
- Your walls are old, uneven, or have hidden pipes/electric.
It’s smart to do smaller projects yourself (like a bathroom or laundry room) before tackling a whole kitchen.
Credit: www.thehandymansdaughter.com
Resources For Further Learning
To learn more about advanced cabinetmaking, join online woodworking communities, watch video tutorials, or read books on furniture building. For technical standards and safety guidelines, visit the Woodworking Network.
Frequently Asked Questions
How Deep Should Wall Cabinets Be?
Most wall cabinets are 12 to 18 inches deep. Kitchen cabinets are usually 12 inches to leave enough workspace below. For garages or laundry rooms, you can go up to 18 inches, but make sure you can still reach the back.
Can I Use Regular Plywood For Wall Cabinets?
Yes, plywood is a great choice. Use at least 1/2-inch thick for sides and shelves, and 3/4-inch is better for larger cabinets. Avoid particleboard for heavy-duty use, as it can sag and break over time.
What Screws Should I Use To Hang Wall Cabinets?
Use 2.5 to 3-inch cabinet screws or lag screws. They must go through the cabinet back and at least 1.5 inches into the wall stud. Regular drywall screws are not strong enough for wall cabinets.
How Do I Make Sure Cabinets Are Level During Installation?
Use a bubble level on top of the cabinet as you install. If you’re installing multiple cabinets, clamp their sides together and check the level across all cabinets before tightening screws. A crooked cabinet can cause doors to swing open or closed by themselves.
Do I Need Special Tools To Make Wall Cabinets?
You can build basic cabinets with a circular saw, drill, clamps, and a level. For advanced features, a table saw, router, or pocket hole jig makes the job easier and gives a more professional finish. You don’t need fancy tools to get started, but good tools save time and effort.
Building your own wall cabinets is a rewarding project that adds value to your home. Take your time, plan carefully, and enjoy the process. With patience and these tips, you’ll have strong, beautiful cabinets that fit your space and style perfectly.