
Brewing the perfect cup of coffee at home is not just about owning a fancy coffee maker or picking the best beans. One of the most important skills for any coffee lover is knowing how to measure coffee in a coffee maker. Precision in measuring coffee grounds can be the difference between a rich, flavorful experience and a bitter disappointment. Many people guess or use rough estimates, but small mistakes can lead to weak, sour, or overly strong coffee. If you want to unlock the full potential of your coffee maker, learning how to measure coffee accurately is essential.
Measuring coffee may sound simple, but the details matter. The right ratio, the kind of coffee maker you use, the grind size, and even your water quality all play a role. You might have noticed that some mornings your coffee tastes amazing, while other days it feels off—even though you think you did the same steps.
This is often because of small errors in measurement. In this guide, you’ll discover clear, step-by-step methods to measure coffee, understand the science behind coffee ratios, and learn easy tricks for getting consistent results every time.
Why Accurate Coffee Measurement Matters
Coffee is a balance of water and ground coffee. If you use too much coffee, the drink becomes bitter and overpowering. Too little, and you’ll get a weak, watery cup. The coffee-to-water ratio is crucial for taste, aroma, and even caffeine strength.
Imagine baking a cake without measuring flour or sugar. The results would be unpredictable. Coffee works the same way. Measuring your coffee properly ensures you get the flavor profile you want and avoid wasting expensive beans.
Even small changes—a few grams more or less—can make a big difference. For example, using just 5 grams extra in a standard 8-cup coffee maker can make your coffee noticeably stronger and more bitter. Once you learn the basics, you’ll be able to adjust the taste exactly how you like.
Understanding Coffee-to-water Ratios
The coffee-to-water ratio is the foundation of good coffee. This ratio tells you how much coffee to use for a certain amount of water.
Most experts recommend a general ratio of 1:15 to 1:18 (1 part coffee to 15-18 parts water by weight). This means for every gram of coffee, you use 15 to 18 grams of water.
Here is a quick reference for common ratios:
| Coffee (g) | Water (ml) | Ratio | Brew Strength |
|---|---|---|---|
| 20 | 300 | 1:15 | Strong |
| 20 | 340 | 1:17 | Balanced |
| 20 | 360 | 1:18 | Mild |
For most drip coffee makers, a ratio of 1:16 is a good starting point. But taste is personal. Some people prefer their coffee stronger or milder. Start with a standard ratio, then adjust in small steps until you find your perfect cup.
Measuring Coffee: Methods And Tools
There are several ways to measure coffee for a coffee maker. Each has its pros and cons. Let’s look at the most popular methods.
1. Measuring By Weight (using A Scale)
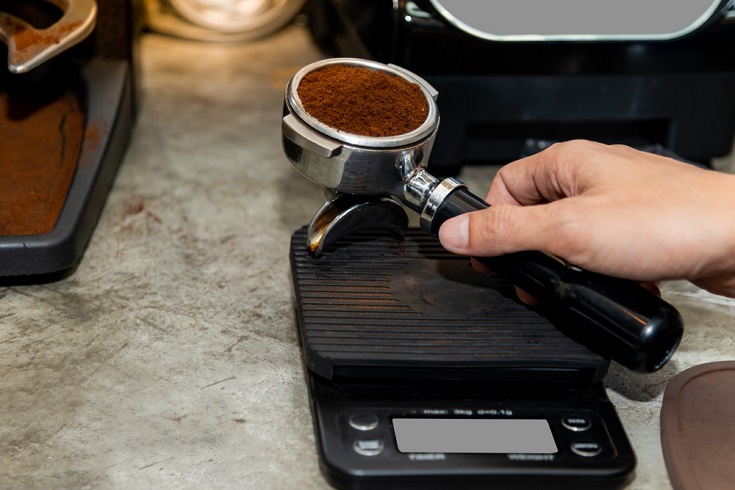
The most accurate method is to weigh your coffee beans or grounds using a digital kitchen scale. This removes all guesswork.
How to do it:
- Turn on your scale and place your empty filter or container on it.
- Tare (zero out) the scale.
- Add coffee grounds until you reach the desired weight (e.g., 30 grams for 500ml water).
Benefits:
- Consistent results every time.
- Works for all grind sizes and coffee types.
- Avoids mistakes from scooping or guessing.
Drawbacks:
- Requires buying a scale.
- Takes a few extra seconds.
2. Measuring By Volume (scoop Or Tablespoon)
Many people use a coffee scoop or tablespoon to measure coffee. This is less precise but more convenient.
- 1 level tablespoon = about 5 grams of coffee.
- 1 standard coffee scoop = about 2 tablespoons = 10 grams.
How to do it:
- Scoop the coffee grounds, level off the top for accuracy.
- Count how many scoops or tablespoons you use.
- Use the ratio (usually 1 to 2 tablespoons per 6 ounces of water).
Benefits:
- Quick and easy.
- No special tools needed.
Drawbacks:
- Volume can change based on grind size and how tightly you pack the scoop.
- Less repeatable results.
3. Measuring With Pre-portioned Packets Or Pods
Some brands sell pre-measured packets or pods for drip coffee makers. You simply open the packet and pour it in.
Benefits:
- Fast and mess-free.
- No need to measure or weigh.
Drawbacks:
- Less flexible—can’t adjust strength easily.
- More expensive per cup.
- May not fit all coffee makers.
Non-obvious insight: Coffee can settle and compact in a bag. Scooping coffee from the top of a bag can give a different measurement than from the bottom, especially if you shake the bag or squeeze it. Weighing is more reliable.
How Much Coffee For Different Coffee Makers
Not all coffee makers are the same. The type and size of your machine changes how much coffee you should use.
Drip Coffee Makers
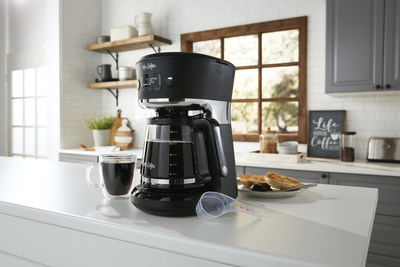
For standard automatic drip coffee makers, each “cup” marked on the pot is usually 5 or 6 ounces (not a full 8-ounce cup). Always check your machine’s manual.
A good starting point is:
- 1-2 tablespoons (5-10 grams) of ground coffee per 6-ounce cup.
For a 12-cup coffee maker (about 60-72 ounces of water), that’s:
- 12-24 tablespoons (60-120 grams) of coffee.
Single-serve Pod Machines
Machines like Keurig or Nespresso use pods, which are pre-measured. You cannot adjust the amount of coffee, but you can change water volume for a stronger or weaker cup.
French Press
A typical ratio is 1:15 (1 gram of coffee for every 15 grams of water). For a standard 1-liter French press:
- Use 60-65 grams of coffee.
- Add 900-1000 ml of water.
Espresso Machines
Espresso requires precision. Usually:
- 18-20 grams of ground coffee for a double shot (about 2 ounces of espresso).
Pour Over
Pour over methods (like Chemex or Hario V60) work best with a scale:
- Common ratio is 1: 16.
- For a 400 ml cup, use 25 grams of coffee.
Percolator Or Moka Pot
These need a little less coffee:
- Use 1 tablespoon per 6 ounces of water.
Pro tip: Not all “cups” are equal. Always check the markings on your coffee maker and adjust your measurements to the actual water volume.
Credit: ir.newellbrands.com
Step-by-step Guide: Measuring Coffee For Your Coffee Maker
Let’s walk through how to measure coffee for a standard drip coffee maker using both the scale and scoop methods.
Using A Scale
- Check your coffee maker’s water capacity. Fill the reservoir to your desired number of cups.
- Find your ratio. For medium strength, use 1: 16 (e.g., 30 grams coffee per 480 ml water).
- Weigh your coffee. Place the filter on the scale, tare it, and add coffee grounds.
- Add to basket and brew.
Using A Scoop
- Count water “cups” in the reservoir.
- Use 1-2 tablespoons of ground coffee per cup.
- Add to filter and brew.
Example: For an 8-cup (48-ounce) coffee maker:
- Use 8-16 tablespoons (40-80 grams) of coffee.
Pro tip: Start with the lower amount and taste. If it’s weak, increase the amount next time.
Measuring For Different Strengths
Everyone likes their coffee a little different. Here’s how to adjust:
- Stronger coffee: Use more grounds, but don’t reduce water below the minimum your machine needs.
- Milder coffee: Use less coffee, but not so little that the water passes through too quickly (which can taste sour).
| Strength | Coffee per 6oz Cup (g) | Coffee per 12-Cup Pot (g) |
|---|---|---|
| Strong | 10 | 120 |
| Medium | 8 | 96 |
| Mild | 6 | 72 |
Non-obvious insight: Water temperature and brew time also affect strength. If you use more coffee but brew too fast, you may still get weak coffee. Matching measurement with correct brew time is key.
Common Mistakes When Measuring Coffee
It’s easy to make small errors that hurt your coffee. Here are the most common mistakes:
- Using “heaping” scoops. Always level off your scoop or spoon for accuracy.
- Ignoring grind size. Coarse grinds take up more space than fine grinds. A scoop of fine grounds has more coffee than a scoop of coarse.
- Not adjusting for freshness. Freshly roasted coffee is lighter and fluffier. Stale coffee is denser.
- Trusting cup markings blindly. Your coffee maker’s “cups” might be smaller than your mug.
- Not calibrating your scoop. Test how much your scoop holds by weighing it once.
- Guessing water volume. Use a measuring cup to fill your coffee maker the first time.
- Changing brands but not ratios. Different beans and roast levels have different densities.
Measuring Whole Beans Vs. Ground Coffee
You can measure coffee before or after grinding. But there are differences.
- Weighing whole beans: Best for freshness. Grind just before brewing.
- Weighing ground coffee: Good if you pre-grind, but grounds can lose aroma quickly.
Tip: If you use a scoop, always use the same grind size for consistency.
How To Measure For Large And Small Batches
Scaling up or down? Keep the ratio the same, but measure carefully. Brewing a full pot needs more precision than a single cup.
- For a small cup (6 oz): 1-2 tablespoons coffee
- For a large travel mug (16 oz): 3-4 tablespoons
- For a party (12-cup maker): 12-24 tablespoons
When making less than a full pot, always center the filter in the basket to avoid uneven brewing.
Adjusting For Different Coffee Types
Different beans and roast levels change how much coffee you should use.
- Dark roast: Denser, needs slightly less by volume.
- Light roast: Fluffier, may need a little more for the same strength.
- Flavored or oily beans: May clog some coffee makers—use a paper filter.
Pro tip: Try a test brew when switching beans. Adjust your scoop or weight as needed.
Water Quality And Its Impact
Even perfect coffee measurement won’t help if your water is poor. Use clean, fresh water for the best results.
- Hard water can make coffee taste flat.
- Filtered or bottled water is best if your tap water tastes bad.
- Never use distilled water—it lacks minerals that help extract coffee flavors.
Measuring For Specialty Coffee Makers
Some machines, like Thermal coffee makers or Siphon brewers, may have special instructions. Always check your manual for recommendations.
How To Calibrate Your Coffee Scoop
Not all scoops are the same. Here’s how to calibrate:
- Fill your scoop with coffee and level it off.
- Weigh the contents on a kitchen scale.
- Now you know exactly how many grams your scoop holds.
Repeat if you use different grind sizes.
The Role Of Grind Size In Measurement
Grind size changes the amount of coffee that fits in a scoop. Finer grounds pack tighter, making your coffee stronger if you use the same scoop.
- For drip makers: Use medium grind.
- For French press: Use coarse grind.
- For espresso: Use fine grind.
If you switch grind size, adjust your measuring method for best results.
Saving Time: Pre-measuring And Storing Coffee
If you’re short on time in the morning, you can pre-measure your coffee.
- Store pre-weighed portions in airtight containers.
- Only grind beans just before brewing for best flavor.
- Label your containers for batch sizes (e.g., “12 grams for 8 oz cup”).
Cleaning And Maintenance Tips
Old coffee grounds or oily residue can change your measurements and flavor.
- Clean your scoop, scale, and filter basket regularly.
- Run a water-only brew cycle weekly to clean the machine.
- Use a brush to remove old grounds from corners.
Measuring For Cold Brew
Cold brew uses a much higher coffee-to-water ratio because it’s diluted with ice or milk.
- Use 1 cup (about 85 grams) of coffee per 4 cups (950 ml) of water.
- Steep for 12-24 hours, then filter.
Cold brew concentrate is strong. Dilute with water or milk before drinking.
Environmental Impact Of Measuring
Measuring coffee carefully reduces waste. Too much coffee means more beans used, more shipping, and more environmental impact.
- Use only what you need.
- Compost used grounds if possible.
Measuring For Health: Caffeine Content
Measuring coffee helps you control your caffeine intake. On average:
- 1 tablespoon ground coffee = 60-80 mg caffeine
- 8-ounce cup brewed coffee = 80-120 mg caffeine
If you’re sensitive to caffeine, measure carefully and adjust as needed.
Quick Reference: Coffee Measuring Guide
Here’s a handy cheat sheet for most home coffee makers:
- 1 cup (6 oz) water: 1-2 tablespoons (5-10 grams) coffee
- 8 cups (48 oz) water: 8-16 tablespoons (40-80 grams) coffee
- 12 cups (72 oz) water: 12-24 tablespoons (60-120 grams) coffee
Adjust to taste and remember to use a scale for best results.

Credit: www.amazon.com
Why Consistency Matters
Consistent measuring gives you control over your coffee’s flavor, strength, and aroma. It’s the secret to turning your morning cup into a daily pleasure, not a gamble.
- Use the same tools every time.
- Write down your favorite ratios for easy reference.
- Share your method with friends or family for better results.
Useful Resources
If you want to learn more about coffee measurements, brewing ratios, and methods, see this resource from the National Coffee Association.
Credit: cornercoffeestore.com
Frequently Asked Questions
How Much Coffee Do I Use For 1 Cup In A Coffee Maker?
For a standard 6-ounce cup, use 1 to 2 tablespoons (5-10 grams) of ground coffee. Adjust based on your taste preference and your machine’s markings.
What Is The Golden Ratio For Coffee?
The golden ratio is about 1:16—one part coffee to sixteen parts water by weight. This makes a balanced cup for most drip coffee makers.
Can I Use A Regular Spoon Instead Of A Coffee Scoop?
Yes, but a coffee scoop is usually 2 tablespoons. A regular tablespoon works, but for best results, use a kitchen scale to measure your exact amount.
Does Grind Size Affect How Much Coffee I Use?
Yes. Finer grinds pack tighter in a scoop, giving more coffee and a stronger cup. For accurate results, weigh your coffee rather than relying on scoops if you change grind size.
How Do I Make Stronger Or Weaker Coffee Without Changing The Taste?
To make your coffee stronger, increase the amount of coffee grounds but keep the same water volume. To make it weaker, use less coffee. Make small changes and taste after each adjustment.
Brewing excellent coffee at home is about more than just beans or machines—it’s about how you measure coffee in your coffee maker. With careful measuring, you can discover your perfect cup every day, and enjoy consistency, flavor, and satisfaction with every brew.