
Making stainless steel nonstick might sound like magic, especially if you have struggled with fried eggs sticking or pancakes tearing apart. But you don’t need a fancy nonstick pan to get that easy-release cooking experience. With the right steps, you can transform your regular stainless steel cookware into a surface where food lifts off smoothly—without using harmful chemicals or coatings.
This guide shows you how to make stainless steel nonstick, explaining each step in detail so you can finally enjoy hassle-free cooking and cleaning. You’ll learn the science behind seasoning stainless steel, common mistakes, practical tips, and how to keep your pan working its best for years.
Let’s dive in and unlock the secrets to nonstick stainless steel.
Why Make Stainless Steel Nonstick?
Stainless steel cookware is popular for many reasons—it’s durable, resistant to rust, and gives excellent browning. But many home cooks find food sticks easily, leading to frustration and wasted meals. Making your stainless steel nonstick has several real advantages:
- Safer cooking: No chemical coatings or Teflon to worry about.
- Better flavor: Stainless steel gives a great sear and richer taste.
- Easy cleaning: Food slides off, so you spend less time scrubbing.
- Longer pan life: Proper seasoning protects the surface and prevents damage.
Many chefs prefer stainless steel because it can go from the stove to the oven and works with all cooking methods. Once you master the nonstick technique, you’ll find your stainless steel pan can handle everything from delicate fish to sticky rice.
The Science Behind Nonstick Stainless Steel
Understanding why food sticks helps you prevent it. Stainless steel pans have tiny pores on their surface. When you heat the pan, these pores expand. If you add oil at the right time, the oil fills the pores, creating a thin layer that separates the food from the metal.
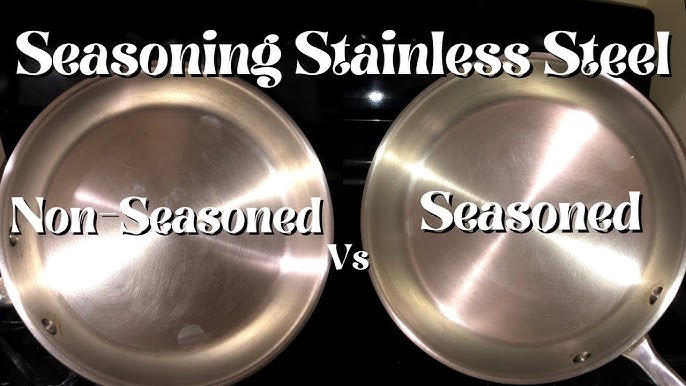
But if the pan is too cold, the oil doesn’t spread well. If the pan is too hot, the oil can burn. Both lead to sticking. Seasoning stainless steel—creating a layer of polymerized oil—makes it even more nonstick. This is similar to what you do with cast iron or carbon steel.
Another key factor is the Maillard reaction. When proteins in your food react with the hot surface, they form a tasty crust. If you disturb this process by moving food too soon, it sticks. But once the crust forms, food releases easily.

Credit: thatothercookingblog.com
Choosing The Right Stainless Steel Pan
Not all stainless steel pans are equal. If you want the best nonstick results, start with high-quality cookware. Here’s what to look for:
- Fully-clad construction: This means the entire pan, not just the base, has layers of stainless steel and aluminum or copper. It gives even heating.
- Heavy weight: Thicker pans retain heat better, preventing hot spots that cause sticking.
- Smooth surface: Avoid pans with scratches, pitting, or damage.
Cheap, thin pans often heat unevenly, causing food to burn in one spot while sticking in another. Investing in a good pan pays off in cooking results and durability.
Comparing Stainless Steel Pan Types
Below is a quick comparison of common stainless steel pan types:
| Type | Heating | Durability | Price | Nonstick Potential |
|---|---|---|---|---|
| Single-ply stainless | Poor | High | Low | Low |
| Disc-bottom | Good at base only | Medium | Medium | Medium |
| Fully-clad | Excellent | High | High | High |
If you’re unsure what type you have, check the pan’s weight and feel. Fully-clad pans feel heavier and balance well in your hand.
How To Season Stainless Steel For Nonstick Performance
Seasoning is the process of adding a layer of polymerized oil to the pan’s surface. This layer fills microscopic pores, reducing sticking. The process is simple but requires attention to detail.
What You Need
- Clean stainless steel pan
- High-smoke point oil (grapeseed, canola, sunflower, or avocado oil)
- Paper towels or a lint-free cloth
- Stove or oven
Step-by-step Seasoning Process
1. Clean The Pan Thoroughly
Wash your pan with hot water and dish soap to remove any factory oils or cooking residues. Dry it completely with a towel.
2. Heat The Pan
Place the empty pan on medium heat for about 2-3 minutes. You want the pan to be hot, but not smoking.
3. Add Oil
Pour a small amount (about 1 teaspoon) of oil into the pan. Use a paper towel to spread the oil over the entire surface, including the sides. Only a thin layer is needed—wipe off excess so the pan does not look greasy.
4. Heat Until Smoking
Turn the heat to medium-high. Let the pan heat until you see faint wisps of smoke. This means the oil is bonding with the steel and forming a new layer.
5. Cool And Wipe
Turn off the heat and let the pan cool slightly. Wipe out any extra oil with a clean paper towel. The surface should look a bit shiny but not wet.
6. Repeat For Best Results
For a more durable nonstick coating, repeat steps 3–5 two or three times.
Seasoning In The Oven (alternative Method)
For a more even finish, you can season your pan in the oven:
- Preheat oven to 400°F (200°C).
- Spread a thin layer of oil over the pan.
- Place the pan upside down on the oven rack. Put a baking sheet underneath to catch drips.
- Bake for 1 hour.
- Let the pan cool in the oven before removing.
This method works well for pans with metal handles (not plastic).
Why High-smoke Point Oils Matter
Not all oils work for seasoning. High-smoke point oils (like grapeseed or canola) withstand high heat and bond well to the metal. Olive oil and butter burn at lower temperatures, leaving sticky residues.
Common Beginner Mistakes
- Using too much oil: Leads to sticky, uneven coating.
- Not heating pan enough: Oil won’t bond and will just wipe off.
- Using low-smoke point oil: Can burn and make the pan more sticky.
How To Cook On Seasoned Stainless Steel Without Sticking
Seasoning helps, but technique matters just as much. Here’s how to cook with your seasoned stainless steel pan:
The Water Drop Test
To know when the pan is ready, try the water drop test:
- Heat the pan on medium.
- Flick a few drops of water onto the surface.
- If the water sizzles and evaporates immediately, the pan isn’t ready.
- If the drops ball up and dance around, the pan is at the right temperature.
This is the sweet spot where oil spreads evenly, and food won’t stick.
Cooking Steps For Best Results
- Preheat the pan using the water drop test.
- Add oil and swirl to coat the surface.
- Let oil heat until it shimmers but does not smoke.
- Add food (for example, eggs or fish).
- Do not move food immediately. Let a crust form. For eggs, wait about 1 minute; for meat, 2–3 minutes.
- Release food. If it sticks, it needs more time. When ready, food will lift easily with a spatula.
Foods That Work Well
- Eggs (fried, scrambled, omelets)
- Fish fillets
- Pancakes and crepes
- Chicken and steak
- Vegetables (stir-fried or sautéed)
Foods That Still Stick
Some foods are always tricky, even with seasoned pans. Sugar-heavy foods or super-lean proteins may still stick. In those cases, extra oil or a gentle touch helps.
How To Clean And Maintain Your Nonstick Stainless Steel Pan
Proper cleaning is key to keeping your pan nonstick. The wrong methods can ruin your seasoning and make food stick again.
Cleaning After Each Use
- Let the pan cool slightly. Don’t put a hot pan in cold water, or it may warp.
- Wipe out excess oil or food with a paper towel.
- Wash with warm water and a soft sponge. Avoid harsh scouring pads.
- Use mild dish soap if needed, but avoid strong degreasers that strip seasoning.
- Dry completely to avoid water spots.
Dealing With Stuck-on Food
If something does stick:
- Soak the pan in warm water for a few minutes.
- Use a nylon scraper or wooden spatula to loosen bits.
- Avoid steel wool or abrasive pads that scratch the surface.
Re-seasoning As Needed
If your pan starts to stick more, repeat the seasoning process. Over time, the nonstick layer gets better with use.
What About The Dishwasher?
Dishwashers use strong detergents that can remove your seasoning and dull the steel. Hand washing is always best for nonstick performance.
Common Mistakes That Ruin Nonstick Results
- Cooking on too high heat (burns the oil layer)
- Not drying the pan after washing (causes rust spots)
- Scrubbing with harsh pads (removes seasoning)
How Nonstick Stainless Steel Compares To Other Pans
People often wonder how a seasoned stainless steel pan matches up to nonstick, cast iron, or ceramic options. Here’s a comparison to help you decide:
| Pan Type | Nonstick Ability | Durability | Heat Tolerance | Maintenance |
|---|---|---|---|---|
| Seasoned Stainless Steel | Good (with practice) | Excellent | High | Moderate |
| Teflon Nonstick | Very Good | Poor (scratches easily) | Low-Moderate | Easy |
| Cast Iron | Excellent (when seasoned) | Excellent | High | Moderate |
| Ceramic Nonstick | Good (at first) | Poor (wears out) | Moderate | Easy |
Seasoned stainless steel sits in the middle—it is more nonstick than you might expect, but a bit less forgiving than Teflon. The payoff is that it lasts much longer and is safer at high heat.
Advanced Tips: Going Beyond Basic Seasoning
If you want to take your stainless steel to a higher nonstick level, try these tips:
1. Use Flaxseed Oil For Super-strong Seasoning
Flaxseed oil creates a hard, durable layer that stands up to heavy use. Apply in very thin coats and bake in the oven for best results. However, it can be finicky and needs careful application to avoid stickiness.
2. Build Up Seasoning Over Time
Every time you cook with oil, you add a little more seasoning. Don’t scrub it off unless absolutely needed. Let the patina build naturally.
3. Avoid Acidic Foods At First
Tomato sauce, vinegar, and citrus can break down the seasoning, especially in the early stages. Cook less acidic foods for the first few uses after seasoning.
4. Try The “salt Polish” Method
After cleaning, sprinkle a tablespoon of coarse salt into the pan. Rub gently with a paper towel to polish away any sticky spots. Rinse and dry. This method is used by some restaurant chefs to keep pans smooth.
5. Heat Control Is Key
Most sticking happens because the pan is too cold or too hot. Once you master the right temperature, you’ll notice a huge difference.
6. Use Enough Fat
Stainless steel is not naturally nonstick. A little oil or butter is always needed, but you can use less as your seasoning layer improves.
7. Store Properly
Stacking pans can scratch the seasoning. Place a soft cloth or paper towel between pans if you nest them.
Troubleshooting: If Food Still Sticks
Sometimes, even after following all the steps, food still sticks. Here are the most common reasons and how to fix them:
1. Pan Not Hot Enough
If you add food before the pan is hot, proteins bond to the steel. Use the water drop test every time.
2. Too Little Or Too Much Oil
A thin, even layer of oil is best. Too much oil can create sticky spots; too little won’t cover the pores.
3. Moving Food Too Soon
Let food cook until a crust forms. For meats, this means not flipping until they release easily. For eggs, wait for the edges to lift.
4. Damaged Or Worn Pans
Scratched or pitted pans lose nonstick ability. If your pan is heavily damaged, it may never become fully nonstick.
5. Cleaning Errors
Washing with strong detergents or scrubbing off the seasoning means you need to reseason.
6. Using The Wrong Foods
Some foods (like skinless fish or melted cheese) are always more likely to stick. Use extra oil, lower heat, and patience.
Real-world Example: Making Fried Eggs On Stainless Steel
Let’s walk through a practical example—cooking fried eggs, which are famously tricky on stainless steel.
- Clean and dry your pan.
- Preheat on medium for 2 minutes.
- Do the water drop test. Drops should dance.
- Add 1 teaspoon of oil and swirl.
- Crack eggs into the pan.
- Wait and do not touch for 1 minute.
- Check edges with a spatula. If they lift, the eggs are ready to flip or slide out.
- Remove eggs easily if the steps were followed.
If your eggs stick, review each step. Most often, the pan wasn’t hot enough or you tried to move them too soon.
:max_bytes(150000):strip_icc()/Allrecipes-Stainless-Steel-Skillet-4x3-c0dd0df19ae5491a89a1eb747b3800e8.jpg)
Credit: www.allrecipes.com
Environmental And Health Benefits
Many people worry about the safety of traditional nonstick coatings. With seasoned stainless steel, you avoid PTFE, PFOA, and other chemicals. This makes it a safer choice for your family and the environment. Stainless steel also lasts for decades, reducing waste compared to pans that wear out quickly.
For more on the safety of cookware materials, visit the EPA’s resource on cookware safety.
Saving Money And Time
Seasoning your stainless steel pan means you don’t need to buy new nonstick pans every year. With good care, one quality pan can last a lifetime. You’ll also spend less time cleaning and more time enjoying your food.
Credit: www.youtube.com
Frequently Asked Questions
Can I Season Any Stainless Steel Pan?
Yes, most stainless steel pans can be seasoned. However, pans with plastic handles or nonstick coatings should not go in the oven for seasoning. Stick to metal-handled, fully stainless steel pans for best results.
How Often Do I Need To Reseason My Pan?
It depends on use. If you notice more sticking, reseason as needed. Some home cooks reseason monthly, others only once or twice a year. Cooking with oil naturally builds up the layer over time.
Can I Use Butter Instead Of Oil For Seasoning?
Butter is not ideal for seasoning because it has a low smoke point and contains water and milk solids. Use oils like grapeseed, canola, or sunflower for best results.
Does Seasoning Change The Taste Of Food?
No, a properly seasoned pan will not change the taste. In fact, it can improve flavor by helping you get better browning without burning.
What Should I Do If My Pan Gets Rusty?
Stainless steel resists rust, but water spots can look like rust. If you see orange spots, scrub gently with baking soda and water, rinse, and dry completely. Reseason if needed.
Making stainless steel nonstick is a skill that pays off with every meal. With patience, practice, and the right techniques, you can enjoy the benefits of a nonstick pan—without the drawbacks. Your food will taste better, your pan will last longer, and you’ll enjoy cooking more than ever before.