
Polishing a knife blade may sound like a job for experts, but anyone can learn to do it with the right approach. A polished knife does more than just look good; it glides through food, resists rust, and lasts longer.
Many people focus only on sharpening, forgetting that polishing is a different step. It removes scratches, smooths the surface, and brings out the shine. Whether you use your knife in the kitchen, for outdoor tasks, or as part of a collection, knowing how to polish a knife blade can make a big difference.
This guide walks you through everything: what polishing really means, the tools and materials you’ll need, step-by-step polishing methods for different situations, and how to avoid common mistakes. You’ll also see practical tips that most beginners miss, such as how to check your progress, and when to stop before over-polishing. By the end, you’ll be able to polish a knife blade confidently and safely, even if you’ve never tried before.
What Does Polishing A Knife Blade Mean?
Polishing is not just cleaning or sharpening. It is a finishing process that smooths the blade’s surface, removes fine scratches, and creates a reflective or “mirror” finish if you want it. This process can be done by hand or with machines. Polishing also makes the knife easier to clean and less likely to rust because a smooth surface does not trap dirt or moisture.
Some people polish for looks, especially collectors or chefs who want their knives to shine. Others do it to improve the knife’s performance and protect the blade. It’s important to understand that polishing does not make a dull knife sharp; that’s what sharpening is for.
Instead, it improves the blade’s surface after sharpening.
Why Polish A Knife Blade?
Many people wonder if polishing is necessary. Here are some key reasons:
- Reduces Friction: A polished blade slices more smoothly because there are fewer micro-grooves to catch on food or material.
- Resists Rust and Corrosion: A smooth surface leaves fewer places for water and acids to cause rust.
- Easier Cleaning: Food and dirt don’t stick as easily, which is especially helpful for kitchen knives.
- Restores Appearance: It removes stains, scratches, and old marks, making the knife look new again.
- Increases Value: For collectors, a polished knife is more desirable and can even raise its resale value.
A common misconception is that all knives should be polished to a mirror finish. In reality, some working knives (like outdoor or hunting blades) are better with a satin or brushed finish, which hides scratches and is less slippery to hold.
Understanding Knife Blade Materials
Before you start, know what kind of blade you have. The type of steel or metal affects how you polish it. Common knife blade materials include:
- Stainless Steel: Resists rust, easy to polish, common in kitchen knives.
- Carbon Steel: Holds an edge well but can rust; needs gentle polishing and oiling.
- Damascus Steel: Layered steel with visible patterns; must be polished carefully to keep patterns visible.
- Ceramic: Rare, but if you have one, do not polish as you would with steel. It can chip easily.
Not all polishes or methods are safe for every blade. Always check the maker’s advice if you’re unsure.
Tools And Materials Needed
You don’t need expensive equipment to start polishing. Here’s what works for most people:
- Microfiber cloths or soft cotton rags (for cleaning and applying polish)
- Metal polish (like Flitz, Simichrome, or Autosol)
- Polishing compounds (such as green or white rouge, for higher finishes)
- Sandpaper (various grits, usually 400 up to 2000 or higher)
- Masking tape (to protect the handle and areas you don’t want polished)
- Gloves (to protect your hands and keep fingerprints off the blade)
- Buffing wheel (optional, for machine polishing)
- Water and mild soap (for cleaning before and after polishing)
- Toothpicks or cotton swabs (for hard-to-reach spots)
- Magnifying glass (helpful for checking progress)
The table below compares some popular metal polishes and their uses:
| Polish Name | Best For | Finish Type | Safe for Damascus |
|---|---|---|---|
| Flitz | Stainless, Carbon Steel | Shiny/Mirror | Yes |
| Simichrome | Stainless, Brass, Copper | High Shine | No |
| Autosol | Stainless, Aluminum | Bright Shine | Yes |
Preparing The Knife For Polishing
Jumping straight into polishing is a mistake many make. You need to prepare the knife first:
- Clean the Blade: Wash with mild soap and water. Dry it well.
- Remove Rust: If there’s rust, use fine steel wool (0000 grade) or a rust eraser, gently. Do not use harsh abrasives.
- Check for Damage: If there are deep chips or cracks, fix them (or have a pro do it) before polishing.
- Tape the Handle: Wrap masking tape around the handle and any part you don’t want to polish.
- Secure the Knife: Place the knife on a flat, stable surface, or hold it firmly in your hand (with gloves).
Neglecting preparation can lead to more scratches, uneven polish, or even injury.
Manual Polishing: Step-by-step
Many beginners ask if they need a machine. For most, manual polishing is enough, especially for kitchen or pocket knives.
Step 1: Choose The Right Grit
If your blade has scratches or a dull finish, start with a coarser sandpaper grit (400 or 600). For a blade that just needs a shine, start at 1000 or 1500 grit.
Step 2: Sand Along The Grain
Find the direction of the original blade lines. Always sand with this “grain,” not across it. This keeps new scratches from showing.
- Wrap the sandpaper around a small block or use your fingers.
- Move in straight, even strokes.
- Check the blade often under a light.
Step 3: Gradually Move To Finer Grits
After each round, wipe the blade clean. Move to the next finer grit (e. g. , 800, 1000, 1500, 2000, even up to 5000 for a mirror finish). Spend more time with the finer grits; this is where the shine appears.
Step 4: Apply Metal Polish
Put a small amount of metal polish on a soft cloth.
- Rub in small, tight circles over the blade.
- Buff with a clean section of cloth until you see the shine.
- Repeat as needed.
For a super-bright finish, you can use a polishing compound on a cloth instead.
Step 5: Clean And Inspect
Wash the blade with mild soap and water to remove any leftover polish. Dry with a clean towel. Use a magnifying glass to check for missed spots or swirl marks.
Step 6: Oil The Blade
A thin coat of food-safe mineral oil protects the blade from moisture and keeps the shine. This is especially important for carbon steel knives.
Here’s a summary of the manual process:
| Step | Action | Purpose |
|---|---|---|
| 1 | Sand with coarse grit | Remove scratches, smooth the surface |
| 2 | Progress to finer grits | Reduce scratches, increase shine |
| 3 | Apply polish | Boost shine, protect steel |
| 4 | Buff and inspect | Check for evenness, remove residue |
| 5 | Oil the blade | Prevent rust, maintain finish |

Credit: knifemaking.com
Using A Buffing Wheel Or Machine
If you want a professional-level mirror finish, a buffing wheel or polishing machine is useful. This tool spins a cloth wheel at high speed, which, when loaded with a polishing compound, can make a blade shine like a mirror.
Safety First
Always wear eye protection and gloves. Clamp the knife securely. Never let the blade “catch” on the wheel, which can fling it dangerously.
Steps For Machine Polishing
- Attach the Polishing Compound: Press the compound (like green or white rouge) gently onto the spinning wheel.
- Move the Blade Gently: Hold the knife at a slight angle to the wheel, moving with the grain. Don’t press too hard.
- Check Often: Stop and look at the finish after each pass.
- Finish by Hand: Even after machine polishing, a quick hand-buff with a microfiber cloth removes leftover compound and gives a final shine.
Machine Vs. Manual Polishing
While machines are fast, they can overheat or remove too much metal if used carelessly. For valuable or thin knives, manual polishing is safer.
Here’s a quick comparison:
| Method | Pros | Cons | Best For |
|---|---|---|---|
| Manual | Control, safety, cheap | Slower, more effort | Kitchen, pocket knives, beginners |
| Machine | Fast, high shine | Risky, needs practice | Collectors, restoration, large knives |
Special Tips For Polishing Different Knife Types
Kitchen Knives
- Use food-safe polish and oil. Avoid harsh chemicals.
- Polishing too often can thin the blade, so only do it when needed.
- Focus on the blade sides, not the cutting edge.
Pocket And Outdoor Knives
- These often have textured or coated blades. Do not polish coated areas.
- For folding knives, clean and lightly oil the joint after polishing.
Damascus Steel Blades
- Never use harsh abrasives; you may erase the unique patterns.
- Use a gentle polish and rub softly, following the visible grain.
- Do not soak in chemicals or acids, which can ruin the finish.
Antique Or Collectible Knives
- Always test polish on a small area first.
- Over-polishing can reduce value. For rare knives, consult a professional.
Common Mistakes And How To Avoid Them
- Using the Wrong Grit: Starting with sandpaper that’s too coarse can create deep scratches that are hard to remove.
- Not Cleaning Between Steps: Grit from one stage can carry over and scratch the blade in the next.
- Rushing the Process: Polishing takes time. Going too fast with a machine can overheat and warp the blade.
- Skipping Oil: Bare metal rusts quickly. Always finish with a protective oil.
- Not Protecting the Handle: Polish or compounds can stain wood or plastic handles.
- Polishing the Edge: Avoid buffing the cutting edge directly; you can round it and make it dull.
A non-obvious tip: check your progress often under different light angles. Some scratches are only visible in certain lighting. Another: keep a separate cloth for final buffing, never used with polish or grit.
How Often Should You Polish A Knife Blade?
There’s no fixed schedule. It depends on use, storage, and the type of blade.
- Kitchen knives: Every few months, or after heavy use and cleaning.
- Outdoor knives: After exposure to water, dirt, or sap.
- Collectibles: Rarely, only when needed.
Polishing too often can actually wear down the blade. Focus on maintenance: keep the knife dry and oiled, and polish only when you see scratches or tarnish.
Advanced Polishing: Achieving A Mirror Finish
A mirror finish means the blade is so polished you can see your reflection in it. This level of shine is mostly for collectors or show knives, not everyday tools.
Steps to a mirror finish:
- Sand with increasingly fine grits, starting at 600 and ending at 5000 or even 7000.
- Polish with a high-quality compound, using both machine and hand methods.
- Spend extra time buffing with a clean, soft cloth.
Be aware: a mirror finish shows fingerprints and scratches easily. For working knives, a satin finish may be better.
Caring For Your Polished Knife
After polishing, keep the blade in top shape:
- Wipe the blade dry after each use.
- Store in a dry place, preferably with a silica gel packet.
- Apply a thin coat of mineral oil every few weeks.
- Do not use abrasive cleaners or harsh sponges.
If you see tarnish or rust spots, address them early before they spread.

Credit: www.youtube.com
Real-world Example: Polishing A Chef’s Knife
Let’s look at a practical example. Maria, a home cook, noticed her favorite chef’s knife had scratches and looked dull after a year of use. She followed these steps:
- Washed and dried the blade.
- Taped the handle to protect it.
- Sanded with 1000, then 2000 grit sandpaper, moving with the grain.
- Applied Flitz polish with a microfiber cloth, rubbing in small circles.
- Buffed with a clean cloth.
- Finished with a few drops of mineral oil.
Her knife looked new, sliced smoothly, and was easier to clean. The process took about 30 minutes.
When To Seek Professional Help
If your knife has:
- Deep chips or cracks
- Heavy rust (pitting)
- Historic or high-dollar value
- A complex pattern (like Damascus)
…it’s best to let a professional handle the polishing. Mistakes can be costly or irreversible on rare blades.
For most everyday knives, though, you can polish safely at home with care.
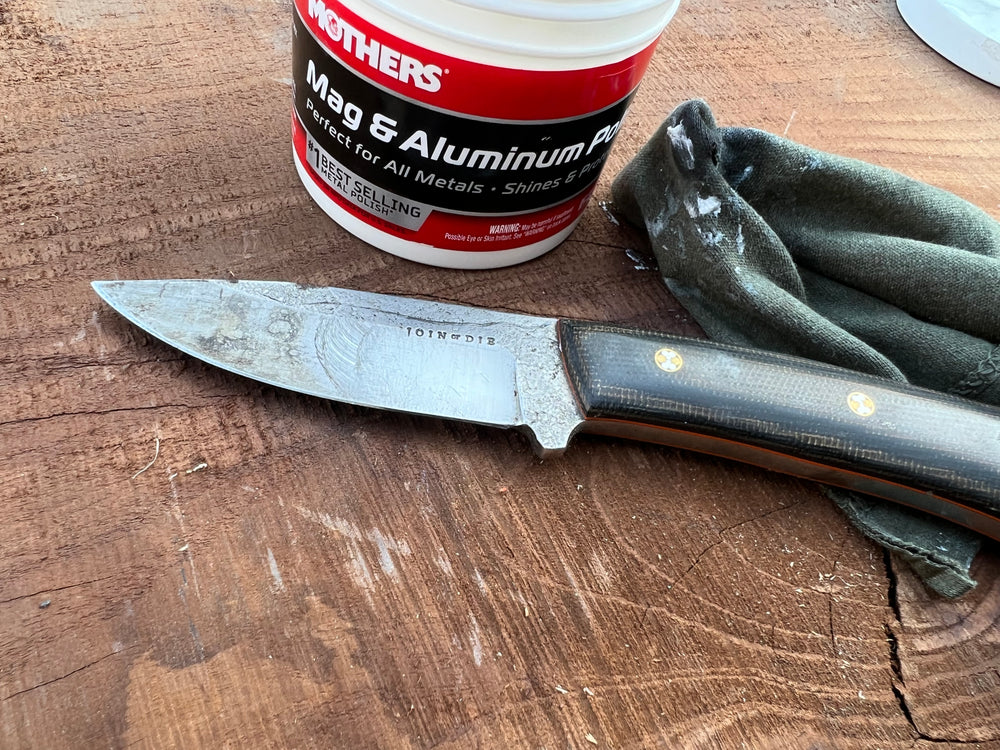
Credit: joinordieknives.com
Frequently Asked Questions
How Do I Know When To Stop Polishing My Knife Blade?
Stop when the surface is smooth, shiny, and free of visible scratches under normal light. Over-polishing can thin the blade or erase patterns. Always check the blade between polishing steps.
Can I Use Toothpaste As A Polish For My Knife?
Toothpaste is a very mild abrasive and can remove light stains, but it won’t give a true polish. For best results, use a dedicated metal polish designed for knives or steel.
Is It Safe To Use A Buffing Wheel On All Knives?
Not all knives are safe for machine polishing. Thin, flexible blades, or knives with delicate patterns (like Damascus steel) can be damaged. Beginners should practice on cheap knives before using a machine.
What If My Knife Blade Has A Coating?
Do not polish coated or painted blades. Polishing can remove the coating and expose bare metal underneath, making it more likely to rust.
Where Can I Learn More About Knife Blade Polishing?
A good resource for deeper learning is the Wikipedia Knife page, which covers knife care, materials, and finishing in detail.
Polishing a knife blade is a rewarding skill that can transform how your knives look and work. With the right tools, patience, and attention to detail, you can make any blade shine—whether it’s your kitchen favorite or a cherished collector’s piece.
The satisfaction of holding a polished knife is worth the effort, and your knives will thank you with years of sharp, smooth performance.