
Painting your kitchen appliances is a smart, affordable way to refresh your cooking space. Many homeowners want a new look but find buying new appliances too expensive. Luckily, you can give your refrigerator, dishwasher, oven, or even your microwave a makeover with the right paint and method. This guide will walk you through everything you need to know—choosing materials, preparing surfaces, avoiding mistakes, and achieving a smooth, lasting finish.
You may be surprised to learn that painting kitchen appliances is not just for old, rusty items. Many people choose to paint newer appliances to match their kitchen design or cover up scratches and stains. Done well, painted appliances can look as good as new and last for years.
Some even use this method to try out a bold color before committing to a full remodel.
Let’s dive in and see how you can paint your kitchen appliances step by step, including tips and facts most beginners miss.
Can You Paint Kitchen Appliances?
The short answer is: yes, you can paint most kitchen appliances. The key is knowing which appliances are suitable and which paints work best.
Types Of Appliances You Can Paint
Most metal appliances like refrigerators, ovens, dishwashers, and microwaves can be painted. Some plastic parts (like handles or trim) can also be painted with the right products. Even the sides and doors of most appliances are safe to paint, but always check your manufacturer’s manual first for any warnings or special coatings.
However, it’s not recommended to paint appliances like toasters, coffee makers, or anything with direct food contact. Stovetops can be painted, but only with high-temperature paints designed for metal surfaces. Also, avoid painting heating elements or any area that gets extremely hot, as regular appliance paint won’t handle this heat.
Why Paint Appliances?
Painting is popular for:
- Updating the color to match new kitchen decor
- Covering old stains, rust, or scratches
- Saving money compared to buying new appliances
- Creating a unique look
In fact, a recent survey found that nearly 20% of homeowners have painted at least one appliance to improve their kitchen’s appearance. Some even repaint appliances when moving into a new home, to give the kitchen a personal touch. In rental properties, landlords sometimes paint appliances before new tenants arrive.
Choosing The Right Paint
Picking the correct paint is crucial. The wrong paint can peel, chip, or become sticky. Always check the manufacturer’s instructions for your appliance and the paint itself. Not all paints labeled “appliance paint” work on every surface, so match the paint to your appliance’s material for best results.
Common Types Of Appliance Paint
1. Epoxy Paint
Most popular for appliances. It’s durable, heat-resistant, and bonds well to metal. Epoxy spray paint is easy to use and dries quickly. It’s a good choice for refrigerators, dishwashers, and microwaves.
2. Appliance Enamel
Designed for metal appliances. Provides a glossy finish and resists chipping. Appliance enamel is often used by professionals and is available in both spray and brush-on versions.
3. Heat-resistant Paint
Used for ovens or stovetops. Can handle temperatures up to 400°F (204°C). For oven doors, cooktops, or any area near a heating element, this is essential.
4. Plastic-adhesion Spray
Needed for plastic parts. Bonds to plastic and resists scratches. Often used for handles, trims, or control panels that aren’t metal.
Paint Comparison
Here’s a simple comparison of popular appliance paints:
| Paint Type | Best For | Finish | Durability | Heat Resistance |
|---|---|---|---|---|
| Epoxy Spray | Metal surfaces | Glossy/Satin | High | Up to 200°F |
| Appliance Enamel | All appliances | Glossy | Very High | Up to 300°F |
| Heat-Resistant Paint | Ovens/Stovetops | Satin/Matte | Medium | Up to 400°F |
| Plastic-Adhesion Spray | Plastic parts | Satin | Medium | Up to 150°F |
Color Choices
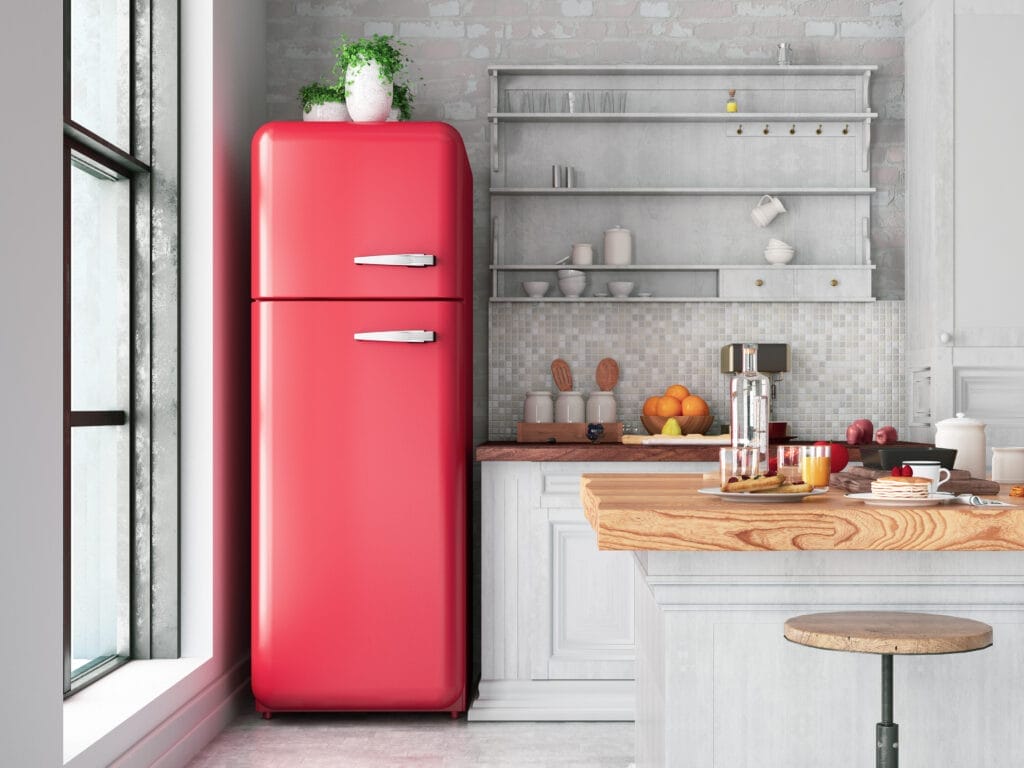
You can choose classic colors like white, black, or stainless steel. Some brands offer bold colors like red, blue, or green. A tip most beginners miss: matte finishes hide fingerprints better than glossy ones. If you want a more modern look, soft gray or navy blue are trending in kitchen design. You can even use two-tone colors for a custom style, like a white fridge with a black handle.
It’s also worth noting that certain paint brands have custom tint options. If you want your appliances to match a specific cabinet or wall color, some paint stores can mix a custom shade for you.

Credit: www.youtube.com
Tools And Materials Needed
Before starting, gather all the necessary supplies. Skipping this step often leads to mistakes or delays.
Basic Materials
- Appliance paint (see section above)
- Sandpaper (fine grit: 220–400)
- Primer (for bare metal or plastic)
- Painter’s tape
- Drop cloths or old sheets
- Screwdriver (for removing handles/trim)
- Degreaser or mild soap
- Lint-free cloths
- Paint sprayer or brush/roller (depending on paint type)
- Protective gear (gloves, mask, goggles)
Optional Materials
- Rust converter (if dealing with rusty spots)
- Plastic filler (for repairing cracks or holes)
- Heat-resistant primer (for oven/stovetop painting)
Most appliance painting projects cost $30–$80 in materials, much less than buying new appliances. If you already have some tools (like sandpaper or drop cloths), your cost will be lower.
A handy tip: Keep a small container or bag for screws and small parts you remove. Losing a screw or handle is a common beginner mistake.
Preparing The Appliance
Preparation is the most important step. Rushing through it is the main reason painted appliances fail.
Step-by-step Prep
1. Unplug And Move The Appliance
Safety first. Unplug and move it to a well-ventilated area, if possible. If you can’t move the appliance, open windows and use fans to improve airflow.
2. Remove Handles, Trims, And Racks
Use a screwdriver to remove anything you can. This makes painting easier and avoids paint on unwanted parts. Place all hardware in labeled bags so reassembly is easy.
3. Clean Thoroughly
Grease and dirt stop paint from sticking. Use a degreaser or mild soap and scrub every surface. Pay attention to hidden areas like the top of the door or behind handles.
4. Sand The Surface
Lightly sand with 220–400 grit sandpaper. This roughens the surface so paint bonds well. Wipe off dust with a lint-free cloth. Don’t sand too hard—just enough to remove gloss or rough patches.
5. Repair Rust Or Damage
If you see rust, use a rust converter. Fill any dents or cracks with plastic filler and sand smooth. For deep dents, you may need two coats of filler.
6. Tape Off Areas Not To Paint
Use painter’s tape to cover logos, buttons, and areas you don’t want painted. Take your time with this step—clean, straight tape lines give a more professional result.
7. Prime If Needed
Bare metal or plastic needs a primer. Apply according to instructions and let dry completely. On glossy surfaces, primer is especially important for good adhesion.
Here’s a comparison of prep steps for different appliances:
| Appliance | Extra Prep Needed | Common Mistakes |
|---|---|---|
| Refrigerator | Remove seals, shelves | Skipping sanding |
| Dishwasher | Cover control panel | Not taping buttons |
| Oven | Clean inside edges | Painting over grease |
| Microwave | Protect vents | Painting vents |
A non-obvious tip: If you are painting in a kitchen, cover nearby cabinets and floors with drop cloths. Paint spray can drift further than you expect.
Painting Process: Step-by-step
Painting kitchen appliances requires patience and careful technique. Here’s how to do it:
1. Choose Your Painting Method
Most appliance paints come in spray cans. For larger appliances, you can use a paint sprayer for a smoother finish. Brushes and rollers are best for smaller parts or touch-ups. Practice spraying on a piece of cardboard first to check your technique.
2. Apply The Paint
- Spray Paint: Hold can 10–12 inches from surface. Use smooth, overlapping strokes. Start with a light coat. Move your arm steadily to avoid drips.
- Brush/Roller: Apply thin, even layers. Avoid heavy coats to prevent drips.
Never rush. Thin coats dry better and look smoother. If you see a drip forming, lightly dab it with a clean brush or roller before it dries.
3. Let Each Coat Dry
Let the first coat dry for 30–60 minutes (check paint instructions). Then apply a second coat. Two to three coats usually give the best result. If you are using a new paint or painting over a dark color, you may need a third or even fourth coat.
4. Inspect And Touch Up
Check for missed spots or drips. Lightly sand any imperfections between coats, then wipe clean. This extra sanding step is what gives a factory-like finish.
5. Finish With A Clear Topcoat (optional)
For extra durability, apply a clear enamel topcoat. This protects against scratches and stains. Some brands sell topcoats made specifically for appliances.
6. Let Paint Cure
Most appliance paints need 24–48 hours to fully cure. Don’t reassemble or use the appliance until paint is hard and dry. If you rush, fingerprints or pressure can leave marks.
A bonus tip: In humid weather, allow extra drying time. Paint dries slower when the air is damp.
Tips For Painting Specific Appliances
Each appliance has unique challenges. Here are practical tips and examples:
Refrigerators
- Remove rubber seals and shelves for better access.
- Clean around door edges thoroughly—grease hides here.
- For stainless steel look, use a metallic appliance paint.
- Many refrigerator handles are plastic, so use a plastic-adhesion primer or spray.
Dishwashers
- Cover control panels and buttons with tape.
- Don’t paint inside the door.
- If the front is plastic, use a plastic-adhesion primer.
- Some older dishwashers have textured panels; extra sanding helps paint stick.
Ovens And Stovetops
- Only use heat-resistant paint.
- Do not paint inside the oven or on burner surfaces.
- For handles, check if they get hot—if so, use heat-resistant paint.
- Remove the oven door for easier painting if possible.
Microwaves
- Paint only the outside.
- Protect vents and avoid painting them.
- Remove the glass tray and tape over the door window.
- Some microwaves have rubber feet—avoid painting these.
Small Appliances
- For blenders, mixers, or coffee makers, only paint the outer shell.
- Never paint parts that touch food.
- If you paint a toaster, do not paint the slots or heating elements.
A pro tip: Always check for manufacturer labels or stickers with serial numbers. You may want to leave these unpainted for warranty or repair reasons.
Common Mistakes And How To Avoid Them
Many beginners make mistakes that ruin the finish or cause paint to peel. Here are the most frequent errors and how to avoid them:
1. Skipping Prep Steps
Not sanding or cleaning leads to peeling.
2. Using Wrong Paint
Household paint won’t last. Always use appliance-specific paint.
3. Painting Over Grease
Even small spots stop paint from sticking.
4. Applying Thick Coats
Causes drips and uneven finish.
5. Not Letting Paint Cure
Using the appliance before paint is fully dry can cause smudges.
6. Ignoring Vent Areas
Painting over vents can block airflow.
7. Painting Moving Parts
Paint on hinges or seals cracks and flakes.
A non-obvious insight: Most people forget to check the humidity and temperature when painting. Painting in high humidity or cold can ruin the finish. Ideal conditions are 60–80°F (15–27°C) with low humidity.
Another overlooked tip: Always shake spray paint cans for at least one full minute before spraying, and shake them between coats. This prevents uneven color or texture.
Safety Precautions
Painting appliances involves chemicals and dust. Always protect yourself:
- Wear gloves, mask, and goggles.
- Work in a well-ventilated area.
- Keep paint away from children and pets.
- Dispose of used materials safely.
According to the EPA, some appliance paints contain volatile organic compounds (VOCs). Always read labels and work safely. If you get paint on your skin, wash immediately with soap and water.
If you have sensitive lungs or allergies, consider using water-based appliance paints, which have less odor and fewer fumes.
Making Painted Appliances Last
You want your painted appliances to stay beautiful for years. Here are proven ways to make the finish last:
- Clean gently with mild soap and a soft cloth. Avoid harsh cleaners.
- Don’t scrub painted surfaces with abrasive pads.
- Touch up chips quickly to prevent rust.
- Avoid magnets on painted refrigerators—they can scratch the paint.
- For ovens and dishwashers, check for peeling every few months.
Surprisingly, many people get years of use from painted appliances if they follow these steps. For example, a painted refrigerator can last 5–7 years before needing a touch-up.
Extra tip: If you’re moving, pad painted appliances with blankets to avoid scratches during transport.
Cost And Time Estimates
Painting kitchen appliances is affordable and takes less time than you might think.
- Materials: $30–$80 per appliance
- Time: 2–4 hours for prep and painting, plus 24–48 hours curing
Compared to replacing appliances (often $500–$2,000), painting is a budget-friendly option. The biggest investment is your time and patience.
For large kitchens with several appliances, paint them one at a time to avoid overwhelming yourself.
Real-life Examples
Many homeowners share their appliance painting stories. Here are two examples:
- Sarah from Ohio painted her old refrigerator with white appliance enamel. She says, “It looks brand new, and I spent less than $50.”
- Mike in California used metallic spray to match his dishwasher to his stainless steel oven. His kitchen now looks modern, and he avoided spending $900 on a new dishwasher.
Another example: A couple in Texas painted their microwave and oven black to match their new cabinets. They found painting both together made the kitchen look more coordinated and stylish.
If you want more inspiration and details, you can check the guide on Family Handyman.
Comparing Painting Vs. Buying New Appliances
Painting and replacing appliances both have benefits. Let’s compare:
| Factor | Painting | Buying New |
|---|---|---|
| Cost | $30–$80 | $500–$2,000+ |
| Time | 2–4 hours + curing | Delivery + installation |
| Customization | Any color/finish | Limited choices |
| Environmental Impact | Low (reuse) | Higher (dispose old) |
| Durability | 5–7 years | 10–15 years |
Painting is ideal if your appliance works well but looks old. Buying new makes sense if the appliance is broken or very outdated.
A bonus: Painting lets you test a new color or style without a big commitment. If you change your mind, you can repaint next year for a new look.
:max_bytes(150000):strip_icc()/kitchen-color-palette-TealGold-1023-877a03d461d04205aa0bc90e6f3786d8.jpg)
Credit: www.marthastewart.com
Advanced Tips For A Professional Finish
If you want your painted appliance to look factory-finished, try these advanced techniques:
- Wet Sanding: After each coat, lightly wet sand with 400–600 grit sandpaper. This removes imperfections and creates a super-smooth surface.
- Spray Booth: If you have access, use a spray booth for even coats and dust-free drying.
- Multiple Thin Coats: Four or five thin coats are better than two thick ones. This prevents drips and ensures durability.
- Temperature Control: Paint in a climate-controlled room for best results.
- Polishing: After the paint is fully cured, use a polishing compound for extra shine.
Few beginners realize that patience is the main secret. Rushing leads to imperfections, but careful work delivers professional-looking results.
Another advanced tip: After polishing, apply a thin coat of car wax to add shine and protect the finish.
Painting Stainless Steel Appliances
Painting over stainless steel needs extra care. Stainless is smooth and paint can peel easily.
- Sand with fine grit sandpaper to roughen the surface.
- Use a bonding primer designed for metal.
- Choose metallic appliance paint for a realistic look.
- Apply a clear enamel topcoat for protection.
A common mistake: skipping primer on stainless steel. This causes peeling within weeks.
If you want to keep the “brushed” look, use a paint with metallic flecks and finish with a satin clear coat.
Credit: www.thisoldhouse.com
Removing Paint From Appliances
If you make a mistake or want to remove paint later, here’s how:
- Use paint remover designed for metal or plastic.
- Apply with a brush, let sit as directed.
- Scrape gently with a plastic scraper.
- Wash and sand the surface before repainting.
Never use harsh chemicals that can damage the appliance or cause toxic fumes. Test paint remover on a small area first.
If removing paint from plastic, avoid products with acetone—they can melt or warp the surface.
Environmental Impact
Painting appliances is environmentally friendly. You reuse old items instead of sending them to landfills. According to the EPA, over 10 million appliances are disposed of each year in the US. Painting helps reduce waste and saves money.
Every appliance you repaint instead of replace prevents hundreds of pounds of waste. Even using leftover paint or tools from other projects makes a difference.
Frequently Asked Questions
Can I Paint Appliances With Regular Wall Paint?
No. Regular wall paint does not bond well to metal or plastic. It will peel, chip, or become sticky. Always use appliance-specific paint for best results.
Is It Safe To Paint Appliances In My Kitchen?
It’s better to paint appliances in a well-ventilated area—like a garage or outdoors. If you must paint indoors, open windows and use fans. Wear a mask to protect from fumes.
How Long Will Painted Appliances Last?
Painted appliances last 5–7 years if you follow proper prep and use the right paint. Touch up chips and clean gently to extend life.
Can I Paint Appliances While They’re Plugged In?
No. Always unplug appliances before painting. This prevents shocks and keeps you safe.
What Should I Do If The Paint Starts To Peel?
If paint peels, lightly sand the spot, clean, and apply a touch-up coat. For larger peeling areas, remove all paint and start the process again.
Can I Paint The Inside Of My Appliance?
No. Never paint inside ovens, microwaves, dishwashers, or any area that comes into contact with food or heat. Only paint exterior surfaces.
—
Painting kitchen appliances is a rewarding, cost-effective project. With the right paint, careful preparation, and patience, you can transform old or mismatched appliances into beautiful, fresh pieces that match your kitchen style. It’s a practical solution for homeowners who want to save money and update their space.
Remember to follow safety steps, use the correct materials, and treat your painted appliances gently. If you follow this guide, your kitchen can look new again, and you’ll enjoy the results for years to come.