
A cutting board is one of the most used tools in every kitchen. Whether you cook daily or only sometimes, your cutting board faces water, food acids, knives, and constant handling. Over time, this can damage the wood, leading to cracks, stains, or even unsafe surfaces for food.
But with proper staining and sealing, you can make your board last longer, look better, and stay safer for food preparation.
Many people think staining and sealing a cutting board is only for professionals or advanced woodworkers. In reality, anyone can do it with the right guidance. This article explains every step, from choosing the right products to applying them safely, and gives practical tips so even beginners can achieve great results.
By the end, you’ll know how to stain and seal your cutting board with confidence.
Understanding Cutting Board Materials
Not all cutting boards are the same. Most are made from wood, but there are also boards from bamboo, plastic, or composite materials. Here, we focus on wood boards because they can be stained and sealed. Popular wood types include maple, walnut, cherry, oak, and teak. Each has unique qualities:
- Maple: Hard, durable, light color, closed grain.
- Walnut: Dark, rich color, medium hardness.
- Cherry: Reddish tone, softer than maple.
- Oak: Open grain, strong, but can absorb more moisture.
- Teak: Naturally oily, resistant to water.
Why does wood type matter? Some woods absorb stain better; others need more sealing to protect against water. For example, oak has open pores and can soak up more stain, but may need extra sealing. Teak already has natural oils, so it needs less sealing but may not take stain well.
Each wood type also brings its own look and feel to your kitchen. For example, maple is often chosen for a clean, bright appearance, making it great for a modern kitchen. Walnut boards look more elegant and can make even a simple kitchen feel rich.
Cherry develops a deeper color over time, while oak’s visible grain lines give a rustic touch. Teak is often preferred in humid climates because it resists moisture naturally.
Some beginners overlook that wood hardness affects knife wear. Maple and walnut are gentle on knife edges, while harder woods like teak can dull knives faster. If you use your board daily, choose a wood that balances durability and knife-friendliness.
Why Stain And Seal A Cutting Board?
Staining adds color and highlights the natural grain of the wood. Sealing protects the board from water, bacteria, and stains. Both together:
- Make the board look more attractive.
- Prevent warping and cracking.
- Keep food odors from soaking in.
- Help the board stay clean and safe.
Many people skip these steps, but a well-stained and sealed board can last for years without problems. In fact, a sealed board is much safer because bacteria cannot hide in the wood pores.
A well-maintained board also prevents food flavors from mixing. For example, if you cut onions and then fruit, a sealed board is less likely to transfer strong smells or tastes. This is especially important in small kitchens, where one board is used for many foods.
Another overlooked benefit: sealing makes daily cleaning much easier. Water and soap will not soak into the wood, so wiping the board is enough for most messes.
Choosing The Right Stain
Not all stains are safe for food contact. For a cutting board, you need a food-safe stain. Most commercial stains are not suitable. Instead, look for:
- Natural oils: Like walnut, coconut, or linseed oil. These can darken wood naturally.
- Food-safe wood stains: Some brands make stains specifically for kitchen items.
- Homemade stains: You can make a stain from coffee, tea, or vinegar and steel wool.
Always check the label: it should say food-safe or non-toxic when cured. Avoid stains with heavy chemicals, as these can leach into food.
You might notice that some cutting boards have an uneven color or patches. This often happens when a non-food-safe or poor-quality stain is used. Food-safe stains are designed to soak in evenly, giving a consistent look.
Some people use homemade stains to match the board to their kitchen style. For example, a coffee stain adds a subtle warmth, while tea gives a gentle golden tint. Vinegar and steel wool create a grey, weathered effect, popular for rustic kitchens.
However, homemade stains are less predictable—always test on a small area first.
| Stain Type | Food Safety | Color Range | Ease of Use |
|---|---|---|---|
| Natural Oil | Excellent | Light to Medium | Easy |
| Food-Safe Stain | Excellent | Wide | Moderate |
| Homemade Coffee/Tea | Good | Light Brown | Easy |
| Commercial Stain | Poor | Wide | Easy |
Many beginners miss this: even if a stain dries hard, it can still leach chemicals unless it’s specifically made for food contact.
Choosing The Right Sealer
Sealing is even more important than staining. The sealer keeps water, food juices, and bacteria out. For cutting boards, the best sealers are:
- Mineral oil: Pure, food-safe, easy to apply.
- Beeswax: Adds water resistance, gives a soft shine.
- Carnauba wax: Harder than beeswax, more durable.
- Food-safe oils: Like coconut or walnut oil.
Some people use polyurethane or lacquer, but these are not food-safe. Only use products that clearly say food-safe.
There are also “board creams” that mix oil and wax for extra protection. These creams fill small cracks and keep the surface smooth. Many professional kitchens use these creams for fast, easy maintenance.
Beginners sometimes choose sealers based on what they have at home, but using the wrong product can ruin the board. For example, using butter or bacon fat will make the board smell and attract pests.
| Sealer | Food Safety | Water Resistance | Durability |
|---|---|---|---|
| Mineral Oil | Excellent | Moderate | Needs re-application |
| Beeswax | Excellent | Good | Needs re-application |
| Carnauba Wax | Excellent | Very Good | Long-lasting |
| Polyurethane | Poor | Excellent | Very Durable |
A common mistake is using vegetable oils like olive or sunflower. These can go rancid and smell bad. Only use mineral oil or approved food oils.
Preparing The Cutting Board
Before you stain or seal, the board must be clean and smooth. This step is critical; a dirty or rough board will not absorb stain or sealer properly.
Cleaning
- Wash the board with warm water and mild soap.
- Scrub gently to remove stains or food bits.
- Rinse well and dry completely.
Never soak the board in water. This can cause warping.
You can also use a mixture of salt and lemon to remove strong odors or stains. Sprinkle salt on the board, rub with half a lemon, then rinse and dry. This method is especially helpful if the board smells like garlic or fish.
Sanding
A smooth surface is important. Use sandpaper, starting with 120 grit and moving to 220 grit for a fine finish.
- Sand with the grain, not against it.
- Wipe off dust with a damp cloth.
- Let the board dry before moving to the next step.
If your board has scratches or deep stains, you may need to sand more. Some beginners miss this, leaving rough spots that ruin the finish.
For very old or damaged boards, start with a rougher sandpaper (like 80 grit), then work up to finer grits. Don’t rush—sanding well makes staining and sealing much easier, and the final result will be much better.
Staining The Cutting Board
Now the board is ready for staining. Here is a step-by-step process:
- Choose your stain: Make sure it’s food-safe.
- Test the stain: Try a small spot on the board’s edge to see the color.
- Apply the stain: Use a clean cloth or brush. Wipe or brush the stain along the grain.
- Let it soak: Wait 5–10 minutes for the stain to penetrate.
- Wipe off excess: With a clean cloth, remove extra stain.
- Repeat if needed: For deeper color, apply a second coat after drying.
Always follow the manufacturer’s instructions. Some stains need more time to cure.
If you want to add designs, you can mask off areas with painter’s tape and stain only certain parts. This creates stripes or borders and makes your board unique.
Homemade Stain Example
You can make a simple stain from coffee. Brew strong coffee, cool it, and apply as above. This gives a light brown color and is fully food-safe.
For a different effect, try black tea or a mix of both. The color will be subtle but natural.
Drying And Curing
After staining, the board must dry fully. This can take several hours or even overnight.
- Place the board in a dry, well-ventilated area.
- Avoid direct sunlight, which can cause uneven drying.
- Don’t rush this step; proper drying ensures the stain sets well.
Some stains need curing time—check the label. Curing makes the stain safe for food.
If you live in a humid area, drying can take longer. Place the board near a fan or in an air-conditioned room for faster results.
One thing beginners miss: after drying, run your hand over the board. If it feels rough, lightly sand with very fine sandpaper (320 grit), then wipe clean before sealing.
Sealing The Cutting Board
Sealing locks in the stain and protects the wood. Here is how to do it:
- Choose your sealer: Mineral oil, beeswax, or carnauba wax.
- Apply the sealer: Pour a small amount on the board. Spread with a cloth or your hand.
- Let it soak: Wait at least 4 hours, or overnight for best results.
- Buff the surface: Use a clean, dry cloth to polish the board.
- Repeat as needed: For new boards, apply 2–3 coats.
For wax, melt it slightly and rub onto the board. Let it harden, then buff. Many people skip buffing, but it creates a smoother, more water-resistant surface.
For extra shine and protection, you can alternate oil and wax layers. Apply oil, let it soak, then wax and buff. This is how many professionals keep their boards in top shape.
Maintaining Your Cutting Board
Staining and sealing is not a one-time job. You must maintain the board:
- Reapply mineral oil every month.
- Wax every 2–3 months.
- Clean after each use, but never soak.
When the board looks dry or dull, it’s time to reapply oil. Some boards need more frequent sealing if used heavily.
After each use, wipe the board dry. If you notice any roughness, a quick sanding with fine sandpaper keeps the surface smooth.
A good habit: keep a small bottle of mineral oil in your kitchen. After washing and drying your board, add a few drops and rub it in. This quick step keeps your board in great condition.
Common Mistakes And How To Avoid Them
Many beginners make mistakes that can damage the board or make it unsafe.
- Using non-food-safe stains or sealers: Always check labels.
- Skipping sanding: Leaves rough spots that trap bacteria.
- Applying too much stain: Can cause sticky, uneven surface.
- Not letting stain or sealer dry: Leads to poor finish and unsafe board.
- Using vegetable oils: These can go rancid and smell bad.
- Ignoring maintenance: The board will crack and warp over time.
If you make a mistake, you can often fix it by sanding and starting again.
Another common error: forgetting to seal the edges. The edges of the board are most exposed to moisture, especially if you wash the board often. Always apply extra sealer to the edges.
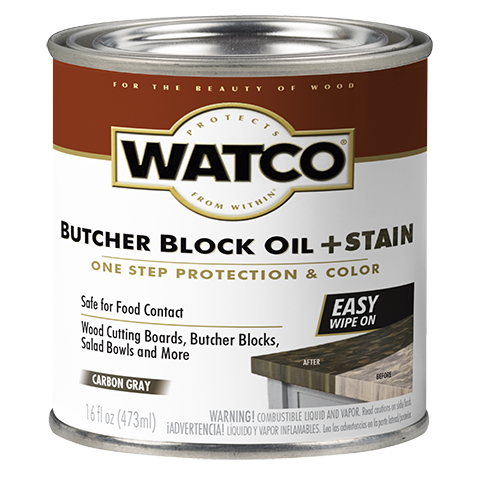
Credit: www.rustoleum.com
Advanced Tips For Best Results
If you want your cutting board to stand out, try these advanced methods:
- Layering stains: Use two different stains for a richer color.
- Custom wax blends: Mix beeswax and carnauba for a harder finish.
- Edge sealing: Pay special attention to the board’s edges, which absorb more moisture.
- Buffing with microfiber cloth: Gives a smooth, professional shine.
A non-obvious insight: Many boards fail at the edges first. Sealing the edges well can double the board’s life.
You can also add a drop of essential oil (like lemon or orange) to your wax for a fresh scent. Make sure it’s food-safe and use only a small amount.
Safety Precautions
Safety is important when working with stains and sealers. Even food-safe products can cause allergies.
- Always work in a ventilated area.
- Wear gloves if you have sensitive skin.
- Keep products away from children and pets.
- Wash hands after handling stains or oils.
If you react to a product, try a different oil or wax.
Some people are allergic to nuts, so avoid walnut oil if you have nut allergies. Always check ingredients, especially with natural products.
Real-life Example: Staining And Sealing A Maple Cutting Board
Let’s walk through a real example:
- Material: Maple (light color, closed grain)
- Stain: Homemade coffee stain
- Sealer: Mineral oil and beeswax mix
Step-by-step:
- Clean and sand the board (120, then 220 grit).
- Apply coffee stain with a cloth. Wait 10 minutes. Wipe off excess.
- Let dry overnight.
- Apply mineral oil. Let soak 4 hours.
- Rub on beeswax. Buff with a microfiber cloth.
- Repeat oil and wax twice.
Result: The board has a light brown tone, smooth surface, and water resistance. No smell or stickiness.
After a few weeks, the board still looks good and smells fresh. Food does not stain the surface, and cleaning is easy with just a damp cloth.
Comparing Different Stain And Sealer Combinations
Some combinations work better than others. Here’s a comparison:
| Stain | Sealer | Color | Durability | Food Safety |
|---|---|---|---|---|
| Natural Oil | Mineral Oil | Light | Medium | Excellent |
| Food-Safe Stain | Beeswax | Medium | Good | Excellent |
| Coffee/Tea | Carnauba Wax | Light Brown | Very Good | Good |
| Commercial Stain | Polyurethane | Wide | Excellent | Poor |
For cutting boards, always put food safety first, even if other options look more durable.
How To Fix Common Problems
If you see issues after staining or sealing, you can fix most of them.
- Sticky surface: Wipe with a dry cloth and let cure longer.
- Uneven color: Sand lightly and reapply stain.
- Rancid smell: Remove old oil with mild soap, then use mineral oil.
- Warping: Let the board dry flat, sand, and reseal.
A non-obvious insight: If your board keeps warping, check humidity levels. Too much moisture in the kitchen is often the hidden cause.
If odor remains after cleaning, try wiping the board with white vinegar, then let it air dry. Vinegar removes most smells without harming the wood.
Staining And Sealing Bamboo Cutting Boards
Bamboo is different from wood. It’s harder, with a unique grain. Most bamboo boards don’t need stain, but you can seal them.
- Use mineral oil or beeswax.
- Avoid staining; it doesn’t absorb well.
- Sand gently before sealing.
Bamboo is naturally water-resistant, but sealing helps keep it safe and looking new.
A tip: Bamboo boards can split at the ends if left too dry. Keep them oiled, especially in dry climates.
How Often Should You Stain And Seal?
For most cutting boards:
- Stain once, then seal regularly.
- Seal monthly for heavy use.
- Seal every 2–3 months for light use.
If you notice dryness, cracks, or dull color, it’s time to reseal.
If you live in a dry area or use the dishwasher (not recommended), you may need to seal more often.
Eco-friendly Options
Many people want eco-friendly products. Choose:
- Natural oils: Like walnut or coconut.
- Organic beeswax: Safe and sustainable.
- Homemade stains: Coffee, tea, or vinegar.
Avoid synthetic chemicals. Eco-friendly options are just as effective and better for health.
Look for products with minimal packaging and no added fragrances. These are gentler on the environment.

Credit: www.youtube.com
When To Replace Your Cutting Board
No matter how well you care for your board, there comes a time to replace it.
- Deep cracks that cannot be sanded out.
- Mold or rot that keeps returning.
- Loose joints in glued boards.
A well-maintained board can last many years, but safety always comes first.
If you see black spots that do not go away after sanding, it may be mold growing inside the wood. In this case, replace the board to protect your health.
Professional Advice
Many chefs prefer mineral oil and beeswax for their boards. It’s simple, effective, and keeps the board food-safe. Some advanced cooks use custom blends, but for most people, mineral oil is best.
A useful resource for food-safe finishes is Woodworking Network.
Professional kitchens often keep a regular maintenance schedule for all boards. This prevents problems and saves money in the long run.
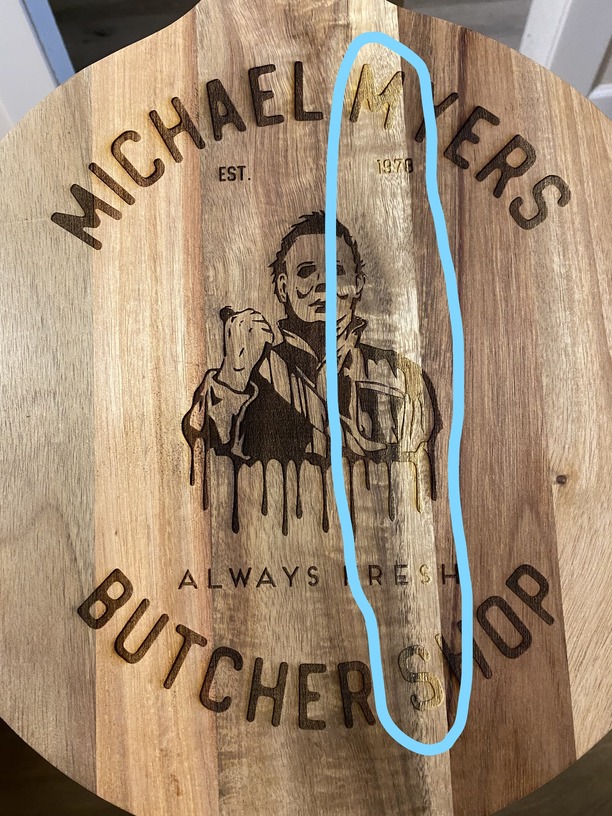
Credit: community.glowforge.com
Frequently Asked Questions
How Long Does It Take To Stain And Seal A Cutting Board?
The whole process usually takes 1–2 days. Staining can be done in 1 hour, but drying and curing need several hours or overnight. Sealing is quick, but also needs drying time.
Is It Safe To Use My Board Right After Sealing?
No. Always let the board dry and cure fully after sealing, usually overnight. This makes sure the sealer is safe and will not transfer to food.
Can I Use Olive Oil To Seal My Cutting Board?
No. Olive oil and other vegetable oils can go rancid, leading to bad smells and unsafe surfaces. Only use mineral oil or approved food-safe oils.
What If My Board Still Looks Dry After Sealing?
Apply another coat of mineral oil or wax. Some boards, especially new ones, absorb a lot of oil. Keep applying until the board stays shiny and smooth.
How Do I Remove Old Stains Or Odors From My Board?
Sand the surface lightly and wash with warm water and mild soap. For deep odors, rub with lemon or baking soda, then rinse and reseal.
Staining and sealing a cutting board is not hard, but it does need careful steps and the right products. With this guide, you can enjoy a beautiful, safe, and long-lasting cutting board in your kitchen. If you follow these tips, your board will serve you well for years and make food preparation safer and more enjoyable.