
Sharpening a Shun knife is not just about keeping your blade cutting vegetables or meat easily. It’s about honoring Japanese craftsmanship and protecting your investment. Many people buy Shun knives because of their sharpness and beauty. But after months or years of use, even the best Shun knife loses its edge. Owners worry: Will I ruin it if I sharpen it myself? Should I use a stone or a machine? Can I keep it as sharp as when it was new?
These questions are common. The truth is, with the right tools and knowledge, you can sharpen your Shun knives at home safely. You do not need to be a Japanese chef. You just need to understand the steel, the edge, and the right methods.
This guide will help you learn how to sharpen Shun knives completely. You will understand the tools, the techniques, and the mistakes to avoid. Whether your knife is a classic chef’s knife or a delicate paring knife, you’ll learn how to restore that legendary edge and keep your Shun knife performing for years.
Why Shun Knives Need Special Care
Shun knives are made with high-quality Japanese steel. Most Shun blades use VG-MAX or VG-10 steel, which are much harder than Western steels. The edge is ground to a 16-degree angle per side, making them sharper but also more delicate.
A regular sharpening method that works for German knives can easily damage a Shun. The steel’s hardness means it holds an edge longer, but when it dulls or chips, you must treat it with care. Using the wrong tool or technique can chip the blade, scratch the finish, or make the edge uneven.
When Does Your Shun Knife Need Sharpening?
A common mistake is waiting until the knife is very dull or even starts slipping. Here’s how you know it’s time to sharpen:
- The knife no longer slices tomatoes or paper-thin foods cleanly.
- You feel resistance cutting through onions or meat.
- The blade slides off food instead of biting in.
- Regular honing with a ceramic rod no longer restores the edge.
If you use your Shun knife daily, expect to sharpen it every few months. If you use it only on weekends, sharpening once or twice a year is enough. Always hone your knife regularly, but sharpening is for when honing no longer works.
Understanding Honing Vs. Sharpening
Many people confuse honing with sharpening. Honing simply straightens the edge that bends with use. Sharpening removes steel to create a new edge. Shun knives need both, but not as often as you might think.
- Honing: Use a ceramic rod weekly or after every few uses. Honing does not remove much metal.
- Sharpening: Use a whetstone or professional service when the edge becomes dull or chipped. Sharpening removes steel to reshape the edge.
A common beginner mistake is over-sharpening. This wears your knife down too fast. Regular honing keeps the edge aligned, so you need to sharpen less often.
Tools You Need To Sharpen Shun Knives
Sharpening a Shun knife requires specific tools. Avoid using pull-through sharpeners or electric grinders. These tools are too rough for the thin, hard edge of a Shun.
Essential tools:
- Whetstone (Sharpening Stone): The best way to sharpen Shun knives. Choose stones with 1000 and 6000 grit for most needs.
- Ceramic Honing Rod: For regular edge alignment.
- Sharpening Guide Rail: Helps beginners keep the right angle.
- Clean Cloth and Water: For cleaning and wetting the stone.
- Towel or Non-Slip Mat: Keeps the stone stable.
Optional:
- Strop: For final polishing of the edge.
- Angle Guide: To keep the 16-degree angle.
Never use steel honing rods or cheap pull-through sharpeners on Shun knives. They can chip the hard Japanese steel or round off the sharp edge.
Choosing The Right Whetstone For Shun Knives
Shun knives require a high-quality whetstone. The right stone makes sharpening easier and safer.
| Grit | Purpose | When to Use |
|---|---|---|
| 400–800 | Coarse | Repair chips, very dull knives |
| 1000–2000 | Medium | Regular sharpening |
| 3000–8000 | Fine | Polishing and finishing |
For most Shun owners, a 1000/6000 combination stone is ideal. The 1000 grit will sharpen, and the 6000 grit will polish the edge.
Non-obvious insight: Always soak your whetstone for at least 10–15 minutes before use unless it’s a “splash-and-go” stone. Dry stones can scratch or crack your knife.
Preparing Your Knife And Workspace
Before sharpening, make sure your workspace is clean, bright, and safe. Follow these steps:
- Place a damp towel or non-slip mat under your stone to prevent slipping.
- Have a bowl of water nearby to wet the stone and clean the blade.
- Wash your Shun knife with warm water and soap. Dry it completely.
- Remove any food residue, oil, or rust. Even a little grit can scratch the blade.
Never try to sharpen a dirty or greasy knife. It can slip and cause injury or damage your stone.

Credit: shun.kaiusa.com
Step-by-step Guide To Sharpening Shun Knives With A Whetstone
Sharpening a Shun knife is a careful process. Here’s how to do it right:
1. Soak Your Whetstone
- Place the stone in water for 10–15 minutes.
- If the stone produces bubbles, it is soaking up water.
- Take it out only when no more bubbles rise.
2. Set The Correct Angle
Shun knives have a 16-degree edge angle. Use an angle guide rail or estimate by raising the spine about the thickness of two coins above the stone.
Common mistake: Many people use a 20-degree angle, which is too wide for Shun knives. This makes the edge duller and harder to cut with.
3. Sharpen The First Side
- Hold the knife so the edge faces you.
- Place the heel (back of the blade) on the stone at the correct angle.
- Use gentle pressure and draw the blade from heel to tip in a sweeping motion.
- Cover the entire edge, keeping the same angle.
- Repeat this motion 10–15 times, or until you feel a slight “burr” (raised metal) on the opposite side.
4. Sharpen The Other Side
- Flip the knife and repeat the same motion on the other side.
- Make sure the angle and pressure are the same.
- Continue until you feel the burr on the original side.
5. Polish The Edge
- Switch to the fine grit side (6000).
- Use lighter pressure and repeat the motions.
- Polish each side until the edge feels smooth and sharp.
6. Remove The Burr
- Gently strop the edge on the stone or use a leather strop.
- This removes any tiny metal bits and makes the edge clean.
7. Clean And Dry The Knife
- Rinse the blade in clean water.
- Dry it completely with a towel.
- Clean your stone and let it dry before storing.
Checking The Sharpness Of Your Shun Knife
After sharpening, test the sharpness safely:
- Paper Test: Hold a sheet of paper vertically. Slice down. A sharp knife should cut smoothly.
- Tomato Test: Try slicing a ripe tomato. A sharp knife will slice cleanly without squishing.
- Hair Test: Very sharp blades can shave arm hair easily (be careful).
Never check sharpness by touching the edge with your finger. You can cut yourself badly.
Non-obvious insight: The sound of the blade on the stone should be smooth, not scratchy. A rough sound means your angle or pressure is off.
Using A Ceramic Honing Rod With Shun Knives
Between sharpenings, keep your Shun knife sharp with a ceramic honing rod. This does not replace sharpening but helps maintain the edge.
How to use it:
- Hold the rod vertically on a towel.
- Hold the knife at a 16-degree angle.
- Draw the blade down and across the rod, starting at the heel.
- Repeat on the other side, alternating strokes 5–6 times per side.
Do not use a steel honing rod. Shun’s hard steel can chip or become micro-serrated.
Should You Use A Pull-through Sharpener Or Electric Sharpener?
Never use a pull-through or electric sharpener on Shun knives. These tools:
- Use a fixed angle (often 20–22 degrees) that is too wide for Shun’s 16-degree edge.
- Remove too much metal, shortening the life of your knife.
- Can chip the thin, hard edge or scratch the blade’s surface.
Always use a whetstone or send your knife to a professional sharpener who understands Japanese knives.
How Often Should You Sharpen Shun Knives?
Sharpening frequency depends on use and care:
| Usage | Honing | Sharpening |
|---|---|---|
| Daily (Chef/Pro) | Every 2–3 days | Every 2–3 months |
| Weekly (Home cook) | Every use | Every 6–12 months |
| Occasional | Before/after use | Once per year |
Remember, regular honing means you will sharpen less often. Over-sharpening removes valuable steel and shortens the knife’s life.
Common Mistakes When Sharpening Shun Knives
Many people make the same errors when sharpening Shun knives. Avoid these:
- Using the wrong angle: 20 degrees is too wide; use 16 degrees.
- Using a steel honing rod: Only use ceramic.
- Applying too much pressure: Let the stone do the work.
- Not soaking the stone: A dry stone can scratch or chip your knife.
- Inconsistent strokes: Uneven sharpening creates a wavy edge.
- Sharpening too often: Only sharpen when honing no longer helps.
- Neglecting to clean the blade and stone: Metal dust can scratch or damage.
- Using cheap sharpeners: These can ruin your knife quickly.
- Ignoring the burr: Always check for and remove the burr for a clean edge.
- Not drying the knife after sharpening: Moisture can cause rust, even on stainless steel.
Non-obvious insight: Many beginners don’t realize that micro-chips are hard to see but can ruin the feel of cutting. Always check the edge in good light.
Can You Sharpen Shun Knives At Home Or Should You Use A Professional?
You can sharpen your Shun knives at home if you follow the right steps and use the right tools. However, there are times when professional help is better:
- If the blade has large chips or is badly damaged.
- If you cannot keep a consistent angle.
- If you are not confident using a whetstone.
Shun offers a free sharpening service for their knives in many countries. You only pay for shipping. Some local Japanese knife stores also offer professional sharpening. Always choose a sharpener who understands Japanese knives.
Professional sharpening is recommended once every 1–2 years to restore the factory edge.
Caring For Your Shun Knife After Sharpening
After sharpening, take extra care of your knife:
- Always hand wash and dry immediately.
- Store in a knife block, sheath, or on a magnetic strip.
- Never put Shun knives in the dishwasher.
- Avoid cutting bones, frozen foods, or hard objects.
- Use a wood or plastic cutting board—never glass or stone.
Proper care extends the life of the sharp edge and prevents chips or rust.
Sharpening Different Shun Knife Types
Shun makes many different knives: chef’s knives, santoku, paring, nakiri, and more. The sharpening method is the same, but be aware of blade shape:
- Chef’s Knife: Long curve, easy to sharpen in a sweeping motion.
- Santoku: Shorter, less curve, sharpen in short, controlled strokes.
- Nakiri: Flat edge, sharpen the full length with even pressure.
- Paring Knife: Small, requires more control, use the tip of the stone.
Always keep the original edge profile. Don’t try to “fix” curves or angles unless you are experienced.
Sharpening Shun Knives With A Guided Sharpening System
If you struggle with holding the right angle, a guided sharpening system can help. These tools clamp the knife at a fixed angle and move the stone for you.
Pros:
- Consistent angle, safe for beginners
- Less risk of damaging the edge
Cons:
- Can be expensive
- May not fit all blade shapes
- Slower than freehand sharpening
Make sure the system allows for a 16-degree angle, not just 20 degrees.
How Shun Knife Sharpening Differs From Western Knives
Shun knives are harder and sharper than most Western knives. Key differences:
- Edge angle: Shun is 16 degrees, Western is usually 20–22 degrees.
- Steel hardness: Shun (VG-MAX, VG-10) is 60–61 HRC, Western (like Wüsthof) is 56–58 HRC.
- Sharpening tool: Shun needs fine stones; Western knives can use steel rods or pull-through sharpeners.
Sharpening a Shun knife with a Western method will make it duller and wear faster. Always use Japanese methods for Japanese knives.
Can Shun Knives Be Sharpened With Diamond Stones?
Diamond stones are very hard and cut quickly. They can be used for Shun knives but with care:
- Use very light pressure. Too much force can chip the blade.
- Only use fine-grit diamond stones (1000+). Coarse diamonds are too rough.
- Rinse the blade often to avoid scratching.
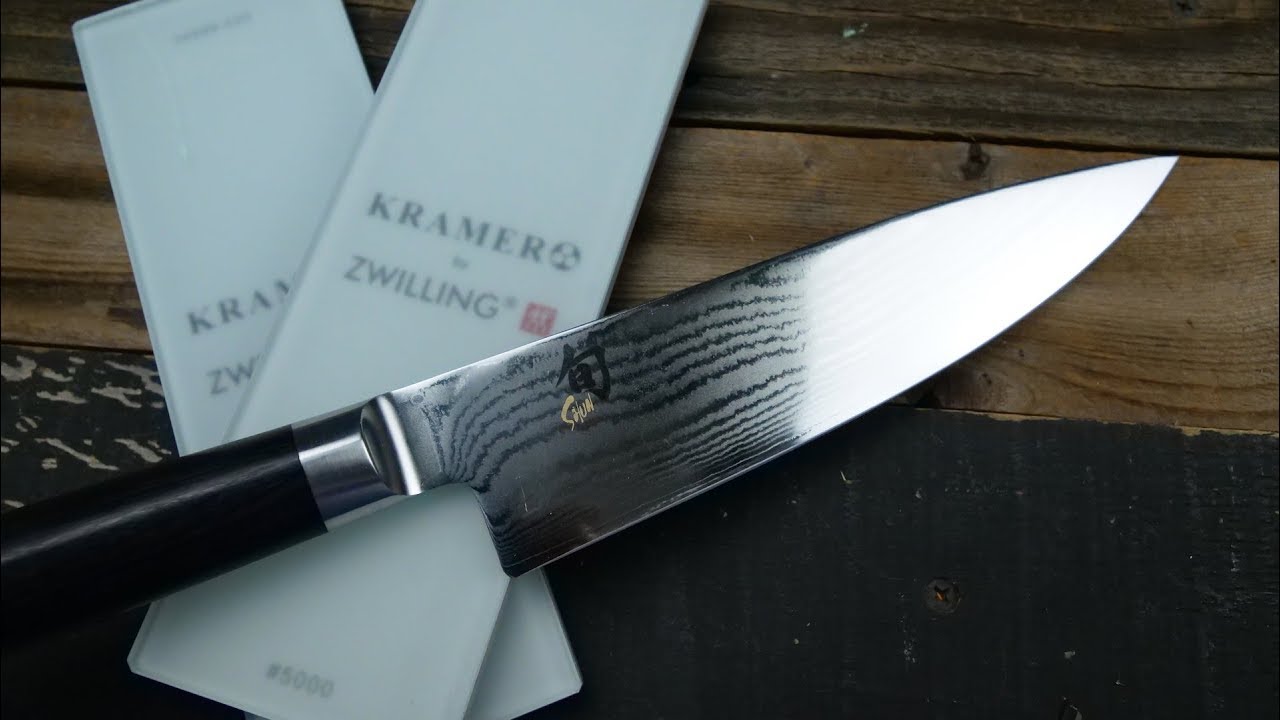
For most home cooks, a traditional water stone is safer and gives a better finish.
Credit: www.youtube.com
How To Store Your Sharpened Shun Knife
After sharpening, store your knife safely:
- Use a wooden knife block with wide slots.
- Store in a blade guard or sheath if in a drawer.
- Use a magnetic strip (wood-covered is best) to avoid scratching.
Never store your knife loose in a drawer. The edge will become dull or chipped quickly.
Tips For Maintaining Your Shun Knife’s Edge Longer
- Use only wood or plastic cutting boards.
- Clean and dry immediately after use.
- Avoid twisting or prying with the blade.
- Store the knife safely.
- Hone regularly with a ceramic rod.
A well-maintained Shun knife may only need sharpening once or twice a year.
Credit: www.reddit.com
The Science Behind Shun Knife Sharpness
Shun knives use VG-MAX or VG-10 steel. These steels are hard (60–61 HRC) and can be sharpened to a very fine edge.
- Hardness: Means the edge stays sharp longer.
- Thin edge: Makes cutting easier but more delicate.
- Damascus cladding: Protects the core steel and adds beauty.
A sharper edge means less force is needed to cut, making food preparation safer and more enjoyable.
Professional Vs. Home Sharpening: Which Is Better?
| Aspect | Home Sharpening | Professional Sharpening |
|---|---|---|
| Cost | Low (after buying stones) | Varies ($10–$30 per knife) |
| Convenience | Anytime | Must send knife or visit shop |
| Edge Quality | Good (with practice) | Excellent, factory-like |
| Risk | Beginner mistakes possible | Low, if expert in Japanese knives |
| Time | 10–20 minutes per knife | Several days (shipping) |
If you want complete control and are willing to learn, home sharpening is rewarding. For a perfect edge, professional service is best once a year.
Real-world Example: Sharpening A Shun Classic Chef’s Knife
Consider a home cook who uses their Shun Classic 8-inch Chef’s Knife daily. After six months, the knife no longer slices tomatoes cleanly.
Steps they followed:
- Washed and dried the knife.
- Soaked a 1000/6000 grit whetstone.
- Set the knife at a 16-degree angle using a guide rail.
- Sharpened each side 15 times on 1000 grit, then 10 times on 6000 grit.
- Tested with a sheet of paper—clean cut.
- Cleaned, dried, and stored the knife in a block.
Result: The knife felt as sharp as new. The owner felt more confident and enjoyed cooking more.
Frequently Asked Questions
What Grit Stone Should I Use For My Shun Knife?
For most sharpening, use a 1000-grit stone for sharpening and a 6000-grit stone for polishing. If your knife is very dull or chipped, start with a coarse 400–800 grit stone. Finish with a fine 6000–8000 grit for a razor-sharp edge.
How Do I Know If I Am Using The Correct Angle?
Shun knives should be sharpened at a 16-degree angle per side. You can use an angle guide rail or measure by raising the spine about two coins above the stone. Practice on a cheap knife first to build confidence.
Can I Use An Electric Sharpener On My Shun Knife?
No. Most electric sharpeners are set for a 20-degree angle and are too aggressive for Shun’s hard steel. This can damage the edge or shorten the knife’s life. Always use a whetstone or professional service.
How Often Should I Sharpen My Shun Knife?
If you cook daily, sharpen your Shun knife every 2–3 months. For occasional use, sharpen once or twice a year. Regular honing with a ceramic rod keeps the edge aligned between sharpenings.
Where Can I Find More Information About Japanese Knife Sharpening?
For more detailed guidance and videos, visit the official Shun sharpening care page for expert advice directly from the manufacturer.
Caring for your Shun knife is a rewarding skill. With the right tools and knowledge, you will enjoy a sharper, safer, and more enjoyable cooking experience for years to come.