Seasoning a flat top may sound simple, but it’s one of the most important steps for anyone who owns a griddle or commercial flat top grill. A well-seasoned flat top creates a natural non-stick surface, prevents rust, and makes food taste better.
If you skip or rush the process, you can end up with sticky food, uneven heating, or a rusty, unusable surface. Many home cooks and professionals struggle with this step, not realizing that seasoning is both an art and a science.
With the right approach, you can transform your flat top into a reliable, easy-to-clean cooking tool that lasts for years.
What Is Seasoning And Why Does It Matter?
Seasoning a flat top means applying thin layers of oil and heating them until they bond to the metal. This process forms a protective coating called a polymerized layer. It’s not just for looks—it protects the steel from air and water, which can cause rust. It also fills tiny holes and cracks in the metal, creating a smooth, non-stick surface that makes cooking and cleaning much easier.
Many people think seasoning is a one-time job, but it’s actually a process you repeat and improve over time. Each layer builds on the last, making your flat top more resilient and effective. If you skip seasoning, you’ll notice right away: food will stick, the surface will rust easily, and cleaning will be a nightmare.
Some commercial kitchens season their flat tops daily, while home users may only need to do it every few months, depending on use and cleaning habits.
Choosing The Right Flat Top: Materials And Impact On Seasoning
The type of flat top you have changes how you should season it. Most flat tops are made from carbon steel, cold-rolled steel, or cast iron. Each material has pros and cons.
| Material | Heats Evenly | Rust Resistance | Seasoning Difficulty |
|---|---|---|---|
| Carbon Steel | Excellent | Low | Easy |
| Cast Iron | Good | Medium | Moderate |
| Stainless Steel | Fair | High | Difficult |
Carbon steel is the most common for both home and commercial use. It heats quickly and evenly, and the seasoning process works well because the oil bonds tightly. Cast iron is heavier and holds heat longer, but it’s more brittle and takes longer to season. Stainless steel is rare for flat tops and doesn’t hold seasoning well, so it’s not ideal.
Tools And Materials Needed For Seasoning
You don’t need fancy equipment, but using the right tools makes the job smoother and safer. Here’s what you’ll need:
- High-smoke-point oil (like flaxseed, canola, grapeseed, or avocado oil)
- Paper towels or lint-free cloths
- Tongs (for holding towels)
- Scraper or spatula
- Grill brush (for cleaning before seasoning)
- Heat-resistant gloves
- Mild dish soap
- Bucket or bowl of water
Some people use bacon grease or lard for seasoning, but vegetable oils are safer and give a more neutral flavor. Never use butter or olive oil—they burn at lower temperatures and will not polymerize properly.
Preparing Your Flat Top For Seasoning
Before you start, your flat top must be completely clean and dry. Any rust, old food, or leftover oils will ruin the new seasoning layer. Here’s how to get it ready:
- Scrape off debris: Use your scraper or spatula to remove any stuck-on food or residue.
- Wash with soap and water: Mix mild dish soap with warm water. Scrub the surface with a grill brush or cloth. Don’t soak the griddle—just clean the surface.
- Rinse and dry: Wipe down with clean water, then dry immediately with towels. Any moisture left behind can cause rust.
- Heat the flat top: Turn the heat to medium-high for 10-15 minutes. This opens the metal’s pores and removes hidden moisture.
- Cool slightly: Let the surface cool until it’s just warm to the touch. This helps the first layer of oil stick evenly.
A common mistake is skipping the soap on a new flat top. Manufacturers sometimes coat new metal with a protective wax or oil. If you don’t remove this, your seasoning will flake or smell bad.

Credit: www.youtube.com
Best Oils For Seasoning And Why They Matter
Not all oils work for seasoning. The best choices have a high smoke point (over 400°F/205°C) and are made of unsaturated fats, which bond well to steel when heated.
Popular options include:
- Flaxseed oil: Creates a hard, durable layer. Popular for first seasoning.
- Canola oil: Cheap, widely available, and works well for maintenance.
- Grapeseed oil: Neutral flavor, high smoke point.
- Avocado oil: High smoke point, but more expensive.
- Sunflower oil: Good for repeated use.
Avoid butter, margarine, or extra virgin olive oil. They burn and produce sticky layers that don’t protect the metal.
Here’s a quick comparison of popular oils:
| Oil | Smoke Point (°F) | Flavor | Durability |
|---|---|---|---|
| Flaxseed | 450 | Neutral | Excellent |
| Canola | 400 | Neutral | Good |
| Grapeseed | 420 | Neutral | Good |
| Avocado | 520 | Neutral | Very Good |
Non-obvious tip: Flaxseed oil can flake if you use thick layers. Always apply as thin a layer as possible.
The Step-by-step Process To Season A Flat Top
Getting your flat top seasoned well is all about patience and technique. Here’s a detailed guide:
1. Preheat The Flat Top
Turn your burners to high and let the surface get hot—at least 400°F (204°C). This helps open the pores of the metal and ensures water is gone. A properly preheated flat top will darken slightly and may even smoke a little.
2. Apply A Thin Layer Of Oil
Pour a small amount of oil onto the surface—about a tablespoon for a small home griddle or two for a large commercial flat top. Use a paper towel held with tongs to spread the oil very thinly over the entire cooking area, including the edges and corners.
Insider tip: If you see puddles or thick, sticky spots, you’ve used too much oil. Wipe off the excess. Thin layers bond better and don’t get gummy.
3. Heat Until Smoking
Turn the burners to medium-high and let the oil heat until it smokes. This process usually takes 10–15 minutes. The surface will change color, often turning brown, blue, or black. This is a good sign—the oil is bonding to the metal.
4. Cool And Repeat
When the smoking stops, turn off the burners and let the flat top cool for 10–15 minutes. Then, repeat the oiling and heating process 2–4 more times. Each layer adds strength and improves non-stick properties.
Non-obvious insight: The first few layers may look uneven. This is normal. Over time, the surface will become smoother and darker.
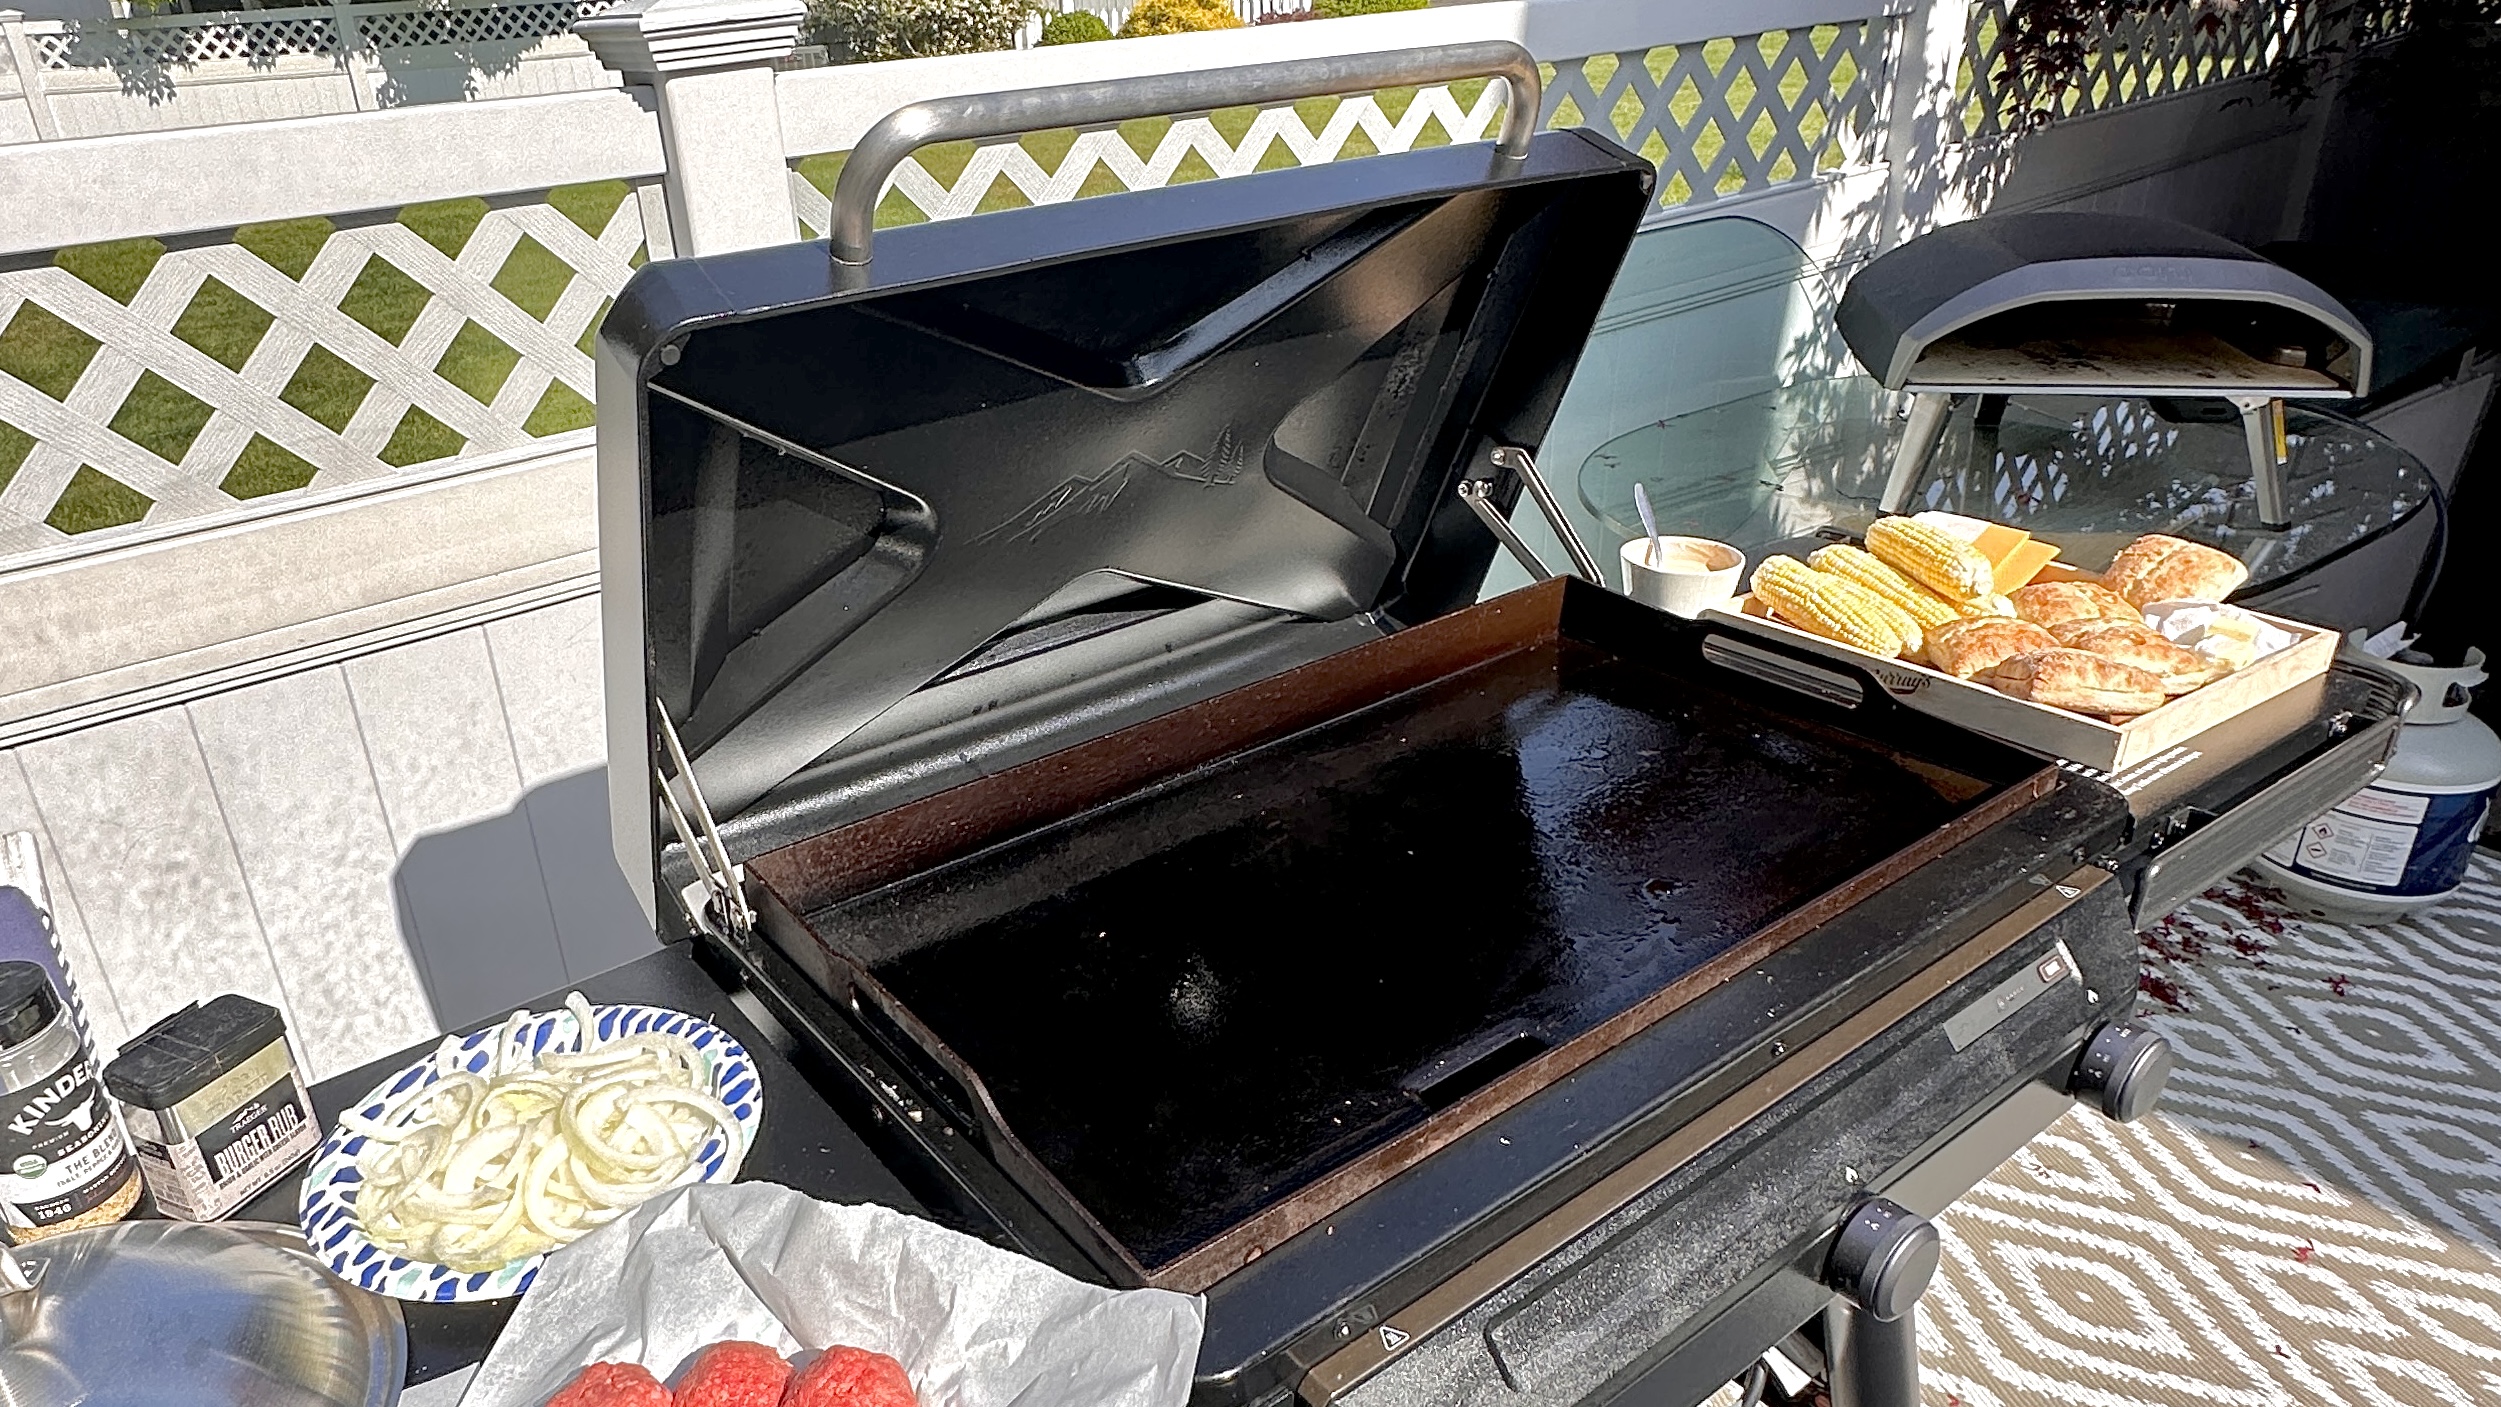
5. Test The Seasoning
After 3–5 cycles, your flat top should have a shiny, dark brown or black surface. Drop a little water on the surface—it should bead and sizzle. If food slides easily, you’re done.
If you see sticky areas, repeat the process with thinner oil layers.
Credit: www.youtube.com
Common Mistakes When Seasoning A Flat Top
Even experienced cooks make errors when seasoning a flat top. Avoid these common pitfalls:
- Using too much oil: Thick layers become sticky and uneven. Always use the thinnest layer possible.
- Not cleaning properly first: Any debris or old oil will cause the new seasoning to peel.
- Rushing the process: Each oil layer needs to smoke and bond fully. Don’t skip or shorten this step.
- Using the wrong oil: Low smoke point oils or animal fats can create sticky, smelly surfaces.
- Not covering the edges: Rust often starts at the corners or sides. Make sure oil gets everywhere.
Experience-based tip: If your flat top gets sticky or flaky, scrub it down and start over with a deep cleaning and fresh seasoning.
How Often Should You Reseason Your Flat Top?
There’s no single answer—it depends on use, cleaning, and the type of food you cook. Most home cooks can get by with a full reseasoning every few months. If you cook acidic foods (like tomatoes or vinegar), you may need to reseason more often, as acid can strip the protective layer.
Professional kitchens often season daily as part of closing duties, especially if the flat top is used heavily.
Signs you need to reseason include:
- Food starts sticking.
- Surface looks dull or rusty.
- You see bare metal spots.
Quick tip: After each cooking session, apply a thin layer of oil to keep the seasoning strong. This mini-seasoning maintains protection between full treatments.
Cleaning And Maintaining Your Seasoned Flat Top
A well-seasoned flat top is easy to clean, but you must use the right methods to keep the seasoning intact.
Daily Cleaning Routine
- Scrape off food: Use a spatula to remove food bits while the surface is still warm.
- Wipe with oil: Add a few drops of oil and wipe with a paper towel. This removes leftover food and keeps the surface shiny.
- Avoid water and soap: Never use harsh soaps or chemicals—they remove the seasoning.
- Tough spots: If there’s stubborn residue, use a small amount of kosher salt as a scrub, then wipe clean.
Deep Cleaning
If you need to remove stuck-on food or repair flaking seasoning:
- Heat the flat top until hot.
- Pour on water (not ice-cold) and use a grill brush to scrub.
- Dry thoroughly, then repeat seasoning process as needed.
Practical insight: Always re-oil after cleaning. Even a quick wipe with oil keeps rust away.
What To Do If Your Flat Top Rusts
Even with good care, rust can sometimes form—especially in humid climates or if you forget to oil the surface. Don’t panic; most flat tops can be rescued.
- Scrape off the rust: Use a grill brush or steel wool. Remove all orange or brown spots.
- Wash and dry: Clean with mild soap and water, then dry completely.
- Reseason: Follow the full seasoning process from scratch.
Helpful tip: A light coat of oil after every use is the best way to prevent rust.
Cooking On A Seasoned Flat Top: What To Expect
A seasoned flat top is a joy to use. Here’s what you’ll notice:
- Food slides easily. Even eggs and pancakes won’t stick.
- Better flavor. The seasoned surface adds a subtle, grilled taste.
- Faster cooking. Heat is distributed evenly, so there are no cold spots.
Certain foods, like bacon or burgers, actually improve the seasoning over time. Acidic foods (like tomatoes) can damage it, so cook these with extra oil or on a pan.
Example: After seasoning, try cooking hashbrowns or a grilled cheese sandwich. If they lift easily and brown evenly, your seasoning is perfect.
Flat Top Seasoning In Commercial Kitchens Vs. Home Use
Seasoning a flat top at home is similar to the process in a commercial setting, but there are some differences.
Commercial kitchens often have larger surfaces and more frequent use. They may season at the end of every shift, and the seasoning wears away faster due to constant cleaning and heavy use. Some restaurants use specialized griddle conditioners, but the basic principles stay the same.
Home cooks can go longer between full seasonings but should still wipe with oil after each use.
Key difference: In commercial settings, it’s vital to train all staff to follow the same cleaning and seasoning routine. Inconsistent care leads to patchy seasoning and more frequent repairs.
Comparing Popular Flat Top Brands And Their Seasoning Needs
Not all flat tops are created equal. Some brands use thicker steel, special coatings, or unique designs.
Here’s a simple comparison of three popular brands:
| Brand | Material | Initial Seasoning Required? | Ease of Maintenance |
|---|---|---|---|
| Blackstone | Carbon Steel | Yes | Easy |
| Camp Chef | Cold Rolled Steel | Yes | Easy |
| Cuisinart | Carbon Steel | Yes | Moderate |
Pro tip: Even if a flat top comes “pre-seasoned,” it’s a good idea to add your own seasoning layers before first use. Factory coatings are often thin and wear off quickly.
Advanced Seasoning Tips For Long-lasting Results
After you master the basics, a few advanced techniques can make your seasoning even better:
- Use different oils: The first few layers with flaxseed oil, then switch to canola or grapeseed for routine seasoning.
- Buff between layers: Lightly buffing with a dry towel before each new oil layer removes high spots and ensures even coating.
- Season at higher temperatures: Some experts recommend going up to 500°F (260°C) for final layers. This creates a harder finish but requires good ventilation.
- Don’t rush the cool-down: Letting the flat top cool slowly helps the seasoning set and prevents flaking.
Insider advice: If you notice blue or rainbow colors after heating, that’s normal. It’s a sign of a strong bond between oil and steel.
Troubleshooting: Fixing Common Seasoning Problems
Even with care, you might run into issues. Here’s how to fix them:
Sticky Surface
- Likely cause: Too much oil or not enough heat.
- Solution: Heat the flat top until sticky areas smoke and turn black. Wipe off excess.
Flaky Seasoning
- Likely cause: Thick, uneven layers or dirty surface.
- Solution: Scrub down to bare metal and reseason with thin layers.
Rust Spots
- Likely cause: Missed areas or not enough oil after cleaning.
- Solution: Scrub away rust, dry, and reseason.
Uneven Color
- Likely cause: Natural part of early seasoning.
- Solution: Keep cooking and oiling. The surface will even out with use.
Helpful reminder: Most problems are fixed by cleaning, drying, and applying thin layers of oil.
The Importance Of Proper Ventilation During Seasoning
Seasoning a flat top creates smoke as the oil polymerizes. Always work in a well-ventilated area. If seasoning indoors, turn on exhaust fans and open windows. The smoke isn’t toxic, but it can set off smoke alarms and linger.
For outdoor flat tops, wind can cool the surface. Block breezes if possible to keep the temperature steady.
Safety tip: Never leave a flat top unattended while heating oil. Overheating can damage the metal or even start a fire.
Seasoning Alternatives And Shortcuts: Do They Work?
Some companies sell griddle seasoning sprays or conditioners. These products can be convenient, but they’re not necessary. Basic vegetable oil works just as well for most users.
Another shortcut is seasoning in the oven (for removable griddles). This works, but most flat tops are too large for home ovens.
Recommendation: Stick with traditional oil seasoning unless you have a specialty product and know it’s safe for your flat top.
Why Seasoning Is Never Really Finished
Seasoning is a cycle, not a one-time event. Every time you cook, clean, and oil your flat top, you’re either building up or slowly wearing away the protective layer. With regular care, your flat top gets better over time, just like cast iron.
Non-obvious benefit: Well-seasoned flat tops develop a “memory”—they become easier to use and maintain the more you cook on them.
Credit: cinemaximiliaan.org
Frequently Asked Questions
How Long Does It Take To Season A Flat Top?
The initial seasoning process usually takes 1–2 hours. Each oil layer takes about 20–30 minutes to apply and heat. For best results, do 3–5 layers before first use.
Can I Use Olive Oil To Season My Flat Top?
No, olive oil has a low smoke point and can create sticky, uneven seasoning. Use oils with a high smoke point, such as flaxseed, canola, or grapeseed oil.
What Should I Do If My Flat Top Starts To Rust?
Scrub off the rust with a grill brush or steel wool, clean the surface, dry it well, and reseason with several thin layers of oil. Don’t use the flat top until the rust is completely removed.
How Do I Keep Food From Sticking To My Flat Top?
Make sure your seasoning is complete and in good shape. Always preheat your flat top before adding food, and use a little oil for cooking. Avoid acidic foods which can strip seasoning.
Is Seasoning A Flat Top The Same As Seasoning A Cast Iron Pan?
The process is similar—both use thin layers of oil and heat to build a non-stick surface. However, flat tops are larger and may need more oil and longer heating times. Always adjust your technique to the size and material of your flat top.
Seasoning your flat top may require patience, but the rewards are clear—a non-stick surface, better-tasting food, and a cooking tool that can last a lifetime. With these steps and tips, you’ll keep your flat top in top shape for years to come. For more detailed information and professional advice, check out the resources at Wikipedia.