
Particle board cabinets covered with a thin layer of veneer are common in kitchens, bathrooms, and offices. They look good and are less expensive than solid wood. But after some years, the veneer can start to peel, bubble, or crack, especially in humid places.
Many people think you must replace the whole cabinet when this happens. But that’s not true. With the right steps, tools, and some patience, you can repair peeling veneer and make your cabinets look almost new again.
This guide takes you step by step through repairing peeling veneer on particle board cabinets. You’ll learn not only how to fix the problem, but also how to prevent it from coming back. Whether you’re a DIY beginner or someone with a bit of experience, you’ll find practical advice, safety tips, and clever tricks that most guides miss.
Let’s get started on bringing your cabinets back to life.
Understanding Veneer And Particle Board Cabinets
Before you start, it’s important to know what you’re working with. Particle board cabinets are made from small wood particles glued together and pressed into panels. These panels are covered with a thin, decorative sheet called veneer. Veneer can be real wood or a plastic laminate that mimics wood. The veneer gives the cabinets their finished look.
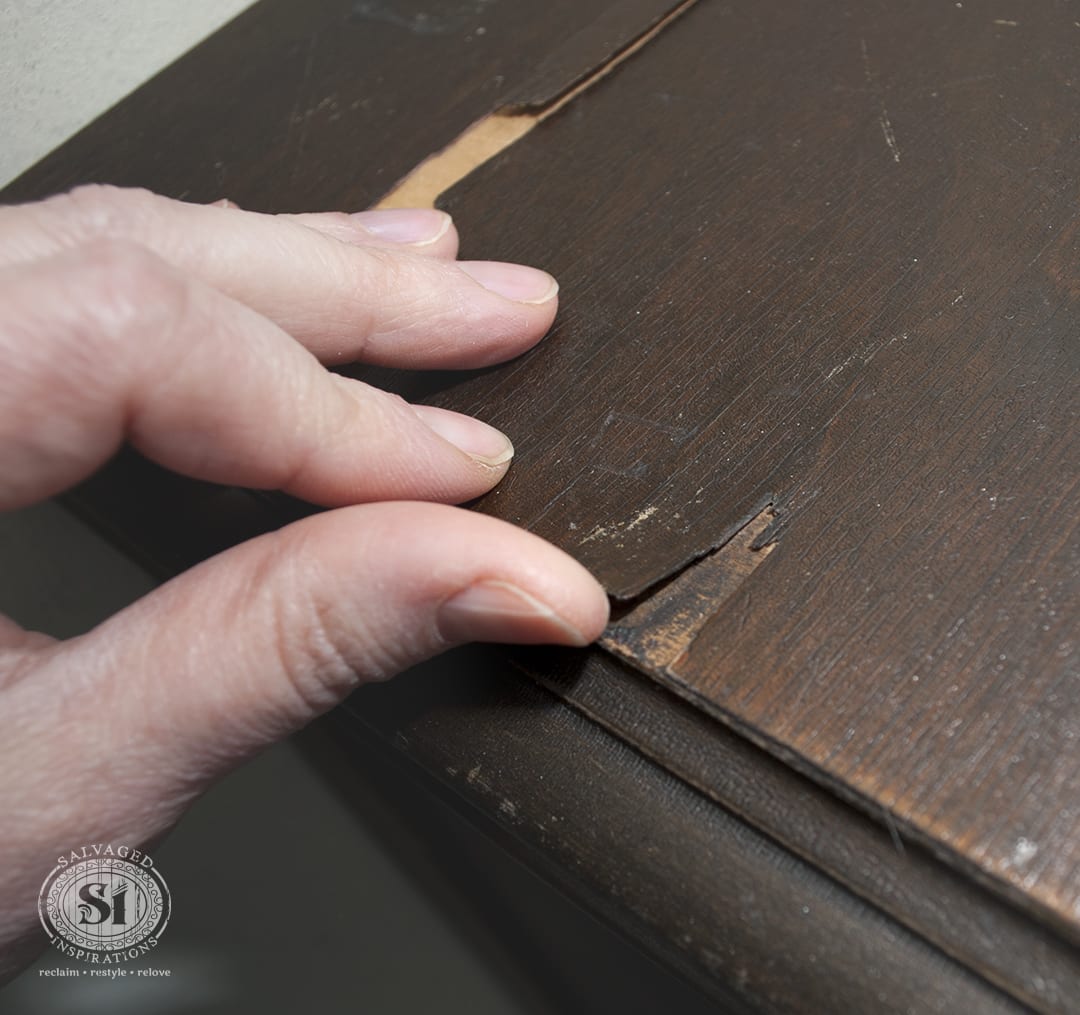
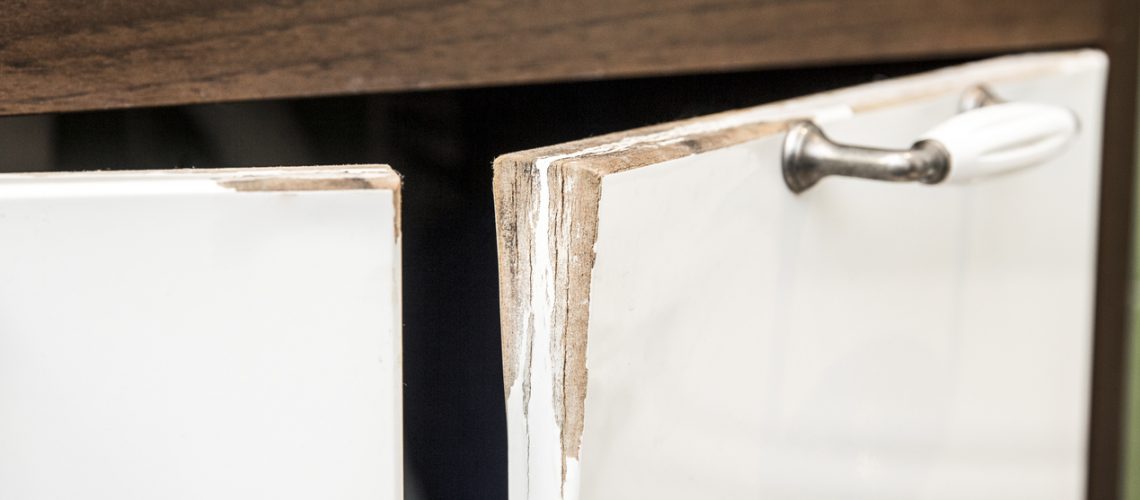
Peeling veneer is usually caused by moisture, heat, or old glue losing its strength. When moisture seeps into the particle board, the glue holding the veneer can break down. Heat from appliances or sunlight can also weaken the adhesive. Over time, the veneer lifts, bubbles, or chips off.
Knowing these causes helps you not only fix the problem but also avoid it in the future.
Why Veneer Peels And How To Spot It Early
Peeling doesn’t happen overnight. Here are the main reasons:
- Moisture exposure: Leaks under sinks, steamy kitchens, or spilled drinks can cause the particle board to swell and the veneer to loosen.
- Heat damage: Placing hot appliances too close to cabinets can weaken the glue.
- Aging glue: Over years, the adhesive naturally loses strength.
- Physical damage: Bumping or scraping the edges can start the peeling.
Early signs include:
- Small bubbles under the surface.
- Edges starting to lift or curl.
- Veneer feels loose when pressed.
If you catch these early, repairs are easier and less noticeable.
Credit: salvagedinspirations.com
Tools And Materials You Need
Repairing peeling veneer doesn’t require special skills, but using the right tools makes a big difference. Here’s what you’ll need:
- Wood glue (PVA glue or carpenter’s glue)
- Syringe or small brush (for applying glue under the veneer)
- Utility knife or razor blade
- Sandpaper (medium and fine grit)
- Clamps or heavy books (for applying pressure)
- Damp cloth
- Putty knife or small spatula
- Veneer edge banding (if replacing sections)
- Contact cement (for larger repairs)
- Wood filler (for chips or missing pieces)
- Matching paint or stain
- Clear topcoat or varnish (optional)
- Masking tape
- Safety gloves and glasses
Optional but helpful:
- Heat gun or hair dryer (to soften old glue)
- Painter’s tape
If you need to buy supplies, most can be found at hardware stores or online.
Step-by-step Repair Guide
Let’s break down the repair into clear steps. Each step includes tips that even experienced DIYers sometimes overlook.
1. Assess The Damage
Look carefully at the cabinet. How much veneer is peeling? Is it only at the edges, or are there large bubbles? If the particle board underneath is crumbling or moldy, you may need to replace that section. For most cases, you can repair what’s there.
Check for:
- How loose the veneer is (try lifting gently with a putty knife).
- Any missing pieces.
- Swollen or soft particle board underneath.
If the damaged area is larger than your palm, it may be better to replace the veneer in that section.
2. Clean The Area
Dirt, grease, or old glue can stop new adhesive from sticking. Use a damp cloth with mild soap to clean the area. Let it dry fully before you move to the next step. If there’s old glue, gently sand it off with medium grit sandpaper.
3. Remove Loose Veneer
If the veneer is still attached in some areas but flapping loose elsewhere, carefully lift it with a putty knife or utility knife. Don’t rip it off—try to keep as much as possible. If a section is too damaged or missing, you’ll have to patch it later.
For very stubborn veneer, a hair dryer or heat gun on low can soften old glue, making it easier to lift.
4. Prepare The Surface
Use fine sandpaper to smooth the particle board and the underside of the lifted veneer. Remove any old glue or rough spots. Wipe away dust with a damp cloth. This helps the new glue bond well.
5. Apply New Glue
For small areas, squirt wood glue under the peeled veneer using a syringe or small brush. Make sure to cover all edges and corners. For larger areas, use contact cement—apply it to both the veneer and the board, let it get tacky, then press together.
If you’re reattaching a large loose section, work slowly and cover a few inches at a time.
Non-obvious tip: If the particle board is swollen, inject glue into the cracks and clamp until dry before re-gluing the veneer. This gives a flat base and avoids future bumps.
6. Clamp And Hold
Press the veneer flat. Use clamps if possible. For spots where clamps won’t fit, use heavy books or bricks, spreading the weight with a flat board. Place a piece of wax paper between the clamp and the veneer to stop glue from sticking to your tools.
Hold for at least 1–2 hours, or follow the glue manufacturer’s directions. Overnight is best for a strong bond.
7. Patch Missing Veneer
If you have missing areas, you’ll need to patch them:
- Cut a piece of veneer edge banding or matching veneer slightly larger than the hole.
- Glue it in place using contact cement.
- Once dry, trim the edges with a sharp utility knife.
- Sand gently to blend with the surrounding area.
This step takes patience but gives a much better final look.
8. Fill And Smooth
Tiny chips or gaps can be filled with wood filler. Use a putty knife to press it in, then smooth the surface. Let it dry completely before sanding with fine grit sandpaper. Don’t rush—if you paint or stain before the filler is dry, you’ll get a rough finish.
Experienced tip: Tinted wood filler that matches your cabinet color makes repairs almost invisible, especially if you plan to stain instead of paint.
9. Sand And Prep For Finishing
After all glue and filler is dry, sand the area lightly to remove rough spots. Use fine grit paper and work with the grain. Clean away all dust with a damp cloth.
If you plan to paint, sand the entire door or panel for the smoothest results.
10. Paint, Stain, Or Seal
Match the repair to the rest of the cabinet:
- For painted cabinets: Prime and paint the repaired area, blending color and texture.
- For stained cabinets: Use a matching stain. Apply in thin layers, letting each dry before the next.
- For clear finishes: Use a clear topcoat or varnish to protect the repair and match shine.
If you can, test your finish on a hidden spot first to make sure the color matches.
11. Reattach Hardware And Clean Up
Once everything is dry, replace handles, hinges, and doors. Clean up extra glue or dust. Step back and admire your work—you’ve just extended the life of your cabinets by years.
When Should You Replace Instead Of Repair?
Sometimes, repairs are not enough. Here’s when replacement might be the better choice:
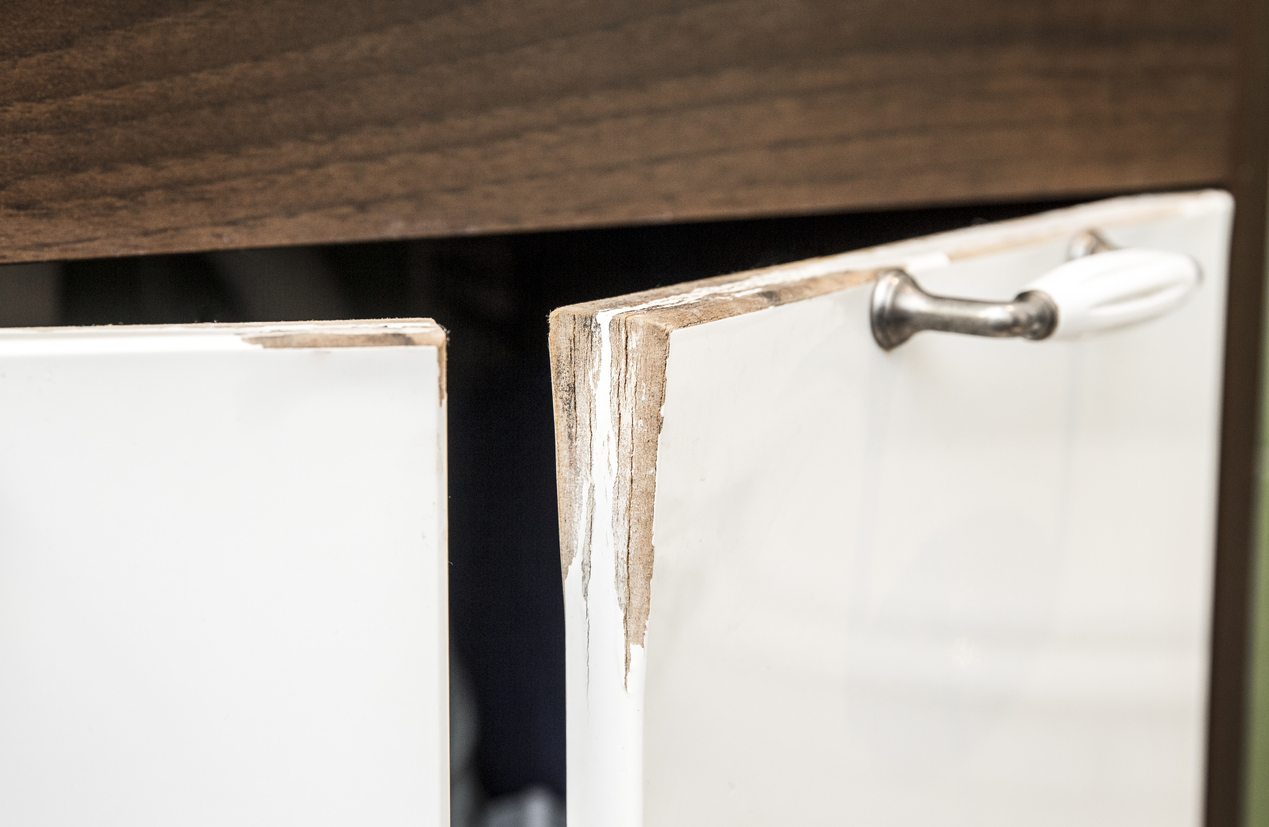
- The particle board is swollen, soft, or crumbling over a large area.
- Mold is present inside the cabinets.
- The veneer is missing from most of the cabinet.
- Previous repairs have failed.
In these cases, replacing just the door or panel may save time and money. You can buy new doors to fit your cabinet boxes, often called “cabinet refacing. ” But if the damage is local, repairs are faster and much cheaper.
Comparing Repair Methods
Not sure whether to use wood glue, contact cement, or patch with new veneer? Here’s a quick comparison to help you decide:
| Repair Method | Best For | Pros | Cons |
|---|---|---|---|
| Wood Glue | Small loose edges | Easy to use, strong bond | Not for large areas |
| Contact Cement | Large loose sheets | Works for bigger patches | Fumes, needs careful application |
| Veneer Patch | Missing pieces | Best finish, matches original | Requires skill, color matching |
| Wood Filler | Small chips/gaps | Quick, sands smooth | Hard to stain perfectly |
Credit: www.handhillscabinets.com
Mistakes To Avoid
Even experienced DIYers sometimes make these errors:
- Not cleaning the area: Glue sticks best to clean, dust-free surfaces.
- Skipping clamps: Without pressure, the veneer may lift again.
- Using too much glue: Excess glue can seep out and ruin the finish.
- Ignoring swollen particle board: Fix or replace soft spots before re-gluing.
- Rushing painting or staining: Always wait for glue and filler to dry fully.
Take your time—rushed repairs usually need to be redone.
Preventing Future Peeling
Repairing is good, but preventing is better. Here’s how to keep your cabinets in top shape:
- Control humidity: Use a dehumidifier or exhaust fan, especially in kitchens and bathrooms.
- Fix leaks fast: Water is the enemy of particle board and veneer.
- Use gentle cleaners: Harsh chemicals can wear down the finish and glue.
- Protect from heat: Don’t place hot items right next to cabinet edges.
- Check for early signs: Small bubbles or lifted edges are easier to fix early.
With these simple habits, your cabinets can last many extra years.
Cost And Time Estimates
Wondering how much this repair will cost? Here’s a breakdown:
| Item | Typical Cost | Notes |
|---|---|---|
| Wood Glue | $4–$8 | One bottle lasts many repairs |
| Contact Cement | $6–$12 | For large areas |
| Veneer Banding | $8–$20 (8ft roll) | For patches |
| Wood Filler | $5–$10 | Optional |
| Sandpaper | $4–$6 (pack) | Essential for smooth finish |
| Paint or Stain | $8–$20 | Depends on color/brand |
| Clamps/Weights | Free–$15 | Use books if no clamps |
Total typical cost: $20–$50 for most repairs.
Time needed: 2–3 hours active work, plus drying time.
This is much cheaper than buying new cabinets or hiring a pro.
Real-life Example: Fixing A Peeling Kitchen Cabinet
Let’s look at a common scenario. The lower kitchen cabinet near the sink starts peeling at the corner. The particle board is a little swollen, but not falling apart.
Steps followed:
- Carefully lifted the peeling veneer with a putty knife.
- Cleaned the area with a damp cloth and let it dry.
- Sanded the particle board and underside of the veneer.
- Injected wood glue into the swollen particle board and clamped overnight.
- Applied glue under the lifted veneer, pressed flat, and clamped again.
- Filled small chips with tinted wood filler.
- After drying, sanded, stained, and applied a clear topcoat.
Result: The repair blended well. Only someone looking closely could spot it. Cost was under $30, and the cabinet lasted another five years without more peeling.
Advanced Tips For A Flawless Finish
- Use wax paper: Place it under clamps to avoid glue sticking to your tools.
- Blend color: If you can’t match stain exactly, add a little paint to your stain or filler.
- Feather edges: When sanding, feather the edge of the repair into the old surface for a seamless look.
- Test finishes: Always test your paint or stain on a scrap or hidden area first.
- Work in small sections: Don’t rush—doing a little at a time gives better results.
Hiring A Professional Vs. Diy
Sometimes, hiring a pro makes sense, especially for large jobs or high-end cabinets. Here’s how DIY compares to hiring a professional:
| Factor | DIY | Professional |
|---|---|---|
| Cost | $20–$50 (materials only) | $150–$400 (per cabinet door) |
| Time | 2–3 hours + drying | 1–2 hours (pro work) |
| Finish Quality | Good with care | Excellent, seamless |
| Control | Full control over color and process | Less flexible |
DIY is a great choice for most homeowners, especially on a budget.
Environmental Impact: Repair Vs. Replace
Repairing cabinets is not just cheaper—it’s greener. Most particle board contains formaldehyde and can’t be recycled easily. Throwing away a cabinet adds to landfill waste. By fixing instead of tossing, you help the environment and save resources. Even small repairs make a difference over time.
Where To Find Matching Veneer And Supplies
If you need new veneer, check:
- Local hardware stores (Home Depot, Lowe’s)
- Online suppliers (Woodcraft, Rockler)
- Cabinet shops (sometimes sell offcuts)
- Specialty stores for edge banding
Take a piece of your cabinet or a clear photo to match color and grain as closely as possible. If you can’t match exactly, consider painting for a uniform look.
Safety Tips
- Always wear safety gloves and glasses when cutting or sanding.
- Use glue and contact cement in a well-ventilated area.
- Keep tools out of reach of children.
- Dispose of old veneer, rags, and unused chemicals safely.
Frequently Asked Questions
How Long Will A Veneer Repair Last?
A well-done repair can last as long as the original cabinet—often five to ten years or more. Keeping moisture away and using good glue is the key.
Can I Paint Over Repaired Veneer?
Yes, once the glue and filler are dry and sanded, you can paint over the veneer. Use primer first for the best results and durability.
What If The Particle Board Is Swollen?
Small swelling can be fixed by injecting glue and clamping. If the board is soft, crumbly, or moldy, it’s better to replace that section or the entire panel.
Where Can I Buy Matching Veneer?
You can find matching veneer and edge banding at most hardware stores, specialty woodworking shops, and online retailers. Bring a sample or photo for the best match. For more details, check this overview on wood veneer.
Is It Worth Repairing Or Should I Replace My Cabinets?
If only the veneer is damaged and the particle board is solid, repair is much cheaper and faster. If the structure is failing, replacement might be a better long-term choice.
—
Repairing peeling veneer on particle board cabinets is a smart, budget-friendly way to refresh your kitchen or bathroom. With good tools, patience, and the right steps, you can get a result that’s both attractive and durable. Next time you see a bubble or a lifted edge, you’ll know exactly what to do.
Credit: www.handhillscabinets.com