
Turning cabinets into drawers is one of the smartest ways to improve your kitchen, bathroom, or workshop storage. Drawers make it much easier to reach items hidden at the back of a cabinet. No more crouching and digging through piles of pots, cleaning supplies, or tools.
With well-designed drawers, every inch of space becomes useful, and your home feels much more organized.
But can you really transform regular cabinets into smooth-sliding drawers without buying all new furniture? Absolutely. With the right approach, this project is very doable—even for beginners. It saves money, reduces waste, and lets you customize the storage to your exact needs. In this guide, you’ll learn everything you need: planning, tools, step-by-step construction, common mistakes, and expert tips for the best results.
Let’s dive in and discover how to turn cabinets into drawers, unlocking more space and convenience in your home.
Why Turn Cabinets Into Drawers?
Switching to drawers is not just a trend—it’s a practical upgrade with clear benefits. Here’s why homeowners and renters choose this project:
- Easier Access: Drawers slide out fully, so you see and reach everything inside. No more forgotten cans or lost Tupperware.
- Better Organization: Items stay tidy and separated. You can assign a drawer for utensils, cleaning supplies, or tools.
- Maximized Storage: Drawers use cabinet space more efficiently, especially in deep or wide cabinets.
- Reduced Strain: No need to kneel or stretch far. This is helpful for people with mobility issues.
- Customizable: You choose drawer sizes, divider options, and finishes to match your needs and style.
Interesting fact: According to the National Kitchen and Bath Association, kitchens with more drawers are among the top requests in modern remodels. People want storage that works for them—not against them.
Planning Your Cabinet-to-drawer Conversion
Before you pick up a tool or order supplies, planning is key. Many beginners skip this step and regret it later. Here’s how to get it right:
Assess Your Cabinet Structure
Not all cabinets are created equal. Start by:
- Opening the doors and inspecting the inside.
- Measuring the width, height, and depth of the space.
- Checking for fixed shelves—these must be removed or worked around.
- Noting any pipes, wires, or obstacles, especially in under-sink cabinets.
Some cabinets have a center divider or thick frames that limit drawer width. Measure carefully and decide if you’ll remove these or design around them.
Decide On Drawer Type
You have a few main options:
- Full pull-out drawers: These replace the entire cabinet interior with sliding drawers.
- Shallow rollout trays: These sit on the existing shelf and slide out, great for lightweight items.
- Deep box drawers: Ideal for pots or cleaning supplies.
- Custom inserts: For very narrow or tricky spaces.
For most kitchens, full pull-out drawers are the most useful upgrade. But under sinks or in small cabinets, rollout trays or custom inserts may fit better.
Make A Simple Sketch
Draw a quick outline of your cabinet. Mark the size and position of each planned drawer. This helps you see how many drawers you can fit and what size works best.
Choose Drawer Slides
Drawer slides (also called runners or glides) are crucial for smooth operation. The main types are:
- Side-mount slides: Attach to the drawer sides and cabinet walls. Strong and easy to install.
- Undermount slides: Hidden under the drawer. Gives a clean look and smooth motion.
- Center-mount slides: One slide under the center of the drawer. Less common for heavy loads.
For most conversions, side-mount slides are the best mix of strength and value.
Drawer Slide Comparison
| Type | Visibility | Weight Capacity | Best For |
|---|---|---|---|
| Side-mount | Visible | 50-100 lbs | General, heavy items |
| Undermount | Hidden | Up to 75 lbs | Premium look |
| Center-mount | Hidden | Light loads | Small drawers |
Set A Budget
The cost depends on how many drawers you add, your material choice, and hardware quality. On average, expect to spend $20-$80 per drawer for DIY materials, not counting tools.
If you plan carefully, you can save money by reusing cabinet doors for drawer fronts or by building simple plywood boxes.

Credit: www.youtube.com
Tools And Materials Needed
Gather all tools and materials before starting. This avoids delays and mistakes.
Basic Tools
- Tape measure (for accurate sizing)
- Drill/driver (with bits for wood and hardware)
- Circular saw or table saw (for cutting panels)
- Screwdriver
- Level (for even slides)
- Pencil
- Clamps (helpful for assembly)
- Square (for straight lines and corners)
- Hammer (may be needed for light tapping)
Materials
- Drawer slides (choose type and length to match your cabinet depth)
- Plywood or MDF (usually 1/2″ or 3/4″ thick for boxes)
- Wood glue (for strong joints)
- Screws (confirm size matches your materials)
- Drawer handles or pulls
- Drawer face/front (reuse old doors or buy new panels)
- Finishing materials (sandpaper, paint, or stain)
For a smoother look, edge banding can cover raw plywood edges, but it’s optional.
Pro Tip: Buy a little extra material—mistakes happen, and it’s easier than running back to the store.
Measuring For Perfect Drawers
The most common mistake in this project? Poor measuring. Drawers that are too wide, tall, or deep won’t fit or slide smoothly.
Here’s how to measure like a pro:
- Measure the cabinet opening width. Subtract the thickness of both drawer slides (usually 1/2″ each, so minus 1″ total for side-mount).
- Measure the cabinet opening height. Decide how many drawers you want. Leave at least 1/2″ between drawers for clearance.
- Measure the cabinet depth (from the back wall to just inside the face frame). Choose drawer slides that match or are slightly shorter.
- If your cabinet has face frames (a wood frame around the opening), measure between the frames—not just the outer edges.
Example
If your cabinet opening is 18″ wide and you use side-mount slides (1/2″ each side):
- Drawer box width = 18″ – 1″ = 17″
- If you want three 6″ tall drawers in a 20″ tall opening: Each drawer box should be about 5.5″ tall (allowing for slide clearance).
Non-obvious insight: Always check the manufacturer’s instructions for your drawer slides. Some require extra space or have unique clearance needs.
Removing Cabinet Shelves And Doors
The next step is to clear out your cabinet.
- Empty the cabinet. Remove all contents.
- Remove the doors. Unscrew the hinges and set doors aside. If you plan to reuse them as drawer fronts, keep them safe.
- Take out shelves. If shelves are adjustable, lift them out. If fixed, use a drill or jigsaw to remove them. Be careful not to damage the cabinet box.
For stubborn shelves, cut them in half with a saw and pry out each piece. Wear eye protection and gloves.
Expert tip: Save the screws and hardware—you may need them for your new drawers.
Building The Drawer Boxes
This is where your project takes shape. Drawer boxes are simple, but accuracy matters.
Cutting The Pieces
Each drawer box has:
- Two sides
- Front and back panels
- Bottom panel
Cut the panels to your measured sizes. For most cabinets, 1/2″ or 3/4″ plywood works well.
Assembling The Box
- Lay out the four sides in a rectangle.
- Apply wood glue to the joints.
- Clamp and screw the sides together. Pre-drill holes to avoid splitting.
- Slide the bottom panel into place. Some builders use a groove (“rabbet joint”), but for beginners, it’s fine to screw the bottom on from underneath.
- Check for square corners. A box that isn’t square will bind in the cabinet.
Typical Drawer Box Sizes
| Cabinet Width | Drawer Box Width | Drawer Box Height | Drawer Box Depth |
|---|---|---|---|
| 18″ | 17″ | 5.5″-8″ | 20″ (or cabinet depth) |
| 24″ | 23″ | 5.5″-12″ | 20″ |
| 30″ | 29″ | 5.5″-12″ | 20″ |
Sanding And Finishing
Once assembled, sand all edges smooth. This prevents splinters and gives a finished look. You can paint or stain your drawers, or leave them natural if the wood looks good.
Non-obvious insight: Label each drawer with its intended location (top, middle, bottom). It’s easy to mix them up during installation.
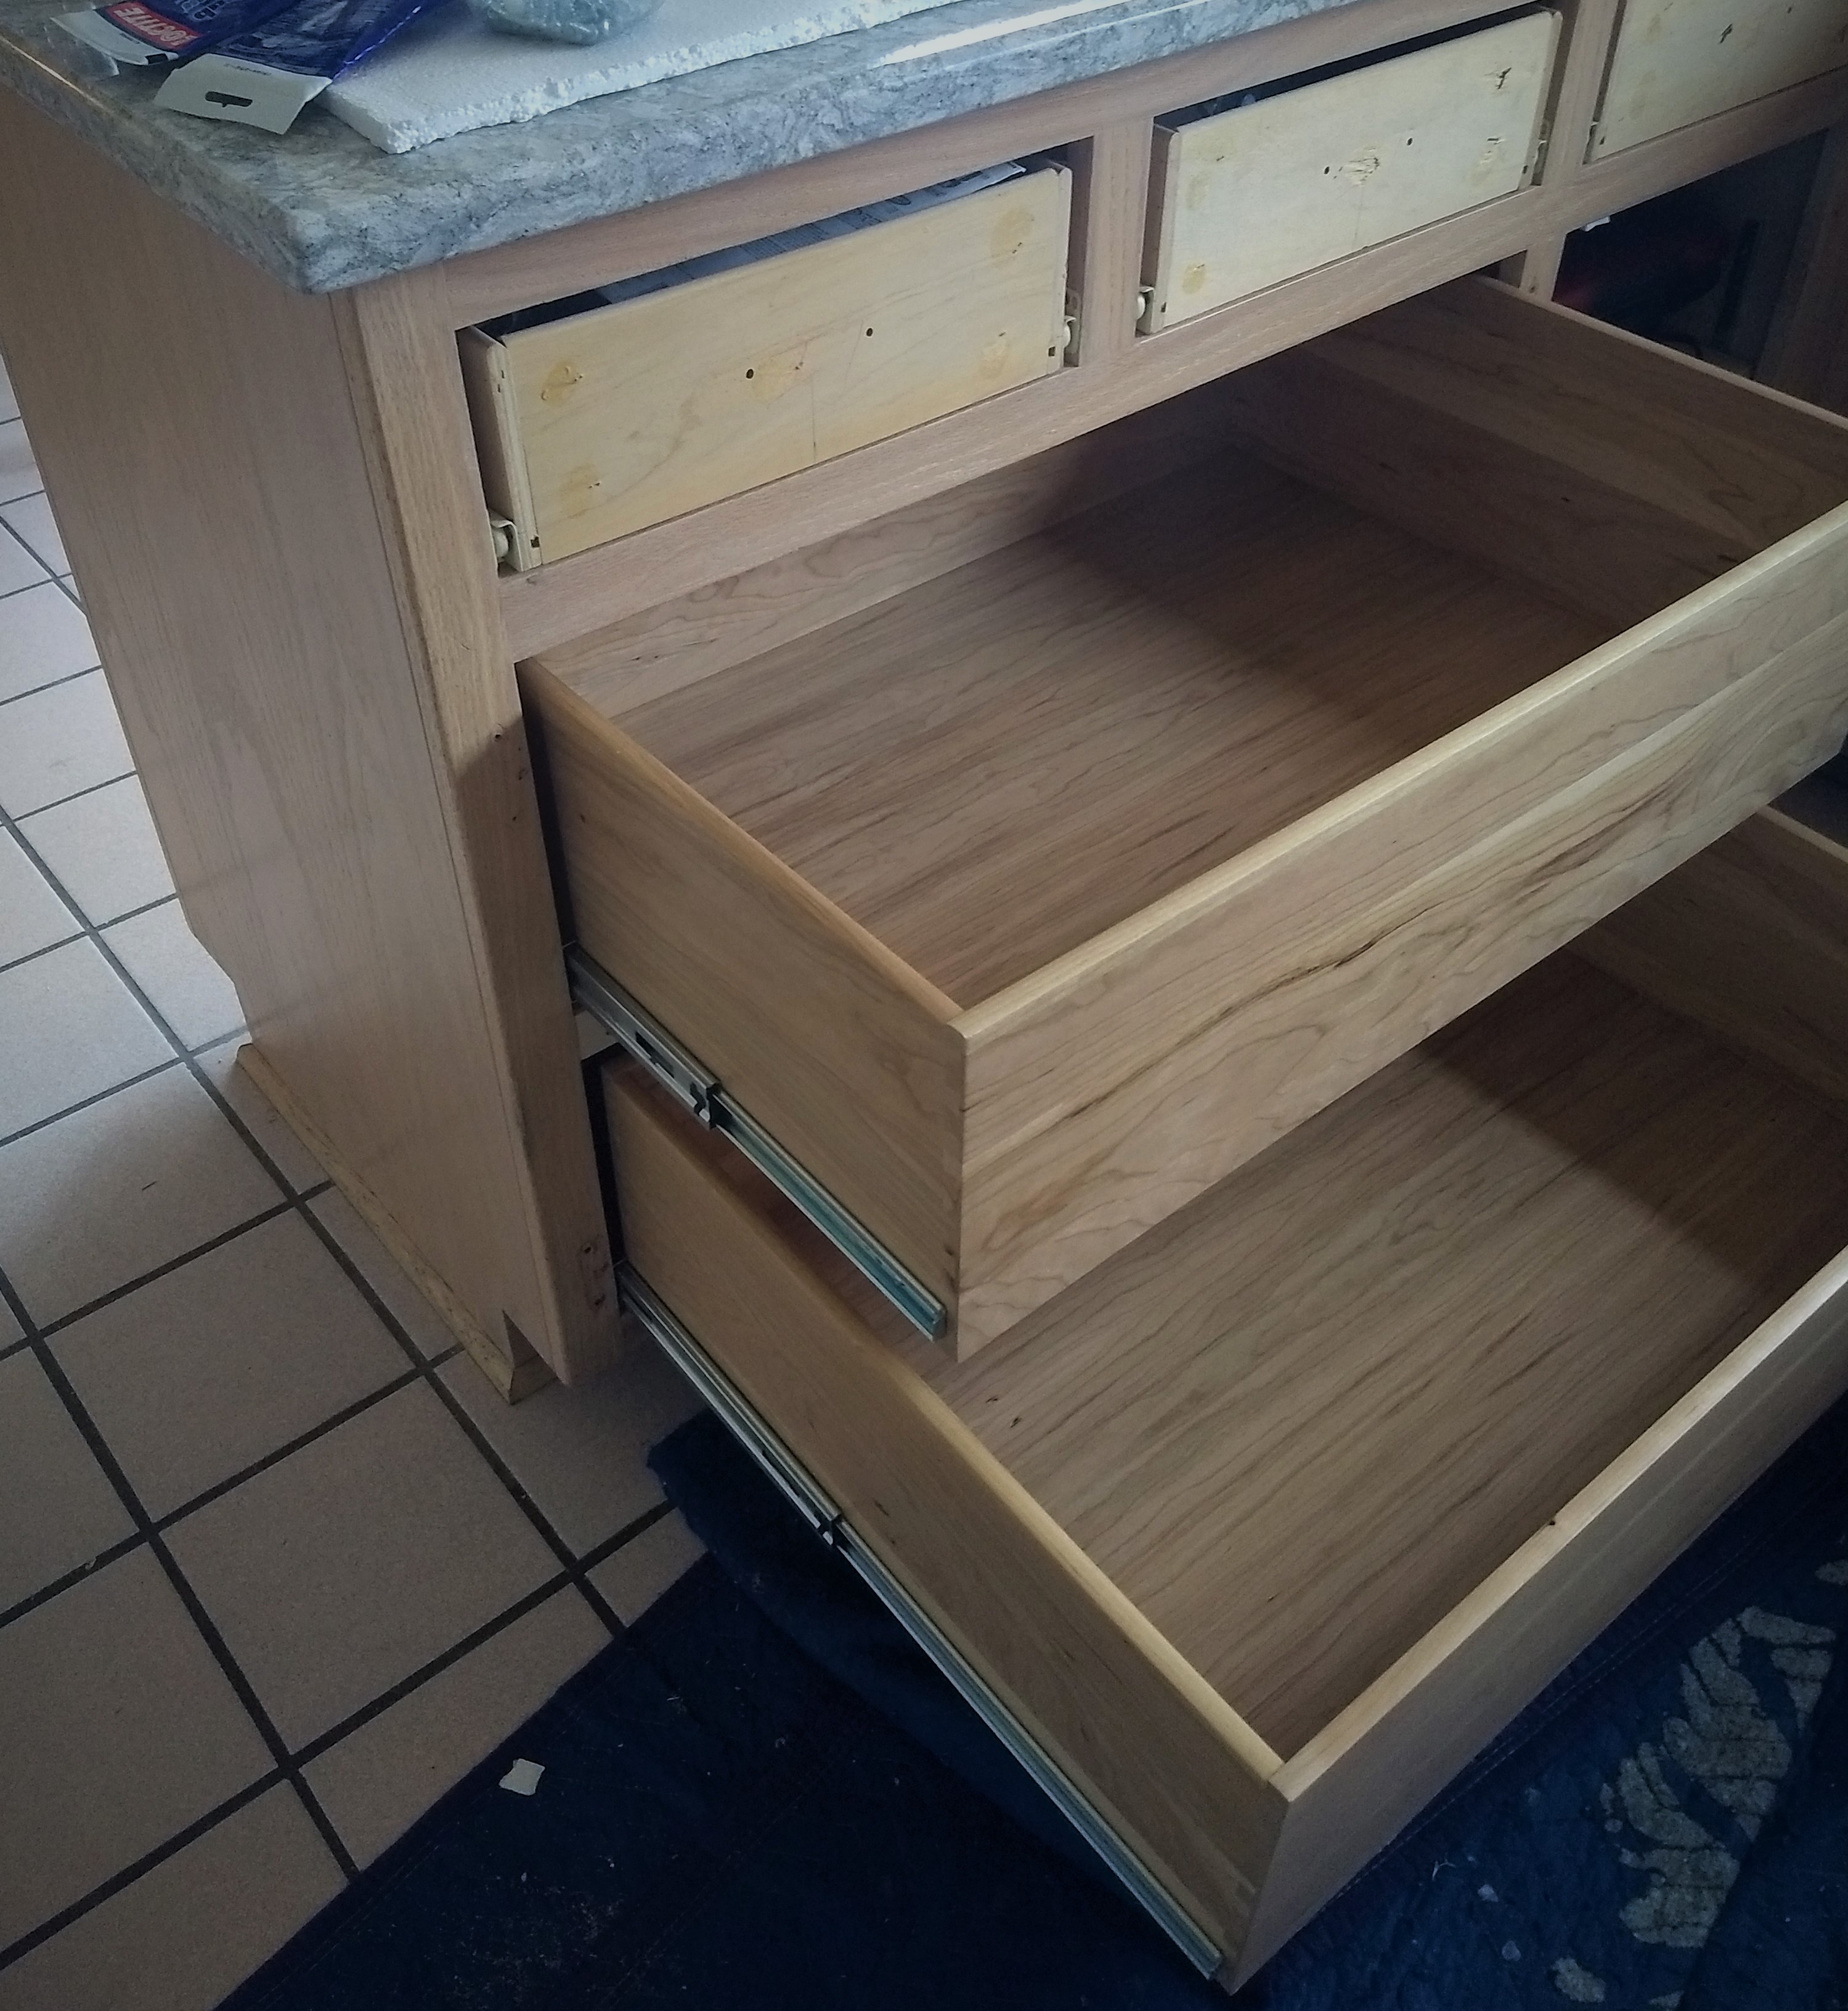
Credit: www.kitchencraftsman.net
Installing Drawer Slides
Drawer slides are the heart of your new drawers. Here’s how to install them for smooth, wobble-free action.
Mounting Slides In The Cabinet
- Mark the location for each slide on the cabinet wall. Use a pencil and a level to keep them straight.
- Hold the slide in place. Check that the front edge of the slide is set back about 1/16″ from the cabinet face (to allow for the drawer front).
- Screw the slide to the cabinet using the included screws.
- Repeat for each side and each drawer level.
Pro tip: Cut a scrap piece of wood to the same height as your slide spacing. Use it as a spacer for quick, even installation.
Attaching Slides To The Drawer
- Place the matching part of the slide on the drawer box, near the bottom edge.
- Screw in place, making sure both slides are level and matched side-to-side.
- Double-check that the slides are parallel.
Test Fit
Slide the drawer into the cabinet. It should move smoothly with a little resistance. If it sticks, check for misaligned slides or screws.
Troubleshooting tip: If your drawer sags or binds, it’s often because the cabinet isn’t perfectly square. You can shim the slides with thin pieces of cardboard or wood to adjust.
Attaching The Drawer Fronts
Drawer fronts are what you see when the cabinet is closed. You can reuse your old cabinet doors (cut down if needed) or make new panels from plywood or solid wood.
- Center the drawer box in the cabinet opening.
- Hold the drawer front in place, with even gaps on all sides.
- Attach the front from inside the drawer box, using screws. Start with one screw, check alignment, then add the rest.
- For perfect spacing, use playing cards or thin spacers between drawers.
Optional: Add a thin layer of double-sided tape to hold the front in place while you screw from inside.
Pro tip: If your old doors have a fancy edge, you can trim them down and reuse them for a custom look.
Installing Handles Or Pulls
Mark the handle location, drill pilot holes, and screw on your new (or old) handles. For a clean look, keep handle placement consistent across all drawers.
Tip: Use a template (a scrap board with measured holes) to ensure every handle is in the same place.
Organizing Your New Drawers
Now comes the fun part—putting everything back in a smarter way.
- Use drawer dividers or trays to separate utensils, tools, or cleaning supplies.
- Store heavy items in lower drawers and lighter items up high.
- Label drawers if you have a big family or want to keep things clear.
Non-obvious insight: Don’t overfill drawers. Leave some space so you can see everything, and the drawers slide easily.
Mistakes To Avoid
Even handy people make errors. Here are some common mistakes and how to dodge them:
- Skipping careful measuring: Drawers that don’t fit waste time and money.
- Buying the wrong slides: Always match slide length to your cabinet depth.
- Misaligned slides: Drawers will bind or wobble if slides aren’t level.
- Forgetting face frame adjustments: If your cabinet has a thick front frame, you may need mounting blocks or spacers.
- Overloading thin material: Cheap particle board can break under heavy loads. Use quality plywood.
- Rushing the finish: Sand and seal wood for long life and a smooth feel.
Expert tip: Before drilling or cutting, double-check every measurement. Measure twice, cut once.
Custom Drawer Upgrades
If you want to go beyond basic drawers, here are some ideas:
- Soft-close slides: These prevent slamming and feel high-end.
- Pull-out trash bins: Great for kitchens.
- Deep pot drawers: Store tall items upright.
- Hidden compartments: Add secret storage for valuables.
- Divided organizers: Built-in sections for cutlery, spices, or tools.
Interesting example: Some homeowners add power strips inside deep drawers for charging devices—very handy in modern kitchens.
Cost And Time Breakdown
How much does it cost, and how long will it take? Here’s a realistic look for a typical 24″ kitchen cabinet with three drawers.
| Item | Quantity | Cost (USD) | Time Needed |
|---|---|---|---|
| Plywood (3/4″) | 1 sheet | $40 | 30 min (cutting) |
| Drawer slides | 3 pairs | $45 | 45 min (installing) |
| Handles/pulls | 3 | $18 | 15 min |
| Screws/glue/etc. | — | $10 | 15 min |
| Finishing (sand/paint) | — | $10 | 30 min |
| Total | — | $123 | 2.5-4 hours |
Note: Costs can vary by region and material quality.
Safety Tips And Practical Advice
- Always wear eye protection when cutting or drilling.
- Work in a well-lit, well-ventilated area.
- Clamp workpieces for safer, more accurate cutting.
- Dispose of sawdust safely, especially if you sand painted or stained surfaces.
- If your cabinet is old, check for lead paint before sanding or cutting.
Pro tip: Take photos before you start. If you forget how something fits together, these can save you hours of guesswork.
When To Call A Professional
Most cabinet-to-drawer conversions can be DIY. But call a pro if:
- You find water damage, mold, or pests.
- The cabinet structure is loose or broken.
- There are complicated pipes or wires inside.
- You want a high-end, factory-perfect finish.
A professional carpenter can build custom drawers and install them quickly, but this usually costs $100-$250 per drawer or more.
Environmental Benefits
By converting existing cabinets instead of replacing them, you:
- Reduce waste going to the landfill.
- Use fewer new materials.
- Save money and energy from manufacturing and transporting new cabinets.
Some cities even offer rebates for home upgrades that reduce waste. Check your local programs.
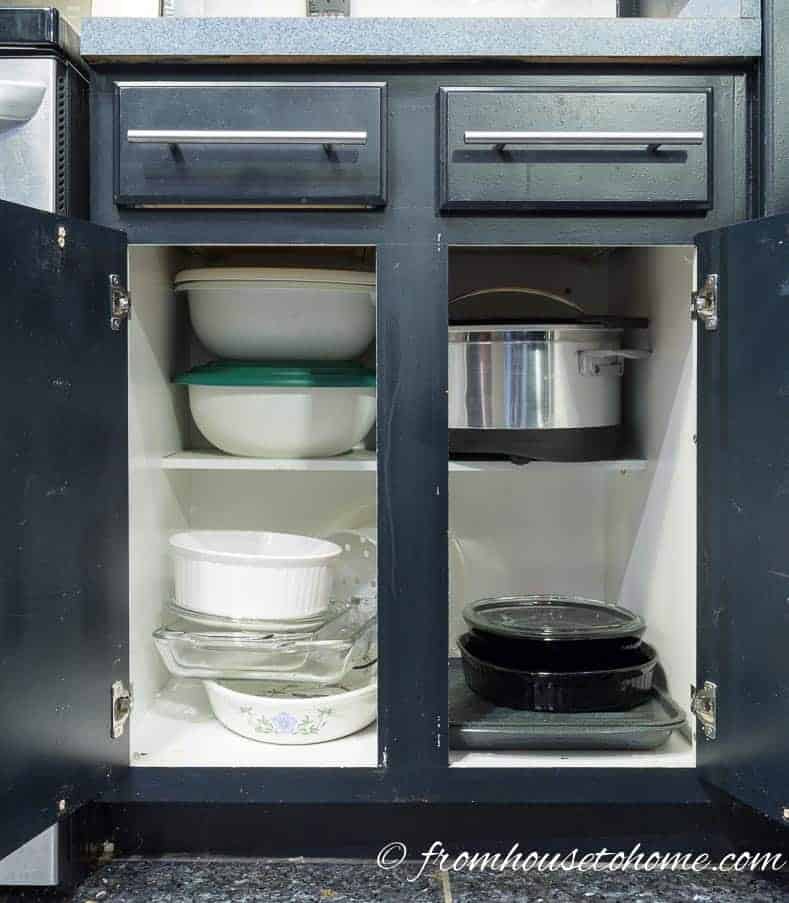
Credit: www.fromhousetohome.com
Real-world Example
Jane, a homeowner in Oregon, turned her old kitchen cabinets into drawers for less than $300. She used recycled plywood, reused her old doors as drawer fronts, and added low-cost side-mount slides. The result? She freed up over 30% more usable storage and cut her cleaning time in half.
Her friends were amazed at how modern and functional her kitchen looked—all without buying new cabinets.
Where To Learn More
If you want a deeper dive into cabinet construction, join online forums or watch step-by-step videos. A good resource is the Wikipedia page on Cabinetry, which explains more about different cabinet types and construction methods.
Frequently Asked Questions
How Hard Is It To Turn Cabinets Into Drawers?
For most people with basic DIY skills, this is a moderate project. If you can use a saw and drill, you can do it. The most important skills are accurate measuring and careful installation.
Can I Reuse My Old Cabinet Doors As Drawer Fronts?
Yes, many people do this to save money and keep a matching look. You may need to cut the doors to size and drill new handle holes, but it’s very doable.
What Is The Best Material For Drawer Boxes?
Plywood is the most popular choice. It’s strong, resists warping, and is easy to work with. MDF is smoother and cheaper but not as strong for heavy loads.
How Much Does It Cost To Convert A Cabinet To Drawers?
Costs vary, but expect to spend $40–$80 per drawer for materials if you do it yourself. Hiring a carpenter can cost $100–$250 per drawer or more.
Do I Need Special Tools?
Most people already have the basic tools needed: tape measure, drill, saw, screwdriver, and level. For the smoothest results, a circular saw and clamps are helpful but not required.
Upgrading cabinets to drawers is one of the best DIY projects for boosting your home’s storage and function. With careful planning, the right tools, and a little patience, you’ll enjoy a kitchen—or any space—that works as smart as it looks.