The Kitchenaid microwave oven combo is more than just a kitchen appliance; it’s a tool that makes cooking easier, faster, and more enjoyable. If you’ve just bought one or are thinking about upgrading your kitchen, knowing how to use this appliance properly can make a big difference. Many people only use the basic microwave function and miss out on the full range of features, including convection baking, grilling, and smart settings. This guide will walk you through every detail you need, from first-time setup to expert cooking tips, with plenty of practical advice along the way.
Understanding Your Kitchenaid Microwave Oven Combo
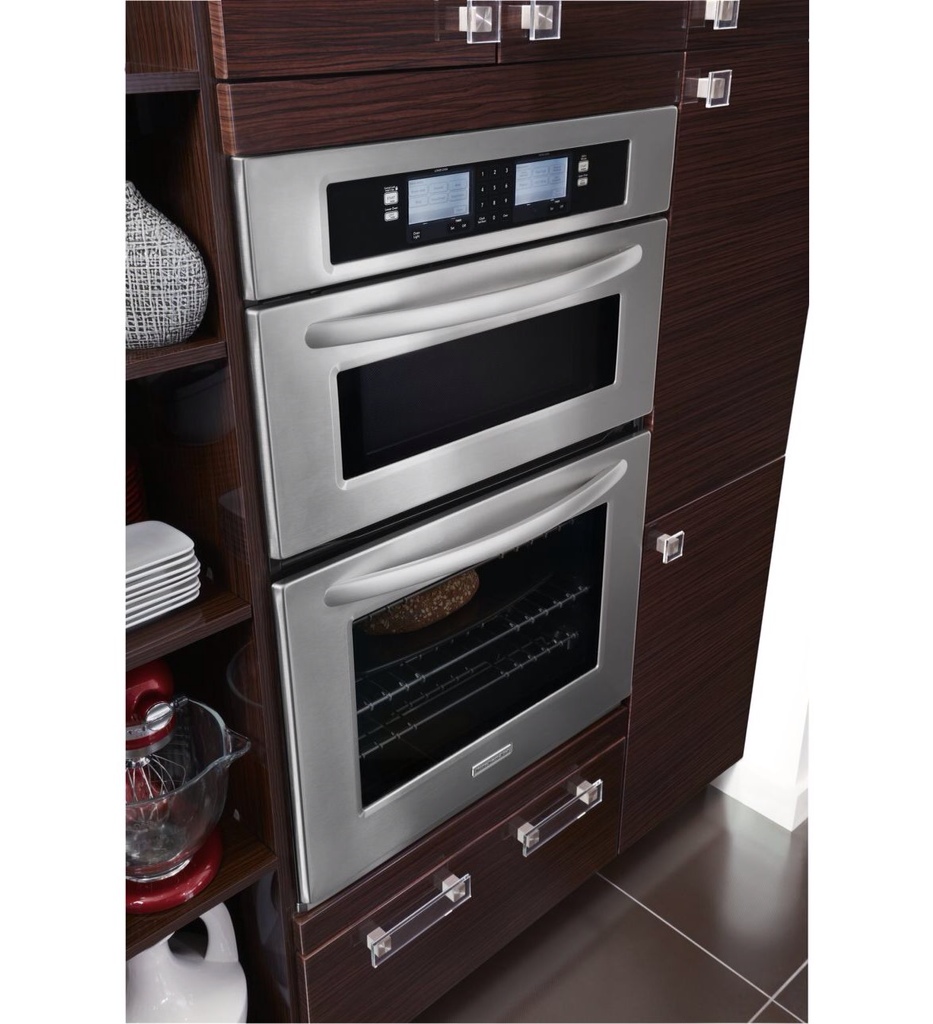
Before you start cooking, it’s important to get familiar with your appliance. The microwave oven combo from Kitchenaid combines two powerful tools: a traditional microwave and a convection oven. This means you can heat food quickly or bake, roast, and even grill—all in one machine.
Most models come with:
- Digital control panel
- Multiple cooking modes (microwave, convection, grill, combination)
- Preset menus for common foods
- Turntable for even cooking
- Interior light
- Multiple power levels
Knowing these basic parts helps you use the appliance more effectively and safely.
What Makes This Appliance Special
Unlike regular microwaves, the Kitchenaid combo can brown and crisp food. The convection mode circulates hot air, so you can bake cookies or roast chicken. The combination mode uses both microwave and convection, reducing cooking time while keeping food moist and flavorful.
Many people overlook the importance of the combination cooking mode, which is actually one of the best features for busy families and food lovers. You can cook a lasagna in half the time, or bake a cake with a crispy top and soft inside.
Essential Safety Precautions
Always read the user manual before first use. Here are some quick safety reminders:
- Use only microwave-safe cookware.
- Do not operate when empty.
- Keep the ventilation clear.
- Do not use metal objects in microwave mode.
- Clean spills immediately to avoid smoke or fire.
Setting Up Your Kitchenaid Microwave Oven Combo
A proper setup is the first step for great results. Many people rush this part, but it’s essential for safety and performance.
Unboxing And Placement
- Remove all packaging materials, including any tape inside the oven.
- Place the appliance on a flat, stable surface with enough space around it for airflow.
- Ensure there’s at least 3 inches (8 cm) of space on all sides and top.
- Plug the unit directly into a wall socket—avoid extension cords.
Installing The Turntable And Accessories
Most models include a glass turntable, rack, and sometimes a metal tray for convection or grilling. Set these up as follows:
- Put the turntable support in place.
- Place the glass tray on the support.
- Use the metal rack only for convection or grill modes (never in microwave-only mode).
First-time Power Check
Plug in the unit and check the display panel. Set the clock following the manual’s instructions. This step often gets missed, but it’s important for using preset functions and timers.
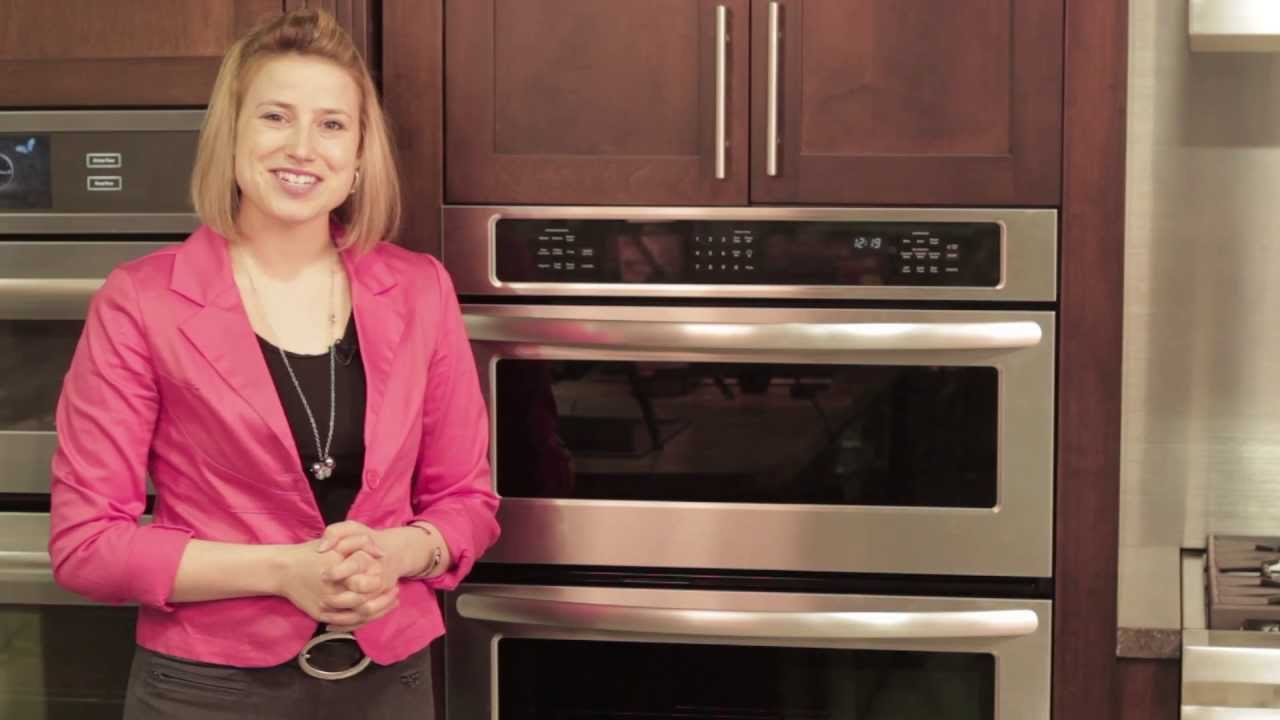
Credit: www.youtube.com
Getting To Know The Control Panel
The control panel is your main tool for using the Kitchenaid microwave oven combo. Let’s break down the most common buttons and what they do.
- Power Level: Adjusts microwave power from low (defrost) to high (full power).
- Time Cook: Lets you set the cooking time manually.
- Convection: Starts the convection oven mode for baking and roasting.
- Grill: Activates the grill element for browning or crisping.
- Combination: Uses both microwave and convection/grill at the same time.
- Preset Menus: For common foods like popcorn, potatoes, pizza, and more.
- Start/Stop: Begins or stops the cooking process.
- Timer/Clock: Sets the kitchen timer or clock.
- Defrost: Thaws food by time or weight.
Reading The Display
The display shows the current mode, cooking time, temperature, and sometimes reminders like “turn food” or “add food. ” Pay attention to these prompts—they help prevent overcooking or uneven results.
Choosing Cookware And Accessories
The right cookware can make a big difference. Many beginners use the wrong type of dish, causing poor results or even damaging the appliance.
Safe Cookware Materials
- Microwave Mode: Glass, ceramic, microwave-safe plastics. Avoid metal, foil, or dishes with metal trim.
- Convection/Grill Mode: Metal, glass, and ceramic. Avoid plastic in these modes.
- Combination Mode: Use glass or ceramic unless the recipe specifically allows metal.
Common Mistakes With Cookware
- Using metal in microwave mode—this can cause sparks or fires.
- Using plastic in grill or convection mode—these can melt.
- Forgetting to use the rack for even air flow in convection mode.
A helpful tip: If you’re unsure, check the bottom of the dish for a microwave-safe label.
Basic Microwave Functions
Let’s start with the features most people use daily. Microwave mode is perfect for reheating leftovers, cooking ready meals, or defrosting frozen foods.
How To Microwave Food
- Place food in a microwave-safe container.
- Open the door and put the container on the glass turntable.
- Close the door firmly.
- Select “Microwave” or “Time Cook.”
- Enter the desired cooking time using the number pad.
- Adjust power level if needed (default is usually 100%).
- Press “Start.”
For even heating, stir or turn food halfway through cooking. The turntable helps, but some foods heat unevenly.
Defrosting Tips
- Use the Defrost button and enter the weight of the food.
- For best results, divide large pieces into smaller portions.
- Check and turn food during the process.
Microwaving is fast, but it can dry out or overcook food if you’re not careful. Cover food with a microwave-safe lid or wrap to keep moisture in.
Using The Convection Oven Feature
The convection mode is one of the main reasons to own a Kitchenaid microwave oven combo. It allows you to bake, roast, or even make cookies and bread.
How Convection Cooking Works
A built-in fan circulates hot air, giving you even heat throughout the oven. This is great for:
- Roasting meats
- Baking cakes and cookies
- Cooking casseroles
- Reheating pizza without sogginess
Steps For Convection Cooking
- Preheat the oven (press “Convection” and set temperature, usually 325°F to 450°F).
- Wait for the oven to beep (preheat finished).
- Place food on the metal rack or a baking tray.
- Set the timer as the recipe suggests.
- Press “Start.”
Always use oven mitts when removing hot trays. The inside gets as hot as a regular oven.
Practical Baking Example
To bake cookies:
- Place cookie dough on a baking sheet.
- Preheat to 350°F (175°C).
- Bake for 10-12 minutes.
A common beginner mistake is skipping preheating. This leads to uneven baking and flat cookies.
Combination Cooking: Microwave + Convection
Combination cooking is where the Kitchenaid combo shines. You can save time and get better results compared to using just microwave or oven alone.
Why Use Combination Mode?
- Speeds up cooking for large or dense foods (like casseroles or lasagna).
- Keeps food moist inside and crispy outside.
- Great for foods that normally dry out in a microwave.
How To Use Combination Mode
- Choose a combination setting (often labeled “Combi” or “Combination”).
- Set the cooking temperature and time, or use a preset menu.
- Place food on the correct rack/tray.
- Press “Start.”
Example: Cooking A Lasagna
- Layer your lasagna in a glass or ceramic dish.
- Use Combination mode at 350°F for 20-25 minutes (check your manual for exact settings).
- The microwave cooks the inside, while convection crisps the top.
Combination mode is not ideal for delicate baked goods like soufflés—they need steady heat.
Using The Grill Function
Grilling in a microwave oven combo is not the same as outdoor grilling, but it’s great for browning cheese, crisping bread, or finishing meats.
How The Grill Feature Works
A heating element at the top of the oven provides direct heat. You can use this to:
- Melt cheese on casseroles
- Make toast
- Crisp up chicken skin
Steps For Grilling
- Place food on the metal rack.
- Select “Grill” and set the time (usually 5-15 minutes depending on food).
- Watch the food closely—grill mode can burn food quickly.
A tip: Place a drip tray under fatty foods to catch grease.
Using Preset And Smart Functions
Kitchenaid includes preset menus for popular foods, making it easier for beginners. These settings automatically choose the best power, time, and mode.
Common Preset Options
- Popcorn
- Baked potato
- Pizza
- Beverage reheat
- Frozen dinner
How To Use Presets
- Place food inside.
- Press the button for the food (or select from the menu).
- The oven will set the time and power.
- Press “Start.”
Presets work well for standard portion sizes. For larger or smaller amounts, you may need to adjust time.
Advanced Features And Customization
Beyond basics, the Kitchenaid microwave oven combo includes features that can save time and improve results.
Multi-stage Cooking
You can set the oven to switch between modes automatically. For example, defrost, then cook, then grill—all in one program.
How to set multi-stage cooking:
- Select first mode and time (e.g., Defrost for 5 minutes).
- Select second mode and time (e.g., Microwave at 80% power for 10 minutes).
- Add a grill or convection stage if needed.
- Press “Start.”
This is especially useful for dishes like roast chicken, where you want to defrost, cook, and then brown the skin.
Child Lock And Safety
Most models include a child lock. Hold the “Stop” or “Clear” button for a few seconds to activate. This prevents accidental use.
Memory Functions
You can save your favorite settings for quick use later. This is handy if you often cook the same meal.
Cleaning And Maintenance
A clean appliance lasts longer and works better. Many problems with microwave ovens come from poor cleaning habits.
Daily Cleaning
- Wipe the interior with a damp cloth after each use.
- Remove and wash the turntable weekly.
- Clean the door seals to prevent leaks.
Deep Cleaning
- Fill a microwave-safe bowl with water and a few lemon slices.
- Microwave on high for 5 minutes.
- Let steam loosen any stuck-on food.
- Wipe the inside with a soft cloth.
Do not use harsh chemicals or abrasive pads—they can damage the inside.
Caring For The Accessories
- Wash the turntable and racks by hand or in the dishwasher (if dishwasher-safe).
- Check for cracks or chips in the turntable—replace if damaged.
Troubleshooting Common Problems
Even the best appliances sometimes have issues. Here are the most common problems and how to fix them.
Oven Won’t Start
- Check the door is closed firmly.
- Make sure it’s plugged in.
- Check the circuit breaker.
Food Cooks Unevenly
- Stir or turn food halfway.
- Use the turntable correctly.
- Avoid overloading the oven.
Sparks Or Smoke
- Remove any metal items.
- Clean up spills, especially greasy ones.
- Don’t use foil in microwave mode.
Display Shows Error Codes
- Check the manual for error meanings.
- Reset by unplugging and replugging the oven.
- If the problem continues, contact Kitchenaid support.

Credit: www.millmansappliances.com
Cooking Tips For Best Results
There’s a lot you can do to get better results from your Kitchenaid microwave oven combo. Here are some expert-backed tips:
- Use combination mode for casseroles and baked pasta—faster and tastier than microwave alone.
- Let food rest after cooking. This lets heat finish spreading, especially with large dishes.
- Don’t overcrowd the oven. Air needs to circulate for even cooking.
- Use a food thermometer to check doneness, especially for meat and poultry.
- Rotate dishes if your model doesn’t have a turntable.
- Experiment with recipes—many oven recipes can be adapted for the combo oven with a little practice.
- Preheat for baking—just like a standard oven, preheating ensures even results.
Two Insights Many Beginners Miss
- Steam can build up in closed containers—always vent or use loose-fitting lids to avoid accidents.
- Browning works best when the surface of the food is dry. Pat foods with a paper towel before grilling or baking for a better crust.
Sample Cooking Projects
To help you get started, here are two practical recipes you can try in your Kitchenaid microwave oven combo.
Quick Roast Chicken
- 1 whole chicken (about 3 lbs)
- Salt, pepper, herbs to taste
Steps:
- Preheat oven in convection mode to 400°F (205°C).
- Place chicken on the metal rack, breast side up.
- Roast for 45-55 minutes, or until juices run clear and internal temp is 165°F (74°C).
- For crispier skin, finish with grill mode for 5 minutes.
Microwave Mug Cake
- 4 tbsp flour
- 2 tbsp sugar
- 2 tbsp cocoa powder
- 3 tbsp milk
- 1 tbsp oil
- 1/4 tsp baking powder
Steps:
- Mix all ingredients in a large microwave-safe mug.
- Microwave on high for 1-2 minutes.
- Let stand for 1 minute, then enjoy.
Credit: uakc.com
Comparing Kitchenaid Microwave Oven Combo To Other Kitchen Appliances
It’s helpful to see how the Kitchenaid combo stacks up against other appliances. Here’s a quick comparison:
| Feature | Kitchenaid Combo | Traditional Microwave | Convection Oven |
|---|---|---|---|
| Microwave Heating | Yes | Yes | No |
| Baking/Roasting | Yes | No | Yes |
| Combination Cooking | Yes | No | No |
| Grill Feature | Yes | No | Some models |
| Counter Space | Medium | Small | Large |
Real-world Energy And Cost Savings
One big advantage of a microwave oven combo is efficiency. You can reduce cooking times by up to 30% compared to a regular oven. This saves both energy and money.
| Cooking Method | Average Cooking Time | Average Power Used | Estimated Cost per Month* |
|---|---|---|---|
| Microwave Only | 10 min/meal | 1.2 kWh | $2.50 |
| Convection Only | 35 min/meal | 2.0 kWh | $6.00 |
| Combination Mode | 20 min/meal | 1.5 kWh | $3.80 |
*Based on 20 meals per month and average US electricity rates.
Maintenance Schedule For Long Life
To keep your Kitchenaid microwave oven combo working well, follow this simple schedule:
| Task | Frequency | Details |
|---|---|---|
| Wipe Interior | Daily | Use damp cloth, avoid harsh cleaners |
| Clean Turntable/Rack | Weekly | Wash with soapy water |
| Check Door Seals | Monthly | Look for damage or residue |
| Deep Clean | Monthly | Steam clean with lemon water |
| Service Check | Yearly | Professional inspection if needed |
Frequently Asked Questions
How Do I Know Which Cookware Is Safe For Each Mode?
Use glass or ceramic for all modes, but only use metal in convection or grill mode. Avoid plastic in convection or grill settings, and never use metal in microwave mode. Check for “microwave-safe” labels if unsure.
Why Does My Food Sometimes Come Out Soggy?
Microwaves heat food quickly but don’t brown or crisp. To avoid sogginess, use the convection or combination mode for foods like pizza or bread. Also, don’t cover food too tightly—let steam escape.
Is It Safe To Use Aluminum Foil In My Kitchenaid Microwave Oven Combo?
Generally, no. Foil can cause sparks in microwave mode. Some recipes allow small pieces in convection mode only, but always check your model’s manual first.
How Do I Clean The Grill Element?
Let the oven cool completely, then wipe the grill element gently with a damp cloth. Avoid using water directly on the element, and never clean while the oven is hot.
Where Can I Find More Recipes And Detailed Instructions?
You can find more recipes and tips on the official KitchenAid Microwave Ovens page, which offers guides, videos, and user manuals.
The Kitchenaid microwave oven combo is a powerful and versatile tool that can help you cook almost anything, from quick snacks to family dinners. By understanding each function and following the tips above, you’ll get the most from your appliance and enjoy tastier, healthier meals with less hassle. Remember to keep it clean, use the right cookware, and experiment with different settings. With a bit of practice, this combo oven can become your favorite kitchen helper for years to come.