
Removing an Oatey toilet flange cap might seem simple at first. But if you’ve never done it before, it can quickly become confusing. The cap is there to keep debris and smells out before you install a toilet. When it’s time to remove it, you want to do it right—so you don’t damage the flange, the pipe, or your floor.
This guide is for anyone facing this task, whether you’re a DIY beginner or you just want to avoid calling a plumber for something you can handle yourself.
We’ll walk through every step, explain why each part matters, and share tips that even experienced DIYers sometimes miss. You’ll learn how to identify the exact type of Oatey flange cap, choose the right tools, and avoid common mistakes that can cost you time or money.
If you want your toilet install to go smoothly, start here.
Understanding The Oatey Toilet Flange Cap
Before you start, it helps to know exactly what you’re dealing with. The Oatey toilet flange cap is a plastic cover that snaps or presses into the flange opening. Its main job is to keep sewer gas, dirt, and construction debris out before the toilet is installed. Oatey makes several types, but most are made of durable PVC or ABS plastic.
Some caps are designed to be temporary and easily removed by hand. Others need to be cut out. The difference matters, because using the wrong method can crack the flange or leave sharp edges that make installing the toilet wax ring difficult.
Types Of Oatey Flange Caps
You’ll mainly find two kinds:
- Snap-in cap: Presses into the flange and pulls out with a little force.
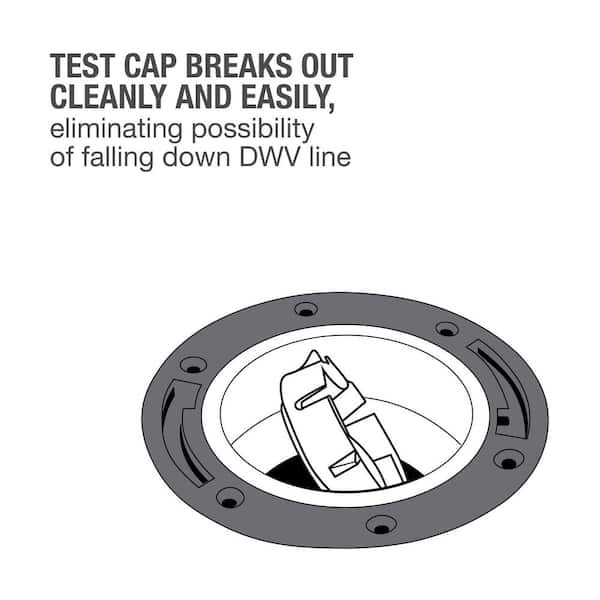
- Knockout cap: Sealed with a thin membrane that’s meant to be broken or cut out, often used for test purposes.
Oatey typically labels these on the packaging, but if you’re unsure, check if the cap flexes when you press the center. Snap-in caps often wiggle, while knockout caps feel rigid.
Why Proper Removal Matters
If you damage the flange or leave rough edges, your toilet might not sit flat. This can cause leaks, rocking, or even break the porcelain base. That’s why removing the cap cleanly is so important.
Tools And Materials Needed
Having the right tools makes the job faster and safer. Here’s what you’ll need, plus some optional items that can help with tricky jobs.
- Work gloves (to protect your hands from sharp edges)
- Flathead screwdriver (for prying)
- Utility knife or oscillating multi-tool (for cutting out knockout caps)
- Adjustable pliers (for extra grip)
- Shop vacuum (to clean up debris)
- Safety glasses (if using power tools)
- Rags or paper towels (to plug the pipe after removal, if the toilet isn’t being installed immediately)
Pro tip: If you’re not sure which kind of cap you have, gather both prying and cutting tools. You won’t have to stop partway through.
Preparing The Work Area
Preparation is often overlooked but makes a big difference. Here’s what to do before you start removing the cap:
- Clear the area: Move any items or tools away from the toilet flange.
- Sweep or vacuum around the flange to avoid dust or debris falling into the pipe.
- Check for standing water in the flange. If there’s water, use a sponge or small cup to remove it.
- Put on gloves and safety glasses, especially if you plan to cut the cap.
If you’re working in a new build or remodel, check that the floor around the flange is level and stable. Uneven floors can make the flange rock, which might confuse you as you remove the cap.
How To Remove A Snap-in Oatey Flange Cap
Snap-in caps are common in newer installations. They’re designed for easy removal, but sometimes construction adhesive or dried paint makes them stick.
Step-by-step Removal
- Test the cap: Press down gently in the center. If it flexes or moves, it’s likely a snap-in.
- Wedge a flathead screwdriver under the rim of the cap. Start on one side and gently twist the handle to lift the edge.
- Work around the cap: Move the screwdriver to another spot and repeat. This loosens the cap evenly and reduces the risk of cracking the flange.
- Grip with pliers: Once part of the cap lifts, use pliers to pull it straight up. Wiggle gently if it’s tight.
- Check for residue: After the cap comes out, inspect the flange for any plastic bits or debris.
Non-obvious insight: If the cap feels stuck, don’t force it with heavy tools. A few drops of soapy water around the edge can help loosen paint or dust. Let it sit for a minute, then try again.
What To Do If The Cap Breaks
Sometimes, a snap-in cap cracks or shreds as you remove it. Don’t panic. Use needle-nose pliers to pick out the pieces. Take your time to avoid scratching the pipe or flange.
Removing A Knockout Oatey Flange Cap
Knockout caps are designed to be removed right before the toilet is installed. They’re usually used for pressure testing, so the cap forms a watertight seal. You can’t pry these out; you have to cut or break the center.
How To Identify A Knockout Cap
- The center of the cap is slightly domed or flat, without a clear edge for prying.
- Sometimes marked with “TEST CAP” or similar wording.
- Feels solid when pressed.
Removal Methods
You have two main choices: manual (using a utility knife or hammer) or power (using an oscillating tool).
Manual Method
- Score the cap: Use a sharp utility knife to cut an “X” in the center. Press firmly, but not so hard you slip.
- Tap with a hammer: Place the tip of the screwdriver at the center and tap gently. The scored lines will help the cap break cleanly.
- Remove the pieces: Pull out the broken sections with pliers.
- Smooth the edges: If there are sharp bits, trim them carefully with the knife.
Power Tool Method
- Attach a plastic-cutting blade to your oscillating tool.
- Cut a circle just inside the cap edge, about 1/8 inch from the flange wall.
- Remove the center disk and clean up any remaining plastic.
- Vacuum debris from the pipe to keep it clear.
Non-obvious insight: Always check that your blade doesn’t touch the flange itself. Cutting into the flange can weaken its structure and cause leaks down the road.
Comparing Cap Removal Methods
Here’s a quick comparison to help you decide which method fits your situation best.
| Method | Speed | Skill Needed | Best For | Risk Level |
|---|---|---|---|---|
| Manual (Knife & Hammer) | Moderate | Beginner | Thin plastic caps | Low |
| Oscillating Tool | Fast | Intermediate | Thick or glued caps | Moderate (cut risk) |
| Screwdriver & Pliers | Slow | Beginner | Snap-in caps | Very Low |

Credit: www.youtube.com
What To Do After Removing The Cap
Once the cap is out, the job isn’t quite done yet. Preparing the flange for the toilet install is just as important.
Cleaning The Flange
- Use a shop vacuum to remove any plastic shavings or dust.
- Wipe the flange with a damp rag to ensure a good seal with the wax ring later.
Inspect For Damage
Check the flange for:
- Cracks or chips (especially if you had to cut the cap)
- Warping or unevenness
- Loose screws or mounting holes
If you find any damage, consider replacing the flange before installing the toilet. A damaged flange can lead to leaks and expensive repairs.
Seal The Pipe (if Needed)
If you’re not installing the toilet right away, plug the pipe with a rag or paper towels. This keeps sewer gas from entering the room and stops debris from falling in.
Tip: Never leave an open pipe uncovered for long. Smells and even small pests can enter the house through an open drain.
Troubleshooting Stuck Or Difficult Caps
Sometimes, the Oatey flange cap just won’t budge. Here’s what you can do if you hit a snag.
If The Cap Is Sealed With Glue Or Paint
- Run a utility knife around the edge to break the seal.
- Apply a little WD-40 or silicone spray around the rim, then wait a few minutes.
If The Cap Spins But Won’t Lift
- Wedge two flathead screwdrivers on opposite sides and twist gently at the same time.
- Try gripping the cap with adjustable pliers and pulling straight up.
If You Accidentally Damage The Flange
- Don’t install the toilet on a cracked flange. Repair kits are available at hardware stores.
- For minor chips, you can use epoxy putty as a temporary fix.

Credit: www.youtube.com
Safety Precautions
Working with plastic caps is usually safe, but it’s easy to slip with a knife or power tool. Here are a few safety basics:
- Always wear safety glasses when cutting plastic.
- Cut away from your body.
- Keep your other hand clear of the blade path.
- Don’t rush. Most injuries happen when people hurry.
If you’re using a power tool, make sure the blade is rated for plastic and is sharp. Dull blades are more likely to slip.
Common Mistakes And How To Avoid Them
Even experienced DIYers can run into problems. Here are the most common issues people face:
- Trying to pry a knockout cap: If you try to pull out a knockout cap, you might break the flange. Always cut these out.
- Forcing a stuck cap: If a cap doesn’t budge, stop and check for glue or paint. Forcing it can crack the flange.
- Leaving rough edges: Sharp plastic pieces can damage the wax ring. Always smooth edges after removal.
- Not cleaning debris: Small plastic bits can clog the drain or affect the seal. Always vacuum after removing the cap.
- Installing the toilet on a damaged flange: Leaks usually happen because of flange problems, not the wax ring. Always check the flange before moving on.
Pro tip: Take a photo of the flange before and after removal. If you ever have a leak, you’ll have a record of the condition.
Real-world Examples
Let’s look at a few short real-life cases to make the process clearer.
Case 1: Snap-in Cap In A New Build
A homeowner in a new house found the Oatey cap popped right out with a screwdriver. But they noticed a thin layer of paint had glued the edge down. They used a knife to score the paint, and the cap lifted easily.
No damage, and the toilet installed perfectly.
Case 2: Knockout Cap In A Remodel
During a bathroom remodel, an older Oatey knockout cap wouldn’t break with a hammer alone. The installer switched to an oscillating tool, cut out a neat circle, and vacuumed the debris. The flange was untouched, and the wax ring sealed tight.
Case 3: Broken Cap, Damaged Flange
A DIYer tried to pry a knockout cap with a crowbar, cracking the edge of the flange. They had to buy a repair ring and wait a day before installing the toilet. The lesson: use the right tool and method for the cap type.
Comparing Oatey Flange Cap Removal To Other Brands
Oatey is popular, but you may run into other brands. Here’s how the removal process compares.
| Brand | Cap Type | Removal Method | Difficulty |
|---|---|---|---|
| Oatey | Snap-in / Knockout | Pry or Cut | Easy-Moderate |
| Sioux Chief | Threaded / Knockout | Unscrew or Cut | Moderate |
| Fernco | Rubber Plug | Pull Out | Easy |
| Keeney | Snap-in | Pry Out | Easy |
Insight: Oatey’s snap-in and knockout designs are common in North America, but always check the brand before you start. Not all caps are removed the same way.
Preventing Problems In Future Installs
If you’re working on a new construction or remodel, you can take steps to make future cap removal easier.
- Avoid painting over the flange cap.
- Don’t use construction adhesive on the cap.
- Mark the type of cap on the flange with a permanent marker.
- If you’re using a knockout cap, don’t install the toilet flange until most work is done.
These small steps save time and headaches for whoever installs the toilet later.
Environmental Considerations
When you remove the cap, don’t just toss it in the trash. Most Oatey caps are made from recyclable plastic. Check with your local recycling program to see if they accept PVC or ABS. If not, seal the cap in a plastic bag before disposal to avoid sharp edges harming sanitation workers.
Cost And Time Estimate
Removing an Oatey flange cap is usually quick and cheap. Here’s a rough breakdown.
- Time needed: 5-20 minutes (depends on method and condition)
- Cost: $0 if you have the tools; $10–$40 if you need to buy a utility knife or oscillating blade
If you damage the flange and need a repair kit, expect to spend another $10–$30 and an extra hour of work.
When To Call A Professional
Most homeowners can remove an Oatey cap without help. But call a plumber if:
- The flange is cracked or loose
- You’re not comfortable using cutting tools
- The pipe below the flange is damaged or leaking
- You encounter unexpected materials (cast iron, lead, etc.)
A pro can also inspect the entire drain for issues, which can be worth it in older homes.
Summary Of Key Steps
Let’s recap the most important points:
- Identify your Oatey cap type (snap-in or knockout).
- Gather the right tools: Screwdriver, knife, pliers, safety gear.
- Prepare the area: Clean, clear, and protect.
- Use the correct removal method for your cap.
- Clean and inspect the flange after removal.
- Plug the pipe if you’re not installing the toilet immediately.
- Always check for damage before moving forward.
Following these steps helps avoid leaks, wobbles, and future repairs.
For more about plumbing standards and best practices, you can read the Oatey professional resource page.
Frequently Asked Questions
What If The Oatey Cap Is Glued In Place?
If the cap is stuck with glue, carefully run a sharp utility knife around the edge to break the seal. Avoid prying too hard, as this can crack the flange. Sometimes a little warm water can soften the glue. If it’s still stuck, use an oscillating tool with a plastic blade to cut out the cap.
Can I Use A Hammer To Break Out A Knockout Cap?
Yes, you can, but it’s best to score the cap with a utility knife first. Place the tip of a flathead screwdriver in the center and tap gently. Be careful not to hit too hard or you could damage the flange.
Is It Safe To Leave The Pipe Open After Removing The Cap?
No. Always plug the pipe with a rag or paper towel if you’re not installing the toilet right away. This keeps sewer gas and debris from entering your home.
What Happens If I Damage The Toilet Flange?
If you chip or crack the flange, don’t install the toilet until you repair it. Use a flange repair kit, which you can find at any hardware store. For major damage, it’s best to call a plumber.
Can I Reuse The Oatey Flange Cap?
Oatey caps are designed for single use. Once removed, they don’t seal well and should not be reinstalled. Replacing them with a new cap is the best practice if you need to temporarily cover the flange again.
Removing an Oatey toilet flange cap is a straightforward task with the right tools and approach. Take your time, follow the steps, and your toilet installation will go smoothly. This little bit of care now can save you from big headaches later.
Credit: www.homedepot.com