
If you just replaced your Moen shower cartridge and suddenly notice low water pressure, you’re not alone. Many homeowners experience this frustrating problem after routine shower maintenance. You expect a steady, strong flow—but instead, you get a weak stream that makes showers less enjoyable and sometimes unusable. This situation can be confusing, especially if everything seemed to work fine before the cartridge change.
Understanding why water pressure drops after installing a new cartridge can save you time, money, and stress. The causes aren’t always obvious. Sometimes, the solution is simple; other times, it points to a deeper plumbing issue. Whether you did the replacement yourself or had a plumber help, knowing what’s happening will help you fix the problem efficiently.
This guide explains, in clear language, why you might have low water pressure after replacing a Moen shower cartridge, how to diagnose the real cause, and what steps you can take to restore your shower’s flow. You’ll also learn key tips, common mistakes, and expert advice to keep your shower in top shape.
Why Low Water Pressure Happens After Cartridge Replacement
A new cartridge should fix leaks and improve your shower. So why does low water pressure sometimes follow? The answer lies in how shower cartridges work. Moen cartridges control the flow and mix of hot and cold water. If something goes wrong during installation, it can restrict water movement.
Possible reasons include:
- Incorrect cartridge installation
- Debris blocking the valve or pipes
- Wrong cartridge model
- Damaged or faulty cartridge
- Issues with the shower’s plumbing
- Water supply problems coinciding with the repair
Understanding these factors is the first step toward a solution.
How A Moen Shower Cartridge Works
A Moen shower cartridge is a small, cylinder-shaped part inside the shower valve. It controls the water flow and temperature by moving up and down or rotating. When you turn the handle, the cartridge opens channels for hot and cold water, mixing them before sending the water to the showerhead.
If the cartridge is blocked, stuck, or the wrong size, it can restrict water, causing low pressure. The cartridge must fit perfectly and move smoothly for the best performance.
Step-by-step Diagnosis: Finding The Real Cause
When you face low water pressure after changing the cartridge, don’t assume the new part is bad. A careful, step-by-step check can save frustration and money.
1. Check All Shower Functions
Before opening the wall or calling a plumber, test both hot and cold water. Try different settings:
- Is the pressure low for both hot and cold?
- Is it only low for one temperature?
- Does the tub spout (if present) have normal pressure?
If only the shower is affected, the problem is likely within the shower valve or cartridge. If the whole bathroom has low pressure, the issue might be with the main supply.
2. Inspect The Showerhead
Sometimes, the showerhead itself is clogged with debris or mineral buildup. Remove the showerhead and test water flow directly from the pipe. If pressure increases, clean or replace the showerhead.
3. Examine The Cartridge Installation
The most common cause is a cartridge that is not seated correctly. A slightly misaligned cartridge can block water flow. Remove the handle and trim, then pull out the cartridge and check:
- Is the cartridge the exact model for your shower?
- Are all O-rings and seals in place and undamaged?
- Is there any debris inside the valve body?
4. Test With The Old Cartridge
If you kept the old cartridge and it worked before, try reinstalling it. If water pressure returns to normal, the new cartridge is likely the problem (wrong type, factory defect, or debris inside).
5. Check For Debris In Pipes
Replacing a cartridge can loosen rust or sediment, which may block the small passages in the cartridge or valve. Shine a flashlight into the valve and use a small brush or compressed air to clear any debris.
6. Inspect Water Supply Valves
Sometimes, shut-off valves near the shower are not fully open after repair. Make sure both hot and cold supply lines are open.
7. Evaluate The Home’s Water Pressure
If your entire house has low pressure, use a water pressure gauge on an outside spigot. Typical home pressure should be between 40–60 psi (pounds per square inch). Lower readings suggest a supply issue unrelated to the shower.
Common Installation Mistakes That Cause Low Pressure
Even careful DIYers and professionals can make small errors that cause big problems. Here are some frequent mistakes:
Not Using The Right Cartridge Model
Moen makes many cartridge types—1222, 1225, 1200, and others. Even a small difference can block water. Always check your model number (often stamped on the old cartridge or valve) and match it exactly.
Forgetting Lubrication
New cartridges should be lubricated with plumber’s silicone grease (never petroleum jelly). A dry or sticky cartridge may not slide into place, causing leaks and pressure drops.
Damaged Or Missing O-rings
These small rubber rings seal the cartridge. If they are pinched, torn, or missing, water will bypass the cartridge, reducing pressure and causing leaks.
Reversing Hot And Cold Sides
If you insert the cartridge backward, the water may flow weakly or not at all. Double-check the orientation—Moen cartridges have small marks or keys for alignment.
Not Flushing The Valve Body
After removing the old cartridge, it’s important to flush the open valve with water for a few seconds. This removes dirt and debris that could clog the new cartridge.
Over-tightening Retaining Clips Or Nuts
If you tighten the retaining clip or nut too much, it can deform the cartridge body, restricting water flow.
Not Pushing Cartridge Fully Into Place
The cartridge should fit snugly, flush with the valve body. If it sticks out, it’s not sealed properly, and water flow will be weak.
Cartridge Types And Their Impact On Water Pressure
Moen makes several cartridge designs, and using the wrong type can create pressure issues. Here’s a comparison of common cartridges:
| Cartridge Model | Compatibility | Flow Rate (GPM) | Common Problems |
|---|---|---|---|
| 1225 | Single-handle, most pre-2000 showers | 2.5 | Leaks, low flow if misaligned |
| 1222 (Posi-Temp) | Single-handle, Posi-Temp valves | 2.5 | Handle hard to turn, pressure drop if debris inside |
| 1200 | Older showers (pre-1980s) | 2.0 | Wears out quickly, difficult to find |
| 1255 (Duralast) | Modern single-handle faucets | 2.5 | Rare pressure issues, more robust |
Tip: Always match the cartridge to your valve model. Even a cartridge that “fits” may restrict water if it’s not designed for your shower.
How To Fix Low Water Pressure Step-by-step
If you find low water pressure after changing the Moen shower cartridge, use this detailed process to restore normal flow.
1. Shut Off Water Supply
Before working on the shower, turn off water at the main supply or local shut-offs. Open the shower handle to drain remaining water.
2. Remove Handle And Trim
Unscrew the handle, trim plate, and any escutcheon covering the valve.
3. Pull Out The Cartridge
Use a cartridge puller tool (available at hardware stores) for stuck cartridges. Gently wiggle and pull straight out. Avoid twisting too much, as this can damage the valve.
4. Inspect And Clean The Valve Body
With the cartridge out, look inside the valve. Use a flashlight to check for debris, rust, or leftover pieces of the old cartridge. Use a small brush, cotton swab, or compressed air to clean.
5. Flush The Valve
Briefly turn the main water supply back on (hold a cup or towel to catch water). Let water flow through the open valve for 10–20 seconds to flush out any dirt.
6. Check The New Cartridge
- Ensure it’s the exact model for your valve.
- Lubricate O-rings with plumber’s silicone grease.
- Check for cracks, bent parts, or missing seals.
7. Insert The Cartridge
Align the cartridge with the valve’s keyway or notches. Gently push it in until fully seated—flush with the valve body. Insert the retaining clip or nut.
8. Reassemble Handle And Trim
Replace all parts in reverse order. Make sure the handle moves smoothly.
9. Test Water Flow
Open the water supply. Run hot, cold, and mixed water. Check pressure at the showerhead and tub spout (if present). If pressure is normal, you’ve solved the problem.
10. Replace Showerhead (if Needed)
If pressure is still low, the showerhead may be clogged. Clean or replace it with a new low-flow or standard head.
When To Call A Professional
Most cartridge and valve problems can be fixed by careful DIY work. But sometimes, you’ll need a plumber’s help:
- If the valve body is cracked or corroded
- If you see leaks inside the wall
- If water pressure is low throughout the house
- If you’re unsure about the cartridge model or installation
A good plumber can diagnose complex problems and prevent water damage.
How Water Pressure Changes Impact Shower Experience
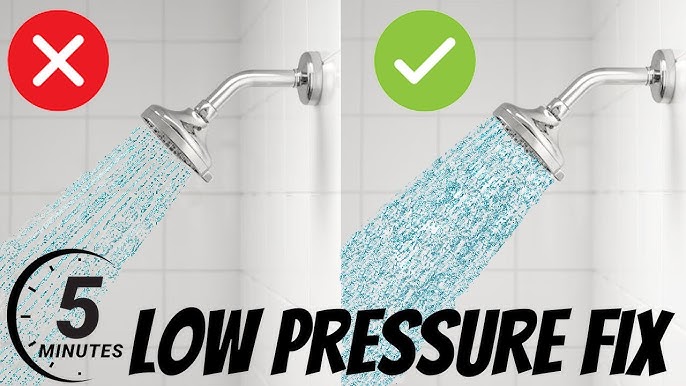
Low water pressure can make showers slow, uneven, or even cold. You may notice:
- Longer shower times to rinse off
- Poor massage or spray from the showerhead
- Inconsistent temperature
High pressure, on the other hand, can damage pipes and fixtures. Finding the right balance is key to a comfortable shower.
Credit: www.youtube.com
Preventing Low Pressure In The Future
Once your shower is fixed, a few simple habits can prevent pressure problems:
- Flush pipes before installing new cartridges.
- Use only genuine Moen parts for replacements.
- Clean showerheads every few months to remove mineral buildup.
- Check for leaks or drips, which may signal a valve problem.
- Keep the area around the valve clean and dry.
Real-world Example: Solving A Post-cartridge Pressure Drop
Consider a homeowner, Sara, who replaced her Moen 1222 cartridge after a persistent leak. After installing the new cartridge, she noticed the water barely trickled from the showerhead. She checked the showerhead, but it was clean. Next, she removed the new cartridge and saw a small piece of rubber had torn off an O-ring, blocking a water channel inside the valve.
After replacing the O-ring and flushing the valve, water pressure returned to normal.
Key insight: Even tiny debris or a misaligned part can cause major pressure loss. Attention to detail makes all the difference.
Diy Vs. Professional Repair: Pros And Cons
If you’re handy, replacing a Moen shower cartridge is usually simple. But consider these points:
| DIY | Professional Repair |
|---|---|
| Lower cost | Higher cost but guaranteed work |
| Learn plumbing skills | Fast, expert diagnosis |
| Risk of mistakes (wrong part, leaks) | Less risk of damage |
| May need special tools | Has all necessary tools |
Insight: If you’re uncertain or face repeated problems, it’s wise to call a plumber to avoid water damage.
Plumbing System Issues Vs. Cartridge Issues
Sometimes, low pressure is not the cartridge’s fault. Other plumbing issues can show up right after you work on the shower. These include:
- Old galvanized pipes: Rust and scale can break loose when water is turned off and on.
- Pressure regulators: If your home has a regulator, it may fail or reset during repairs.
- Pipe leaks: Turning valves off and on can reveal hidden leaks.
- Municipal water supply changes: Rare, but a drop in city pressure can happen at the same time as a repair.
If you’ve checked the cartridge and shower valve carefully, but pressure is still low, ask neighbors if they have the same problem. A wider issue may be at play.
Key Non-obvious Insights
- Debris is often the hidden culprit. When you remove a shower cartridge, rust, mineral chunks, or pieces of old seals can dislodge and clog the new cartridge’s tiny passages. Always flush the valve body and cartridge before final assembly.
- O-ring placement matters. Even a small misplacement or fold in an O-ring can drastically reduce flow, yet it’s often missed during installation.
- Handle orientation affects function. If you install the cartridge upside-down, the handle may “work,” but pressure will be restricted. Always check the alignment guides.
- Pressure problems may be temporary. Sometimes, after repairs, small debris moves through the pipes and clears out after a few uses. If pressure is low immediately after repair but improves with time, debris was likely the cause.
- Not all “Moen” cartridges fit all Moen showers. This is a common source of error—always check your valve model number, not just the brand.
Troubleshooting Summary: Quick Checklist
If you experience low water pressure after replacing your Moen shower cartridge, remember these steps:
- Confirm the right cartridge model for your shower.
- Remove and clean the cartridge and valve body.
- Lubricate O-rings and seals.
- Flush the valve before installing the new cartridge.
- Check showerhead for clogs.
- Open all supply valves fully.
- Test with the old cartridge if possible.
- Consider broader plumbing issues if all else fails.
Credit: www.homedepot.com
Additional Resources
For more details on Moen cartridge types and troubleshooting, see the official Moen Support FAQs.
Frequently Asked Questions
Why Is My Water Pressure Low Only After Replacing The Shower Cartridge?
Low water pressure after cartridge replacement often means the new cartridge isn’t seated correctly, is blocked by debris, or is the wrong model for your shower. Double-check installation steps and flush the valve to remove hidden blockages.
How Can I Tell If I Installed The Moen Cartridge Backwards?
Signs of backward installation include reversed hot/cold water, a stiff or stuck handle, and low or no water flow. Remove the cartridge and compare its orientation with the instructions or the old part.
Is It Safe To Use Plumber’s Grease On Moen Cartridges?
Yes, plumber’s silicone grease is recommended for all rubber O-rings and seals. It helps the cartridge slide into place and prevents tearing. Do not use petroleum-based grease, as it can damage rubber.
What If I Have Low Pressure In All My Faucets After Shower Repair?
Low pressure everywhere usually points to a main water supply issue, a pressure regulator problem, or a municipal water supply drop. Check your main shut-off and ask neighbors if they have the same problem.
Can A Faulty Showerhead Cause Low Pressure After Cartridge Replacement?
Yes, a clogged or old showerhead can restrict water flow. Remove and test water flow without the head. If pressure is normal, clean or replace the showerhead.
—
Solving low water pressure after replacing a Moen shower cartridge is usually straightforward with the right knowledge and tools. Careful installation, cleaning, and attention to detail can restore your shower’s flow. For stubborn problems, professional help ensures your shower works as it should, bringing back comfort and convenience to your bathroom.

Credit: www.youtube.com