
If you’re planning a bathroom remodel or building a new shower, you’ll quickly realize that installing a shower pan liner is one of the most critical steps for a leak-free, long-lasting shower. Many homeowners and even some professionals underestimate the importance of properly gluing the liner to a concrete floor. When done right, you prevent water from seeping under your shower, which can cause mold, structural damage, and expensive repairs. But what’s the best way to glue a shower pan liner to concrete? What are the mistakes to avoid, and which products work best? This guide will walk you through everything you need to know, whether you’re a first-timer or have some DIY experience.
Why The Shower Pan Liner Matters
The shower pan liner acts as a hidden waterproof barrier between the tile floor and the subfloor. Its main purpose is to direct any water that gets through the tile or grout safely to the drain. If water gets under the liner, it can damage the concrete, cause mildew, and even rot wood framing. This is why gluing the liner down securely is not just a step—it’s essential protection for your home.
A high-quality liner, properly installed, can last 30 years or more. Skipping steps or using the wrong adhesive can dramatically reduce its lifespan. While some think “concrete is already waterproof,” in reality, concrete is porous and can absorb and pass water, leading to hidden damage.
Types Of Shower Pan Liners
Before you start, it’s important to understand what kind of liner you’re working with. Not all liners are created equal, and the material type affects your choice of adhesive and installation process.
1. Pvc Liners
PVC (polyvinyl chloride) liners are the most common choice for residential showers. They are usually gray or blue, come in rolls, and are flexible but durable. PVC liners are often 40 mil thick, which is about the thickness of a credit card.
2. Cpe Liners
CPE (chlorinated polyethylene) liners are similar to PVC but have better chemical and UV resistance. They cost more but are more flexible, especially in cold weather. CPE liners often have a longer warranty.
3. Liquid Membrane Liners
These are painted or rolled directly onto the concrete, forming a seamless layer. Liquid membranes are less common for traditional shower pans but useful for complex shapes.
4. Sheet Rubber Liners
Some commercial showers use sheet rubber. These are heavy-duty and require special adhesives.
Comparison Of Common Liner Types
| Liner Type | Flexibility | Cost | Common Use |
|---|---|---|---|
| PVC | Medium | Low | Residential showers |
| CPE | High | Medium-High | High-end residential/commercial |
| Liquid membrane | High | Medium | Custom shapes |
| Sheet rubber | Low | High | Commercial/industrial |
Tools And Materials Needed
Having the right tools and materials ready will make the installation smoother. Here’s what you’ll need for a standard PVC or CPE liner installation:
- Shower pan liner (sized for your shower, with extra for walls)
- Concrete patch (if repairing floor)
- Adhesive (compatible with liner and concrete; more details soon)
- Utility knife (for trimming liner)
- Measuring tape
- Roller or wood float (for smoothing liner)
- Caulking gun (for sealant at edges)
- Staple gun (if attaching liner up walls—never on the floor area)
- Notched trowel (for spreading adhesive)
- Protective gloves
- Buckets and sponges (for cleaning)
- Safety glasses
Choosing The Right Adhesive
Not all adhesives work well for gluing shower pan liners to concrete. The wrong choice can lead to poor bonding, chemical reactions, or quick failure. Here’s what you need to know:
Types Of Adhesives
- Solvent-based contact cement: Most common, but strong fumes. Bonds instantly.
- Water-based contact adhesive: Easier cleanup, less odor, but not always as strong on porous concrete.
- Polyurethane construction adhesive: Good for irregular surfaces, stays flexible.
- Manufacturer-specific adhesives: Some liners require their own branded glue. Always check the liner instructions.
Important: Never use regular PVC cement (like for pipes). It’s not made for flexible liners and can eat through the material.
Adhesive Selection Table
| Adhesive Type | Best For | Pros | Cons |
|---|---|---|---|
| Solvent-based contact cement | PVC/CPE liners | Instant bond, strong hold | Strong fumes, flammable |
| Water-based contact adhesive | PVC liners, indoor use | Low odor, easy to apply | Longer cure time, not for all liners |
| Polyurethane construction adhesive | Uneven concrete | Flexible, strong | More expensive, slower set |
| Manufacturer-specific glue | Brand-required installs | Guaranteed compatibility | Limited availability |
Two Insights Beginners Miss
- Test for compatibility: Some glues react with liners, causing bubbles or weak spots. Always test a small piece.
- Check for “open time”: Some adhesives must dry until tacky before pressing the liner down. Rushing this step leads to bad adhesion.
Preparing The Concrete Floor
A clean, dry, and smooth surface is key to a strong bond. Here’s how to prepare your shower base:
1. Cleaning
Sweep away all dust, dirt, and debris. Even a small stone can puncture the liner. Use a shop vacuum for best results. If there’s any grease or oil, scrub it off with a degreaser.
2. Repairing Cracks And Holes
Fill any cracks, holes, or low spots with concrete patch. Uneven floors can create “air pockets” under the liner, which may split over time. Allow repairs to dry fully.
3. Smoothing The Surface
If the concrete is rough, sand high spots with a masonry stone or grinder. Remove all sharp edges, especially around the drain. The smoother the floor, the better the bond.
4. Dryness Check
Concrete must be dry. If you’re working on new concrete, let it cure for at least 28 days. Moisture under the liner can cause adhesive failure.
5. Prime If Needed
Some adhesives recommend a primer for porous concrete. Check the label and follow instructions for best results.
Measuring And Cutting The Liner
Get this step right and you’ll avoid leaks and wasted material.
- Measure the shower area, including up the walls (at least 6 inches above the finished curb).
- Add 6-8 inches extra on all sides for adjustments and mistakes.
- Lay out the liner flat in the room for an hour. This helps relax any folds.
- Cut the liner with a sharp utility knife. Never stretch the liner to fit—this can cause tears later.
Tip: Always keep the liner in one piece. Joints are weak points.
Dry-fitting The Liner
Before using adhesive, lay the liner in place and check all corners and upturns.
- Make sure it lies flat with no wrinkles.
- Ensure the liner goes up the walls and over the curb without gaps.
- Mark the position of the drain hole, but don’t cut it yet.
Take your time here. Adjusting a glued liner is much harder than a dry one.
Gluing The Shower Pan Liner To Concrete
Here’s where careful work pays off. Let’s break down the process step-by-step.
Step 1: Plan Your Work Area
Decide if you’ll glue the entire floor at once or work in sections. Most pros recommend working in halves—roll up one side, glue, press down, then do the other. This prevents the adhesive from drying out before you get the liner in place.
Step 2: Apply Adhesive
Using a notched trowel or roller, spread adhesive on the concrete, following the manufacturer’s instructions. Cover the entire pan area but avoid putting adhesive under the area where the drain will be cut out (this keeps the drain area flexible for adjustments).
- Apply a thin, even layer.
- Don’t apply more than you can cover in 15-20 minutes.
Step 3: Wait For Tacky Stage
Most contact adhesives require a few minutes to become tacky. Touch with your finger—if it sticks but doesn’t transfer glue, it’s ready. Skipping this step is a common mistake.
Step 4: Lay The Liner
Carefully lay the liner onto the adhesive. Start at the back and work forward, smoothing as you go.
- Use your hands or a wood float to press the liner into the adhesive.
- Work out all air bubbles, starting from the center and moving outward.
- Do not stretch the liner; let it relax into place.
Step 5: Secure Edges And Corners
Where the liner meets the walls or curb, press it firmly into the corners. Some installers use a small bead of flexible sealant at the edge for extra waterproofing.
- If allowed by local code, you can staple or tack the liner to the walls above the curb height—but never on the floor or curb itself.
Step 6: Trim And Cut The Drain
Once the liner is glued and smoothed, locate the drain hole. Cut a small “X” just large enough for the drain flange. Do not overcut, as this is a critical waterproofing point.
- Fold the liner down over the drain.
- Install the top part of the drain assembly, sandwiching the liner in place as per manufacturer instructions.
Step 7: Inspect And Test
Double-check for wrinkles, loose spots, or missed adhesive areas. It’s much easier to fix now than after the tile goes in.
Pro Insight: Let the adhesive cure fully (usually 24 hours) before flood-testing the pan.
Curing And Flood Testing
After installing the liner, allow the adhesive to cure as directed. This is not the time to rush—the glue needs to reach full strength for a waterproof seal.
Flood testing means plugging the drain, filling the pan with water, and letting it sit for 24 hours. If the water level drops, you have a leak that must be fixed before tiling.
How To Flood Test:
- Plug the drain with a test plug.
- Fill the shower base with water up to the edge of the curb.
- Mark the water level with tape.
- Wait 24 hours and check for leaks inside and outside the shower.
- If the water has dropped, inspect for wet spots under or around the shower.
Flood testing is required by code in many areas and is your best guarantee that the liner is watertight.
Common Mistakes To Avoid
Even experienced installers make errors. Here are the most frequent problems and how to avoid them:
- Not cleaning the concrete: Dust and debris prevent glue from sticking.
- Using the wrong adhesive: Regular construction glue may not bond with PVC/CPE liners.
- Failing to wait for tacky stage: Laying the liner too soon can cause bubbles or weak spots.
- Cutting the drain hole too large: Always make a snug fit around the flange.
- Skipping flood test: Never tile over an untested liner.
- Gluing up the walls: Most codes require the liner to be loose up walls to accommodate movement and settling.
- Stretching the liner: This causes tension that can lead to splits.
- Not overlapping corners: All corners must be tight, with no gaps or folds.
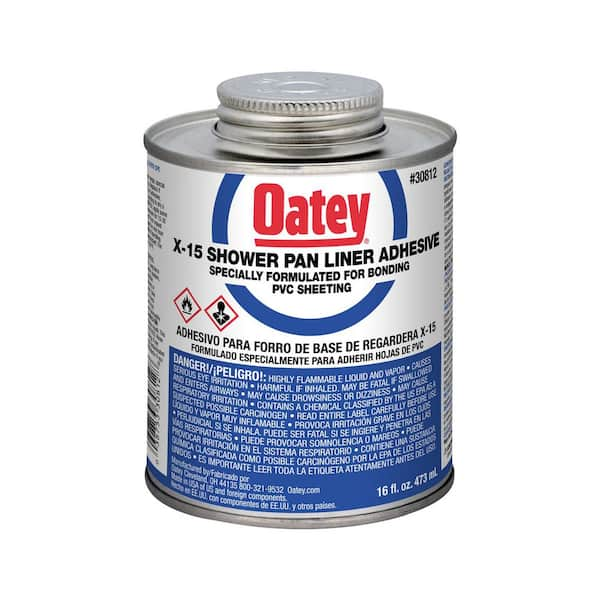
Credit: www.homedepot.com
Tips For A Professional-grade Installation
Some extra steps can make your liner installation last for decades:
- Use corner pre-formed patches: These seal tricky inside corners and curb ends.
- Heat the liner if cold: Cold PVC is stiff and hard to work with. Let it warm up to room temperature before installing.
- Double-check compatibility: If using a liner and adhesive from different brands, test them together first.
- Document your work: Take photos before covering the liner. This helps with future repairs or warranty issues.
When To Call A Pro
While many handy homeowners can install a shower pan liner, some situations call for a licensed professional:
- Complex shapes: Odd-shaped showers or custom benches are tricky.
- Multiple drains: Commercial showers with multiple drains need perfect slopes.
- Building code requirements: Some areas require inspections and certified installers.
A single leak can cause thousands of dollars in damage, so never hesitate to get help if you’re unsure.

Credit: www.lowes.com
Maintenance After Installation
Once your liner is installed and flood-tested, it’s mostly hidden forever. However, you can extend its life with a few simple habits:
- Keep weep holes open: These are small gaps in the drain assembly that let water under the tile escape. Don’t clog them with mortar or debris.
- Check grout and caulk regularly: Cracked grout lets water through faster.
- Address slow drains immediately: Standing water above the liner increases the risk of leaks.
Cost Breakdown: Diy Vs. Professional
Is it worth doing yourself? Here’s a quick look at typical costs.
| Item | DIY Cost | Pro Install Cost |
|---|---|---|
| Shower pan liner (3×5 ft) | $40-$60 | Included |
| Adhesive | $15-$35 | Included |
| Tools & supplies | $30-$80 | Included |
| Labor | $0 | $300-$600 |
| Total | $85-$175 | $300-$700 |
Insight: DIY saves money, but if you make a mistake, repairs can cost much more than hiring a pro.

Credit: www.youtube.com
Real-world Example
Consider a homeowner named Alex who installed a shower pan liner in a 4×4 ft shower. Alex followed all the steps above but skipped the flood test because of time pressure. After tiling, he noticed a musty smell in the bathroom.
On investigation, he found a small leak near the drain where the adhesive had not bonded well. Fixing it required removing the new tile and reinstalling the liner, costing over $1,000 in extra work.
Lesson: Never skip flood testing or rush adhesive application.
Environmental And Safety Considerations
- Ventilation: Many adhesives have strong fumes. Always work in a well-ventilated area and use a mask if recommended.
- Disposal: Leftover adhesive and liner scraps must be disposed of according to local rules—never pour down the drain.
- Eco-friendly options: Some water-based adhesives and liners are now available with low-VOC content. Check for “greenguard” or similar certifications if this matters to you.
Frequently Asked Questions
What Is The Best Adhesive For Gluing A Shower Pan Liner To Concrete?
The best adhesive is usually a solvent-based contact cement or a manufacturer-approved glue designed for your liner material (PVC or CPE). Always check the liner’s instructions and test a small area first to ensure compatibility. Never use regular construction adhesive or PVC pipe glue, as these can damage the liner.
How Long Should I Wait Before Water Testing The Liner?
Wait at least 24 hours after gluing the liner to the concrete before flood testing. This allows the adhesive to fully cure and ensures a strong bond. If the manufacturer recommends a longer cure time, follow their guidance.
Can I Install A Shower Pan Liner On Damp Or New Concrete?
No. Concrete must be fully cured (at least 28 days for new pours) and completely dry. Moisture can prevent proper adhesive bonding and may cause the liner to fail over time.
Do I Need To Glue The Liner Up The Walls, Or Just On The Floor?
Glue is usually only needed on the shower floor. The liner should run loosely up the walls and over the curb without adhesive, to allow for movement and settling. Secure it with staples or fasteners above the curb height if allowed by local code, but never puncture the liner on the floor or curb.
Where Can I Find Official Guides Or Codes For Shower Pan Liner Installation?
For official guidance, check your local building codes or trusted resources like the National Tile Contractors Association. They provide standards and step-by-step guides for waterproofing showers.
Final Thoughts
Gluing a shower pan liner to concrete is not a glamorous job, but it’s one of the most important steps for a long-lasting, leak-free shower. With careful preparation, the right adhesive, and attention to detail, even a beginner can achieve professional results. Don’t skip steps, always test for leaks before tiling, and remember that small mistakes can have big consequences down the road. If you ever feel unsure, consult a professional—peace of mind is worth the investment. With these tips and a methodical approach, you’ll protect your bathroom and enjoy a beautiful, durable shower for years to come.