Switching from a bath to a shower is a decision that can transform your daily routine and home experience. Whether you want to save water, create more space, or make your bathroom safer and easier to use, the process involves several important steps and choices.
People often imagine this project is simple, but even small details like water pressure, drainage, and the type of shower enclosure can make a big difference in the final result.
As someone who has guided many homeowners through this journey, I’ve seen common mistakes and surprising benefits that most people miss. This article will walk you through every aspect of switching a bath to a shower, from planning and preparation, to design choices, installation, and long-term considerations.
You’ll find practical advice, real examples, and tips to avoid problems—so your new shower fits your needs perfectly and adds lasting value to your home.
Why Consider Switching From Bath To Shower?
The decision to switch from a bathtub to a shower can be motivated by many factors, and understanding these reasons is important before you start.
- Space Saving: Showers take up less room than most bathtubs. In small bathrooms, this can make the space feel much larger and more open.
- Accessibility and Safety: Climbing into a bathtub can be difficult for seniors or people with mobility issues. Showers with low or no thresholds are safer and easier to enter.
- Water and Energy Savings: Showers generally use less water than baths, especially if you install a low-flow showerhead. This can lower utility bills and is better for the environment.
- Modern Look: Many people prefer the clean, modern look of a glass shower enclosure. It can make your bathroom appear more stylish and increase your home’s value.
- Maintenance: Showers are often easier to clean. There are fewer surfaces for grime and mold to collect, especially if you choose solid wall panels instead of tile.
- Lifestyle Changes: Some families find they rarely use their bathtub. Switching to a shower can make the bathroom more practical for daily use.
However, there are also reasons to keep a bathtub, like if you have young children or if a bath is important for resale value in your area. Think carefully about your current and future needs.
Planning Your Bath-to-shower Conversion
A successful bath-to-shower switch starts with good planning. Rushing into demolition or buying the first kit you see can lead to expensive mistakes.
Measure Your Space
Start by measuring your existing bathtub area. Most standard tubs are about 60 inches (152 cm) long and 30 inches (76 cm) wide. Knowing these dimensions will help you choose the right shower base and enclosure.
Assess Your Plumbing
Check where your water lines and drain are located. Most bathtubs have drains at one end, while some showers need a center drain. Moving plumbing can add cost and complexity. If possible, choose a shower base with a drain that matches your current setup.
Set A Budget
Costs for a bath-to-shower conversion can range from $1,500 to over $8,000 depending on your choices and whether you hire professionals. Include costs for demolition, materials, labor, permits, and unexpected repairs. Setting a clear budget helps you make smart decisions.
Decide Diy Or Professional
Some handy homeowners can handle a simple bath-to-shower swap, especially with ready-made kits. But if you have old plumbing, need to move pipes, or want a custom tiled shower, hiring a licensed contractor is safer and will likely produce a better result.
Types Of Showers To Consider
There are many types of showers you can install where your tub used to be. Your choice will affect cost, appearance, maintenance, and long-term value.
Prefabricated Shower Kits
These kits include a shower pan (base) and wall panels that fit together. They’re often made from acrylic or fiberglass. Kits are affordable, quick to install, and easy to clean. However, they offer less design flexibility and can look less “high-end.”
Custom Tiled Showers
A custom tiled shower lets you choose the exact size, shape, and tile design. They look beautiful and can match any style. However, tiled showers are more expensive and require more time and skill to install. Grout lines also need regular cleaning.
Walk-in Showers
Walk-in showers have no curb, making them highly accessible for seniors or anyone who wants a modern, open look. They usually require precise floor sloping and waterproofing, so professional installation is recommended.
Shower-tub Combos
If you want the option to shower or bathe, consider a shower-tub combo. This is especially common in homes with only one bathroom, so you don’t lose the ability to take a bath.
Steam Showers
For a luxury upgrade, a steam shower adds a steam generator, special doors, and extra waterproofing. This is a bigger investment but can turn your bathroom into a mini-spa.
Comparing Shower Types
To help you decide, here’s a comparison of the most common shower replacement types:
| Type | Cost Range | Installation Time | Maintenance Level | Design Options |
|---|---|---|---|---|
| Prefabricated Kit | $1,500 – $5,000 | 1–3 days | Low | Limited |
| Custom Tiled | $4,000 – $8,000+ | 5–10 days | Medium | Unlimited |
| Walk-In | $4,000 – $9,000+ | 4–8 days | Medium | High |
| Shower-Tub Combo | $1,700 – $6,500 | 2–5 days | Medium | Moderate |
| Steam Shower | $6,000 – $15,000+ | 7–14 days | High | High |
Key Steps To Switch From Bath To Shower
Now, let’s walk through the main steps involved in converting your bathtub to a shower.
1. Prepare The Area
Before you start, protect your floors and remove anything that could be damaged by dust or water. Turn off the water supply to the bathroom.
2. Remove The Old Bathtub
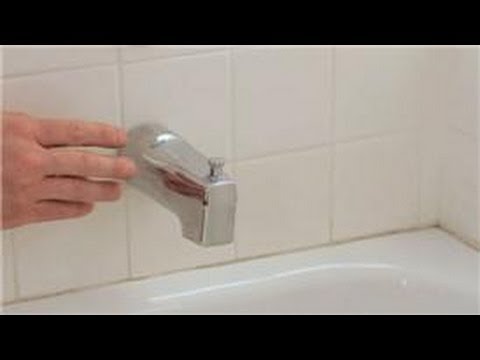
Removing a bathtub is a heavy, messy job. First, disconnect the drain and overflow. Remove the faucet and spout. Cut away any caulk or trim. The tub may need to be cut into sections to fit through the door. Watch for hidden water damage under or around the tub—this is more common than people expect.
3. Inspect And Repair
Check the subfloor and walls for rot, mold, or water damage. Repair any problems before you continue. This is also the time to update old plumbing, replace shutoff valves, or add extra supports if needed.
4. Adjust Plumbing
Shower drains are often in a different spot than tub drains. If you need to move the drain or water lines, this step can be tricky. It’s best to hire a plumber unless you have experience. For some kits, you may find a shower pan with a drain that matches your existing setup.
5. Install The Shower Base
The shower base (or pan) must be level and well supported. Some bases require a bed of mortar underneath for stability. Double-check that the drain lines up perfectly.
6. Add Waterproofing
For tiled showers, apply a waterproof membrane to the floor and walls. This step is critical to prevent leaks and future mold issues. For prefabricated kits, make sure wall panels are properly sealed at all joints.
7. Install Walls And Fixtures
Attach the shower walls (panels or tile backer board). Then install your showerhead, controls, and any extra features like body sprays or a handheld sprayer. Position controls so they’re easy to reach from outside the shower.
8. Add The Shower Door Or Curtain
Glass doors look modern but cost more. Curtains are budget-friendly and easy to replace. If you choose a glass door, make sure the floor slopes toward the drain to prevent leaks.
9. Test Everything
Turn the water back on and check for leaks around the drain, controls, and showerhead. Run the shower for several minutes to be sure all water flows into the drain.
10. Finish And Clean Up
Seal any gaps with waterproof caulk. Clean up the work area and dispose of the old tub and construction waste. Now your new shower is ready to use!
Choosing Your Shower Base
The shower base is a key part of your new setup. It needs to be strong, waterproof, and fit your space.
Materials
- Acrylic: Lightweight, affordable, and easy to clean. Scratches can be repaired with special kits.
- Fiberglass: Similar to acrylic but sometimes less durable. It’s a budget choice.
- Porcelain or Cast Iron: Very strong, but heavy and more expensive.
- Custom Tile: Allows any size or shape but requires expert installation and waterproofing.
Threshold Height
Some bases have a low step-over (great for accessibility), while others have a higher curb to keep water inside. No-threshold (curbless) showers are modern and wheelchair-friendly but need careful floor design.
Drain Location
Try to match the drain location to your old tub if possible. Changing the drain position adds cost.
Shower Walls: Panels Or Tile?
Your shower walls are important for both style and maintenance.
- Wall Panels: Acrylic or solid-surface panels install quickly and have no grout lines. They’re easy to clean and last for years. They come in many colors and patterns, including options that mimic tile or stone.
- Tile: Offers unlimited design choices, from classic subway tiles to modern mosaics. However, tile needs regular cleaning and grout sealing to prevent mold.
Shower Doors Vs. Curtains
Most people choose between glass shower doors and fabric curtains.
Glass Doors
- Frameless: Modern and open look, more expensive, but easier to clean.
- Framed: Cheaper, sturdy, but may have more spots for grime to collect.
Curtains
- Inexpensive and easy to change for a new look. They’re also more forgiving if the shower area isn’t perfectly square.
- Curtains don’t seal as tightly, so make sure your floor is well-protected.
Accessibility Features
If you’re switching for accessibility, consider these additions:
- Grab Bars: Add sturdy bars near the entrance and inside the shower for balance and support.
- Built-in Seat: A fold-down or built-in seat makes showering easier for those who can’t stand for long.
- Handheld Showerhead: Allows you to rinse without moving around much.
- Non-slip Flooring: Choose a shower base with a textured surface or add slip-resistant strips.
- Wide Entry: Make sure the opening is wide enough for easy access, with no threshold if possible.
Special Plumbing Considerations
Bath and shower plumbing look similar, but there are some key differences.
- Shower Valves: Modern shower valves keep water temperature steady, even if someone flushes a toilet elsewhere.
- Water Pressure: Some homes have low water pressure, so choose a showerhead designed for this.
- Drain Size: Bathtubs usually have a 1.5-inch drain, but some showers require a 2-inch drain for faster water removal.
- Ventilation: Showers create more steam, so make sure your bathroom fan is strong enough (look for at least 50 CFM for small bathrooms).
Ventilation And Moisture Control
Showers create more humidity than baths, so good ventilation is essential to prevent mold.
- Upgrade the Exhaust Fan: Choose a quiet, high-power fan. Some models include a timer or humidity sensor.
- Seal Around Edges: Use silicone caulk where the shower meets the walls and floor to keep water out.
- Waterproof Paint: Consider waterproof or mold-resistant paint on the ceiling and upper walls.
Finishing Touches: Shelves, Niches, And Benches
Don’t forget about storage and comfort.
- Built-In Niches: Recessed shelves in the wall keep soap and shampoo handy without sticking out.
- Corner Shelves: Easy to add, especially in prefab showers.
- Benches: Useful for shaving, washing, or just relaxing. Fold-down models save space.
Common Mistakes To Avoid
- Ignoring Water Damage: Skipping repairs under the old tub can lead to leaks and mold later.
- Choosing the Wrong Size: Measure carefully—some shower kits don’t fit standard tub spaces perfectly.
- Poor Waterproofing: Even small gaps can cause big problems over time.
- Underestimating Costs: Small surprises (like moving a drain) can add hundreds or thousands to your budget.
- DIY Overconfidence: If you’re not sure, hire a pro. Water damage is expensive to fix.
Cost Breakdown: Where Does The Money Go?
Here’s a rough breakdown of costs in a typical bath-to-shower conversion:
| Item | Cost Range | Notes |
|---|---|---|
| Shower Base | $200 – $1,500 | Material and size affect price |
| Walls (Panels/Tile) | $300 – $3,000 | Tile costs more |
| Glass Door | $300 – $2,500 | Frameless cost more |
| Fixtures | $100 – $800 | Includes showerhead, controls |
| Plumbing | $300 – $2,000 | Moving drains is expensive |
| Labor | $1,000 – $5,000+ | Varies by region and complexity |
| Permits | $50 – $300 | Check local rules |
| Miscellaneous | $100 – $500 | Includes caulk, paint, repair supplies |
How To Choose A Contractor
If you decide to hire a professional, picking the right contractor is crucial.
- Check Reviews and References: Ask for recent jobs and talk to past clients.
- Get Multiple Quotes: Prices can vary a lot. Compare what each estimate includes.
- Verify License and Insurance: Protect yourself from accidents or poor work.
- Ask About Warranty: Good contractors guarantee their work and materials.
- See Past Work: Photos or visits to previous jobs can show quality and style.
Timeline: How Long Does It Take?
Most bath-to-shower conversions take 3–7 days for basic kits and up to 2 weeks for custom tile or major plumbing changes. Add time for planning, getting permits, and ordering materials. If you only have one bathroom, consider how you’ll manage during construction.
Credit: www.youtube.com
Increasing Home Value
A new shower can increase your home’s value, especially if you add modern features or improve accessibility. According to the National Association of Realtors, bathroom remodels can return 60–70% of their cost in resale value. In some markets, losing the only bathtub might be a drawback, so check local trends before you remove all tubs.
Real-world Example
A couple in Chicago had a small, outdated bathroom with a worn tub. They switched to a walk-in shower with glass doors and built-in shelves. The project cost $6,500 and took eight days. Afterward, the space felt bigger, safer, and more attractive. Their home appraised for $10,000 more after the upgrade.

Credit: www.youtube.com
Non-obvious Insights Most People Miss
- Consider Future Needs: Even if you’re healthy now, a no-threshold shower or grab bars can help you age in place or increase appeal to future buyers.
- Waterproofing Is More Important Than Looks: Fancy tile won’t matter if water gets behind the walls. Always invest in high-quality waterproofing and proper installation.
- Plan for Storage: Many people forget shelves and niches, then end up with messy caddies or bottles on the floor.
- Check Local Building Codes: Some cities require permits for plumbing or major remodels. Skipping this step can cause problems when you sell your home.
Sustainability Considerations
Switching to a shower is often a greener choice. The average bath uses 35–50 gallons (130–190 liters) of water, while a five-minute shower with a low-flow head uses 10–15 gallons (38–57 liters). Choose WaterSense-labeled fixtures for maximum savings. Recycle your old tub if possible—cast iron and steel tubs can often be taken to scrap yards.
Permits And Building Codes
Many cities require a permit for bathroom remodeling, especially if you change plumbing or move a drain. This protects you and future buyers by ensuring the work meets safety standards. Inspectors check waterproofing, electrical, and plumbing. Skipping permits can cause trouble when selling your home or if something goes wrong.
Cleaning And Maintenance Tips
- Squeegee Walls and Doors after each use to prevent water spots and mold.
- Clean Grout Regularly if you have tile. Use a grout sealer every year.
- Check Caulk Lines every few months and repair cracks to keep water out.
- Ventilate after every shower to keep moisture down.
When To Keep A Bathtub
If you only have one bathroom, removing the tub could reduce your home’s value for families with young kids. Some buyers see a tub as essential. If you have a second bathroom with a tub, switching one bath to a shower is less risky.
Helpful Resources
For more in-depth remodeling advice, the National Kitchen & Bath Association offers free guides and design inspiration at nkba.org.

Credit: www.reddit.com
Frequently Asked Questions
How Much Does It Cost To Switch From A Bath To A Shower?
The cost can range from $1,500 to over $8,000, depending on the type of shower, materials, and whether you hire professionals. Prefab kits are cheapest, while custom tile and walk-in showers cost more. Always get several quotes before starting.
Can I Convert A Bathtub To A Shower Myself?
Yes, if you’re handy and choose a prefabricated kit, you might do it yourself. However, moving plumbing, waterproofing, and tiling are best left to pros. Mistakes can lead to leaks and expensive repairs.
Do I Need A Permit To Change A Bath To A Shower?
In many places, yes—especially if you’re changing plumbing or moving drains. Check with your city’s building department before starting. Permits protect you by ensuring the work meets safety codes.
Will Removing My Bathtub Lower My Home’s Value?
If it’s your only tub, some buyers may see this as a negative. In homes with more than one bathroom, replacing a tub with a shower is less risky and often increases value, especially for accessibility.
How Long Does A Bath-to-shower Conversion Take?
Most projects take 3–7 days for standard kits and up to 2 weeks for custom work. Plan for extra time if you need permits or special materials.
Switching from a bath to a shower is a smart way to modernize your home, improve accessibility, and save water. With good planning, the right materials, and careful installation, you’ll enjoy a beautiful, low-maintenance shower for years to come.