
A loose faucet on a granite countertop is more than just an annoyance—it can lead to water leaks, damage to your granite, and even costly repairs if left unchecked. Many homeowners worry about tightening a faucet on granite because the material feels hard, heavy, and easy to chip.
In reality, with the right approach and tools, you can secure your faucet and protect your countertop without calling a plumber. Whether you’re a DIY beginner or someone who’s just never worked with granite before, this guide will walk you through the process step by step, explaining everything in clear, simple language.
Why Faucets On Granite Countertops Get Loose
Faucets can become loose for several reasons, and granite adds a unique set of challenges. Unlike wood or laminate, granite is a dense, brittle stone. Over time, the faucet’s mounting nuts can loosen due to:
- Vibrations from regular use of the faucet handles, especially in busy kitchens where the faucet is frequently turned on and off. Even small movements add up over time, and the constant back-and-forth can start to loosen the hardware.
- Water leaks causing corrosion or mineral build-up. When water seeps beneath the faucet base, it can cause rust on metal parts or leave hard mineral deposits that force the mounting hardware apart, making the faucet unstable.
- Improper installation where nuts weren’t tightened enough. Sometimes, during installation, the nuts are hand-tightened but not given a final secure turn with a wrench, or the wrong washers are used. Over months or years, this initial looseness gets worse.
- Shrinkage or movement in caulk or sealant. Over time, sealant materials can shrink, crack, or lose adhesion, allowing the faucet to shift slightly, especially if heavy pressure is applied.
Granite doesn’t flex, but if the hole for the faucet is too large or the mounting hardware isn’t designed for stone, the faucet may wobble. Sometimes, installers use mounting kits meant for wood or laminate, not realizing granite needs special support.
Understanding these causes helps you fix the problem and prevent it from happening again. If you’ve had countertop work done, always check that the right hardware was used for granite.
Tools And Materials You’ll Need
Before starting, gather all necessary tools and materials. This ensures you won’t have to pause mid-project or risk damaging your countertop.
- Basin wrench (essential for tight spaces). This tool has a long handle and a swiveling jaw, making it easy to reach nuts behind the sink basin.
- Adjustable wrench or pliers for easier-to-reach nuts.
- Flashlight or headlamp to see clearly in dark, cramped spaces under your sink.
- Towel or foam pad (to protect your back and the cabinet). Cabinets are often cramped and uncomfortable, and a little padding makes a big difference during longer jobs.
- Plumber’s putty or a silicone sealant (if needed). These sealants create a waterproof barrier between the faucet and granite, preventing leaks.
- Bucket or bowl (to catch any water drips). Even if you turn off the water, a small amount can remain in the lines and drip out unexpectedly.
- Cleaning cloth for wiping away old putty, dirt, or mineral buildup.
- Protective gloves to shield your hands from sharp edges and cleaning chemicals.
- Masking tape (optional, for marking positions or protecting granite). If you’re worried about scratching the granite with tools, a little tape around the faucet base helps.
- Granite cleaner (for finishing up). Granite needs special cleaners—avoid anything acidic or abrasive.
If you have a helper, the process goes faster, but it’s not required. Make sure you have all tools within arm’s reach before you start. Place small items in a bowl so you don’t lose them inside the cabinet. Having everything ready reduces frustration and keeps your workspace safer and cleaner.
Credit: sureshinecares.com
Safety Tips When Working With Granite
Granite is tough but can crack or chip if handled carelessly. Here’s how to protect both yourself and your countertop:
- Always turn off the water supply under the sink before starting. Even a small amount of water can create a mess or cause injury if a hose pops off.
- Place a towel or foam pad inside the cabinet to protect your back and to catch small parts. Working under the sink can take time—comfort matters for doing a careful job.
- Don’t overtighten nuts; too much force can crack granite. Granite is strong but not flexible, so gentle tightening is best.
- Use only non-abrasive cleaners on granite to avoid scratches. Even a small scratch can make granite look dull or let water seep in over time.
- If you drop a tool, check the granite for chips or cracks right away. Even a small impact can cause damage you might not notice until later.
Two things beginners often miss: It’s easy to forget to turn off both hot and cold supplies, and some people don’t realize that overtightening metal against granite can cause permanent damage. Always use a gentle, steady approach. Another important point: Wear gloves if you have sensitive skin, as old putty or mineral buildup can be rough or irritating.
Step-by-step Guide To Tightening A Faucet On Granite
Tightening a faucet on granite is similar to other surfaces but requires extra care. Here’s a practical, detailed process you can follow.
1. Clear Out The Cabinet
Remove any items stored under the sink. This gives you enough space to work and prevents accidental damage or water exposure to stored goods. Take out cleaning products, garbage bins, or anything else that could be in the way. If your sink has pipes or a garbage disposal, note their locations so you don’t bump or loosen them.
2. Turn Off Water Supply
Locate the shut-off valves under your sink. Turn both hot and cold valves clockwise until they stop. Test the faucet to make sure no water comes out. Sometimes, the valves can be stiff if they haven’t been used in a while. If you can’t turn them by hand, use a small adjustable wrench, but be careful not to force them.
3. Inspect The Faucet Base
Wiggle the faucet gently. If it moves, check how severe the looseness is. Sometimes, only the handle is loose; other times, the whole faucet base moves. Shine a flashlight under the sink to see the mounting nuts. Look for any signs of water stains, mold, or mineral crust, which can indicate slow leaks.
4. Position Yourself For Access
Lay a towel or foam pad in the cabinet to make it more comfortable. Some cabinets are tight, so consider using a headlamp for hands-free light. Take a few minutes to adjust your position so you can reach up easily.
If your cabinet is very deep or has a center divider, you may need to work from one side and then the other.
5. Locate And Check The Mounting Nuts
Under the sink, look up to where the faucet comes through the granite. You’ll see one or two mounting nuts (usually brass or plastic). If there’s corrosion, mineral buildup, or old putty, wipe it away with a damp cloth. If the nuts are covered in green or white crust (typical of hard water), use a little vinegar on your cloth (but don’t let it touch the granite).
6. Tighten The Mounting Nuts
Use a basin wrench for hard-to-reach nuts or an adjustable wrench if you have space. Turn the nuts clockwise, but do not overtighten. A good rule: once the nut feels snug and the faucet no longer moves when gently pushed, stop. If the nut was very loose, tighten it slowly and check the faucet’s movement as you go. Sometimes, tightening one nut can make the other side loose, so check both before finishing.
Pro tip: If the nut keeps spinning or won’t tighten, the threads may be stripped. In this case, you’ll need a replacement nut (bring the old one to a hardware store to match). Also, make sure the washer (rubber or metal ring) between the nut and granite is in place and not deformed.
7. Check The Faucet’s Stability
From above, gently move the faucet. If it’s secure, you’re done with this step. If it still moves, double-check that you’ve tightened all nuts and that the bracket or washer under the granite is positioned correctly. Some faucets have a horseshoe-shaped bracket—make sure it sits flat and is not twisted.
8. Reseal If Necessary
If you see any gaps between the faucet base and the granite, apply a small bead of silicone sealant or plumber’s putty around the edge. This prevents water from leaking under the faucet, which can loosen it over time. Use your finger or a small tool to smooth the bead for a neat finish. Let silicone dry according to the package instructions (usually 30 minutes to an hour).
9. Turn Water Supply Back On
Slowly open the hot and cold shut-off valves. Check for leaks under the sink and around the faucet base. If you see any water, turn the supply off again and tighten the nuts slightly more. It’s a good idea to keep a towel or bowl under the faucet for a few hours after, just in case a slow drip appears.
10. Clean Up
Wipe away any extra sealant with a damp cloth. Use a granite cleaner to remove fingerprints or smudges. Return any items to the cabinet. Take a moment to check that all tools are accounted for and that the area is dry before you finish.
Credit: www.brizo.com
Special Considerations For Different Faucet Types
Not all faucets are the same. Some use a single mounting nut, while others have two or more. Here’s how to handle common types.
Single-hole Faucets
Most modern kitchen faucets use a single hole and one large nut. Tightening is straightforward, but always check for an extra washer between the nut and granite. If the washer is missing or worn, the nut may not hold firmly, and the faucet can keep loosening.
Widespread Faucets
These have separate hot and cold handles. Each handle and the spout may have its own mounting nut. You’ll need to tighten each one. This can be tricky in small cabinets, so take your time and check each part for movement separately.
Pull-down Or Pull-out Faucets
These faucets have a flexible hose inside. Be careful not to pinch the hose when tightening the nut. Move the hose out of the way as you work. If your faucet has a weight on the hose (to help it retract), make sure it’s not tangled or caught on anything after you finish.
Touchless And Sensor Faucets
These often have electronic modules under the sink. Turn off power or remove batteries before starting. Handle wires carefully. If your model has a control box, avoid bumping or moving it, as this can affect the faucet’s sensor operation.
Beginner tip: Some faucets come with a special plastic mounting tool. If you still have it, use it—it’s designed to fit the nut perfectly. If not, a basin wrench is usually the next best tool.
Common Mistakes To Avoid
Many people damage their granite or faucet by making one of these mistakes:
- Using too much force: Overtightening can crack granite or strip the threads. Always use gentle, steady pressure.
- Ignoring leaks: Water under the faucet can weaken mounting hardware over time. Even a slow drip can cause damage.
- Not cleaning before tightening: Dirt or mineral build-up can prevent a secure fit. Take time to clean the area for the best result.
- Forgetting to check all nuts: Some faucets have more than one mounting point. If you miss one, the faucet may still move.
- Neglecting to reseal: Skipping sealant invites leaks and loosening. Fresh sealant gives extra protection.
- Not turning off both water supplies: Water can spray out if you loosen hoses by mistake.
A non-obvious insight: Even if your faucet seems secure after tightening, check it again after a week. Water or daily use can reveal a slow leak or gradual loosening. Another tip is to check underneath with a flashlight for drips or moisture, as these can be easy to miss in a dark cabinet.

Credit: www.reddit.com
Table: Typical Faucet Mounting Hardware Materials
Here’s a quick reference for the most common materials you’ll find and their pros and cons.
| Material | Pros | Cons |
|---|---|---|
| Brass | Strong, corrosion-resistant, long-lasting | More expensive |
| Plastic | Cheap, easy to work with | Can crack or strip easily |
| Stainless Steel | Very durable, rust-proof | Sometimes harder to tighten by hand |
When possible, choose brass or stainless steel for replacements on granite countertops. They offer better strength and longer life. If you must use plastic, handle it gently to avoid cracks.
How To Know If You Need To Replace Instead Of Tighten
Sometimes, tightening isn’t enough. Here are signs you may need to replace hardware or even the faucet:
- The faucet still wiggles after tightening all nuts. This often means the threads inside the nut or on the mounting stud are damaged and can’t hold tension.
- Threads on the mounting nut or stud are stripped. You’ll feel the nut spinning but not getting tighter.
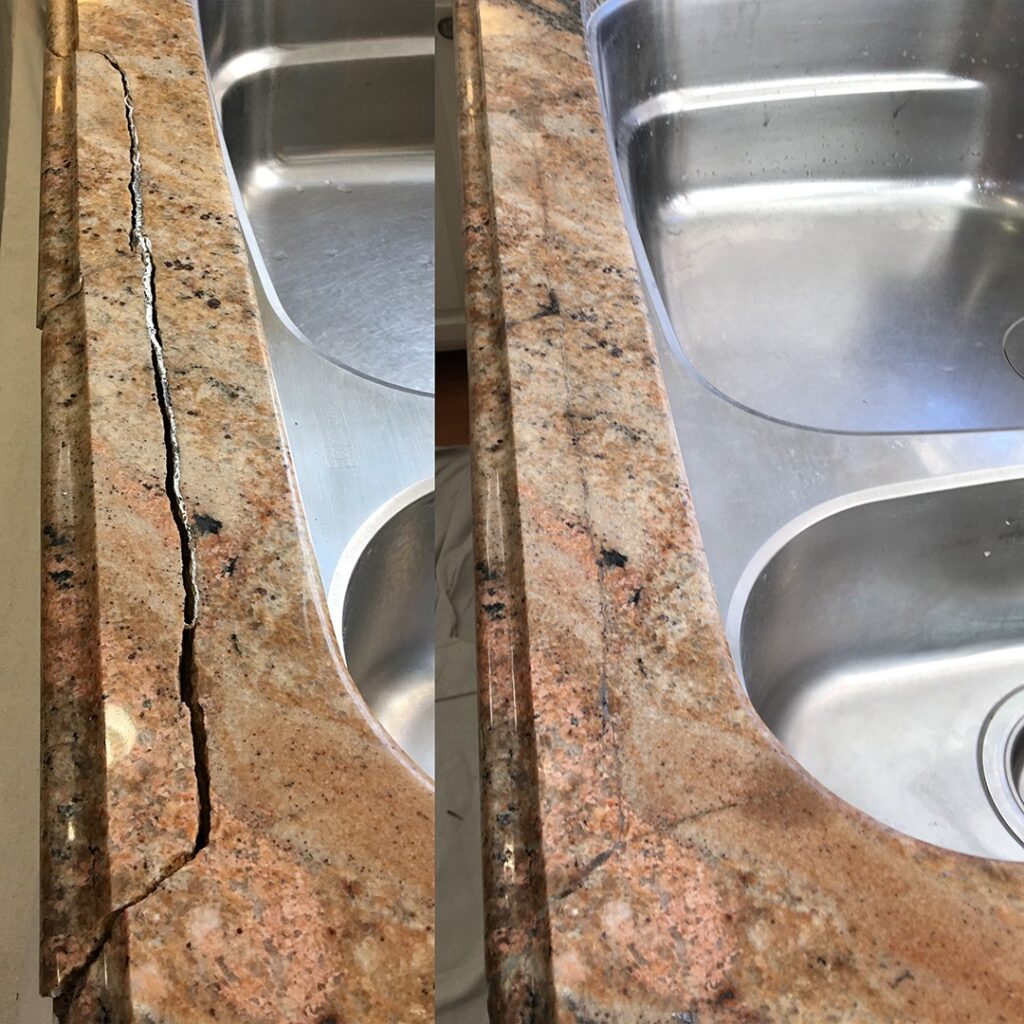
- The granite around the hole is chipped or broken. A secure fit may not be possible if the stone is damaged.
- There’s persistent leaking from the base. This can mean the faucet body or seal is cracked.
If your faucet is very old or the hardware is damaged, replacement may be the safer choice. Bringing the old parts to a hardware store helps you find the right match. For major granite damage, consult a professional installer. Don’t try to patch large chips with putty—improper repairs can make things worse.
Table: Comparing Faucet Tightening On Granite Vs. Other Countertops
Understanding the unique challenges with granite helps avoid mistakes.
| Countertop Material | Ease of Access | Risk of Damage | Sealant Required |
|---|---|---|---|
| Granite | Often tight spaces | High (cracking possible) | Yes, always recommended |
| Laminate | Easy to access | Medium (swelling if wet) | Yes, but less critical |
| Solid Surface (e.g., Corian) | Moderate | Low to medium | Optional |
| Wood | Easy | High (warping possible) | Yes, to prevent water damage |
Granite is beautiful but requires the most care during faucet maintenance. It is less forgiving than wood or laminate if mistakes are made, so always use proper tools and techniques.
Preventing Future Faucet Loosening
After you’ve tightened your faucet, you want it to stay secure. Here’s how to prevent future problems:
- Check for leaks monthly. Early detection stops damage. Run your finger around the faucet base and look for moisture or discoloration.
- Dry around the faucet after use. Water left standing can seep under the base. This is especially important in busy kitchens or bathrooms where splashes are frequent.
- Avoid using the faucet as a handle. Don’t hang towels or pull up on it. Granite is strong, but the mounting hardware can only take so much pressure.
- Use a quality sealant. Replace old caulk or putty every few years. Over time, sealant can dry out or peel away.
- Re-tighten gently if needed. If you feel movement, act before it gets worse. Waiting too long can damage granite or strip the hardware.
A unique insight: If your home has “hard water” (high mineral content), mineral buildup can loosen mounting hardware. Clean around the base with a vinegar-water solution (safe for granite in small amounts) every few months to prevent deposits. Always rinse well and dry to avoid dulling the stone.
Another tip: If you’re planning countertop work or replacing a faucet, ask the installer to use a solid metal or thick plastic support plate under the faucet. This spreads the pressure and helps prevent future loosening.
When To Call A Professional
While most homeowners can tighten a faucet themselves, there are times when you should get help:
- The faucet is still loose after repeated tightening. Persistent movement means the hardware or granite may be damaged.
- You notice cracks or chips in your granite. Professionals can repair stone and make sure the faucet is safely reinstalled.
- There’s water damage under the sink. Mold or rot can develop quickly if leaks are ignored.
- The mounting hardware is impossible to reach. Some sinks are installed in very tight cabinets, making it hard to work without special tools.
Professional plumbers have special tools and experience with granite. They can also advise if your faucet or granite needs repair or replacement. If you’re ever unsure, it’s safer (and often cheaper in the long run) to call an expert. They can also spot problems you might miss, like hidden leaks or improper installation.
Cost Of Tightening A Faucet On Granite
Doing it yourself is usually free if you already have the tools. If you need to buy a basin wrench, expect to pay $10–$30. Sealant costs $5–$10. Hiring a plumber usually costs $75–$150, depending on your area and the complexity of the job.
Remember, fixing a small problem now is much cheaper than repairing water-damaged granite or cabinets later. If you need to replace hardware, parts are usually inexpensive, but granite repair can cost hundreds of dollars.
Table: Quick Reference For Faucet Tightening Solutions
This table summarizes common problems and their best solutions.
| Problem | DIY Solution | When to Call a Pro |
|---|---|---|
| Loose faucet base | Tighten mounting nuts | Faucet still wobbles |
| Leaking at base | Reseal with silicone | Leak persists after resealing |
| Stripped threads | Replace nut | Mounting stud is damaged |
| Granite crack | N/A | Always call a pro |
This quick reference can help you decide your next step if you run into trouble.
Advanced Tips For A Professional Finish
If you want your faucet to look and feel brand new, here are some expert-level tricks:
- Use masking tape around the faucet base before applying sealant. Peel away for a clean edge. This makes your work look neat and professional.
- If space is extremely tight, consider a ratcheting basin wrench for better leverage. These tools make it easier to turn nuts in awkward spots.
- For very old faucets, a small amount of penetrating oil on the nut can help loosen rust before tightening. Wipe away excess oil so it doesn’t stain granite.
- Take a photo of the mounting hardware before starting, so you remember how everything fits together. This is especially helpful if you have to replace parts or work with complex faucets.
A final non-obvious insight: Keep all removed nuts, washers, and tools in a small bowl as you work. Small parts can disappear quickly inside a dark cabinet. Another tip is to label parts with masking tape if you’re removing multiple pieces.
Frequently Asked Questions
How Tight Should I Make The Faucet Nuts On Granite?
Faucet nuts should be snug but not over-tightened. Stop turning when the faucet base feels firm and doesn’t move when gently pushed. Extra force can crack granite. If you’re unsure, use a hand tool rather than a power tool for better control.
What Sealant Is Safe For Granite Countertops?
Use a 100% silicone sealant labeled “kitchen and bath” or plumber’s putty made for stone surfaces. Avoid anything with acids or abrasives. Always check the product label—some putties are not safe for natural stone.
Can I Tighten A Faucet Without A Basin Wrench?
You can try an adjustable wrench or pliers if you have enough space. However, a basin wrench is much easier and safer for tight spots under sinks. Basin wrenches are inexpensive and a good investment for anyone who does home repairs.
What If The Granite Around My Faucet Is Chipped?
If the chip is small and doesn’t affect the faucet’s stability, seal it with clear silicone. For large chips or cracks, call a professional to repair the granite. Small chips can sometimes be polished smooth, but deep cracks must be fixed by an expert.
How Often Should I Check My Faucet For Looseness?
Check your faucet every 3–6 months. Regular checks help catch leaks or loosening early, especially in busy kitchens. If you notice water spots, mold, or a musty smell, check right away.
Tightening a faucet on a granite countertop is a manageable task for most homeowners. With patience, the right tools, and a gentle touch, you can keep your kitchen both beautiful and functional for years to come. For more on faucet installation and maintenance, see this helpful guide from Family Handyman. Remember, a secure faucet protects your investment and saves you from bigger problems down the road.