
Removing steps from an above ground pool may seem like a simple task, but doing it the right way can make a big difference. If you try to rush or skip steps, you can damage your pool, hurt yourself, or even break your pool steps.
For many pool owners, the steps are heavy, awkward, and sometimes even stuck to the floor. Understanding how to remove steps from above ground pool safely and efficiently saves you time, effort, and money.
Many people install pool steps to make getting in and out of the water easy. But when pool season ends, or when you need to clean, repair, or replace the steps, taking them out can be a challenge. Some steps have sand or water inside for weight, others use anchors, and some even have suction.
Removing them requires the right tools, knowledge, and preparation. This guide walks you through each part of the process—explaining what to watch out for, how to avoid common mistakes, and how to do the job safely. Whether you are a new pool owner or have been doing your own pool care for years, you’ll find practical advice and expert tips here.
Why Remove Steps From Your Above Ground Pool?
Pool steps are not permanent. There are several reasons you may need to remove them during the year:
- Winterization: Leaving steps in cold weather can cause cracking or other damage. Ice can form around or inside the steps, leading to expensive repairs.
- Cleaning and Maintenance: Algae and debris often collect around steps. Removing them lets you clean both the steps and the pool floor underneath.
- Storage and Longevity: Storing steps indoors in the off-season protects them from UV rays, chemicals, and weather, making them last longer.
- Repairs or Replacement: If your steps are loose, cracked, or unstable, removing them is the first step to fixing or replacing them.
- Safety: Sometimes, steps become unstable or slippery. Taking them out prevents accidents.
Each reason means the removal process should be done with care to protect both your pool and the equipment.
Types Of Above Ground Pool Steps And How They Affect Removal
Not all pool steps are the same. Knowing what type you have helps you plan the removal.
| Step Type | Main Material | Common Weighting Method | Removal Difficulty |
|---|---|---|---|
| Plastic Steps | Polyethylene/Resin | Sand or water fill | Medium |
| Metal Frame Steps | Steel/Aluminum | Anchors or bolts | High |
| Ladder Steps | Plastic/Resin | Hooked on edge | Low |
| Wedding Cake Steps | Resin/Plastic | Sand or water fill, sometimes suction | High |
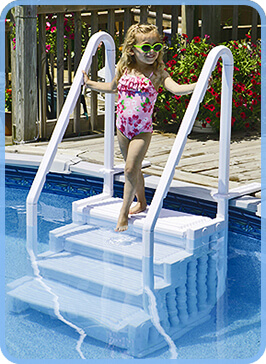
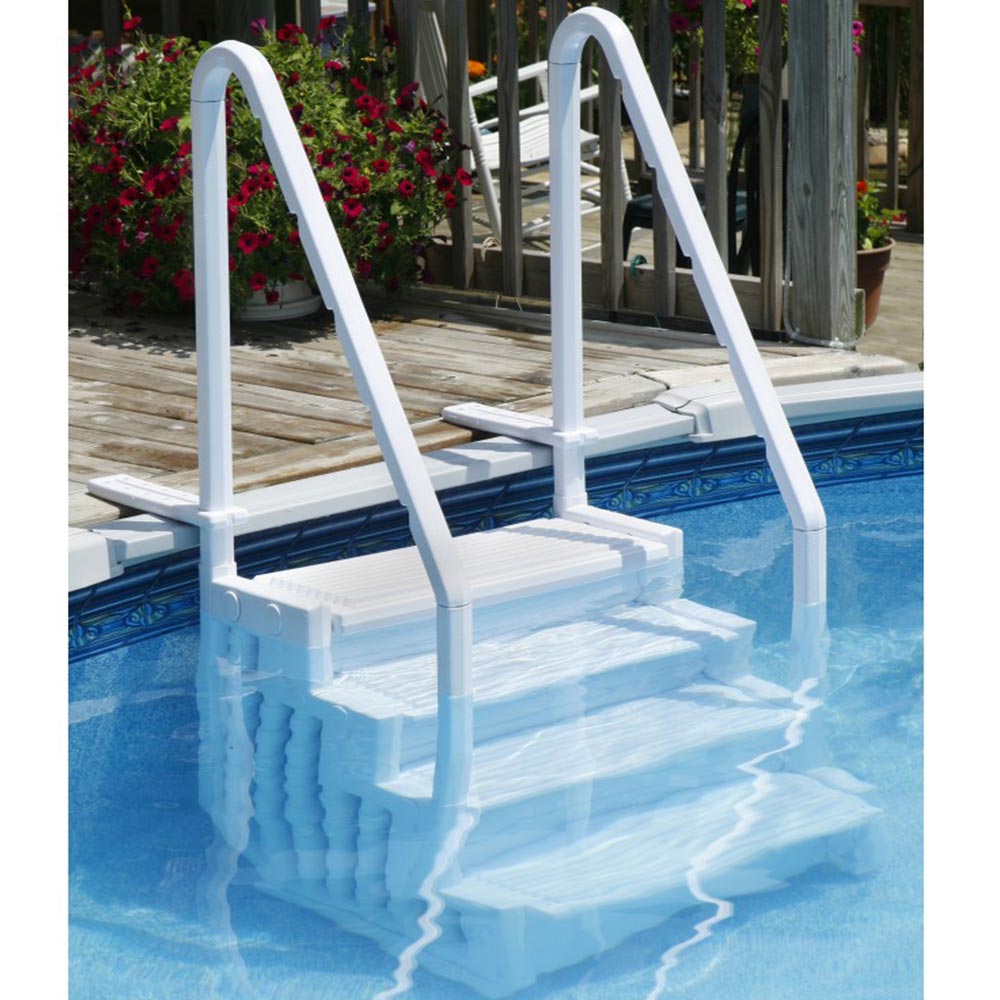
Plastic steps are the most common and usually filled with sand or water. These are often the heaviest and hardest to lift out. Metal frame steps may be bolted or anchored to the pool wall or deck—removal requires tools and sometimes two people. Ladder steps are usually simple to remove, with the legs hooked over the pool wall. Wedding cake steps are stylish but heavy, often with extra suction or weight for stability.
Before you begin, always identify your step type and check the manufacturer’s instructions if you have them.
Credit: intheswim.com
Tools And Supplies You’ll Need
Having the right equipment makes the job much easier and safer. Here’s a checklist of what you may need, depending on your step type:
- Screwdriver or cordless drill (for steps with screws or bolts)
- Socket wrench set (for metal frame steps)
- Utility knife or scissors (if zip-ties or rope are used)
- Plastic siphon pump (for steps filled with water)
- Bucket or scoop (for removing sand)
- Heavy-duty gloves (for grip and protection)
- Soft towel or pool mat (to lay steps on after removal)
- Helper or friend (for heavy steps)
- Garden hose (to rinse steps after removal)
- Tarp or large trash bag (for storage)
Not all steps need every tool, but gathering them before you start prevents delays or accidents.
Preparing Your Pool And Steps For Removal
A little preparation makes the removal process safer and smoother.
- Clear the area around the steps. Remove pool toys, floating mats, or anything else nearby.
- Turn off pool pump and filtration systems. This prevents strong currents or suction while you work.
- Inspect the steps for visible damage, sharp edges, or places where algae may be hiding.
- Check the water temperature. If it’s cold, use gloves to protect your hands.
- Read manufacturer’s instructions if you have them. There may be specific steps or warnings for your model.
Professional pool owners know: Never rush the prep stage. Skipping preparation is the top reason steps get damaged during removal.
Step-by-step Guide: How To Remove Steps From Above Ground Pool
1. Detach Anchors, Bolts, Or Ties
Many steps are held in place with anchors, bolts, or zip-ties.
- Use a screwdriver or socket wrench to remove screws or bolts.
- If using zip-ties or rope, carefully cut with scissors or a utility knife.
- Place removed hardware in a small container so you don’t lose them.
Some steps are weighted with sandbags or water bags. These may be inside the steps or attached to the frame. Remove these first for easier lifting.
2. Remove Water Or Sand From Inside Steps
Many steps are filled with sand or water to keep them stable.
- For water-filled steps:
- Locate the drain plug or cap (usually on the back or bottom).
- Place a bucket under the plug.
- Unscrew the cap and let the water drain out.
- For stubborn water, use a siphon pump.
- For sand-filled steps:
- Lay a towel or mat beside the pool.
- Carefully tip the step to let sand pour out into a bucket.
- Never dump sand into the pool—it can damage your filter.
- Some steps have sealed sand compartments. If you can’t remove the sand, be prepared for a heavier lift.
Removing weight makes the next steps much safer. Beginners often skip this, making the removal much harder and risking back injury.
3. Loosen Steps From The Pool Floor
Sometimes, steps stick to the liner or pool floor due to suction, algae, or chemical buildup.
- Gently rock the steps side to side to break the seal.
- Slide a soft towel or thin mat under the base if the liner is sticking.
- Never force or jerk the steps, as this can tear the liner.
- If there is heavy algae, wear gloves and rinse your hands after.
4. Lift Steps Out Of The Pool
This is the most physically demanding part. Use safe lifting methods.
- Stand with feet shoulder-width apart.
- Bend your knees and keep your back straight.
- Grip the steps firmly—use gloves for extra grip.
- If steps are wide or heavy, ask a friend to help.
- Slowly lift, keeping the weight close to your body.
- Move carefully—don’t rush or twist your body.
Place the steps on a mat or towel to avoid scratching your deck or patio.
5. Rinse And Clean Steps
After removal, it’s the perfect time to clean.
- Use a garden hose to rinse off dirt, algae, or chemicals.
- Scrub with a soft brush if needed.
- Let steps dry fully before storage.
This extends the life of your steps and prevents mold or mildew during storage.
6. Store Steps Properly
Proper storage prevents damage and keeps steps ready for next season.
- Store steps in a dry, shaded place like a shed or garage.
- Avoid direct sunlight to prevent UV damage.
- If space is tight, stand steps upright to save room.
- Store bolts, screws, and hardware in a labeled bag taped to the steps.
- Check steps for cracks or wear before putting them away.
Common Problems And How To Solve Them
Removing pool steps doesn’t always go perfectly. Here are common issues and what to do.
Stuck Or Jammed Steps
If steps feel glued to the liner, do not force them. Try:
- Pouring warm water around the base to loosen suction.
- Using a soft mat to gently pry the edge.
- Rocking the steps slowly side to side.
Lost Hardware
It’s easy to lose screws or bolts in the grass. Always:
- Place hardware in a small bowl or bag as soon as removed.
- Label the bag with the step brand and model.
Heavy, Unliftable Steps
If sand or water won’t come out, do not try to lift alone.
- Ask a friend for help.
- Use a dolly or cart if available.
- If necessary, remove steps in sections (some models allow this).
Torn Pool Liner
If the liner tears, patch immediately to prevent leaks.
- Use a pool liner patch kit.
- Clean and dry the area before applying the patch.
- Monitor for leaks over the next few days.
Steps Sinking Into Pool Floor
Some steps dig into soft pool floors over time.
- Place a wide mat or plate under steps next season to prevent this.
- Remove steps gently to avoid tearing the floor.
Safety Precautions You Should Never Skip
Pool safety is essential, especially when dealing with heavy or awkward items.
- Never remove steps while children are in or near the pool.
- Always wear gloves for grip and protection.
- Keep the area dry to avoid slipping.
- Do not stand on the steps while removing them.
- If you feel strain or pain while lifting, stop and ask for help.
- Store tools and hardware out of children’s reach.
According to the Consumer Product Safety Commission, over 2,000 pool-related injuries occur each year from slips, falls, and improper lifting. Taking precautions prevents accidents.
Tips For Easier Removal Next Year
A little planning now makes next year’s removal much easier.
- Lubricate screws and bolts with a little silicone spray before reinstallation.
- Use removable sandbags instead of filling steps directly, if your model allows.
- Place a mat under steps to prevent suction and liner damage.
- Label hardware bags for quick reassembly.
- Take photos of steps before removal to remember how they attach.
Most experienced pool owners develop their own system for seasonal step removal. These small habits save time and trouble every year.
How Different Step Types Affect Removal
Some step designs have unique challenges and benefits. Here’s a comparison to help you prepare:
| Feature | Plastic Steps | Metal Frame Steps | Wedding Cake Steps | Ladder Steps |
|---|---|---|---|---|
| Weight When Full | 80-150 lbs | 50-120 lbs | 100-200 lbs | 20-40 lbs |
| Typical Anchoring | Sand/Water fill | Bolted/Anchored | Sand/Water, Suction | Hooks |
| Estimated Removal Time | 30-60 min | 40-90 min | 45-90 min | 10-20 min |
| Can Be Done Solo? | Maybe | No | No | Yes |
It’s important to know which type you have before you start. For example, ladder steps are much lighter and easier for one person to handle, while wedding cake steps almost always require two people.
When To Replace Instead Of Remove Steps
Sometimes, removing steps is a chance to check if they need to be replaced.
- Cracks or Splits: Deep cracks can cause steps to break in use. Replace if cracks are longer than 3 inches.
- Excessive Wear: If tread is smooth or slippery, it can be dangerous.
- Loose Handrails: These are a fall risk. If they cannot be tightened, replace the steps.
- Rust or Corrosion: For metal steps, rust weakens structure.
- Mold or Mildew Smell: Persistent smell may mean internal mold—replacement is safer.
Modern steps can last 5-10 years with good care. If you notice any of these issues during removal, consider upgrading for safety and comfort.
Environmental Concerns: Disposal And Storage
Old steps or leftover sand/water must be handled carefully.
- Never dump sand into the pool or yard. Dispose of in garden beds or waste collection.
- Recycle plastic steps where facilities exist.
- Clean steps thoroughly before storage to prevent pests.
- Store away from direct sunlight to reduce plastic degradation.
Responsible disposal and storage protect your pool, your yard, and the environment.
What Beginners Usually Miss When Removing Pool Steps
Even careful owners can make mistakes. Here are two insights often overlooked:
- Forgetting to remove all weighting material (sandbags, water bags) before lifting. This makes steps much heavier and increases risk of injury or liner damage.
- Not checking underneath steps for algae or small tears in the liner. These hidden problems grow over time and can be expensive if not fixed right away.
Always double-check for both before finishing the job.

Credit: www.michaelsjunkremovalandlighthauling.com
Professional Vs. Diy: When To Call An Expert
Most pool steps can be removed with basic tools and a helper. But sometimes, calling a professional is smart.
- If steps are bolted to a deck and you can’t access the bolts.
- If steps are extremely heavy or stuck, especially wedding cake models.
- If you have a back or shoulder injury.
- If you notice major liner damage during removal.
Pool professionals have the equipment and experience to remove steps safely and spot potential problems. While DIY saves money, don’t risk personal injury or expensive pool damage.
How To Reinstall Steps After Removal
If you plan to reinstall your steps next season, make it easier by following these tips:
- Lay out all hardware and check for missing parts before starting.
- Clean and dry steps thoroughly before putting back in the pool.
- Check that all weighting material is secure and not leaking.
- Place a pool mat or pad under steps to protect the liner.
- Follow the manufacturer’s instructions for reassembly.
Taking care during removal means much less work when putting steps back in.
Real-world Example: Removing Heavy Wedding Cake Steps
Let’s walk through a real example. Mike, a pool owner in Ohio, needed to remove his wedding cake steps before winter. The steps were filled with 80 pounds of sand and had two water bags on the sides.
- Mike first removed the water bags, then unscrewed the side rails.
- He placed a towel under the steps, tipped them back, and slowly scooped out the sand into a bucket.
- The steps were still heavy, so he asked his neighbor to help lift them straight up, careful not to scrape the liner.
- After getting the steps out, they rinsed them with a hose, let them dry, and stored them in the garage.
- The whole process took about 90 minutes, but the steps and pool liner were protected.
Mike’s experience shows that patience, preparation, and a helper make a big difference, especially with heavy step models.
Maintenance Tips For Your Pool Steps
- Inspect steps monthly for cracks, loose bolts, or algae.
- Clean with mild soap and water to avoid chemical buildup.
- Store steps indoors during winter for longer life.
- Check handrails for tightness before each season.
Preventive maintenance keeps your steps safe and looking good for years.
Credit: www.familypoolfun.com
Frequently Asked Questions
How Often Should I Remove And Clean My Pool Steps?
For most above ground pools, remove and clean steps at least once per season—usually at the end of summer or before winterizing your pool. If you notice algae or slipperiness, clean more often. Regular removal prevents buildup of debris and extends the life of your steps.
Can I Remove Heavy Pool Steps By Myself?
It depends on the step type and your strength. Ladder steps are light and manageable alone, but plastic or wedding cake steps filled with sand or water often weigh over 100 pounds. Always ask for help with heavy or awkward steps to avoid injury and damage to your pool.
What If My Steps Are Stuck To The Pool Liner?
If steps are stuck, do not force them. Try loosening with gentle rocking, use a soft mat to slide under the base, or pour warm water around the edges. Forcing stuck steps can tear your pool liner, leading to leaks and costly repairs.
Is It Safe To Store Pool Steps Outdoors?
Storing steps outdoors is not recommended. UV rays, weather, and temperature changes can damage plastic and metal parts. If you must store outside, cover steps with a tarp and keep them off the ground. Indoor storage in a garage or shed is best for longevity.
Where Can I Find More Information About Pool Maintenance?
A reliable resource for pool owners is the SwimmingPool.com maintenance section, which offers tips, guides, and expert advice on caring for your pool and equipment.
Taking the right steps—literally and figuratively—protects your pool, saves money, and keeps swimming safe and fun. Removing steps from your above ground pool doesn’t have to be a struggle. With the proper tools, preparation, and knowledge, you can do it smoothly and safely every time.