
If you notice water pooling at the base of your toilet or see stains on the bathroom floor, the problem might be more than just a loose connection. Leaking toilet tank bolts are a common frustration, especially with popular brands like American Standard. This problem can lead to higher water bills, bathroom damage, and even mold growth if left unchecked. While the issue may seem minor, understanding the causes, solutions, and prevention methods can save you time and money. Let’s explore everything you need to know about American Standard toilet tank bolts leaking, including how to spot trouble, fix it yourself, and avoid future leaks.
Why Do American Standard Toilet Tank Bolts Leak?
Toilet tanks are held securely to the bowl with bolts and rubber washers. These bolts pass through the bottom of the tank and are sealed to prevent water escape. Over time, several factors can cause leaks:
- Worn-out rubber washers – The rubber or silicone washers that seal the bolts can become hard, cracked, or misshapen, losing their effectiveness. Often, washers degrade because of mineral buildup, cleaning chemicals, or just old age. If your toilet is more than five years old and you haven’t changed the washers, this is likely the reason for leaks.
- Loose bolts – Vibration, incorrect installation, or general wear can make the bolts lose their grip. Sometimes, repeated use or movement of the toilet during cleaning can slowly loosen these bolts without you noticing.
- Corrosion – Metal bolts are exposed to water constantly, leading to rust that can eat away at the bolt or washer. This is especially true in areas with high humidity or hard water, which accelerates corrosion.
- Improper installation – If bolts are not tightened evenly or if washers are missing or pinched, leaks can occur right away. People often make the mistake of using just one washer, or using a washer that doesn’t fully cover the bolt hole, leading to a poor seal.
- Tank or bowl damage – Cracks or chips in the porcelain where the bolts sit can let water escape, even if the bolts and washers are in good condition. Sometimes, cracks are so small they are hard to spot until a leak develops.
Each of these causes can develop over time or suddenly, depending on the age of your toilet and the quality of installation. For example, a sudden leak after moving or cleaning the toilet could mean a washer slipped out of place or a bolt became loose.
Signs Your Toilet Tank Bolts Are Leaking
Sometimes, a leak is obvious. Other times, it’s subtle. Watch for these signs:
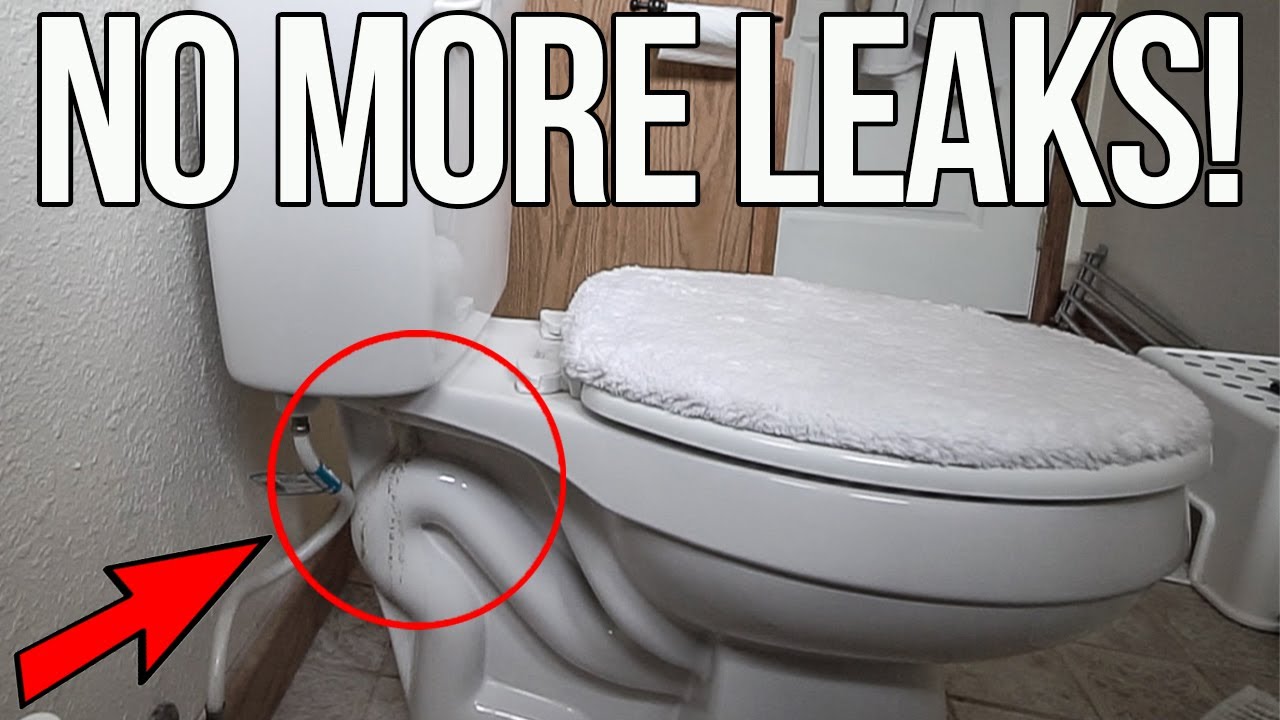
- Water puddles near the toilet base (especially after flushing). If you wipe up the water and it returns after another flush, the tank bolts are a likely culprit.
- Moisture or rust around the bolt heads inside the tank. Even small orange stains on the inside of the tank indicate water is escaping and interacting with metal.
- Dripping noises after a flush. If you hear water dripping onto the floor or subfloor when the tank is refilling, check the area under the tank bolts.
- Water stains or discoloration on the floor. Over time, even small leaks can leave yellow, brown, or white stains on tile or wood.
- Frequent refilling of the tank, even if the bowl isn’t being used. If your tank is losing water slowly, the fill valve may activate more often than usual, which you’ll notice as frequent noises.
Ignoring these signs can lead to bigger problems like subfloor damage or mold, so act quickly if you notice them. Even if the leak seems minor, consistent moisture can cause long-term issues.
Credit: www.youtube.com
Risks Of Ignoring Leaky Tank Bolts
A small leak might seem harmless, but it can create several issues:
- Water waste: Even a slow leak can waste hundreds of gallons per month, increasing your water bill. For example, a slow drip that fills a small cup every hour adds up to gallons over a week.
- Structural damage: Water can seep into flooring, causing rot, mold, and damage to subfloors. In bathrooms with wood or laminate floors, you may not see the damage until the floor feels soft or spongy.
- Health hazards: Mold and mildew thrive in damp environments, leading to possible respiratory issues. Mold can also make cleaning your bathroom much harder.
- Toilet instability: Over time, leaking bolts can cause the toilet to shift, creating more leaks or even breaking the porcelain. A wobbly toilet can also break the wax ring under the base, leading to even more leaks.
Most importantly, many home insurance policies do not cover gradual water damage from plumbing leaks, making repairs expensive if you wait too long. Quick action not only prevents bigger repairs but also protects your home’s value.
Anatomy Of An American Standard Toilet Tank Bolt Assembly
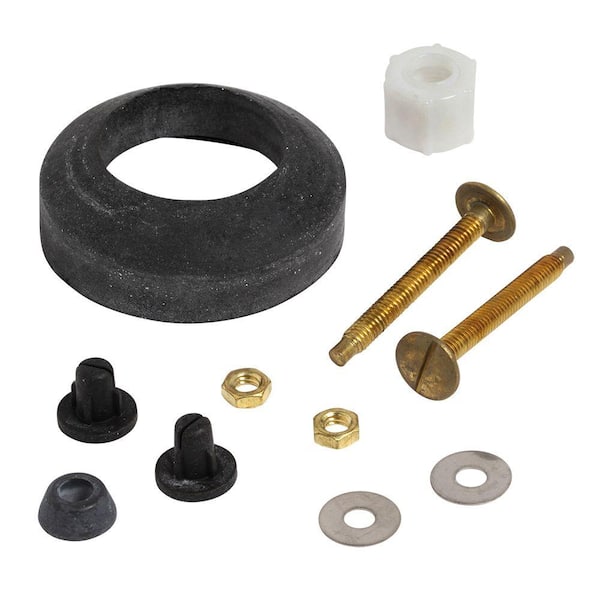
Understanding the parts of your toilet’s tank bolt assembly will help you diagnose and repair leaks more effectively. Here’s how a typical American Standard toilet tank bolt setup looks:
| Component | Material | Function |
|---|---|---|
| Tank Bolt | Brass/Steel (sometimes plastic) | Connects the tank to the bowl, holds washers and nuts |
| Rubber Washer | Rubber/Silicone | Seals water inside the tank, prevents leaks at bolt holes |
| Metal Washer | Stainless Steel | Distributes pressure, protects porcelain from bolt head |
| Nut | Brass/Steel/Plastic | Tightens the bolt from under the bowl |
Non-obvious insight: Not all bolts are created equal. Cheaper steel bolts tend to rust faster than brass or stainless steel, and using the wrong washer material (like generic rubber) can lead to leaks sooner. American Standard toilets often use brass bolts for better durability, but over-tightening can still crack the porcelain.
Some newer kits include special “conical” washers that create a tighter seal than flat washers, especially if your tank’s bolt holes are slightly uneven. If your tank is older, upgrading to this style can give you extra leak protection.
Step-by-step: How To Fix A Leaking Toilet Tank Bolt
You don’t always need a plumber to solve this problem. With basic tools and a little patience, most people can fix leaking tank bolts themselves. Here’s how:
1. Gather The Right Tools And Parts
Before you start, make sure you have:
- Adjustable wrench or pliers
- Flathead and Phillips screwdrivers
- Sponge or small towel
- Replacement tank bolt kit (preferably brass bolts with rubber washers)
- Bucket
Tip: Buy a kit made for American Standard toilets, as dimensions can vary between brands. Some kits also include extra washers or a gasket for the flush valve, which is a good opportunity to do a full refresh if your toilet is older.
2. Turn Off The Water Supply
Find the valve behind your toilet and turn it clockwise to stop water flow. Flush the toilet to drain as much water as possible from the tank. Use a sponge or towel to soak up any remaining water. If your shutoff valve is stuck, use a little WD-40 and gentle pressure—don’t force it.
3. Remove The Tank Bolts
Use your wrench to loosen the nuts under the bowl. If the bolts spin, hold the bolt head inside the tank with a screwdriver. Remove the bolts, washers, and nuts completely.
Common mistake: Forgetting to support the tank while removing bolts can cause it to shift or crack. If you’re working alone, work carefully and avoid leaning or putting weight on the tank.
4. Inspect And Clean
Check for:
- Cracked washers (these often cause leaks)
- Rusty bolts (replace if corroded)
- Porcelain damage (look for chips or cracks near bolt holes)
Wipe the tank and bowl surfaces clean. Any debris can prevent a good seal. If you see white or greenish mineral deposits, use a little vinegar to dissolve them before installing new parts.
5. Install New Bolts And Washers
Follow these steps:
- Place a new rubber washer on each bolt, then insert through the tank’s bolt holes from the inside.
- Add a metal washer and nut to each bolt on the outside of the tank.
- Carefully lower the tank onto the bowl, aligning bolt holes.
- From underneath, add another rubber washer and then a nut to each bolt.
Non-obvious insight: Double washers (one inside, one outside) help prevent leaks better than a single washer setup. Also, if your new kit includes plastic “sleeves,” install them through the bolt holes for extra leak protection.
6. Tighten Bolts Evenly
Tighten each nut a little at a time, alternating sides. The goal is to compress the washers just enough to form a seal—not to crush the porcelain.
Tip: Over-tightening is a top cause of cracked tanks. Stop when you feel resistance and the tank sits firmly on the bowl without wobbling.
If you’re not sure, fill the tank halfway and check for leaks before fully tightening.
7. Reconnect Water And Test
Turn the water valve back on and let the tank fill. Watch closely for leaks at the bolts. Flush several times and check again. Use a dry paper towel around the bolts to check for small drips.
If You See No Drips, Congratulations—problem Solved!
Choosing The Best Replacement Bolts And Washers
When shopping for replacement parts, consider these factors:
- Material: Brass bolts resist corrosion best. Stainless steel is also good. Avoid plain steel.
- Washer type: High-quality silicone or rubber washers last longer than generic rubber. Silicone washers are often more flexible and less likely to dry out.
- Compatibility: Not all kits fit every toilet. Look for kits labeled for “American Standard” or check your toilet model number.
- Length: Bolts come in various lengths. Too short and they won’t reach; too long and they stick out awkwardly.
Here’s a quick comparison of common bolt materials:
| Material | Rust Resistance | Durability | Price |
|---|---|---|---|
| Brass | Excellent | High | Medium |
| Stainless Steel | Very Good | High | High |
| Plain Steel | Poor | Medium | Low |
| Plastic | Doesn’t Rust | Low | Low |
Practical tip: Bring the old bolt and washer to the hardware store for comparison if you’re unsure about size or length.

Credit: www.amazon.com
Preventing Future Leaks In Your Toilet Tank Bolts
A little prevention can keep your toilet dry and trouble-free for years:
- Check bolts regularly – Every few months, inspect for corrosion or loose nuts. A quick check while cleaning your bathroom is enough.
- Use quality parts – Cheap kits may save money now but lead to leaks later. Remember, brass or stainless steel may cost a bit more, but they last longer.
- Don’t overtighten – Always tighten bolts gently and evenly. Uneven pressure is a common reason tanks crack.
- Replace washers every few years – Even the best washers wear out. If you notice any sign of stiffness or cracking, replace them sooner.
- Address hard water – If you have hard water, mineral buildup may speed up washer and bolt deterioration. Clean mineral deposits when inspecting bolts.
Uncommon tip: If you live in a humid area or have bathroom ventilation issues, regularly wiping down the tank and checking for condensation can help you spot leaks before they grow. Condensation can sometimes be mistaken for a leak, so checking bolt tightness and washer condition is important.
When To Call A Professional
Most leaking tank bolts are simple to fix, but some situations need expert help:
- Cracked porcelain: If you see hairline cracks or chips around bolt holes, a plumber can advise if repair or replacement is better. Cracks can quickly get worse with regular use.
- Persistent leaks: If new washers and bolts don’t stop the leak, there may be a hidden crack or misalignment. Sometimes, the tank or bowl itself is warped, making a tight seal impossible.
- Old toilets: Very old American Standard toilets (over 25 years) may have non-standard parts or hidden damage.
Professional repairs can cost $100–$250, but ignoring serious leaks can lead to much higher expenses from water damage. Plumbers can also check for other problems, such as wax ring leaks or supply line issues.
Comparing Common Diy Vs. Professional Costs
To help you budget, here’s a typical cost breakdown:
| Repair Option | Parts Cost | Labor Cost | Total Estimated Cost |
|---|---|---|---|
| DIY (kit replacement) | $6–$15 | $0 | $6–$15 |
| Professional plumber | $6–$20 | $100–$250 | $106–$270 |
| Toilet replacement (if tank is cracked) | $120–$400 | $150–$300 | $270–$700 |
Practical note: Many plumbers offer free estimates. If you’re unsure about the problem, it’s often worth getting a professional opinion before deciding. Sometimes what looks like a simple leak is part of a larger issue.
Real-world Example: Leaking Bolts In An American Standard Cadet
Anna, a homeowner in Texas, noticed water around her toilet after every flush. She found the bolts under her American Standard Cadet tank were rusty and the rubber washers had hardened. By following the steps above, she replaced both bolts and washers with a brass kit for less than $10.
The leak stopped immediately.
However, Anna almost made a mistake by over-tightening the bolts, which could have cracked her tank. Careful, even tightening was key to her successful repair.
In another example, a renter in Florida ignored a small leak for several months. Eventually, the subfloor rotted, causing the toilet to become unstable. This repair required not only a new toilet but also expensive floor work. Acting quickly saves money and trouble.
Common Mistakes When Fixing Toilet Tank Bolt Leaks
Even handy people make errors that lead to continued leaks or damage:
- Reusing old washers: They may seem fine, but old washers lose flexibility and sealing power. It’s always better to install new ones.
- Using the wrong parts: Kits not meant for your toilet model may not fit correctly. Even a small difference in bolt size can prevent a watertight seal.
- Over-tightening bolts: Cracks are more expensive to fix than leaks. Stop tightening as soon as the tank feels secure.
- Not cleaning surfaces: Dirt prevents a perfect seal. Any grit or old washer material left behind can lead to leaks.
- Ignoring small cracks: Even tiny chips can worsen with time and pressure. If you’re unsure, ask for advice before continuing.
Avoiding these mistakes saves time and money. Take your time and double-check everything before reassembling the tank.
Upgrading Your Toilet For Leak Prevention
If you’re tired of repeat leaks or have an old toilet, consider upgrading:
- Modern tank bolt kits: Some new kits have built-in rubber gaskets and corrosion-proof hardware. These can last much longer and make installation easier.
- One-piece toilets: With no separate tank and bowl, there are fewer places for leaks to develop. These models are also easier to clean and maintain.
- Touchless flush valves: Less movement in the tank area means less risk of hardware loosening over time. These upgrades can also improve hygiene.
While upgrades cost more upfront, they can reduce maintenance and water waste for years. If your bathroom is being remodeled, it’s a good time to consider these options.
Environmental Impact Of Leaky Toilet Tank Bolts
A single leaking bolt can waste over 200 gallons of water per month. According to the EPA, household leaks waste nearly 1 trillion gallons of water each year in the US. Fixing leaks is one of the simplest ways you can help conserve water and protect the environment.
Even a small leak is enough to fill a bathtub every month. By repairing leaks quickly, you save money and reduce your household’s environmental impact. It’s a small action with a big benefit.
Are American Standard Toilets More Prone To Tank Bolt Leaks?
American Standard is a trusted brand, but no toilet is immune to leaks. The main factors affecting leaks are:
- Water quality (hard water causes more buildup and washer wear). Installing a water softener can help extend the life of your toilet’s parts.
- Installation quality. Even the best toilet will leak if installed with poor-quality washers or bolts, or if the tank is not properly aligned.
- Maintenance habits. Regular inspection and gentle cleaning prevent most leaks.
With regular checks and the right replacement parts, American Standard toilets can last decades without major leaks. Choosing quality hardware and inspecting your toilet twice a year is usually enough to avoid trouble.
Credit: www.homedepot.com
Frequently Asked Questions
Why Do My Toilet Tank Bolts Keep Leaking Even After I Replace Them?
This is usually because of improper installation, using the wrong size washers, or a cracked tank or bowl. Make sure washers are the correct size and material, and always inspect for hairline cracks. If leaks continue, a hidden crack or warped tank may be the issue.
Can I Use Any Brand’s Bolt Kit For My American Standard Toilet?
Not always. American Standard toilets may have different hole spacing or bolt lengths compared to other brands. It’s safest to buy kits labeled for your toilet brand or check your toilet’s model number before buying.
How Tight Should I Make The Tank Bolts?
Bolts should be snug but not overtightened. Tighten each side a little at a time until the tank is stable and doesn’t rock. If you see the rubber washer start to bulge, stop tightening. Over-tightening can crack the tank.
Is It Safe To Use Plastic Bolts Instead Of Metal?
Plastic bolts don’t rust, but they are less durable and more likely to break, especially in high-use toilets. Brass or stainless steel is usually a better choice for long-lasting repairs.
Where Can I Find Official American Standard Replacement Parts?
Official parts and installation guides are available on the American Standard website. Always match your toilet’s model number to ensure a proper fit.
—
A leaking toilet tank bolt is a simple problem with the potential for big headaches if ignored. With the right knowledge, tools, and a little attention to detail, you can stop leaks, save water, and keep your American Standard toilet working perfectly for years. If you ever feel unsure, don’t hesitate to call a professional. Taking care of small plumbing issues now prevents major damage and expense later, giving you peace of mind in your home.