
A curbless shower is more than a design choice—it’s a step towards safer, more accessible, and visually open bathrooms. For homeowners or renovators, the idea of a seamless shower floor is attractive. But many fear it means major construction, especially the need to cut into floor joists. The good news? It’s possible to build a curbless shower without cutting your joists at all. This guide shows you how, step by step, with practical advice, expert insights, and real-world examples. Whether you’re a homeowner, a DIY enthusiast, or a contractor, you’ll learn how to achieve a zero-threshold shower that’s both beautiful and structurally sound.
Why Choose A Curbless Shower?
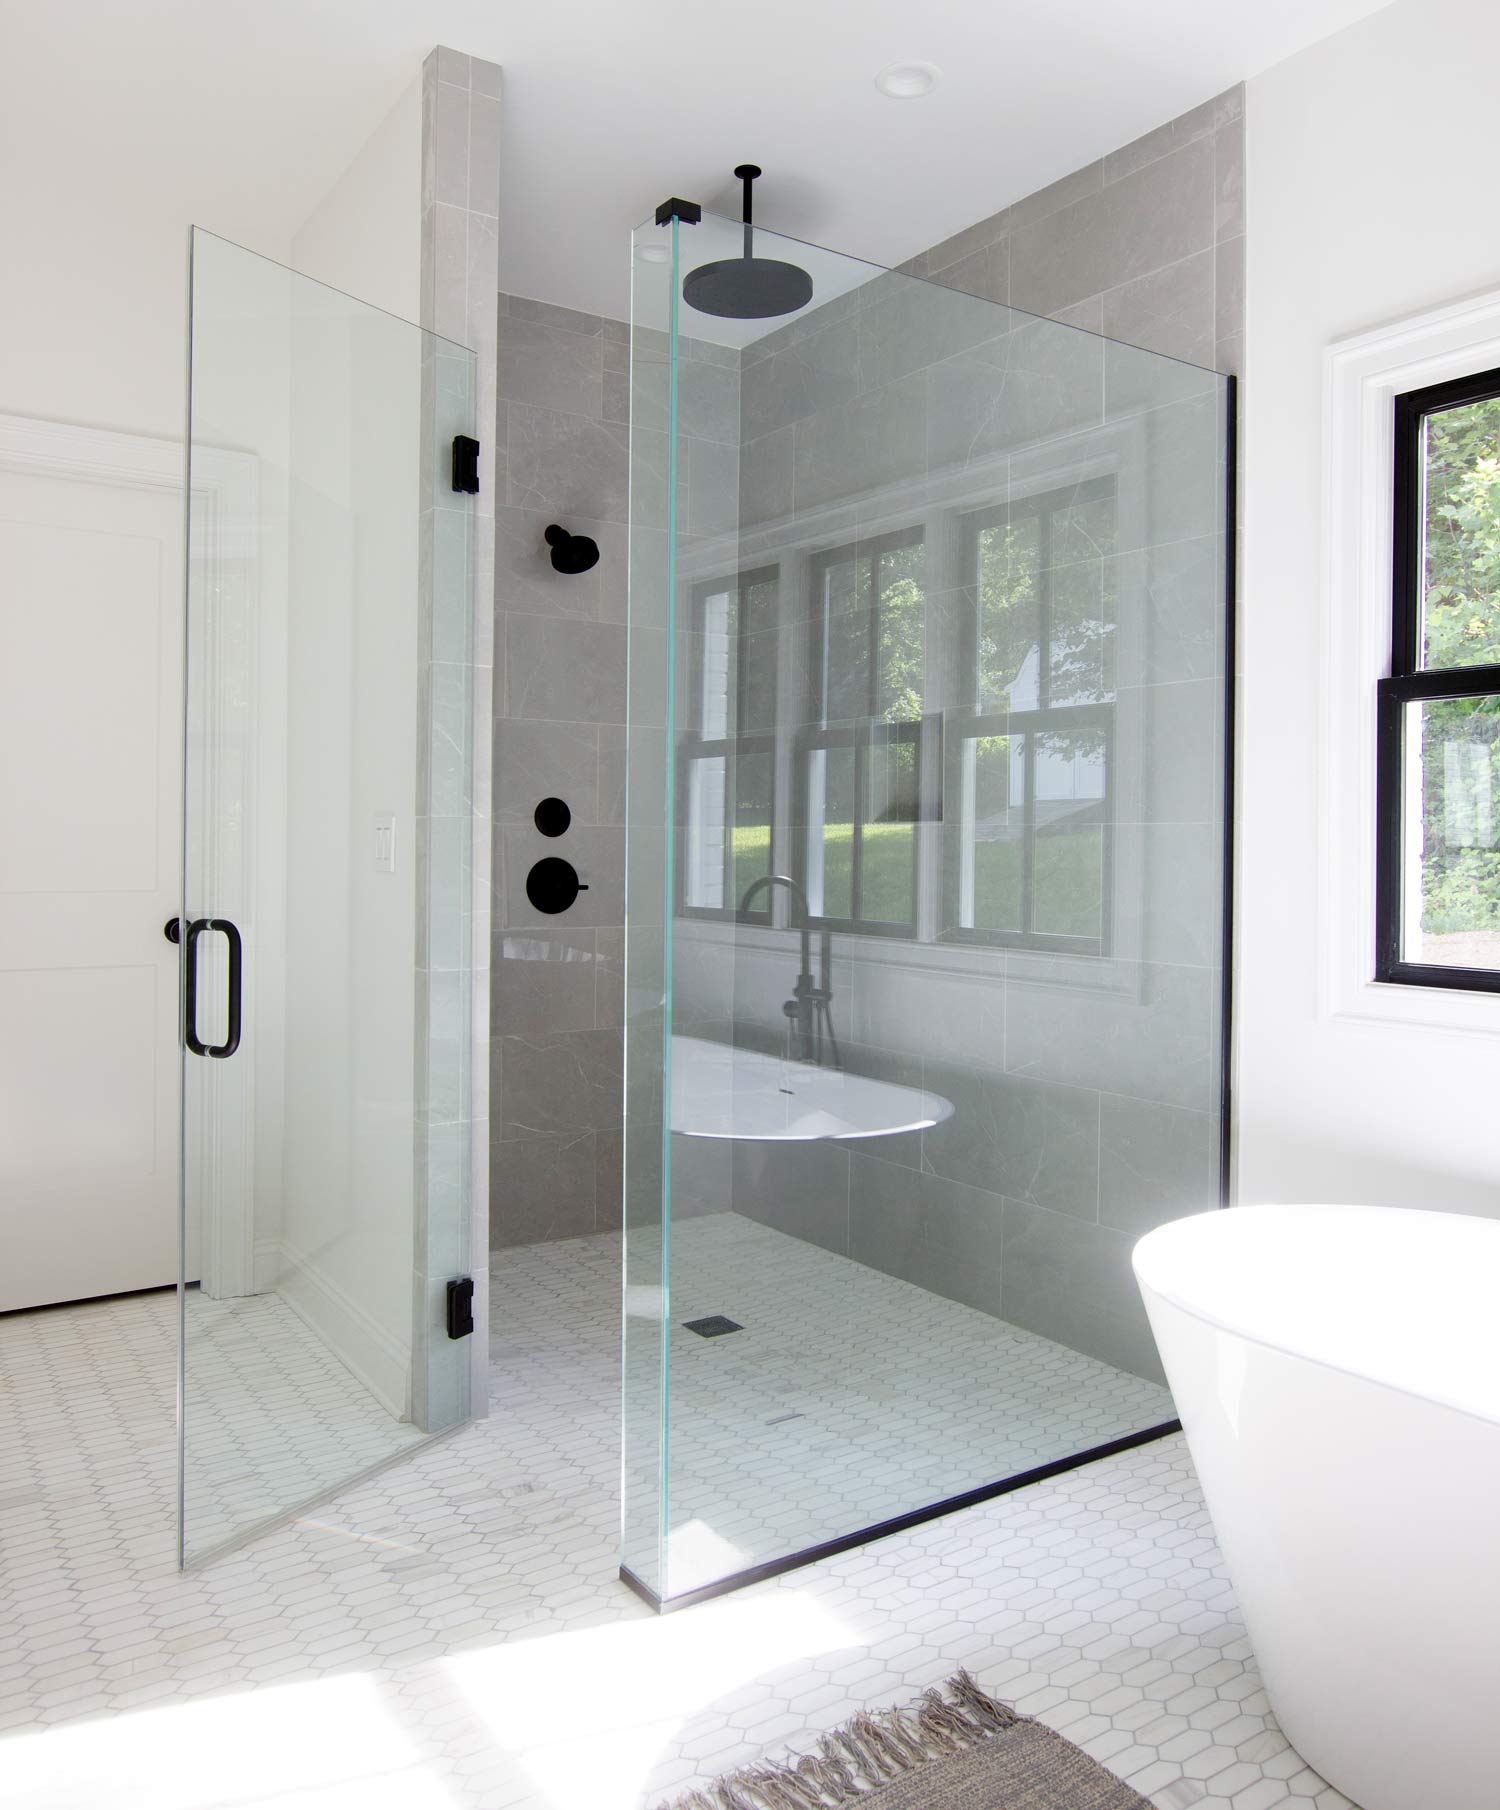
A curbless shower, sometimes called a zero-threshold or walk-in shower, has no step or lip at the entrance. The floor flows continuously from the bathroom into the shower area. This design is popular for several reasons:
- Accessibility: It’s easier for people with mobility issues, seniors, or wheelchair users to enter.
- Modern Style: The seamless look fits contemporary and minimalist bathrooms.
- Easy Cleaning: No curb means less grime and mold buildup.
- Increased Home Value: Buyers often prefer accessible and updated bathrooms.
But creating this look, especially in homes with wooden floor joists, raises a challenge: how to get the shower floor low enough for water to stay in, without weakening your structure.
The Challenge: Shower Slope Without Cutting Joists
To keep water from spilling out, a shower floor needs a slope—typically at least 1/4 inch per foot toward the drain. In traditional showers, the curb holds water in and allows a higher shower floor. In curbless designs, the floor must slope down gently, starting at the same height as the bathroom floor.
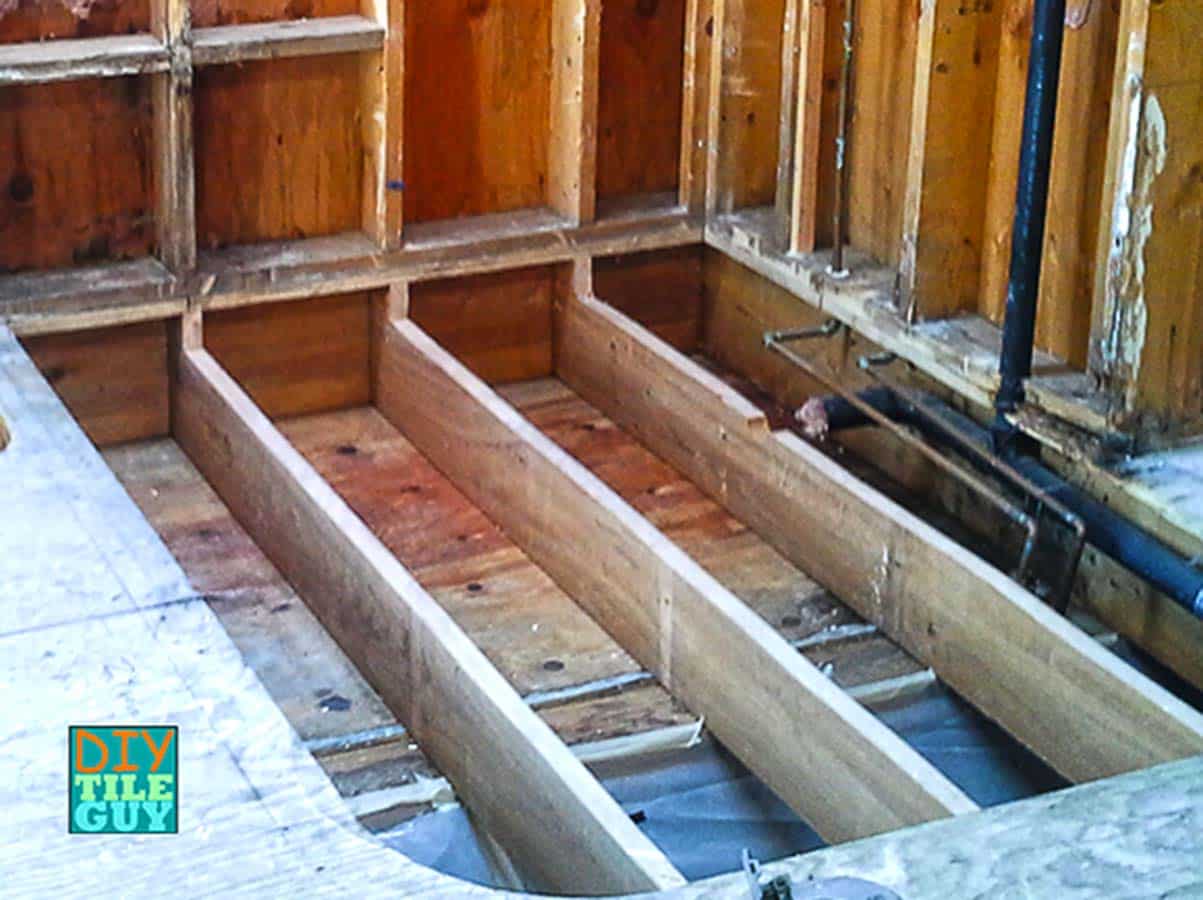
Most guides suggest lowering the shower area by cutting or notching the joists. But this weakens your floor and may break building codes. There are safer, smarter ways to achieve a low, sloped shower—no structural compromise needed.
Credit: plankandpillow.com
Planning Your Curbless Shower
Every project starts with careful planning. This is where success or failure is decided. Rushing in can lead to leaks, uneven floors, or even expensive rework. Here’s what to consider before you begin.
Assess Your Floor Structure
Find out what kind of floor you have:
- Wooden Joists: Common in older homes, especially above ground level.
- Concrete Slab: Often found on ground floors or basements.
This guide focuses on wooden joists. If you have concrete, the process is different (usually involves breaking and re-pouring concrete).
Measure The Available Height
Measure from your subfloor to the top of your finished floor outside the shower. The more height you have, the easier it will be to create a proper slope without altering joists.
Check Drain Location And Plumbing
A curbless shower works best when the drain can be placed for optimal slope. Center drains are common, but linear drains (long, narrow drains at one end of the shower) can make sloping easier and look sleek.
Local Building Codes
Always check local codes for minimum slope, waterproofing requirements, and accessibility standards. Some cities have special rules for curbless showers.
Select Waterproofing Methods
Modern shower systems offer several ways to waterproof without building up a thick mortar bed. Sheet membranes, liquid-applied membranes, and foam shower pans all have their pros and cons.
Methods To Build A Curbless Shower Without Cutting Joists
There are several proven ways to create a curbless, sloped shower floor—none of which require slicing into your joists. Here, we’ll explore the best options, with details on when to use each, how to do it, and practical tips.
1. Build Up The Bathroom Floor Outside The Shower
One simple solution is to raise the bathroom floor just enough so the shower area can slope down.
How It Works
- Add a layer (or layers) of plywood to the main bathroom floor, not the shower area.
- The shower floor stays at the original subfloor height.
- The transition is now flush, with enough height difference for a proper slope.
Advantages
- No joist cutting.
- Good for bathrooms that can handle a small height change (like when retiling the entire floor).
Drawbacks
- The whole bathroom floor will be a little higher than adjacent rooms.
- May require adjusting doors or trim.
Example
If your bathroom is 8 feet wide and you need a 1/2 inch slope for a 2-foot-deep shower, raise the main bathroom floor by 1/2 inch using plywood and self-leveling compound. Then build your shower floor at the original subfloor level.
2. Use A Pre-sloped Foam Shower Pan
Foam shower pans are pre-shaped, lightweight, and waterproof. They come in various sizes and slopes, fitting directly over your subfloor.
Installation Steps
- Remove old flooring and expose the subfloor in the shower area.
- Cut the foam pan to fit your space, if needed.
- Set the drain according to the pan’s design.
- Glue the pan down with thin-set mortar.
- Waterproof seams with membrane or tape as recommended.
Advantages
- Quick and easy to install.
- No extra height buildup.
- Lightweight and easy to cut on site.
Drawbacks
- Must match the exact height of your finished floor outside the shower.
- Some pans can be expensive.
Pro Tip
Choose a linear drain model if you want to keep the slope simple (just one direction). This is especially helpful if your joists run parallel to the shower entry.
3. Lower The Subfloor In The Shower Area (without Touching Joists)
If your existing subfloor is thick, you may be able to remove it in the shower area and replace it with a thinner, strong alternative.
How It Works
- Remove subfloor (often 3/4″ plywood or OSB) only in the shower area.
- Replace with thinner, high-strength material (such as 1/2″ cement board or specialty backer board).
- The difference in thickness allows for the needed slope.
Safety Note
Never remove the subfloor beyond what’s needed, and always ensure there’s adequate support for the new material.
Advantages
- Maintains structural integrity.
- Works well if your floor was built with an extra-thick subfloor.
Drawbacks
- Only possible if you have enough subfloor thickness to spare.
- Must carefully seal seams to prevent leaks.
4. Use Tapered Mortar Beds Over Subfloor
A mortar bed is a mix of sand and cement, shaped to create a slope. Instead of building up a thick base, use a tapered mortar bed as thin as possible at the entry and thicker at the drain.
Key Steps
- Apply waterproofing membrane to subfloor.
- Build up mortar from 1/4″ at the entry to full thickness at the drain.
- Let it cure fully before tiling.
Important Tips
- Minimum mortar thickness at the thinnest point should be at least 1/2″ to avoid cracking.
- Use reinforcing mesh for added strength.
Advantages
- Customizable slope for any shower size.
- Works with any drain type.
Drawbacks
- Requires skill to get the slope perfect.
- Mortar can add some weight to the floor.
5. Install A Recessed Shower Tray
Some manufacturers offer recessed shower trays that sit between joists but do not require cutting them. These trays are designed to fit within the typical depth of joists and come with built-in slopes.
How It Works
- Tray sits on top of joists, with ends supported by blocking between joists.
- The shower area is effectively “dropped” without altering the joists.
Advantages
- Clean installation.
- Compatible with many waterproofing systems.
Drawbacks
- May require custom ordering.
- More expensive than DIY mortar beds or foam pans.
Comparing Curbless Shower Methods
To help you choose, here’s a simple comparison of the most popular curbless shower methods that don’t involve joist cutting:
| Method | Cost | Skill Level | Time to Install | Best For |
|---|---|---|---|---|
| Raise Bathroom Floor | Low | Beginner/Intermediate | 1-2 days | Full bathroom remodels |
| Pre-Sloped Foam Pan | Medium-High | Beginner | Half day | Quick upgrades |
| Thinner Subfloor | Medium | Intermediate | 1 day | Thick subfloor houses |
| Tapered Mortar Bed | Low | Advanced | 2 days | Custom shapes/sizes |
| Recessed Tray | High | Intermediate | 1 day | High-end renovations |
Step-by-step Example: Pre-sloped Foam Shower Pan With Linear Drain
Let’s walk through a real-world example that’s popular among both pros and DIYers. This method uses a pre-sloped foam pan and a linear drain, making it possible to have a curbless shower with no joist cutting.
Tools And Materials Needed
- Pre-sloped foam shower pan (size to fit)
- Linear drain kit
- Thin-set mortar
- Waterproofing membrane (sheet or liquid)
- Tile backer board
- Waterproofing tape or band
- Utility knife, trowel, drill
- Shower tiles
- Silicone sealant
Approximate Time
- 1-2 days for prep and installation
- Additional time for tile and finishing
Step 1: Prepare The Subfloor
Remove existing flooring down to the subfloor in the shower area. Ensure the subfloor is solid and free of rot or damage. If needed, screw down any loose areas.
Step 2: Dry Fit The Foam Pan And Drain
Set the foam pan in place and check for a flush transition with the bathroom floor. Position the linear drain at the shower entry or the far wall (depending on design). Adjust plumbing to fit the drain, if necessary.
Step 3: Install The Drain
Follow manufacturer instructions for your linear drain. Usually, this involves screwing or gluing the drain base to the subfloor, connecting it to the waste pipe, and ensuring it sits level.
Step 4: Attach The Foam Pan
Spread thin-set mortar on the subfloor using a notched trowel. Set the pan in place, pressing down firmly to remove air pockets. Make sure the pan is level and slopes consistently toward the drain.
Step 5: Waterproof The Pan And Walls
Apply waterproofing membrane over the pan and up the walls at least 6 inches. Seal all seams and corners with waterproofing tape or band. Pay special attention to the joint where the pan meets the drain.
Step 6: Install Backer Board And Tile
Mount cement or foam backer board on the walls, overlapping the membrane at the bottom. Apply thin-set and install your chosen tile, working from the drain outward.
Step 7: Seal And Finish
After the tile adhesive cures, grout the joints and seal all corners with silicone. Let everything dry thoroughly before using the shower.
Non-obvious Insights For A Flawless Curbless Shower
Many beginners miss these important details:
- Check the Finished Floor Height: The top of your shower pan or mortar bed must match the bathroom floor after tile is installed, not before. Always factor in the thickness of your tile and thin-set.
- Choose the Right Drain: Linear drains are much easier to slope toward, especially in narrow showers. They also look modern and help prevent water escaping.
- Continuous Waterproofing: Overlap all waterproofing layers and extend them at least 12 inches past the shower entry zone. Water can splash beyond the shower, especially with no curb.
- Slope the Bathroom Floor Slightly (if possible): In wet rooms, pros sometimes slope the entire bathroom floor gently toward the shower. This is not always practical, but it’s the ultimate solution for preventing leaks.
- Consider Heating: Electric floor heating mats can be embedded under the tile for comfort. Install them outside the shower (not inside, unless rated safe for wet locations).
Mistakes To Avoid
Many curbless shower projects go wrong because of avoidable errors. Here are the most common:
- Not Enough Slope: Less than 1/4 inch per foot may cause water to pool and leak.
- Incorrect Pan Height: Forgetting to account for tile thickness can leave the shower floor higher than the bathroom, ruining the zero-threshold effect.
- Poor Waterproofing: Skipping corners or not sealing the drain area properly leads to leaks and costly repairs.
- Ignoring Local Codes: Some areas require specific waterproofing methods or restrict foam pans.
- Choosing the Wrong Tiles: Large, slick tiles can be slippery. Use small, textured tiles for better grip.
Waterproofing: The Heart Of A Curbless Shower
A leak in a curbless shower is much more dangerous than in a traditional shower with a curb. Water can run straight into the rest of your bathroom or even the floor below. That’s why waterproofing is the most important part of your build.
Options For Waterproofing
- Sheet Membranes (e.g., Schluter Kerdi, NobleSeal): Roll out and cut to size, then bond with thin-set.
- Liquid Membranes (e.g., RedGard, Laticrete Hydro Ban): Paint or roll on, creating a seamless barrier.
- Foam Boards: Some brands include waterproof foam panels for walls and floors.
Pros often combine sheet and liquid methods for extra security. All seams and corners must be sealed, and the membrane should run up the wall at least 6 inches.
Waterproofing Comparison
Here’s a quick look at waterproofing systems:
| System | Application | Drying Time | Cost | Durability |
|---|---|---|---|---|
| Sheet Membrane | Thin-set + Overlap | Immediate | High | Excellent |
| Liquid Membrane | Roll/Paint On | 4-24 hours | Medium | Good |
| Foam Board | Screwed/Adhesive | Immediate | High | Excellent |
Drain Selection: Center Vs. Linear
Choosing the right drain makes a big difference in both appearance and performance.
- Center Drains: Require a four-way slope (like a shallow pyramid). Works well for square showers but is harder to slope gently.
- Linear Drains: Require only a single slope, making them perfect for curbless designs. They can be placed at the entry, the far wall, or even along the side.
Linear drains are more expensive, but they’re worth the investment for ease of installation and a modern look.
Accessibility And Universal Design
A true curbless shower isn’t just about looks. It’s about making bathrooms usable for everyone. Following universal design principles can future-proof your home.
- Entry must be truly flush—no bumps or lips.
- Consider adding sturdy grab bars.
- Use slip-resistant tiles.
- Keep controls within easy reach from both standing and seated positions.
- If possible, make the shower large enough to turn a wheelchair.
For more on universal design, you can refer to this resource.
Budget And Timeline Considerations
A curbless shower build can vary in price from a few hundred to several thousand dollars, depending on the method and materials. Here are some typical cost factors:
- DIY foam pan: $400–$1,000 (materials only)
- Custom mortar bed: $100–$400 (materials only)
- Professional install: $2,000–$8,000 (including labor)
- Linear drain: $200–$800
Time-wise, a skilled DIYer can usually complete the job in 2–4 days (not counting tile curing time).

Credit: www.youtube.com
Real-world Example: Avoiding Joist Cuts In A 1940s Home
In a recent renovation, a homeowner wanted a curbless shower in a 1940s house with 2×8 joists and a thick subfloor. By removing the 3/4″ subfloor in the shower area and replacing it with 1/2″ cement board, they gained 1/4″ of extra depth.
A pre-sloped foam pan and a low-profile linear drain completed the system, matching the finished bathroom floor perfectly—no joist cuts required.
Long-term Care And Maintenance
A curbless shower is easy to clean, but there are a few things to keep in mind:
- Check grout and caulk regularly for cracks.
- Use a squeegee after each use to reduce water spots and mold.
- Clean the drain often to prevent clogs.
- Inspect waterproofing if you notice any leaks or water outside the shower.
Credit: www.diytileguy.com
Frequently Asked Questions
How Much Slope Does A Curbless Shower Need?
A curbless shower floor should have a minimum slope of 1/4 inch per foot toward the drain. This is enough for water to flow efficiently without feeling unsteady underfoot.
Can I Build A Curbless Shower In Any Bathroom?
Most bathrooms with wooden joists can be adapted for a curbless shower without cutting joists, but space and height are important. If your bathroom is very small or the subfloor is thin, options may be limited.
Are Curbless Showers More Likely To Leak?
Curbless showers do require careful waterproofing because water can flow directly into the rest of the bathroom. If properly installed with continuous waterproofing, they are no more likely to leak than traditional showers.
What Type Of Tiles Are Best For A Curbless Shower Floor?
Small, slip-resistant tiles are best for curbless shower floors. Mosaic tiles with lots of grout lines provide extra grip and allow for easier sloping.
Do I Need A Special Drain For A Curbless Shower?
While you don’t need a special drain, linear drains make it much easier to create a gentle, one-direction slope. They also look modern and can be installed at the shower entry or end.
A curbless shower is an upgrade in both form and function. With the right planning and the right method, you can achieve this look—and the safety and accessibility it brings—without ever touching your joists. The process takes patience and care, but the result is a bathroom that’s modern, open, and ready for the future.