
Building a stove hood in your kitchen is more than just a home improvement project—it’s a key step to creating a cleaner, healthier, and more comfortable cooking space. Whether you love to cook or just want to keep your kitchen air fresh, a stove hood is a smart upgrade. Many people think installing a stove hood is difficult or only for experts, but with the right planning and guidance, you can do it yourself. This guide will show you every step, from choosing the right materials to finishing the final installation.
A well-installed stove hood removes smoke, steam, odors, and grease before they spread. It protects your walls and cabinets, keeps your air cleaner, and even helps your cooking by giving better visibility. But getting it right is important—mistakes can lead to poor ventilation, noisy operation, or even safety hazards.
You might be wondering where to start. Should you buy a pre-made hood or build your own? What tools do you need? How do you connect it safely to power and ventilation? This article will answer all these questions and more.
We’ll break down the process into simple steps, offer tips from real experience, and highlight common mistakes people make. Whether you’re a DIY beginner or have some home improvement skills, you’ll find everything you need to build a stove hood you can trust.
Understanding Stove Hoods: The Basics
Before you start building, it’s important to know what a stove hood does and the options available. A stove hood, also called a range hood, is a vent installed above your stove or cooktop. Its main job is to pull out smoke, steam, grease, and food smells from your kitchen air.
There are two main types:
- Ducted stove hoods: These push air outside your home through a duct. They are more effective but need a way to lead air outdoors.
- Ductless (recirculating) stove hoods: These filter the air and send it back into the kitchen. They are easier to install but less powerful.
Most experts agree that ducted hoods are better for removing smoke and odors, especially if you cook often or use high heat. However, ductless hoods can work if outdoor venting isn’t possible.
A standard stove hood includes:
- A capture area (the visible hood body)
- A fan or blower
- Filters (grease filters, and sometimes charcoal filters)
- Lighting
- Control panel (switches or buttons)
- A duct (for ducted models)
Knowing these parts will make the building process clearer.
Planning Your Stove Hood Project
Building a stove hood requires careful planning. Rushing in without a plan can lead to mistakes, wasted materials, or even safety risks. Here are the most important steps before you begin any cutting or assembly.
Measure Your Space
First, measure your stove or cooktop’s width. Most home stoves are 30 or 36 inches wide. Your hood should be at least as wide as your stove, but a bit wider is better for capturing smoke.
Next, measure the distance from your cooktop to the ceiling. The bottom of the hood should be 24 to 30 inches above the cooking surface for best results. If it’s too high, it won’t work well; too low, and it can get in the way.
Choose The Venting Type
Decide if you will use a ducted or ductless system. If you can vent to the outside, do it—it’s more effective. Check for an exterior wall nearby, or see if you need to vent through the ceiling.
Local Building Codes And Permits
Check your area’s building codes. Some places require a permit for electrical or vent work. Skipping this can lead to trouble when selling your home or even legal issues.
Power Source
You’ll need a power connection for the hood’s fan and lights. Most hoods use 120V household current. Plan where you’ll run the wiring, and always follow safety standards. If you’re unsure, consult an electrician.
Materials And Tools
List all the materials and tools you need. Nothing slows down a project more than missing supplies.
Materials:
- Sheet metal or wood (for hood body)
- Vent fan (blower)
- Grease filters (and charcoal filters for ductless)
- Ductwork (metal or rigid plastic, for ducted hoods)
- Electrical wiring and connectors
- Light fixtures (LED or halogen)
- Screws, brackets, and mounting hardware
- Paint or finish (optional)
Tools:
- Tape measure and pencil
- Drill and bits
- Screwdriver set
- Tin snips (for metal) or saw (for wood)
- Level
- Stud finder
- Wire stripper
- Safety glasses and gloves
Budget And Time
Expect to spend $200 to $600 on a DIY stove hood, depending on size and features. More advanced hoods or custom designs can cost more. Set aside at least 2 full days for the project.
Designing Your Custom Stove Hood
Now comes the creative part: choosing a design that fits your kitchen style and needs.
Classic Metal Vs. Wood Hood
- Metal hoods (stainless steel, copper, or painted steel) are durable, easy to clean, and fit modern kitchens.
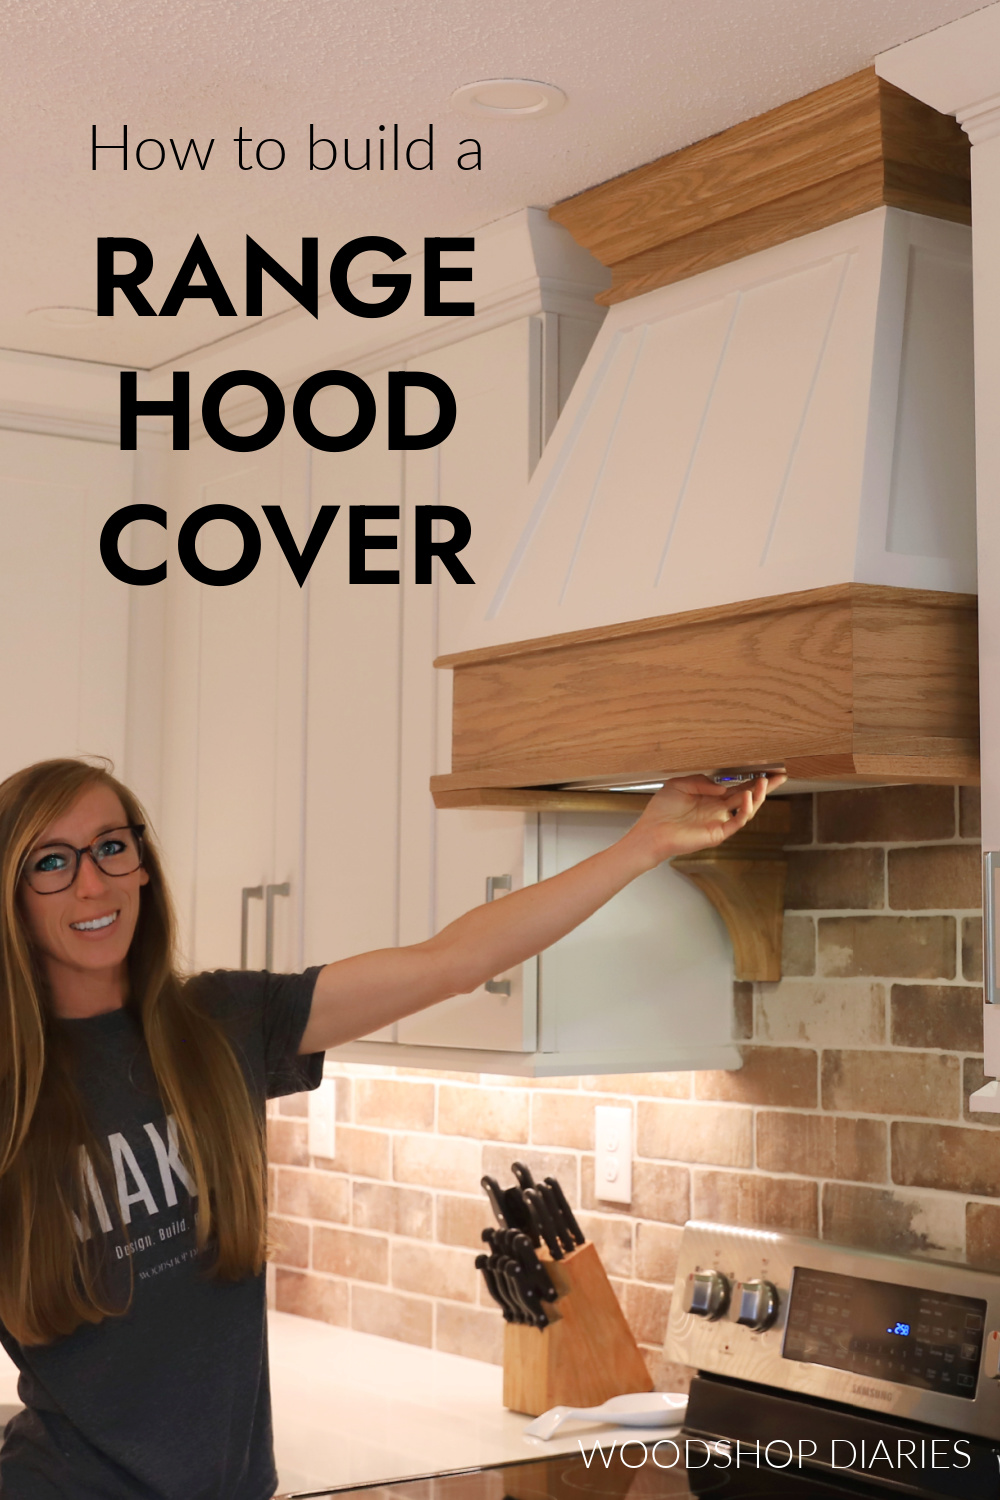
- Wood hoods can be painted or stained to match cabinets, giving a warmer, classic look. Wood hoods usually cover a metal liner inside for fire safety.
Many people prefer a mix: a metal liner for safety and a wood shell for style.
Shape And Style
Stove hoods come in many shapes:
- Box-style: Simple and modern, easy to build
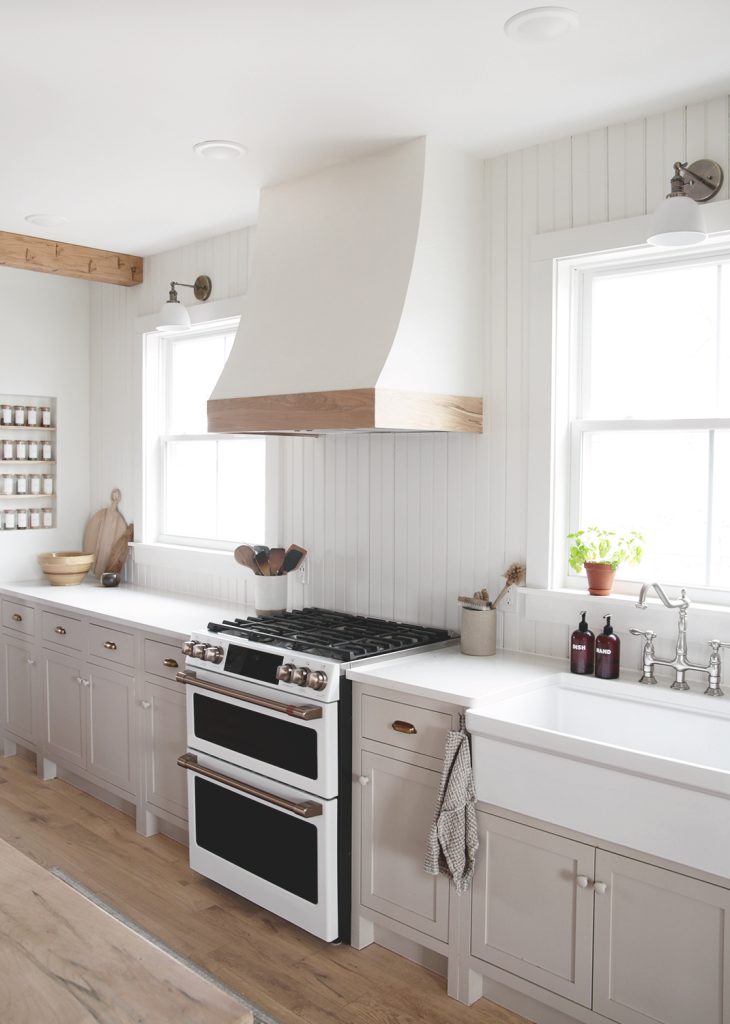
- Curved (arched): More stylish, a bit harder to make
- Angled or sloped: Sleek and modern
Choose a shape that matches your kitchen and skill level. Simple box designs are best for first-timers.
Functionality Features
Think about extra features:
- Built-in lighting
- Adjustable fan speeds
- Removable filters
- Easy-to-clean surfaces
Plan for enough power. A good rule is 100 CFM (cubic feet per minute) of airflow for every 10 inches of stove width. For heavy cooking, more is better.
Building The Stove Hood Body
This is the main structure that you’ll see above your stove. It holds the fan, lights, and filters.
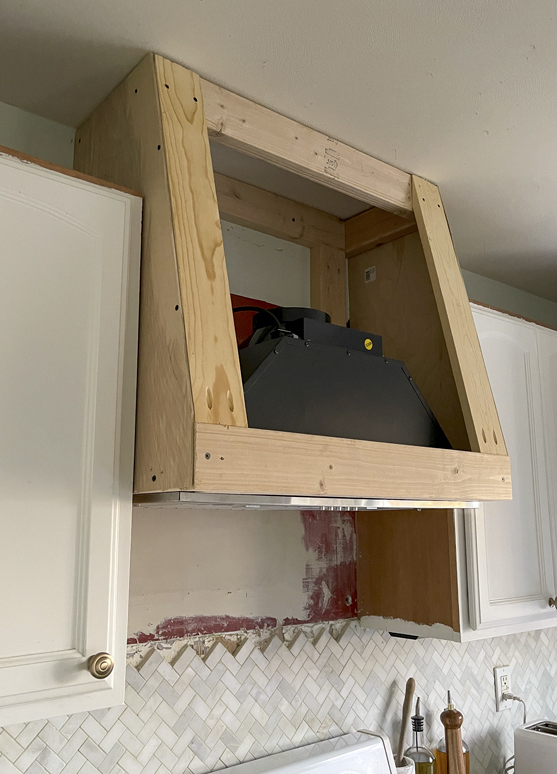
Step 1: Build A Sturdy Frame
Most DIY hoods use a simple frame made from 1×2 inch wood strips. The frame gives shape and support.
- Cut wood strips to size for the sides, top, and bottom.
- Assemble a rectangular or box shape using screws or wood glue.
- Check that it’s square using a level.
Tip: Build the frame on the floor, then lift it into place. It’s easier and safer.
Step 2: Attach The Frame To The Wall
Find the wall studs with a stud finder. Mark where you’ll attach the hood. Use long screws driven into the studs for strong support. The frame must be solid—it will hold the fan, lights, and sometimes heavy ductwork.
Step 3: Add The Outer Shell
Cut panels of sheet metal or wood to cover the frame. Attach them with screws or nails.
- For metal, use tin snips and sheet metal screws.
- For wood, use a saw and finishing nails.
Leave an opening at the bottom for the fan and filters, and at the top (or back) for the duct.
Step 4: Smooth And Finish
Fill any gaps or screw holes with wood filler (for wood) or metal putty (for metal). Sand the surfaces smooth. Paint or stain as desired. Use high-temperature paint near the stove for safety.
Credit: www.shadesofblueinteriors.com
Installing The Ventilation System
This is the heart of the stove hood. Ventilation removes smoke, steam, and grease from your kitchen.
Step 1: Choose And Place The Fan
Buy a vent fan rated for kitchen use—preferably 300 CFM or more. Some fans are built into metal liners, which are easy to install.
Mount the fan inside the hood frame, directly above the cooking surface. Follow the manufacturer’s instructions.
Step 2: Plan The Ductwork
For ducted hoods, plan the shortest, straightest duct route to the outside. Fewer bends and shorter runs mean better airflow and less noise.
- Use rigid metal ducting if possible.
- Avoid flexible plastic ducts—they collect grease and are less safe.
Cut a hole in the wall or ceiling for the duct. The hole must match the duct size (usually 6 or 8 inches). Wear safety gear and check for wires or pipes before cutting.
Step 3: Install The Duct
Attach the duct to the fan outlet using a metal clamp or foil tape. Run the duct to the exterior vent. Seal all joints with foil tape, not regular duct tape.
Install a wall or roof cap on the outside. Make sure it has a flap to keep out rain and pests.
Step 4: Install Filters
Most fans need a grease filter (usually aluminum mesh). For ductless hoods, add a charcoal filter to trap odors.
Slide the filters into place under the fan. Check they are easy to remove and clean.
Step 5: Test The Airflow
Turn on the fan and hold a tissue up to the filter. It should stick from the suction. If not, check for leaks or blockages.
Wiring And Lighting
Safety is critical when working with electricity. If you’re unsure about wiring, hire a professional.
Step 1: Plan The Electrical Path
Decide where you’ll connect the hood. You can use an existing circuit or run a new one. The hood needs power for the fan and lights.
Step 2: Install The Light Fixtures
Most hoods use LED or halogen bulbs. Install the light fixtures inside the hood, in a spot that lights up the stove but stays cool.
Wire the lights to a switch or to the hood’s control panel.
Step 3: Wire The Fan
Connect the fan’s power cable to the switch or control panel. Use wire nuts and electrical tape for safety.
Run the wires through a cable clamp to keep them from moving.
Step 4: Test The System
Turn the power back on. Test the lights and fan. If anything doesn’t work, turn off the power and check all connections.
Pro Tip: Use GFCI (ground-fault circuit interrupter) outlets for extra safety near water or cooking areas.
Final Assembly And Finishing Touches
With the main parts in place, finish the hood for both function and style.
Step 1: Install The Control Panel
Most DIYers use a simple switch for the fan and lights. More advanced hoods use a multi-speed switch. Mount the control panel in an easy-to-reach spot.
Step 2: Add Trim And Molding
To give your hood a built-in look, add wood trim, crown molding, or metal edging. Match your kitchen’s style.
Step 3: Seal And Paint
Seal any seams with caulk (for wood) or high-temp sealant (for metal). Paint or stain the hood as desired. Let it dry fully before use.
Step 4: Check Everything
Test the fan, lights, and filters again. Make sure the hood is solid and doesn’t rattle or move.
Practical Tips And Insights
Building a stove hood is not just about following steps. Here are some insights that many beginners miss:
- Always check airflow direction before sealing the duct. It’s easy to install a fan backward.
- Leave access for cleaning. Grease builds up fast—plan a way to remove filters and clean the inside.
- Noise matters. Powerful fans can be loud. Look for fans rated under 65 decibels for a quieter kitchen.
- Don’t skip the exterior vent cap. Without it, rain or animals can enter your duct.
- Test with real cooking. After installation, fry something with oil. If you still smell smoke, check for leaks or poor airflow.
Common Mistakes To Avoid
Even experienced DIYers can make errors with stove hoods. Here are mistakes to watch for:
- Choosing the wrong size. A hood smaller than your stove won’t work well.
- Using flexible plastic ducting. This collects grease and can catch fire.
- Not venting outside when possible. Ductless hoods only filter, not remove, smoke and moisture.
- Ignoring building codes. Unsafe wiring or venting can cause insurance issues.
- Forgetting to seal joints. Air leaks mean poor performance.
- Mounting too high or too low. Follow the 24–30 inch rule for the best effect.
- Not cleaning filters regularly. Dirty filters block airflow and create fire risks.
Comparing Materials And Costs
Choosing the right materials affects the look, safety, and cost of your hood. Here’s a comparison to help you decide:
| Material | Pros | Cons | Cost Estimate |
|---|---|---|---|
| Stainless Steel | Durable, easy to clean, modern look | Shows fingerprints, can be noisy | $150–$400 |
| Wood (with metal liner) | Customizable, matches cabinets, warm look | Needs more maintenance, risk of grease stains | $200–$600 |
| Powder-Coated Metal | Many colors, resists rust | Can chip, limited styles | $120–$350 |
Tip: Mixing wood and metal gives the best of both worlds—style and safety.
Ducted Vs. Ductless Stove Hoods
Your choice here affects installation effort and performance.
| Type | Air Quality | Installation Difficulty | Maintenance |
|---|---|---|---|
| Ducted | Best (removes all smoke/odors) | Medium to high (needs exterior vent) | Clean filters and ducts |
| Ductless | Good (filters, but doesn’t remove moisture) | Easy (no outside vent needed) | Change filters often |
Pro Insight: Even in apartments, try to use ducted hoods. It’s possible to vent through an upper wall or small window.
Safety And Maintenance
A stove hood is only as good as its care. Here’s how to keep it safe and working well.
Fire Safety
- Always use metal or a metal liner near the stove.
- Never block airflow with decorations or shelves.
- Don’t overload the circuit with too many devices.
Cleaning
- Wash metal filters every month with warm, soapy water.
- Replace charcoal filters (for ductless) every 3–6 months.
- Wipe the hood surface weekly to prevent grease buildup.
- Check the duct every year for blockages.
Inspections
- Test the fan and lights monthly.
- Listen for rattling—this means loose parts.
- Look for any water leaks near the vent cap.
Credit: www.woodshopdiaries.com
Advanced Options And Upgrades
If you want to go beyond basic, consider these upgrades:
- Smart controls: Some hoods can connect to your phone or smart home system.
- Heat sensors: Automatically adjust fan speed.
- Quiet fans: Some high-end models use insulated fans for ultra-low noise.
- Custom lighting: Add LED strips for better cooking light.
- Decorative covers: Change the look with wood, tile, or stainless panels.
These features cost more but can make your kitchen more comfortable and stylish.
Real-world Example: A Simple Diy Box Hood
Let’s look at a basic example—a 30-inch wide, box-style ducted hood, perfect for most home kitchens.
Materials:
- 1×2 inch wood for frame
- 1/2 inch plywood for the shell
- 6-inch round metal duct
- 350 CFM vent fan
- Aluminum grease filter
- 2 LED puck lights
- Switch for fan and lights
- Metal exterior vent cap
Steps:
- Build a 30-inch wide, 18-inch deep box frame.
- Attach the frame to wall studs, 28 inches above the stove.
- Cover with plywood panels, leaving the bottom open.
- Mount the vent fan inside the frame.
- Run the 6-inch duct through the top, out the wall.
- Install the exterior vent cap.
- Wire the fan and lights to a switch.
- Add the grease filter under the fan.
- Paint or stain the hood to match your kitchen.
This basic hood costs about $250 in materials and takes a weekend to complete.
Troubleshooting: What If Something Goes Wrong?
Even with careful planning, things can go wrong. Here’s how to fix common issues:
- Fan won’t turn on: Check the power connection and switch wiring.
- Low airflow: Look for blocked ducts, dirty filters, or too many bends in the duct.
- Hood rattles: Tighten all screws and mounting brackets.
- Smoke leaks into kitchen: Check for duct leaks or wrong fan direction.
- Lights flicker: Make sure all wire connections are secure.
If you can’t find the problem, ask for help from an electrician or appliance expert.
When To Call A Professional
Some projects are best left to pros:
- If you need to cut through brick, stone, or a roof.
- If you’re unsure about electrical wiring.
- If your city requires a licensed installer.
- If you want advanced features or a designer look.
A professional install costs more, but ensures safety and code compliance.
Credit: themerrythought.com
Inspiration And Resources
Building your own stove hood lets you customize your kitchen and save money. For more ideas, check out kitchen design sites, or see real-life projects on forums and social media. You’ll find hundreds of styles, from rustic wood to ultra-modern metal.
For detailed building codes and ventilation standards, visit the U.S. Department of Energy’s ventilation guide.
Frequently Asked Questions
How High Should A Stove Hood Be Above The Stove?
The bottom of your stove hood should be 24 to 30 inches above the cooking surface. This height captures smoke well without being too close to pots and pans.
Can I Build A Stove Hood If I Have No Vent To The Outside?
Yes, you can build a ductless (recirculating) hood. It uses filters to clean the air and returns it to the kitchen. However, it won’t remove moisture, so it’s less effective than a ducted hood.
Do I Need A Metal Liner Inside A Wood Stove Hood?
Yes. Always use a metal liner or fire-resistant material inside a wood hood. It protects against heat and grease fires, making your hood safer and easier to clean.
How Often Should I Clean Or Replace Filters?
Metal grease filters should be washed every month. For charcoal filters (ductless models), replace them every 3–6 months for best results.
Can I Use Any Kitchen Fan For My Stove Hood?
No. Use a fan rated for kitchen use, with enough airflow (at least 100 CFM per 10 inches of stove width). Regular fans may not handle smoke, heat, or grease safely.
Building a stove hood is a rewarding project that can transform your kitchen. With careful planning, the right materials, and attention to detail, you’ll enjoy better air, safer cooking, and a custom look for years to come.