
Keeping your Breville juicer clean is not just about making it look shiny. Regular, proper cleaning keeps your juicer working well, ensures your juice tastes fresh, and helps your machine last longer. If you have ever noticed your juicer slowing down, producing less juice, or smelling odd, it’s often a sign that it needs a deep clean. Many people think cleaning a juicer is hard, but with the right steps and a little routine, it’s simple and quick. This guide will show you exactly how to clean Breville juicer models the right way, from daily rinsing to deep cleaning and stain removal. Along the way, you’ll learn tips and tricks that even experienced users sometimes miss.
Why Cleaning Your Breville Juicer Matters
Juicers are powerful machines that process fruits and vegetables quickly. This creates a lot of pulp, juice, and sometimes sticky residue. Even a small amount left behind can cause bacteria growth, odd smells, or mold over time. Dirty blades and mesh filters mean less juice and more waste. Also, dried pulp can make parts hard to remove, causing strain on the motor. Regular cleaning also keeps your warranty valid, since Breville recommends cleaning after each use.
Neglecting cleaning doesn’t just affect taste or appearance—it can reduce the lifespan of your juicer. Studies show that appliances with regular cleaning and maintenance last up to 40% longer. For people who juice daily or several times a week, this means saving money and hassle in the long run.
Tools And Supplies You Need
Cleaning your Breville juicer is easier if you have the right tools ready. Most Breville juicers come with a custom cleaning brush for the mesh basket, but a few other items help a lot:
- Soft sponge or cloth
- Non-abrasive brush (for tight spots)
- Dish soap (mild, unscented is best)
- White vinegar or lemon juice
- Baking soda
- Toothpicks or old toothbrush
- Paper towels or drying rack
- Large bowl or sink filled with warm water
- Dish gloves (optional for sensitive skin)
Having a small kit or basket with these items near your juicer space saves time. Some people also keep a small spray bottle with diluted vinegar for easy rinsing.
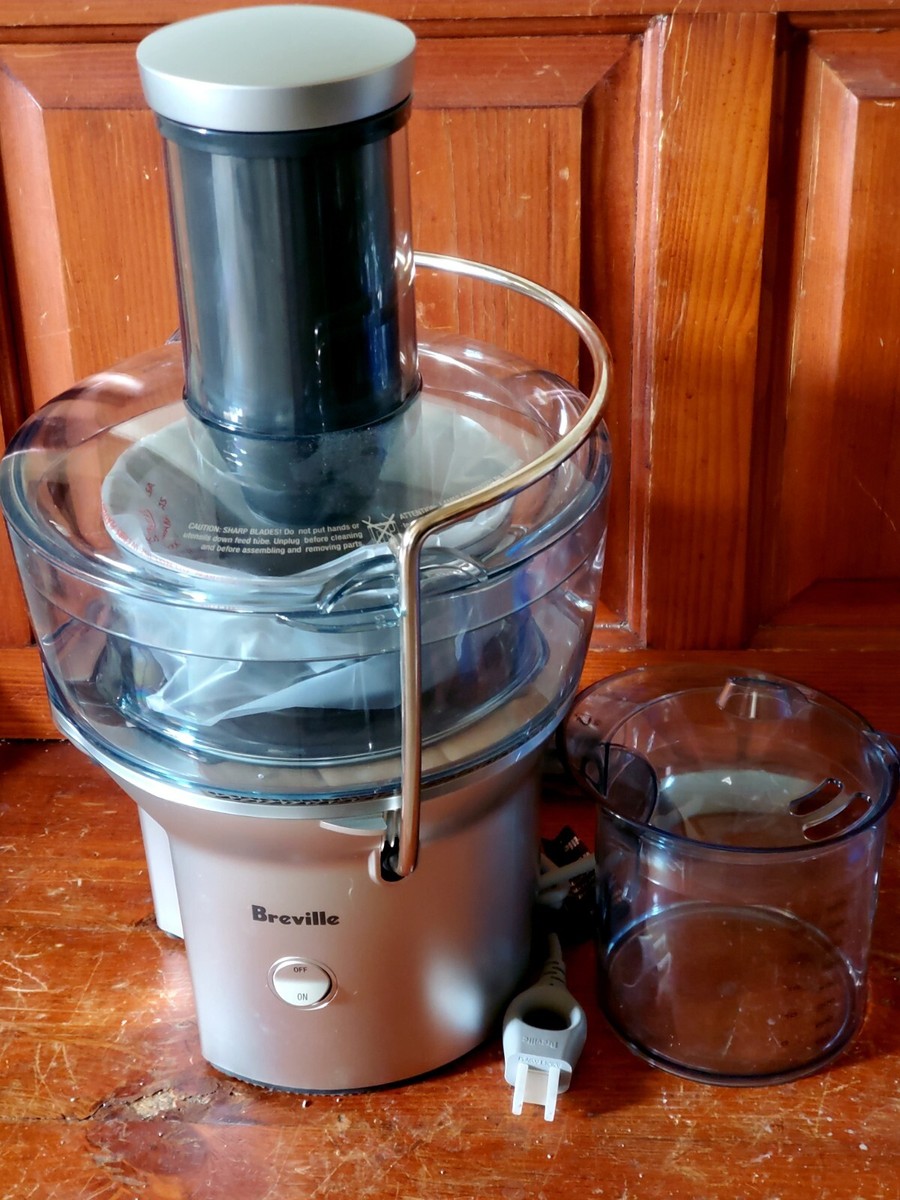
Credit: www.ebay.com
Step-by-step Guide To Cleaning Your Breville Juicer
Knowing how to clean Breville juicer models is more than just washing parts. Here’s a full process, from quick after-use rinsing to deep cleaning.
1. Unplug And Disassemble Safely
Before doing anything, unplug the juicer from the wall. Never clean while the machine is plugged in, even if it’s off. Next, carefully remove all detachable parts. For most Breville juicers, this means:
- Pulp container
- Juice jug
- Lid/cover
- Feed chute and pusher
- Mesh filter basket (blade assembly)
- Main body (motor base)
If you’re unsure, check your model’s manual. Most manuals are also available on Breville’s official website if you lose yours.
Place all parts on a towel or in your sink. Be careful with the mesh filter basket—it’s sharp!
2. Rinse Immediately After Use
Quick rinsing right after juicing prevents pulp and juice from drying. This is the most important step for easy cleaning. Here’s how:
- Rinse each part under running warm water.
- Use your fingers to remove pulp from corners and the mesh.
- If you can’t clean right away, fill the juice jug with water and pour it through the machine. This helps loosen residue.
Many beginners skip this step, but it makes deep cleaning much easier.
3. Soak Parts For Easy Cleaning
For parts with sticky or stubborn pulp, soaking is best. Fill a large bowl or your sink with warm water and a few drops of dish soap. Place the mesh filter basket, lid, feed chute, and pulp container in the water. Let them soak for 10–15 minutes. This softens any dried pulp or juice.
For extra cleaning, add a few tablespoons of white vinegar. Vinegar helps break down mineral deposits from hard water and fruit acids.
4. Scrub The Mesh Filter Basket
The mesh filter basket is the heart of your juicer. If this gets clogged, juicing becomes slower and you get less juice. Use the special cleaning brush (or an old toothbrush if lost) to gently scrub both sides of the mesh. Move in small circles. Don’t use steel wool or anything rough—this can damage the mesh.
If you see stubborn stains or pulp stuck in holes, soak the basket in a solution of one part vinegar to two parts water for another 10 minutes, then scrub again.
5. Wash All Removable Parts
Take each part—pulp container, juice jug, feed chute, lid—and wash with warm, soapy water and a soft sponge. Pay attention to corners and edges where pulp can hide. For the juice spout, use a small brush or toothpick to clear any leftover pulp.
Rinse well so no soap remains.
Note: Most Breville juicer parts are top-rack dishwasher safe, but hand-washing helps them last longer. Dishwashers can make plastic parts cloudy over time.
6. Clean The Motor Base
The motor base should never be immersed in water. Instead, wipe it with a damp cloth. For sticky spots, use a little diluted dish soap on the cloth, then wipe again with a clean, damp one. Dry with a towel.
Check the area around buttons or dials—if juice spills here, clean it gently with a cotton swab or small brush.
7. Dry Thoroughly Before Reassembling
After washing, let all parts air dry on a rack or towel. Moisture left inside can lead to smells or mold. For faster drying, use a paper towel to pat parts dry, especially the mesh basket.
Wait until everything is completely dry before putting your juicer back together. This prevents water from getting into the motor or electrical parts.
8. Reassemble And Store Properly
Once dry, reassemble your juicer. Make sure all parts fit tightly. Store your juicer with the lid slightly open or off if you won’t use it for a few days—this lets air circulate and prevents odors.
Deep Cleaning For Stubborn Stains And Odors
Even with regular cleaning, some parts may develop stains or smells over time. This is common with carrots (which stain orange) or beets (which stain red). Here’s how to tackle these tough spots.
Removing Stains
- Baking Soda Paste: Mix baking soda with a little water to make a paste. Rub onto stains, let sit for 10 minutes, then scrub gently with a sponge or brush. Rinse well.
- Lemon Juice: Cut a lemon in half and rub directly onto stained areas. The acid helps lift stains and neutralize odors.
- Vinegar Soak: Soak stained parts in a mix of one part white vinegar to three parts water for 30 minutes, then wash as usual.
Odor Removal
- Soak smelly parts in a solution of water and a few tablespoons of baking soda for 30–60 minutes.
- Rinse very well to remove all powder.
- Dry completely before reassembling.
Mold Or Mildew
If you see black spots or fuzzy mold (usually from forgetting to clean pulp), soak the part in hot water with a splash of vinegar for at least 30 minutes. Scrub well and rinse. If mold remains, contact Breville support for advice before using again.
Cleaning Frequency: How Often Should You Clean?
How often you clean depends on how often you juice. Here’s a simple table to help:
| Juicing Frequency | Quick Rinse | Deep Clean |
|---|---|---|
| After Every Use | Yes | Every 2–3 Days |
| Daily | Yes | Once a Week |
| Weekly | Yes | After Each Use |
The key point: Always rinse after every use. Deep clean at least once a week if you juice daily.
Tips Most Juicer Owners Miss
Many people stick to basic cleaning, but a few extra habits make a big difference. Here are some insights beginners often miss:
- Clean Immediately: If you leave pulp in the juicer, it dries quickly and becomes much harder to remove. Even a 10-minute wait can turn a 2-minute clean into a 10-minute scrub.
- Check Under the Blade: The area beneath the mesh filter basket often hides pulp or juice. Lift and wipe this space gently.
- Rotate Brushes: Keep two cleaning brushes—one for daily use, one for deep cleaning. Replace every 3–6 months if bristles flatten.
- Use Filter Liners: Some people line the pulp container with a compostable bag or even newspaper. This makes cleaning much faster, especially for large batches.
- Don’t Ignore Small Parts: The food pusher and juice spout can trap pulp. Remove and rinse these after each use.
- Keep the Manual Handy: Every Breville model is a little different. Keep your manual in a kitchen drawer so you can check part numbers or cleaning diagrams quickly.

Credit: www.breville.com
Common Mistakes To Avoid
Mistakes can shorten your juicer’s life or make cleaning harder. Here are the biggest pitfalls:
- Forgetting to Unplug: Always unplug before cleaning to avoid electric shock.
- Using Abrasive Tools: Steel wool and rough sponges damage the mesh and plastic.
- Soaking the Motor Base: Never put the base in water. This can ruin the electronics.
- Letting Parts Stay Wet: Damp parts encourage mold and can make the machine smell.
- Dishwasher Overuse: Even if parts are labeled dishwasher-safe, too much dishwasher use causes cloudiness and weakens plastic over time.
Special Tips For Different Breville Juicer Models
Breville makes several juicer types, including centrifugal, masticating, and citrus models. While the basics are the same, a few details help:
| Model Type | Unique Cleaning Note |
|---|---|
| Centrifugal (e.g., Juice Fountain) | Mesh basket is very fine—needs gentle but thorough brushing every time. |
| Masticating (e.g., Big Squeeze) | Auger and strainer require soaking and careful brushing, especially after leafy greens. |
| Citrus Press | Rinse pulp cone immediately—citrus sugars dry fast and become sticky. |
Always check your model for special instructions. Some newer models even have dishwasher warnings for certain parts.

Credit: www.youtube.com
How To Clean Hard-to-reach Areas
Even with careful cleaning, some parts of your Breville juicer are tricky to reach. Here’s how to handle them:
- Juice Spout: Use a drinking straw brush or pipe cleaner to scrub inside.
- Mesh Basket Holes: Toothpicks can loosen pulp from tiny holes—do this gently to avoid damage.
- Under the Lid Seal: Run a damp cloth or thin brush under rubber seals where juice can collect.
- Around Buttons or Dials: Use a dry toothbrush to brush away dried pulp or dust.
If you notice juice leaking into seams or hard-to-reach areas, check that all seals and gaskets are in place and not worn out.
How To Store Your Juicer For Long Life
Proper storage is part of keeping your juicer clean. Here’s what to do:
- Always dry all parts fully before storage.
- Store with the lid off or slightly open if not used every day.
- Keep in a cool, dry place—avoid storing near the oven or stove.
- Store the brush and small tools in a small container with the juicer, so you don’t lose them.
If storing for a long time (like for travel), wrap the mesh basket in paper towel to prevent dust and scratches.
When To Replace Breville Juicer Parts
Even with the best cleaning routine, some parts wear out. Here’s a guide:
| Part | Average Lifespan | Replacement Sign |
|---|---|---|
| Mesh Filter Basket | 1–2 years | Clogging, tears, hard-to-remove stains |
| Cleaning Brush | 3–6 months | Bent or flattened bristles |
| Pulp Container | 2–3 years | Cracks, bad odor remains after cleaning |
| Juice Jug | 2–4 years | Cloudy, leaks, hard stains |
You can buy official replacement parts on Breville’s website or from major retailers.
Advanced Cleaning: Removing Mineral Deposits
If you use hard water, you may see white buildup (mineral deposits) on metal parts over time. To remove:
- Soak affected parts in a solution of equal parts white vinegar and water for 1–2 hours.
- Scrub gently with the cleaning brush.
- Rinse well and dry.
This keeps your juicer running smoothly and prevents off-tastes in juice.
Eco-friendly Cleaning And Disposal
Many Breville users want to keep cleaning as eco-friendly as possible. Here are a few ideas:
- Use baking soda and vinegar instead of harsh chemicals.
- Line the pulp container with a compostable bag, then compost the pulp for your garden.
- Use leftover lemon halves for scrubbing, then compost them.
- Dry parts in sunlight if possible—sunlight helps kill bacteria naturally.
These small steps reduce waste and keep your cleaning routine greener.
Troubleshooting: If Your Juicer Still Smells Or Looks Dirty
Sometimes, even after cleaning, your juicer may have a smell or look dirty. Here’s what to try:
- Repeat Baking Soda Soak: Soak all plastic parts in baking soda and water overnight. Rinse very well.
- Deep Vinegar Rinse: Run a solution of water and vinegar through the juicer (without produce) if your model allows. This helps clear internal residue.
- Check for Hidden Pulp: Disassemble again and check under all seals, rubber gaskets, and inside the spout.
- Replace Parts: If smells remain, a part may be worn out and need replacing.
If all else fails, contact Breville support for help. Sometimes they offer cleaning advice based on your specific model.
Frequently Asked Questions
How Often Should I Clean My Breville Juicer?
You should rinse and wash your juicer after every use. For deep cleaning, once a week is best if you use it daily. Never let pulp or juice sit overnight, as it can cause mold and odors.
Can I Put Breville Juicer Parts In The Dishwasher?
Most Breville juicer parts are top-rack dishwasher safe. However, hand washing helps parts last longer and keeps plastic clear. Always check your manual for your model’s recommendations.
What Is The Best Way To Clean The Mesh Filter Basket?
Use the special Breville cleaning brush or a soft toothbrush. Scrub in circles under running water. For tough stains, soak the basket in vinegar and water, then scrub again.
How Do I Remove Carrot Or Beet Stains From My Juicer?
Rub stains with a paste of baking soda and water or a cut lemon. Let it sit for 10–15 minutes before rinsing. For very tough stains, soak in vinegar and water.
Where Can I Find Official Breville Replacement Parts?
You can buy official replacement parts directly from the Breville website or from major appliance retailers. Always use genuine parts for best fit and safety.
Keeping your Breville juicer clean is simple if you make it a habit. Clean right after juicing, deep clean regularly, and use the right tools. These small steps keep your juice tasting fresh and your machine running smoothly for years.
With proper care, your Breville juicer can be a reliable kitchen partner for healthy living.