
After construction or renovation, everything can look exciting and new—except for the thick layer of dust that seems to settle everywhere, especially on the walls. Construction dust is not just unsightly. It can also be harmful if not cleaned properly. Tiny particles from drywall, cement, wood, and insulation can hang in the air and cause breathing problems, allergies, or even damage to electronics and paint. Many people try to wipe the dust away quickly, but often find streaks, stubborn patches, or even damage left behind. Cleaning construction dust from walls takes patience, the right tools, and a clear plan.
If you’re facing a room full of white powder, don’t worry. With the right steps, you can make your walls look spotless and safe again. This guide explains everything you need to know—from preparing your space, to picking the right cleaning methods, to tips professionals use that most people miss.
By the end, you’ll have the confidence to clean any wall, no matter how dusty, and keep your home healthy and beautiful.
Understanding Construction Dust
Before cleaning, it’s important to know what kind of dust you’re dealing with. Construction dust is not just regular dirt. It comes from:
- Drywall sanding (gypsum and paper dust)
- Cement and mortar (fine silicates)
- Woodwork (sawdust, sometimes with chemicals)
- Paint overspray (tiny paint particles)
- Insulation (fiberglass or mineral wool)
Each type of dust behaves differently. For example, drywall dust is very fine and can float in the air for hours, while wood dust can be sticky if it has resins. Construction dust is often electrostatically charged, so it clings to walls and is hard to brush off.
Many beginners make the mistake of using water too soon, which can turn drywall dust into a paste that’s even harder to remove. Another common error is scrubbing too hard, which can scratch paint or drywall. Knowing your dust type helps you choose the right cleaning method.
Safety First: Protecting Yourself And Your Space
Cleaning construction dust isn’t just about looks—health and safety are critical. These particles can irritate your lungs, eyes, and skin. Here’s how to protect yourself:
- Wear a dust mask or respirator. A simple paper mask is often not enough for fine construction dust. Use an N95 or better for true protection.
- Use safety goggles to prevent dust from getting in your eyes.
- Wear gloves if you have sensitive skin, or if the dust contains chemical residues.
- Ventilate the area. Open windows and use fans to blow dust outside, not deeper into the house.
- Protect other rooms. Close doors, or hang plastic sheeting to keep dust from spreading.
Many people forget to cover air vents, which can suck dust into your HVAC system and spread it throughout your home. Always cover vents with plastic and tape before you start cleaning.
Preparing The Area For Cleaning
Proper preparation is key to a dust-free result. Rushing into cleaning can actually spread dust further. Take these steps before any wall cleaning:
- Remove furniture and soft items like curtains, rugs, and cushions from the room. Dust will settle on them, making more work for you later.
- Cover floors with plastic or old sheets. This keeps dust from grinding into your flooring.
- Tape off electrical outlets and switches to keep water and dust out.
- Gather your supplies. You’ll need a vacuum with a HEPA filter, microfiber cloths, a mop or sponge, buckets, and possibly a ladder.
Here is a quick comparison of cleaning supplies and what they are best for:
| Cleaning Tool | Best For | Why It Matters |
|---|---|---|
| HEPA Vacuum | Fine, airborne dust | Traps tiny particles, keeps air clean |
| Microfiber Cloth | Wiping walls | Holds dust, avoids scratching |
| Soft Mop | Large wall areas | Covers area quickly, gentle on paint |
| Sponges | Stubborn spots | Can use damp for sticky dust |
Don’t skip these steps—preparation saves time and prevents re-cleaning.
Dry Cleaning Methods: The First Attack
You should always start with dry cleaning methods before using any water. This avoids turning dust into mud and helps remove the majority of particles.
Vacuuming Walls
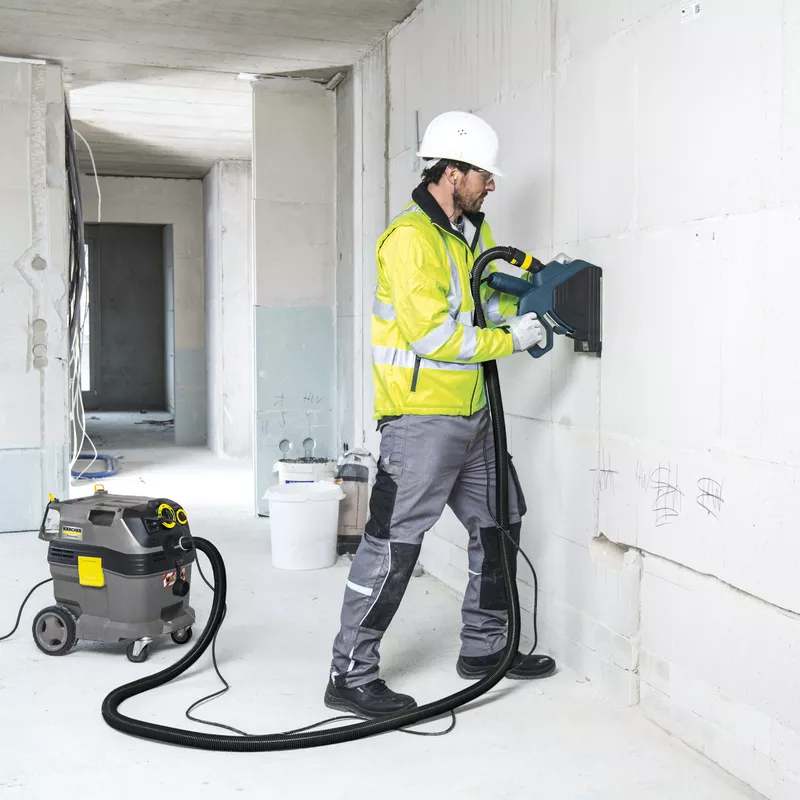
A vacuum with a HEPA filter is the best tool for fine dust. Use the brush attachment to gently sweep the wall from top to bottom. Hold the nozzle just above the surface—do not press hard, as this can damage paint or drywall.
- Start at the ceiling and work down.
- Overlap each pass slightly, like mowing a lawn.
- Pay extra attention to corners and edges, where dust collects.
Vacuuming removes most loose dust and prevents it from spreading when you wipe later.
Using Microfiber Dust Cloths
Microfiber cloths attract dust with static electricity, making them much more effective than paper towels or regular rags.
- Fold the cloth into quarters for a firm grip.
- Wipe walls in long, gentle strokes.
- Shake out or replace the cloth often, so you don’t rub dust back onto the wall.
Never use a feather duster—these just push dust around or send it into the air.
Tack Cloths For Stubborn Dust
A tack cloth is a sticky, resin-coated cloth used by painters to pick up the last bits of dust. It’s especially good for glossy walls or wood trim.
- Press lightly and drag across the surface.
- Replace the cloth when it loses stickiness.
Don’t press too hard, or the resin can leave marks.
Wet Cleaning Methods: Dealing With Stuck-on Dust
Once you’ve removed as much dry dust as possible, it’s time to tackle any remaining grime. This is where many people go wrong—using too much water, too much pressure, or harsh chemicals.
When To Use Water
Only use wet cleaning if the wall is painted (not raw drywall or wallpaper) and dry cleaning hasn’t removed everything. Test a small area first to check for paint damage.
Choosing The Right Cleaning Solution
For most painted walls, simple warm water is enough. For tougher grime, add a few drops of mild dish soap. Avoid strong cleaners—they can strip paint or leave streaks.
Here is a quick look at cleaning solutions and their safe uses:
| Cleaning Solution | Safe For | Notes |
|---|---|---|
| Plain Water | All painted walls | Safest choice, no residue |
| Dish Soap & Water | Glossy, semi-gloss, or satin paint | Removes greasy or sticky dust |
| White Vinegar & Water | Gloss paint | Good for removing odors; may dull some finishes |
| Specialty Wall Cleaner | Heavy stains | Test first—can be strong |
Never use bleach, ammonia, or abrasive cleaners on painted walls.
The Right Way To Wipe
- Dampen a soft sponge or microfiber cloth, then wring it out well—you want it barely damp, not wet.
- Start at the top of the wall and work down.
- Rinse the sponge often in clean water.
- Dry the wall with a separate, clean towel or cloth to avoid streaks.
For textured walls, use a soft-bristle brush in circular motions, then wipe with a cloth.
Removing Stubborn Dust And Stains
If you find spots where dust has mixed with paint or adhesive, try:
- Dabbing with a mixture of water and dish soap.
- Gently scrubbing with a melamine sponge (like Magic Eraser) for small marks—test first, as these can be abrasive.
- For sticky residues, a little white vinegar on a cloth can help, but always rinse and dry the area.
Never soak the wall or let water run down, as this can cause paint to bubble or drywall to swell.
Cleaning Different Wall Types
Not all walls are the same. The material and finish will change how you should clean.
Painted Drywall
Most modern homes have painted drywall. Use gentle methods—vacuum, microfiber cloth, and a barely damp sponge if needed. Gloss and semi-gloss paints are more durable than flat or matte.
Wallpapered Walls
Vacuum or dust with a dry cloth only. Never use water unless the wallpaper is marked as “washable. ” Even then, use minimal moisture.
Textured Or Plaster Walls
These surfaces trap more dust. Use a soft brush or vacuum with a brush attachment. For deep grooves, a painter’s brush can help loosen dust before wiping.
Brick Or Concrete Walls
Vacuum first, then use a damp (not wet) sponge. These surfaces are more forgiving, but avoid harsh chemicals, which can discolor masonry.
Credit: www.kaercher.com
Post-cleaning: Keeping Dust Away
After you finish, it’s important to keep dust from coming back—especially if construction is still happening nearby.
- Change your HVAC filter. Construction dust clogs filters quickly.
- Wipe down other surfaces. Shelves, light fixtures, and floors hold dust, which can float back onto walls.
- Use an air purifier for a few days to catch any remaining fine dust.
- Check for hidden dust behind doors, in closets, and on top of door frames.
Most people forget to clean baseboards and window sills, which collect large amounts of dust. Wipe these with a damp cloth after finishing the walls.
Advanced Tips And Pro Insights
Here are some professional tricks that most guides leave out:
- Use painter’s tape on trim before cleaning to avoid rubbing off paint or varnish.
- For very high walls, a telescoping duster or mop makes cleaning easier and safer than using a ladder.
- If you have a lot of static dust, lightly mist the air with water from a spray bottle before cleaning. This helps settle particles, so they don’t float away.
- For homes with pets, change their bedding and vacuum their favorite spots—animal hair traps dust and can hold allergens.
- Always check your progress in natural daylight. Dust is easier to see in sunlight than under artificial lights.
Common Mistakes To Avoid
Many beginners make the same errors when trying to clean construction dust from walls:
- Using too much water. This can ruin paint and create streaks.
- Skipping dry cleaning. Going straight to wet methods just makes mud.
- Not cleaning top to bottom. Dust falls as you clean—starting high saves work.
- Forgetting to change or clean cloths often. A dirty cloth just moves dust around.
- Not ventilating the room. Without good airflow, dust lingers in the air and resettles.
Avoid these mistakes, and you’ll have a cleaner, healthier home in much less time.
Special Cases: Cleaning After Major Renovations
Sometimes, regular cleaning methods are not enough—especially after big projects like drywall installation or tile cutting. In these cases:
- Consider renting a commercial-grade HEPA vacuum.
- Use a negative air machine to suck dust out of the room if possible.
- Clean walls in stages: Vacuum, then dry wipe, then damp wipe, then vacuum the floor again.
If you find white, chalky patches that won’t come off, it may be efflorescence (minerals from cement or brick). This requires special cleaners—ask a hardware store for advice.
When To Call A Professional
If you have allergies, asthma, or a very large area to clean, hiring a post-construction cleaning service can save time and protect your health. Professionals have special equipment and know how to handle hazardous dust, such as from old paint (lead) or insulation (fiberglass).
Professional cleaners also know how to avoid damage to delicate wall finishes and can spot issues like hidden water damage or mold.
Sample Cleaning Schedule For Best Results
Many people ask how to break up the work. Here’s a sample schedule for one medium-sized room:
| Time | Task |
|---|---|
| 0-30 minutes | Set up: Remove items, cover floors, gather tools |
| 30-60 minutes | Vacuum all walls, starting at the top |
| 60-90 minutes | Wipe walls with dry microfiber cloths |
| 90-120 minutes | Damp wipe stubborn spots, dry immediately |
| 120-150 minutes | Clean baseboards, window sills, and corners |
| 150-180 minutes | Inspect in daylight, touch up missed areas |
This schedule can be adjusted for bigger or smaller rooms. Taking breaks helps reduce fatigue—and missed spots.
Credit: fantasticcleaners.com.au
Essential Products For Cleaning Construction Dust
Here are some products that make cleaning easier and safer:
- HEPA vacuum (essential for fine dust)
- Microfiber dusters and cloths
- Soft sponges
- Mild dish soap
- Painter’s tape
- Buckets and clean water
- Safety goggles and masks
Always check product labels to ensure they are safe for your type of wall.
For more on construction safety and dust control, you can visit the OSHA construction safety page.
Frequently Asked Questions
How Long Does It Take To Clean Construction Dust From Walls?
The time depends on room size, dust level, and wall type. A single room usually takes 2-3 hours for a careful cleaning, including setup and finishing touches. Heavily dusted spaces or textured walls can take longer. Don’t rush—thorough cleaning prevents problems later.
Is It Safe To Use Water On All Wall Types?
No, water is safe only for painted drywall or certain washable wallpapers. Raw drywall, paper wallpaper, and some specialty finishes can be damaged by water. Always test a small spot first, and use as little moisture as possible.
Can I Use A Regular Vacuum Cleaner?
A regular vacuum can help with larger dust, but only a HEPA-filter vacuum traps fine construction dust. Basic vacuums often blow dust back into the air or can clog quickly. If you don’t have a HEPA vacuum, rent one or use microfiber cloths for best results.
What Should I Do If The Dust Keeps Returning?
Ongoing dust could be from unsealed construction, air ducts, or missed areas. Change your HVAC filter, use an air purifier, and check for places where dust escapes (like open vents or unsealed doors). Clean other surfaces like shelves and floors to prevent dust from resettling on walls.
How Do I Know If I Should Call A Professional?
Call a professional if you have respiratory issues, a large area to clean, or suspect hazardous materials like lead or asbestos. Also consider it if the dust is too thick, persistent, or you want a guaranteed spotless result. Professionals have the right tools and experience for tough jobs.
Restoring your walls after construction dust doesn’t have to be overwhelming. With patience, smart techniques, and the right products, you can bring back a fresh, clean look—while protecting your health and investment for years to come.
Credit: yorlenyscleaningservice.com