
Cleaning an electric skillet may seem simple, but doing it the right way is crucial if you want your appliance to last and your food to taste great. Many people overlook small details when cleaning, which can lead to stuck-on stains, weird flavors, or even damage to the skillet’s surface or electronics.
In this guide, you will learn every step for cleaning your electric skillet properly, from unplugging to drying, plus extra tips to keep your skillet working like new. Whether you use your electric skillet every day or just for special meals, following these tips will help you avoid common mistakes and get the best results every time.
Why Cleaning Your Electric Skillet Matters
An electric skillet is more than just a convenient cooking tool. It can cook everything from pancakes to fried chicken, making it a favorite in many kitchens. But the way you clean it affects its lifespan, safety, and the taste of your food.
Food residue can quickly build up, especially if you use oil or cook foods with sticky sauces. Over time, this buildup can burn onto the nonstick coating, making it harder to clean and possibly releasing unhealthy fumes when heated. Grease left in the pan can also attract pests or cause unpleasant odors.
And if moisture gets into the electrical parts, your skillet could stop working or even become dangerous.
A clean skillet cooks food more evenly, saves you time in the future, and gives you confidence that your meals are safe to eat. Taking a few extra minutes to clean well after each use is a smart investment.
Understanding Your Electric Skillet
Before you start cleaning, it’s important to know your skillet’s design. Most electric skillets have these parts:
- Cooking surface (often nonstick-coated)
- Heating element (built-in, usually not removable)
- Temperature control probe
- Base and handles
- Lid (glass or metal, sometimes with a vent)
Some newer models have removable pans, while older or budget models do not. Always check the user manual for specific cleaning instructions. If you lost your manual, look up your model online for a PDF copy.
Understanding these parts helps you clean each area safely, avoiding water in the electronics and protecting the nonstick surface.
Preparation Steps Before Cleaning
You should always let your electric skillet cool down before cleaning. This prevents burns and stops sudden temperature changes that can damage the nonstick coating.
- Unplug the skillet from the wall socket.
- Remove the temperature control probe. Store it in a dry place away from water.
- Let the skillet cool until it is warm, not hot. This usually takes 15–30 minutes.
- If there is extra oil or grease, carefully pour it out into a container. Never pour grease down the sink, as it can block drains.
These steps seem basic, but skipping them risks injury and damage.
Cleaning The Cooking Surface
The cooking surface is where most food and grease collect. Cleaning it properly is key for hygiene and keeping the nonstick layer in good shape.
Basic Cleaning For Everyday Use
For regular cleaning after each meal, follow these steps:
- Wipe with a paper towel to remove loose food and oil.
- Mix a few drops of mild dish soap with warm water in a bowl.
- Dip a soft sponge or cloth into the soapy water. Wring it out so it’s damp, not soaking.
- Gently wipe the surface. Do not use steel wool or abrasive scrubbers. These can scratch the nonstick coating, making it less effective.
- Rinse the sponge with clean water. Wipe again to remove soap residue.
- Dry the surface with a clean towel.
Dealing With Stuck-on Food
Sometimes, bits of food stick firmly to the skillet. Never chip at them with metal utensils, which can ruin the coating.
Instead, try this method:
- Fill the skillet with a small amount of warm water (not boiling).
- Plug in the skillet and heat on low for 5–10 minutes. The heat helps soften stuck food.
- Unplug and let it cool a bit, so it’s safe to handle.
- Use a plastic or wooden spatula to gently loosen the food.
- Clean as usual with a sponge.
Cleaning Heavy Grease And Stains
If you notice brown stains or a sticky surface, it’s time for a deeper clean.
- Make a paste of baking soda and water (about 1 tablespoon of baking soda with 2 teaspoons of water).
- Gently rub the paste onto the stains using a soft cloth.
- Let it sit for 15 minutes.
- Wipe clean with a damp cloth, then dry.
Never use oven cleaners or harsh chemicals. They can damage the surface and may leave harmful residues.
Washing The Lid
The lid gets splattered with oil and steam, so it needs regular attention.
- Most glass or metal lids (without electrical parts) are dishwasher safe. Check the manual to be sure.
- If you wash by hand, use warm, soapy water and a soft sponge.
- Pay special attention to the edges and vent holes.
- Rinse and dry thoroughly. Water left in the rim can drip onto your food during the next use.
If your lid has a vent or knob that comes off, remove it for deeper cleaning.
Caring For The Temperature Control Probe
The temperature control probe is the heart of your electric skillet. It should never get wet.
- Wipe it with a dry or slightly damp cloth only.
- Never submerge it in water.
- Inspect the metal prongs and cord for signs of wear, cracks, or grease buildup.
- If the probe is sticky, wipe with a cloth slightly dampened with rubbing alcohol, then dry immediately.
If the probe is damaged, do not use it. Replace with an official part from your skillet’s manufacturer.
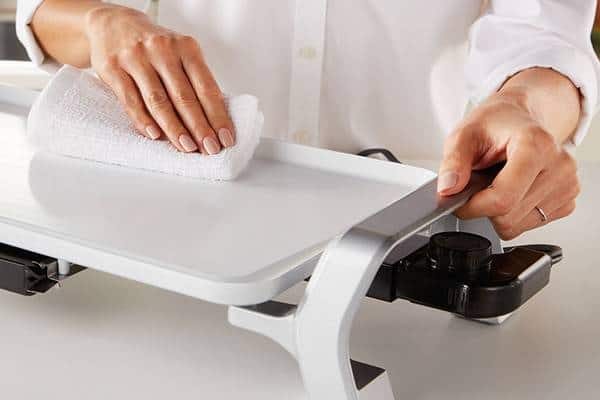
Cleaning The Exterior And Handles
Many people forget to clean the outside of the skillet. Grease and fingerprints can build up, making it look old and dirty.
- Use a damp cloth with a drop of dish soap to wipe the outside and handles.
- For stubborn spots, a little baking soda on the cloth helps.
- Rinse with a clean, damp cloth and dry well.
Do not let water drip into the area where the probe connects. This could cause electrical problems.
Drying And Storage
Water left inside your skillet can cause rust, bad smells, or even electrical shorts.
- Always dry the skillet with a clean, absorbent towel after washing.
- Leave the skillet open on the counter for 10–15 minutes to air dry fully.
- Store the skillet with the lid off or sideways, so air can circulate.
If you need to store it assembled, place a paper towel between the lid and skillet. This absorbs any remaining moisture.
How To Remove Odors From Your Electric Skillet
Certain foods, like fish or curry, can leave strong smells in your skillet. Even after washing, these odors might stick around.
Try these tips:
- Wipe the surface with a cloth dampened with vinegar. Let it sit for 5–10 minutes, then rinse and dry.
- For stubborn smells, sprinkle baking soda on the surface, let sit overnight, then wipe clean in the morning.
Avoid using lemon or citrus directly on the nonstick surface, as acids can sometimes damage certain coatings.
Cleaning Nonstick Vs. Stainless Steel Electric Skillets
Not all electric skillets are the same. The cleaning method can change depending on the surface.
Here’s a simple comparison to help you:
| Feature | Nonstick Skillet | Stainless Steel Skillet |
|---|---|---|
| Scrubbing tools | Soft sponge only | Can use gentle scrubber |
| Cleaning agents | Mild soap, baking soda | Soap, vinegar, baking soda |
| Dishwasher safe | Rarely | Sometimes (if removable) |
| Reaction to acid | Can damage coating | Safe to use |
| Stain removal | Baking soda paste | Vinegar, stainless cleaner |
Nonstick skillets need gentle cleaning to protect the coating. Stainless steel can handle stronger scrubbing and more acidic cleaners.
Common Mistakes To Avoid
Even experienced cooks sometimes make mistakes when cleaning electric skillets. Avoid these for best results:
- Washing while hot: Sudden temperature changes can warp the pan or crack glass lids.
- Soaking the skillet in water: This can damage the electrical parts and ruin the appliance.
- Using metal utensils or abrasive scrubbers: These scratch the cooking surface.
- Submerging the probe: This almost always breaks the temperature control.
- Using harsh chemicals: Oven cleaner or bleach can eat away at nonstick and cause health hazards.
- Skipping drying: Water left inside can cause rust or bad odors.
- Ignoring the lid and handles: These can collect bacteria and grease.
- Storing with the cord wrapped tightly: This can damage the cord over time.
How Often Should You Deep Clean?
A quick clean after every use is enough most of the time. But a deep clean is smart every 1–2 months, depending on how often you use the skillet.
Deep cleaning means:
- Removing the handles and knobs (if possible)
- Cleaning under the rim and around the probe port
- Soaking the lid and wiping down every surface
If you notice discoloration, sticky residue, or odd smells, it’s time for a deep clean.

Credit: streetphotographersfoundation.com
Troubleshooting Problems After Cleaning
Sometimes, your skillet may not work as expected after cleaning. Here’s how to handle common issues:
- Skillet won’t heat: Check that the probe is fully dry and plugged in tightly. Try a different outlet.
- Surface feels sticky: There may be soap or grease residue. Wipe with a clean, damp cloth and dry.
- Rust spots: Dry the skillet thoroughly after every wash. If rust appears, scrub gently with baking soda and dry right away.
- Flickering temperature light: Moisture might be inside the probe port. Let the skillet air dry overnight.
If problems continue, stop using the skillet and contact the manufacturer.
Tips To Extend The Life Of Your Electric Skillet
An electric skillet can last for years if you treat it well. Here’s how to get the most from your appliance:
- Always use wooden, plastic, or silicone utensils. Metal spoons and spatulas will scratch the surface.
- Cook on medium heat or lower. High heat can warp the pan and damage nonstick coatings.
- Wipe up spills right away, even on the outside.
- Avoid stacking heavy objects on top of the skillet during storage.
- Check the cord and probe regularly for cracks or fraying.
Many people forget to clean the area around the probe port. Grease can collect here and cause heating problems over time.
Credit: thedaringkitchen.com
Comparing Cleaning Electric Skillet Vs. Other Appliances
You may wonder if cleaning your electric skillet is different from other cookware. Here’s a quick look:
| Appliance | Cleaning Method | Special Care Needed? |
|---|---|---|
| Electric Skillet | Hand wash, no soaking | Avoid water on electronics |
| Stovetop Pan | Hand or dishwasher | None, unless nonstick |
| Air Fryer | Removable basket, hand wash | Keep electronics dry |
| Slow Cooker | Removable insert, dishwasher safe | Wipe exterior only |
| Rice Cooker | Removable pot, hand wash | Keep base dry |
The main difference: electric skillets have built-in electronics, so you can’t soak or submerge them. Always check what parts are removable before cleaning.
Non-obvious Insights For Beginners
Most guides stop at basic cleaning, but here are extra tips that beginners often miss:
- Even if the manual says “dishwasher safe,” washing by hand is always gentler and will make your skillet last longer.
- If you use your skillet for frying, wipe the power cord with a dry paper towel every few uses. Oil mist can settle on the cord and become sticky or attract dust.
- When cleaning the vent on the lid, use a cotton swab or a toothpick to remove hidden grease.
- For removable handles or knobs, clean the screws and attachment points. Grease can build up here and cause odors.
- If your kitchen has hard water, use distilled water for the final rinse. Minerals in tap water can leave spots or dull the surface.
What To Do If You Can’t Remove The Pan
Some electric skillets have a fixed pan that cannot be removed from the base. Cleaning these models takes extra care.
- Use as little water as possible. A damp, not wet, sponge works best.
- Tilt the skillet so water runs away from the control port.
- Use a spray bottle to mist the surface with soapy water, then wipe clean.
- Dry with a towel, then air dry upside down (with the cord and probe port facing up) for at least 30 minutes.
Never risk water pooling near the electronics, even if it takes more time to clean.
Signs It’s Time To Replace Your Electric Skillet
No matter how well you clean, all appliances wear out eventually. Watch for these signs:
- Nonstick coating is peeling or flaking
- Cracked or frayed cord
- Probe no longer fits tightly
- Frequent uneven heating or temperature problems
- Rust inside the pan that won’t come off
Cooking with a damaged skillet is unsafe and can ruin your food. If you see these issues, consider buying a new one.

Credit: themontessoritwinmama.com
Safe Cleaning Products To Use
Stick to gentle, food-safe cleaners for your electric skillet:
- Mild dish soap (like Dawn or Palmolive)
- Baking soda for stains
- White vinegar for odors (on metal or glass only)
- Rubbing alcohol for the probe (use sparingly)
Avoid bleach, ammonia, or heavy-duty oven cleaners. These are too strong and can damage coatings or electronics.
Environmental Tips: Grease Disposal
Pouring grease down the drain can block pipes and hurt the environment. Instead:
- Pour cooled grease into a can or jar. Once full, throw it in the trash.
- Some cities have collection sites for used cooking oil—check local rules.
- Wipe the skillet with a paper towel before washing to remove extra grease.
These small steps protect your home and the planet.
Frequently Asked Questions
How Do I Clean A Burnt Electric Skillet?
If your skillet is burnt, fill it with a little warm water and a drop of dish soap. Heat on low for 10 minutes, unplug, and let cool. Use a wooden or plastic spatula to gently scrape off burnt bits.
For stubborn areas, apply a baking soda paste, let sit, then wipe clean.
Can I Put My Electric Skillet In The Dishwasher?
Most electric skillets are not dishwasher safe because of the built-in electronics. However, some models with removable pans or lids can go in the dishwasher. Always check your user manual. If in doubt, wash by hand for safety.
What Should I Do If Water Gets In The Probe Port?
If water gets into the probe port, unplug and dry the skillet immediately. Let it air dry upside down overnight. Do not use the skillet until you are sure it is completely dry. Using it wet can cause electrical shorts.
How Do I Prevent Nonstick Coating From Peeling?
Never use metal utensils or abrasive cleaners on the nonstick surface. Only use soft sponges and plastic or wooden tools. Cook on medium or low heat, and avoid preheating the skillet empty. If the coating is already peeling, replace the skillet.
Where Can I Find More Information About Electric Skillet Care?
For more details on caring for your electric skillet, check the manufacturer’s website or trusted kitchen guides. A good resource is the Wikipedia electric skillet page.
Cleaning your electric skillet the right way takes just a few extra minutes, but the rewards are worth it—better food, a safer kitchen, and an appliance that lasts for years. Pay attention to the details, avoid shortcuts, and your skillet will always be ready for your next meal.