A sparkling clean oven does more than look good—it delivers better cooking results, lasts longer, and keeps your kitchen smelling fresh. If you own a Kitchenaid oven with a blue interior, you have a beautiful appliance that deserves special care. The vibrant blue color inside is not just for looks; it’s a porcelain enamel coating, designed for durability and easy cleaning. But, using the wrong cleaning methods can dull, scratch, or even damage this unique surface. Many owners worry about how to clean the oven safely without losing the blue shine or causing permanent marks.
This guide explains, in clear language, how to clean your Kitchenaid oven with a blue interior. You’ll learn which products are safe, which methods work best, and what mistakes to avoid. Along the way, you’ll discover non-obvious tips, practical steps, and the reasons behind each recommendation.
Whether you need a quick tidy-up or a deep clean after a big meal, this article gives you the tools and confidence to care for your oven the right way.
Why The Blue Interior Needs Special Care
Kitchenaid’s blue oven interiors are made from porcelain enamel. This finish is tough, but it is not invincible. Unlike standard gray or black interiors, blue porcelain shows scratches, stains, and dull spots much more easily. Strong chemicals, metal scouring pads, and even some self-cleaning cycles can damage the enamel or fade the color.
The blue surface is also designed to reflect heat evenly, helping your food cook perfectly. If you scratch or chip the enamel, not only does it look bad, but it can also create hot spots or make cleaning harder in the future.
That’s why understanding the right way to clean is important for both looks and performance.
Types Of Cleaning Methods For Kitchenaid Blue Interiors
Before you start, it’s helpful to know the main ways to clean your oven. Each method has its place, depending on how dirty the oven is and how much time you have.
1. Routine Wipe-downs
Light cleaning after each use prevents buildup and makes deep cleaning easier.
2. Manual Deep Cleaning
For stuck-on food or stains that need more effort without using the self-clean feature.
3. Kitchenaid’s Self-cleaning Cycle
Some models have a self-clean option. There are important warnings and steps to follow for blue interiors.
4. Steam Cleaning
A gentler alternative to self-cleaning, using water and heat to soften grime.
Each method needs the right tools and steps. Let’s look at each in detail.
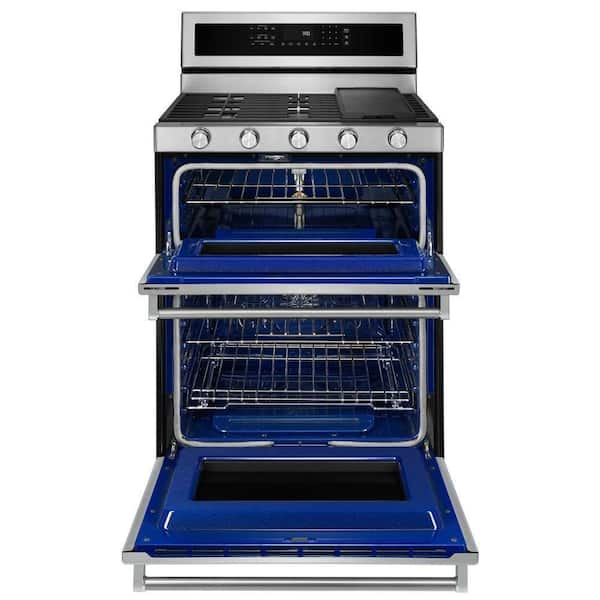
Credit: www.homedepot.com
Tools And Supplies You’ll Need
Having the right supplies makes cleaning your blue oven easier and safer. Here’s what to gather before you start:
- Soft microfiber cloths (at least 3-4)
- Non-scratch sponges
- Plastic scraper or old credit card
- Bowl of warm water
- Dish soap (mild, non-abrasive)
- Baking soda
- White vinegar (for tough spots)
- Spray bottle
- Paper towels
- Rubber gloves
- Toothbrush or small soft brush
- Kitchenaid-approved oven cleaner (if needed)
Important: Avoid any metal scrapers, steel wool, or harsh chemical cleaners like oven sprays containing lye, as these can ruin the blue enamel.
Step-by-step: Routine Cleaning After Each Use
Many people skip this step, but regular wipe-downs are the secret to an easy-to-clean oven. Here’s how to keep things simple:
- Let the oven cool: Never clean a hot oven; you could burn yourself or damage the enamel.
- Remove loose crumbs: Use a dry microfiber cloth to pick up any loose debris.
- Mix a gentle solution: Add a few drops of mild dish soap to warm water.
- Wipe surfaces: Dampen a cloth or non-scratch sponge in the soapy water. Wipe the interior walls, floor, and door. Focus on visible splatters or drips.
- Rinse and dry: Use a clean, damp cloth to wipe off soap, then dry with a soft towel.
This quick routine takes only a few minutes and prevents stains from becoming permanent.

Credit: www.reddit.com
How To Deep Clean A Kitchenaid Blue Oven Interior
Sometimes, routine cleaning isn’t enough. After roasting, baking, or a spill, you may see brown spots, greasy marks, or burned-on food. Deep cleaning is needed, but it must be done gently to protect the blue finish.
Preparing For Deep Cleaning
- Unplug the oven or turn off the breaker if possible, for safety.
- Remove oven racks, trays, and other accessories. Clean these separately with soapy water and a non-scratch sponge.
- Lay old towels or newspapers around the oven to catch drips.
Making A Safe Cleaning Paste
For stubborn spots, use baking soda, which is gentle but effective.
- Mix 1/2 cup baking soda with 3–4 tablespoons water until you get a spreadable paste.
- Do not use too much water, or the paste will drip.
Applying The Paste
- Spread the baking soda paste onto stained or greasy areas of the blue interior. Avoid the heating elements and vents.
- Let it sit for at least 30 minutes (or overnight for tough stains).
Scrubbing And Removing The Paste
- Use a non-scratch sponge or a soft brush to gently scrub the paste. Move in small circles.
- For thick buildup, use a plastic scraper or old credit card to lift off the loosened debris.
- Wipe with a damp cloth to remove all paste and residue. It might take 2–3 passes to get the surface clean.
- Dry with a soft towel.
Tackling Grease And Odors With Vinegar
If you still see oily spots or smell lingering odors:
- Spray white vinegar onto the affected areas.
- Let it bubble and fizz—this is normal.
- Wipe clean with a damp cloth, then dry.
Pro tip: For especially tough stains, repeat the baking soda and vinegar treatment. Always rinse well to avoid white residue.
Cleaning The Oven Door And Glass
The door and its glass often get overlooked, but food splatters here too. Blue interior ovens usually have a glass window that shows stains clearly.
- Open the door fully. Lay a towel underneath.
- Clean the glass with a mixture of baking soda paste or mild soap and water.
- Avoid spraying water into door vents.
- Use a soft brush along the edges and seals.
- Dry thoroughly to prevent streaks.
If there are stains between the glass panels, these can be difficult to reach. Check your Kitchenaid manual—some models allow the door to be removed and taken apart for deep cleaning.
Oven Racks: Cleaning And Replacing
Oven racks can collect grease and become sticky over time. Cleaning them the wrong way can cause rust or peeling.
- Soak racks in hot, soapy water for at least 30 minutes. Use your bathtub if needed (with an old towel underneath to prevent scratches).
- Scrub gently with a non-scratch sponge.
- Rinse and dry completely before putting them back in the oven.
Note: Never leave racks in the oven during self-cleaning, as this can discolor or warp them.
Using The Self-clean Feature On Blue Interior Ovens
Many Kitchenaid models offer a self-clean cycle, which heats the oven to a very high temperature to burn off residue. This sounds easy, but for blue interiors, it’s important to follow special precautions:
- Remove all racks and accessories.
- Wipe away as much loose debris as possible before starting.
- Check your owner’s manual—some blue interiors are not recommended for frequent self-cleaning.
- Never use self-cleaning if the enamel is chipped or damaged.
Risks Of Self-cleaning For Blue Enamel
High heat can sometimes cause blue enamel to fade or develop white spots. It’s safer to use the self-clean feature only occasionally and to rely on manual or steam cleaning most of the time.
How To Use Self-clean Safely
- Select the self-clean option according to the manual.
- Ventilate your kitchen—open windows or turn on fans, as the process can produce smoke.
- Let the oven cool completely before wiping away ash with a damp cloth.
Steam Cleaning: A Gentler Alternative
Some Kitchenaid ovens have a steam cleaning feature, which uses water and heat to loosen grime. This is much safer for blue interiors than traditional self-cleaning.
Steps For Steam Cleaning
- Remove racks and debris.
- Pour about 1 cup of water into the bottom of the oven (check your manual for the correct amount).
- Select the steam clean cycle.
- After the cycle, wipe away loosened dirt with a soft cloth.
Non-obvious tip: If your oven doesn’t have a steam clean setting, you can mimic it by placing an oven-safe dish of water inside and running the oven at 250°F (120°C) for 30–40 minutes. Steam will help soften baked-on messes.
What To Avoid When Cleaning Blue Interiors
Not all cleaning advice is safe for your Kitchenaid blue oven. Many owners accidentally cause damage by using the wrong products or tools. Here are the biggest things to avoid:
- Abrasive pads like steel wool or rough scouring pads—they scratch enamel easily.
- Harsh chemicals such as oven sprays with lye, ammonia, or bleach.
- Metal utensils or scrapers—even a butter knife can chip the blue surface.
- Leaving acidic spills (like tomato sauce or lemon juice) to sit—they can stain or dull the blue.
- Frequent use of self-clean cycles—causes fading or white spots over time.
- Cleaning a hot oven—this can warp racks and damage porcelain.
Common Mistakes And How To Avoid Them
- Waiting too long to clean: The longer spills sit, the harder they are to remove. Try to clean after each use.
- Using too much water: Excess water can seep into seams and damage electrical parts.
- Ignoring the edges and corners: Food buildup here is easy to miss but can cause smells and even smoke.
- Skipping drying: Moisture left on the enamel can cause streaks or water spots.
- Not rinsing after baking soda or vinegar: White residue can appear if not wiped off completely.
How Often Should You Clean Your Kitchenaid Oven?
The best schedule depends on how often you cook:
- Light use (1–2 times a week): Wipe down every few uses; deep clean monthly.
- Heavy use (daily): Quick wipe after each use; deep clean every 2 weeks.
- Self-clean or steam clean: No more than 3–4 times per year, unless your manual says otherwise.

Credit: www.lowes.com
Special Tips For Keeping Your Blue Oven Looking New
Here are some extra tricks that many new owners don’t know:
- Line the bottom with oven-safe mats: These catch drips but must be rated for high heat and not block vents.
- Cover food that splatters: Use lids, foil, or baking sheets to reduce mess.
- Keep a spray bottle of soapy water nearby: A quick spritz after roasting makes cleaning easier later.
- Polish with a soft, dry cloth: After cleaning, buff the blue enamel to restore its shine.
Real-life Example: Cleaning After A Holiday Feast
Imagine you’ve just finished a big family dinner. The oven is covered in splatters, and there’s a stubborn spot of burnt cheese on the floor.
- Wait until the oven cools.
- Remove racks and soak in soapy water.
- Use a plastic scraper to lift off the burnt cheese.
- Apply baking soda paste to the stain and let it sit overnight.
- Wipe clean with a damp sponge the next day.
- Buff dry with a microfiber cloth.
With patience, even tough messes can be handled without harming the blue finish.
Comparing Cleaning Methods For Blue Interiors
To help you decide which cleaning method fits your needs, here’s a comparison:
| Cleaning Method | Effectiveness | Safety for Blue Enamel | Time Needed |
|---|---|---|---|
| Routine Wipe-Down | Good for light messes | Very safe | 5–10 minutes |
| Manual Deep Clean (Baking Soda) | Excellent for stains | Very safe | 1–2 hours (with soaking) |
| Self-Clean Cycle | Best for heavy buildup | Potential risk | 3–5 hours |
| Steam Clean | Good for moderate messes | Very safe | 30–60 minutes |
Which Products Are Safe For Kitchenaid Blue Interiors?
There’s confusion about which commercial products can be used. Here’s a summary:
| Product Type | Safe for Blue Interior? | Notes |
|---|---|---|
| Baking Soda | Yes | Gentle, non-abrasive |
| White Vinegar | Yes | Good for odors, light stains |
| Mild Dish Soap | Yes | Use for routine cleaning |
| Oven Cleaner Spray | No | Too harsh, damages enamel |
| Steel Wool | No | Scratches blue finish |
| Plastic Scraper | Yes | Safe for stuck food |
| Kitchenaid-Approved Cleaner | Yes | Follow instructions carefully |
Troubleshooting: Dealing With Common Blue Interior Problems
White Spots Or Fading
White spots often appear after using the self-clean feature. This is caused by heat affecting the porcelain. Sadly, these marks are usually permanent, but you can minimize them by using self-cleaning less often.
Scratches
If you see fine scratches, they’re usually cosmetic. Avoid metal tools in the future. For deep scratches, contact Kitchenaid support.
Stubborn Baked-on Stains
Repeat the baking soda and vinegar process, or let the paste sit longer. Never use sharp tools to pry off burnt food.
Lingering Odors
Place a shallow pan of water with a few lemon slices in the oven and heat at 200°F (90°C) for 20 minutes. This helps neutralize smells.
Long-term Care And Maintenance
Keeping your Kitchenaid blue oven looking new takes more than just cleaning up after spills. Regular care can extend its life and keep cooking results consistent.
- Inspect the enamel for chips or cracks every few months.
- Check the door seal for food or grease, which can prevent a tight close.
- Don’t store pans or trays in the oven when not in use—this can scratch the blue surface.
- Wipe spills immediately to prevent permanent stains.
When To Call A Professional
If you notice large chips in the enamel, persistent discoloration, or mechanical issues (like the oven not heating properly), it’s best to contact a Kitchenaid technician. Attempting to fix major enamel problems yourself can void your warranty or make things worse.
Additional Resources
For official guidance, maintenance videos, or to order replacement parts, visit the Kitchenaid Oven Cleaning Tips page.
Frequently Asked Questions
How Often Should I Clean My Kitchenaid Blue Oven Interior?
It depends on usage. For most people, a quick wipe after each use and a deep clean every month is enough. If you cook daily or roast messy foods often, clean more frequently.
Can I Use Regular Oven Cleaner On My Blue Interior?
No. Most commercial oven cleaners are too strong for blue porcelain enamel and can cause permanent damage. Stick to baking soda, mild soap, or Kitchenaid-approved products.
Is It Safe To Use The Self-clean Cycle With Blue Enamel?
Yes, but only occasionally and after checking your manual. Too many self-clean cycles can fade or spot the blue finish. Remove racks and accessories before starting.
What Should I Do If I Accidentally Scratched The Blue Interior?
Minor scratches are mostly cosmetic. Stop using metal tools or abrasive pads. If the scratch is deep or the enamel is chipped, call Kitchenaid support for advice.
How Do I Remove Tough Stains That Won’t Come Off?
Apply a baking soda paste, let it sit overnight, then scrub gently with a non-scratch sponge. For extra stubborn stains, repeat the process or use a vinegar spray. Avoid sharp tools.
Caring for your Kitchenaid oven with a blue interior takes a little extra attention, but it’s worth it. With the right methods, your oven will stay beautiful and perform perfectly for years to come. Don’t rush—gentle, regular cleaning is the secret to keeping that blue shine alive.