
Keeping your white kitchen cabinets spotless can feel like a never-ending task. Every fingerprint, grease mark, and splash seems to show up more clearly on those bright surfaces. But the good news is, cleaning white cabinets does not have to be stressful or time-consuming. With the right methods, products, and a bit of regular care, you can keep your cabinets looking fresh and new for years.
Many people struggle with yellowing, stubborn stains, or dull spots on their cabinets. Some worry that harsh chemicals will damage the finish, while others simply do not know the best tools or techniques. In this guide, you will discover clear, practical steps and insider tips that make cleaning white cabinets easy—even if you have never done it before.
You will learn what really works, what to avoid, and how to solve common problems like grease buildup and discoloration.
Let’s dive in and see how you can transform your kitchen by keeping those white cabinets shining bright.
Why White Cabinets Get Dirty
White cabinets look beautiful, but their color makes dirt and stains easy to see. Understanding why they get dirty helps you clean them better and prevent future problems.
Grease is a common issue in kitchens. When you cook, tiny drops of oil float in the air and land on cabinet surfaces. Over time, this creates a sticky film that attracts dust and dirt.
Food splashes and spills are another culprit. Even small drops from sauces, coffee, or juice can leave marks, especially if not wiped up quickly.
Fingerprints and handprints also build up. White surfaces show the oils from your hands more clearly than darker colors.
Water stains can form from wet hands or cleaning cloths. If your water has minerals, these can leave dull spots.
Sunlight sometimes causes white paint or laminate to yellow over time, especially if the cabinets are near a window.
Knowing these causes helps you target your cleaning and protect your cabinets in the future.
Essential Tools And Supplies
Having the right tools saves time and keeps your cabinets safe from scratches or damage. Here are the basics you will need:
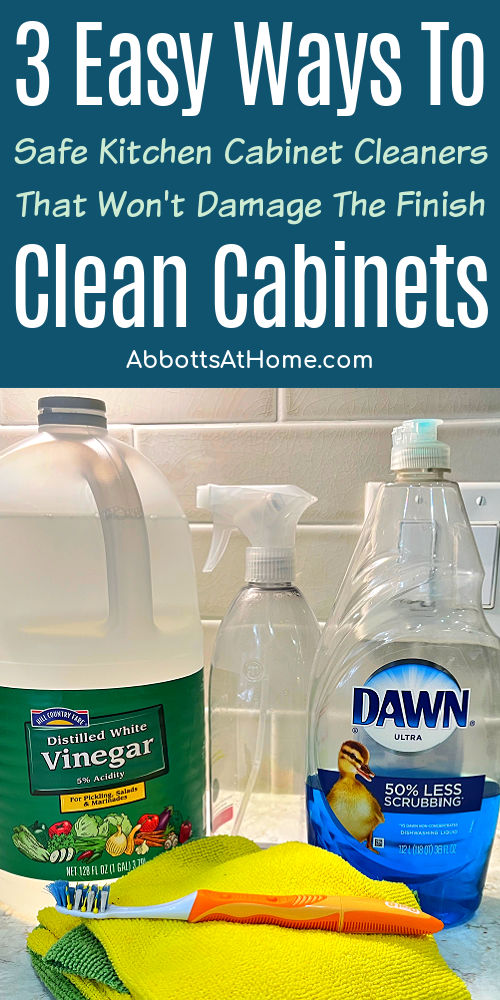
- Microfiber cloths – These are gentle and effective. They pick up dust and grease without scratching.
- Soft sponges – Choose non-abrasive sponges. Avoid anything rough that could damage the finish.
- Bucket of warm water – Warm water helps loosen grease.
- Mild dish soap – A few drops in water cleans most dirt and grease.
- Baking soda – Good for stubborn stains.
- White vinegar – Useful for disinfecting and removing light stains.
- Old toothbrush – Perfect for cleaning in corners and grooves.
- Spray bottle – For mixing and applying homemade cleaners.
- Clean towels – Use for drying cabinets after cleaning.
For tougher jobs, you might use magic erasers (test in a hidden spot first), and gentle commercial cabinet cleaners. Always check labels to ensure they are safe for painted or laminated surfaces.
Step-by-step Guide: Daily And Weekly Cleaning
Keeping white cabinets clean is easier with regular, simple care. Here’s how to do it:
Daily Cleaning
- Wipe cabinet doors and handles with a damp microfiber cloth. This removes fingerprints and fresh spills before they set.
- If you see food splashes, use a little mild dish soap on the cloth. Rinse with clean water and dry right away.
- Pay extra attention to handles and edges. These areas collect more dirt from frequent touching.
Weekly Cleaning
- Fill a bucket with warm water and add a few drops of mild dish soap.
- Dip a microfiber cloth or sponge, wring it out well (you want it damp, not soaking wet).
- Wipe all cabinet surfaces, including frames, edges, and under the handles.
- For grooves or detailed areas, use an old toothbrush dipped in soapy water.
- Rinse your cloth in clean water, wipe surfaces again to remove soap.
- Dry with a clean towel to prevent water spots.
Tip: Cleaning spills right away prevents stains and keeps weekly cleaning quick.
Deep Cleaning: Tackling Grease And Stubborn Stains
Even with regular cleaning, you will sometimes face tougher problems like grease or dried stains. Here’s how to handle them:
Removing Grease
- Mix one part white vinegar with two parts warm water in a spray bottle.
- Spray onto greasy spots and let sit for 2-3 minutes.
- Wipe with a damp microfiber cloth.
- For thick grease, add a drop of dish soap to the mixture.
If vinegar is too strong for your cabinets, use just mild dish soap and warm water. Always rinse and dry.
Cleaning Stubborn Stains
- Sprinkle a little baking soda onto a damp sponge.
- Gently rub the stain in a circular motion.
- Rinse with clean water and dry.
- For tough spots near handles or around hinges, use a toothbrush with baking soda paste (mix baking soda and water).
Dealing With Yellowing
White cabinets can yellow from age, sunlight, or grease. Sometimes, gentle cleaning removes the yellow tint.
- Mix equal parts baking soda and water into a thick paste.
- Apply to the yellowed area and let sit for 10 minutes.
- Scrub gently with a sponge or toothbrush.
- Rinse and dry.
If yellowing does not improve, it may be permanent from sun damage or old paint. In that case, painting or professional refinishing may be needed.
How To Clean Different Cabinet Materials
Not all white cabinets are the same. The cleaning method depends on the material. Here’s a comparison of how to clean different types:
| Material | Best Cleaning Method | What to Avoid |
|---|---|---|
| Painted Wood | Mild dish soap and water, microfiber cloth | Abrasive pads, harsh cleaners |
| Laminate | Damp cloth, vinegar-water mix for grease | Strong acids, scratching tools |
| Thermofoil | Gentle soapy water, soft sponge | Heat, sharp scrapers |
| Melamine | Soapy water, non-abrasive sponge | Bleach, steel wool |
Always test new cleaners on a hidden spot first. Some materials are sensitive and may fade or peel if cleaned with strong chemicals.
Cleaning Cabinet Handles, Knobs, And Hardware
Handles and knobs collect oils and grime quickly. They need special attention during cleaning.
- Remove handles and knobs if possible. This helps you clean both the hardware and the area underneath.
- Soak hardware in warm, soapy water for 10-15 minutes.
- Scrub with a soft brush or old toothbrush, especially around screws and grooves.
- Rinse and dry completely before reinstalling.
- For fixed hardware, use a soapy cloth or brush to clean around it, wiping away all residue.
Don’t forget to dry metal parts well to avoid water spots or rust.
Extra insight: Many people clean only the visible parts. Dirt often hides behind handles, so removing them once in a while helps keep your cabinets truly clean.
Credit: www.abbottsathome.com
Cleaning Inside Cabinets And Drawers
Interior cleaning is just as important as exterior cleaning. Crumbs, dust, and spills can build up inside, attracting pests and causing odors.
- Empty the cabinet or drawer. Take out all items.
- Vacuum loose crumbs or dust using a small brush attachment.
- Wipe surfaces with a damp microfiber cloth and mild soapy water.
- For sticky spots, use a little baking soda paste or vinegar-water solution.
- Dry thoroughly before returning items. Damp interiors can cause mold or warping.
Pro tip: Line the inside of cabinets with shelf paper. This protects surfaces from spills and makes future cleaning easier.
How To Remove Odors From White Cabinets
Sometimes, cabinets develop unpleasant smells from old food, spills, or moisture. Here’s how to freshen them up:
- Clean all surfaces as described above.
- Leave cabinet doors open to let fresh air circulate.
- Place a small bowl of baking soda or activated charcoal inside for 24 hours. Both absorb odors naturally.
- For persistent smells, wipe interiors with a solution of one part vinegar to three parts water, then dry completely.
Do not use strong-smelling cleaners, as they can leave chemical odors in your kitchen.
Preventing Damage: What To Avoid When Cleaning
White cabinets are tough, but some cleaning mistakes can ruin their finish or color. Here are things to avoid:
- Abrasive pads or brushes: These scratch paint or laminate.
- Bleach or strong chemicals: These can yellow or strip surfaces.
- Soaking with water: Too much moisture can cause swelling, warping, or peeling.
- Leaving cabinets wet: Always dry after cleaning to prevent water damage.
- Ignoring hinges and hardware: Built-up grime here can make cabinets hard to open or close.
When in doubt, stick to mild soap and water with soft cloths. Test new products in a hidden spot first.
How To Handle Tough Problems
Sometimes, regular cleaning is not enough. Here’s what to do for special issues:
Mold And Mildew
If you see black spots or smell mustiness:
- Mix equal parts vinegar and water.
- Wipe the area, let sit for 10 minutes, then rinse and dry.
- Improve ventilation to prevent future mold.
Sticky Residue
Old tape or glue can leave sticky areas:
- Rub gently with a little vegetable oil on a cloth, then clean with soapy water.
- Avoid harsh chemicals that may damage the finish.
Water Marks And Dullness
Hard water can leave dull spots:
- Wipe with a mix of water and a few drops of vinegar.
- Polish gently with a dry microfiber cloth.
If cabinets stay dull, you may need to use a cabinet polish made for your material.
How Often Should You Clean White Cabinets?
Cleaning frequency depends on your kitchen’s use, but here is a practical schedule:
| Task | How Often | Notes |
|---|---|---|
| Wipe fingerprints/spills | Daily | Prevents stains and buildup |
| Clean handles/knobs | Weekly | High-touch areas need frequent care |
| Wash all exterior surfaces | Weekly | Keeps cabinets bright |
| Clean inside cabinets | Monthly | Prevents odors and pests |
| Deep cleaning | Every 3-6 months | Removes grease and tough stains |
Adjust this schedule if you cook a lot or have children who touch cabinets often.
Natural And Homemade Cleaning Solutions
Many people prefer to avoid store-bought cleaners. Here are safe, simple recipes you can make at home:
Vinegar Cleaner
- Mix 1 cup white vinegar with 2 cups warm water in a spray bottle.
- Add a few drops of dish soap for extra grease-fighting power.
- Spray, wipe, and dry.
Baking Soda Paste
- Mix 3 tablespoons baking soda with enough water to form a paste.
- Apply to stains, scrub gently, rinse, and dry.
Lemon Juice Cleaner
- Mix 2 tablespoons lemon juice with 1 cup water.
- Wipe onto cabinets for a fresh scent and light bleaching action.
Note: Vinegar and lemon are safe for most cabinets, but can dull natural stone or marble. Avoid using them on countertops if you have these materials.
Tips For Keeping White Cabinets Clean Longer
Small habits can keep your cabinets bright and reduce how often you need to deep clean.
- Wipe up spills immediately. Don’t let sauces, coffee, or oils sit.
- Wash your hands before cooking. This keeps oils off cabinet surfaces.
- Use kitchen exhaust fans. They pull grease and moisture out of the air, reducing buildup.
- Keep a microfiber cloth handy. Wipe as you go while cooking.
- Open windows often. Fresh air helps prevent moisture and odors.
- Check for leaks under sinks. Water drips can cause stains or warping.
Insider tip: Placing mats or trays under coffee makers and toasters catches crumbs and splashes before they reach your cabinets.
When To Call A Professional
Sometimes, problems go beyond regular cleaning:
- Deep yellowing that does not improve with cleaning may need professional refinishing.
- Water damage (swelling, peeling, or mold) should be checked and fixed by a cabinet specialist.
- Broken hinges or warped doors may require a carpenter.
If you are not sure, ask a local kitchen or cleaning expert for advice. Fixing problems early saves money and keeps your kitchen looking great.
Common Myths About Cleaning White Cabinets
There is a lot of advice online, but not all of it is true. Here are some myths:
- “White cabinets get dirty faster.”
Not true—they show dirt more clearly, but do not attract it more than darker colors.
- “You need special cleaners for white cabinets.”
Most white cabinets can be cleaned safely with dish soap, water, and soft cloths.
- “Bleach is the best for stains.”
Bleach can damage or yellow cabinet finishes. It is rarely needed for regular cleaning.
- “Magic erasers are always safe.”
They can remove finish if used too hard. Test in a hidden spot first.
Knowing what works helps you avoid mistakes and saves you time and effort.
Real-life Example: A Quick Cleaning Routine
Imagine you just finished cooking a big meal. Here’s how you can clean up quickly, step by step:
- Wipe down cabinet doors near the stove and sink with a damp microfiber cloth.
- Use a drop of dish soap on greasy spots, then rinse and dry.
- Check for splashes near handles and under appliances. Clean with a soapy cloth.
- Wipe inside cabinet doors if you spilled while reaching for spices or ingredients.
- Dry all surfaces, especially around edges and hardware.
This routine takes only 10 minutes but keeps cabinets looking great every day.

Credit: www.youtube.com
Cost Comparison: Diy Cleaning Vs. Professional Services
Many people wonder if it’s better to clean themselves or hire a service. Here’s a simple comparison:
| Method | Average Cost | Pros | Cons |
|---|---|---|---|
| DIY Cleaning | $10-$30 (supplies for several months) | Cheap, flexible, done your way | Takes time and effort |
| Professional Cleaning | $100-$250 per visit | Deep cleaning, saves time | Expensive, must schedule |
For most homes, regular DIY cleaning works well. Hire professionals only for tough jobs or once-a-year deep cleaning.
Extra Tips: What Most People Miss
1. Clean under the cabinet edges:
Dust and grease collect on the lower lip under cabinets. Wipe here regularly to prevent buildup.
2. Clean the top of upper cabinets:
Few people check this area. Use a step stool, vacuum loose dust, then wipe with a damp cloth.
3. Rotate cleaning products:
If you use only one cleaner, residue can build up over time. Switch between soap, vinegar, and baking soda for best results.
4. Watch for seasonal changes:
Cabinets near windows can yellow more in summer. Use blinds or curtains to reduce sun exposure.
5. Use gentle pressure:
Scrubbing hard can damage the finish. Let your cleaner do the work and be patient with stains.
Credit: www.abbottsathome.com
Frequently Asked Questions
How Can I Keep White Cabinets From Turning Yellow?
To prevent yellowing, clean cabinets regularly with mild soap and water. Use kitchen exhaust fans when cooking to remove grease from the air. Protect cabinets from direct sunlight with blinds or curtains. If yellowing is already present, try cleaning with baking soda paste.
For severe discoloration, repainting may be the only solution.
What Is The Safest Cleaner For Painted White Cabinets?
The safest cleaner is a mix of warm water and a few drops of mild dish soap. Use a soft microfiber cloth to avoid scratching. Avoid harsh chemicals like bleach or ammonia, as they can damage the finish.
Can I Use Vinegar To Clean White Cabinets?
Yes, diluted vinegar (mixed with water) works well for removing grease and light stains. However, always test on a small hidden area first. Do not use vinegar on natural stone or marble surfaces, as it can dull the finish.
How Do I Clean Sticky Residue From My Cabinets?
Apply a little vegetable oil to a soft cloth and rub the sticky spot gently. Then clean with soapy water to remove the oil. This method is safe for most finishes and removes tape or sticker residue effectively.
Should I Polish My White Cabinets?
Most modern white cabinets do not need polish, but you can use a gentle cabinet polish if the surface looks dull. Always choose a product made for your cabinet material and follow the instructions. Avoid silicone-based polishes, as they can leave a sticky residue over time.
—
With the right methods, keeping white kitchen cabinets clean is simple and stress-free. Regular wiping, gentle products, and a few smart habits will keep your kitchen bright and welcoming. For more detailed tips and cleaning science, you can check resources like Good Housekeeping.
Remember: the key is consistency. A few minutes each day saves you hours of deep cleaning later, and your white cabinets will always look their best.